Home>Production & Technology>Acoustic>How To Adjust Acoustic Guitar Neck
Acoustic
How To Adjust Acoustic Guitar Neck
Published: March 12, 2024
Learn how to adjust the neck of your acoustic guitar for optimal playability and sound. Follow these simple steps to keep your instrument in top condition.
(Many of the links in this article redirect to a specific reviewed product. Your purchase of these products through affiliate links helps to generate commission for AudioLover.com, at no extra cost. Learn more)
Table of Contents
Introduction
Adjusting the neck of an acoustic guitar is a crucial maintenance task that can significantly impact the instrument's playability and sound quality. The neck of a guitar is a vital component that supports the strings and fretboard, and its proper alignment is essential for achieving optimal playability and sound projection. Over time, factors such as changes in humidity, temperature, and string tension can cause the neck to bend or warp, leading to issues such as buzzing strings, high action, or fretting out. Fortunately, with the right tools and techniques, it's possible to adjust the neck of an acoustic guitar and restore its optimal playability.
In this comprehensive guide, we will walk you through the step-by-step process of adjusting the neck of your acoustic guitar. Whether you're a seasoned guitarist or a beginner looking to learn more about guitar maintenance, this guide will equip you with the knowledge and skills to effectively address neck-related issues and enhance your playing experience. By following these instructions and taking a hands-on approach to guitar care, you can ensure that your instrument remains in top condition and continues to deliver exceptional sound quality.
Throughout this guide, we will cover the essential tools and materials needed for the neck adjustment process, as well as detailed instructions for each step, including loosening the strings, adjusting the truss rod, and checking the neck alignment. Additionally, we will provide insights into the importance of proper neck alignment and offer tips for re-tuning the guitar after the adjustment process is complete.
By gaining a deeper understanding of how to adjust the neck of your acoustic guitar, you'll not only be able to address common issues but also develop a greater appreciation for the craftsmanship and care required to maintain a high-quality instrument. So, let's dive in and explore the art of neck adjustment, empowering you to keep your acoustic guitar in prime playing condition.
Tools and Materials Needed
Before embarking on the process of adjusting the neck of your acoustic guitar, it's essential to gather the necessary tools and materials to ensure a smooth and effective adjustment. Here's a comprehensive list of what you'll need:
-
Truss Rod Wrench: This specialized tool is crucial for adjusting the truss rod, a key component in controlling the neck's curvature. Truss rod wrenches come in various sizes and are designed to fit the specific truss rod configuration of your guitar.
-
Capo: A capo is used to temporarily clamp the strings, allowing for easier access to the neck and truss rod. It helps maintain tension on the neck while the strings are loosened, preventing any sudden shifts in the neck's position.
-
Guitar Tuner: A reliable guitar tuner is essential for accurately assessing the instrument's pitch and ensuring proper tuning after the neck adjustment. This tool helps maintain the correct tension on the strings, contributing to the overall stability of the neck.
-
Straightedge or Precision Straightedge Tool: A straightedge is used to assess the straightness of the neck and identify any deviations from the ideal alignment. It provides a visual reference for determining the extent of the neck adjustment required.
-
Microfiber Cloth: Keeping a microfiber cloth handy is essential for cleaning and protecting the guitar's finish during the adjustment process. It helps remove any accumulated dust or debris from the instrument's surface, maintaining its pristine condition.
-
String Winder: Loosening and re-tightening the strings is a fundamental aspect of adjusting the neck. A string winder facilitates this process, making it quicker and more efficient while minimizing the strain on your fingers.
-
Adjustable Wrench or Screwdriver: Depending on the design of your guitar's truss rod access point, you may need an adjustable wrench or screwdriver to make the necessary adjustments. It's important to use the appropriate tool to avoid damaging the truss rod mechanism.
-
Guitar Polish and Conditioner: After completing the neck adjustment, it's beneficial to apply guitar polish and conditioner to the instrument's body and neck. This helps maintain the wood's integrity and luster, prolonging the guitar's lifespan.
By ensuring that you have these tools and materials at your disposal, you'll be well-prepared to undertake the process of adjusting the neck of your acoustic guitar with confidence and precision. Each item plays a crucial role in facilitating the adjustment process and maintaining the overall condition of the instrument, ultimately contributing to an enhanced playing experience.
Step 1: Loosen the Strings
Before initiating the neck adjustment process, it is imperative to start by loosening the strings of your acoustic guitar. This step is essential as it reduces the tension on the neck, allowing for safe and effective adjustments without risking damage to the instrument.
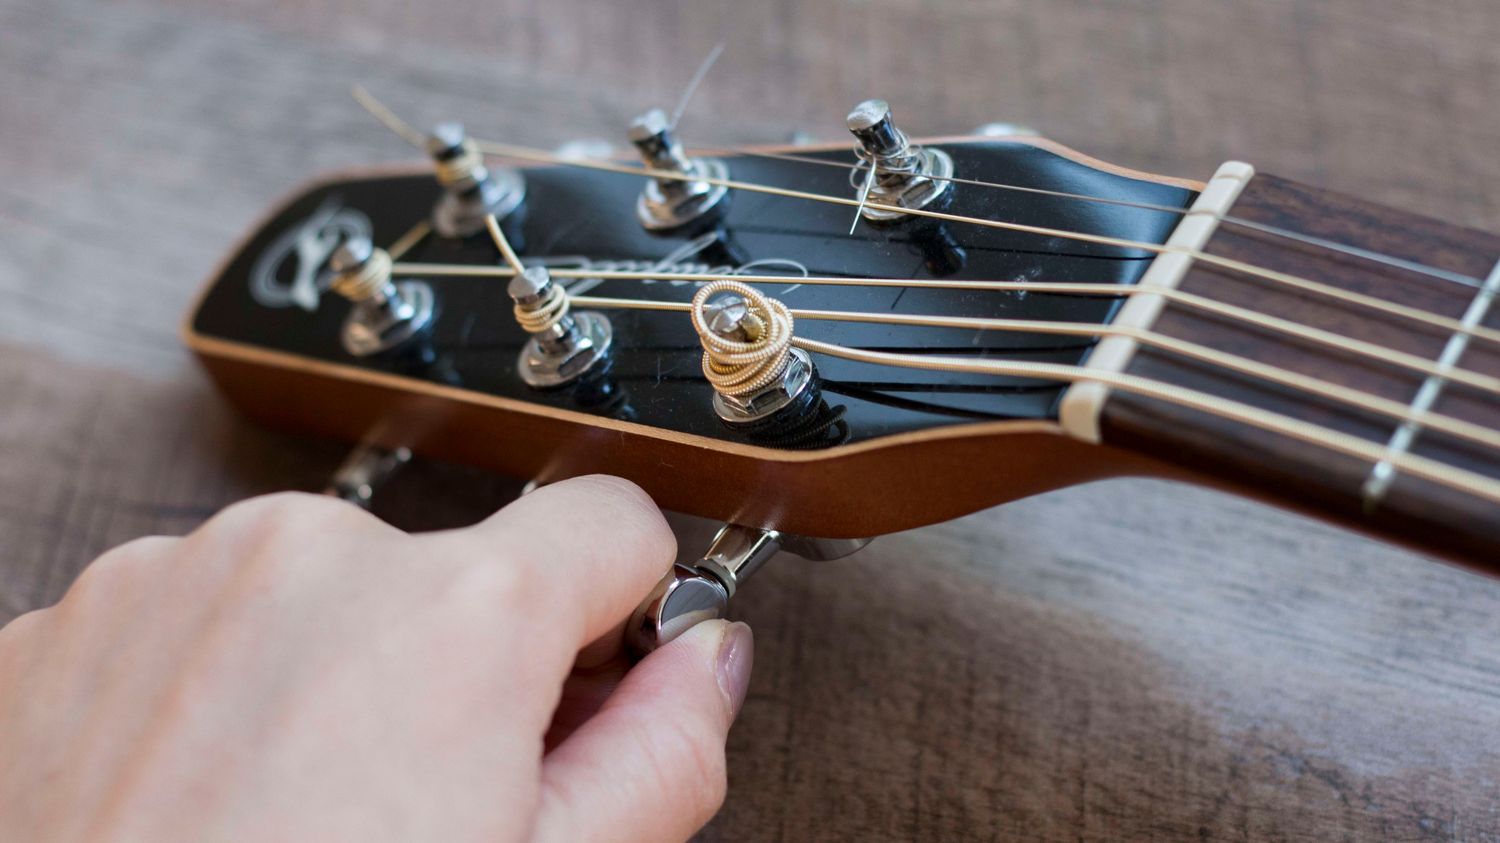
To begin, place a capo on the first fret of the guitar. The capo helps maintain tension on the neck while the strings are being loosened, preventing any sudden shifts in the neck's position. Once the capo is in place, proceed to loosen the tuning pegs for each string, starting from the low E string and working your way to the high E string. Utilizing a string winder can expedite this process, making it more efficient and minimizing strain on your fingers.
As you loosen the strings, it's important to monitor the tension and ensure a gradual release to prevent any abrupt changes that could impact the neck's stability. Once all the strings are sufficiently loosened, carefully remove them from the tuning pegs and set them aside in a secure location. This step not only reduces the tension on the neck but also provides unobstructed access to the truss rod for the subsequent adjustments.
By loosening the strings in a controlled manner, you create a conducive environment for addressing the neck's alignment and curvature, setting the stage for the next crucial step in the adjustment process. This initial preparatory step is fundamental to the overall success of the neck adjustment, as it lays the foundation for making precise and effective changes to the guitar's neck.
With the strings loosened and the tension alleviated, you are now ready to proceed to the next step in the process: adjusting the truss rod to optimize the neck's curvature and alignment. This pivotal stage in the neck adjustment process will be explored in detail in the following section, guiding you through the necessary steps to achieve an optimal neck configuration for your acoustic guitar.
Step 2: Adjust the Truss Rod
With the strings loosened and the guitar prepared for the next phase of the neck adjustment process, the focus now shifts to the pivotal task of adjusting the truss rod. The truss rod, a metal rod located within the neck of the guitar, plays a critical role in controlling the neck's curvature and providing structural support. By making precise adjustments to the truss rod, it's possible to influence the degree of bow or relief in the neck, ultimately optimizing its alignment and playability.
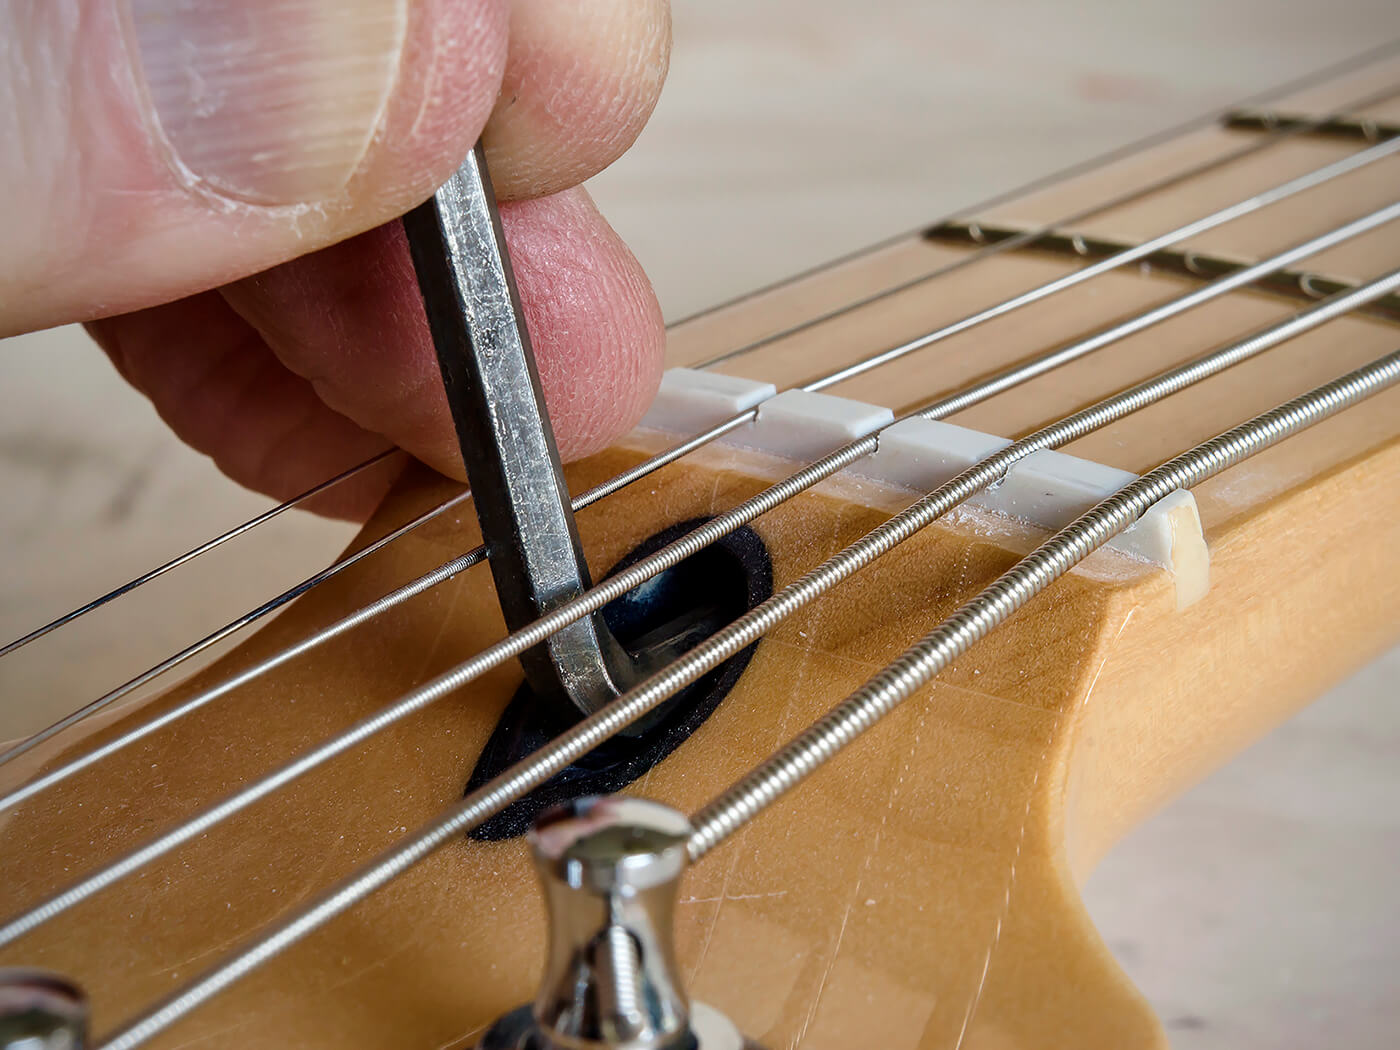
To access the truss rod for adjustment, locate the truss rod cover, which is typically situated on the headstock or inside the soundhole of the guitar, depending on the instrument's design. Using the appropriate tool, such as a truss rod wrench that matches the specific size and configuration of your guitar's truss rod, carefully remove the truss rod cover to reveal the truss rod adjustment nut.
Before proceeding with the truss rod adjustment, it's essential to understand the two primary types of truss rod adjustments: clockwise and counterclockwise. Turning the truss rod nut clockwise typically tightens the truss rod, reducing the amount of bow in the neck, while turning it counterclockwise has the opposite effect, allowing for more bow or relief in the neck. The specific adjustment required depends on the current condition of the neck and the desired outcome in terms of playability and string action.
Using the truss rod wrench, make gradual and measured adjustments to the truss rod, taking care not to over-tighten or force the rod, as this can lead to damage to the neck or truss rod mechanism. It's advisable to make quarter-turn adjustments and then reassess the neck's curvature using a straightedge or precision straightedge tool. This iterative approach allows for precise control over the truss rod's influence on the neck, ensuring that the adjustments are gradual and well-calibrated.
As you make adjustments to the truss rod, it's important to maintain a balanced approach, considering the impact on both the bass and treble sides of the neck. Aim to achieve a slight, uniform bow across the neck, promoting optimal string action and playability. Throughout the adjustment process, periodically check the neck's curvature using the straightedge, visually inspecting for any signs of excessive bow or backbow.
By methodically adjusting the truss rod and monitoring the neck's response, you can fine-tune the curvature to align with your playing preferences and the guitar's specific requirements. Once the desired neck curvature is achieved, proceed to the next step of the neck adjustment process: checking the neck alignment to ensure that the adjustments have resulted in an optimally aligned and playable neck.
With the truss rod adjustments completed, the neck of your acoustic guitar is now poised for the next phase of the adjustment process, setting the stage for evaluating the alignment and making any necessary refinements to achieve an optimal playing experience.
Step 3: Check the Neck Alignment
After adjusting the truss rod to achieve the desired curvature, the next critical step in the neck adjustment process is to assess the alignment of the guitar's neck. Checking the neck alignment is essential for ensuring that the adjustments made to the truss rod have resulted in a well-aligned and playable neck, free from issues such as fret buzz or uneven string action.
To begin the assessment, position the guitar in playing orientation, holding it as you would during a typical playing session. This allows you to observe the neck from a player's perspective, gaining insight into its alignment and any potential deviations that may affect playability. With the guitar in hand, visually inspect the neck from both the bass and treble sides, looking for any signs of unevenness or misalignment.
One effective method for evaluating the neck alignment is to use the straightedge or precision straightedge tool placed along the length of the fretboard. By positioning the straightedge against the frets, you can assess the continuity of the neck's curvature and identify any areas where the straightedge deviates from the fretboard. This visual inspection provides valuable feedback on the overall alignment of the neck, highlighting any areas that may require further attention.
As you assess the neck alignment, pay close attention to the presence of any high or low spots along the fretboard. High spots may indicate excessive backbow, while low spots could signify an overly pronounced forward bow. Additionally, observe the string action and fret clearance, noting any areas where the strings appear to be excessively close to the frets or fretting out when played. These observations offer valuable insights into the neck's alignment and playability, guiding the refinement of the adjustments made thus far.
If discrepancies in the neck alignment are identified during the assessment, it may be necessary to revisit the truss rod adjustments, making incremental refinements to achieve a more uniform curvature. By iteratively adjusting the truss rod and reassessing the neck alignment, you can fine-tune the curvature to address any areas of concern and optimize the overall playability of the guitar.
Once the neck alignment is deemed satisfactory, proceed to the final step of the neck adjustment process: re-tuning the guitar to restore the correct string tension and assess the impact of the adjustments on the instrument's playability and sound quality.
With the neck alignment assessed and any necessary refinements made, the guitar is now primed for the concluding phase of the neck adjustment process, setting the stage for re-tuning the instrument and experiencing the results of the meticulous adjustments made to optimize its playability.
Step 4: Re-tune the Guitar
With the neck adjustments completed and the alignment assessed, the final crucial step in the neck adjustment process is to re-tune the guitar. Re-tuning the instrument is essential for restoring the correct string tension and assessing the impact of the adjustments on the guitar's playability and sound quality.
Begin by carefully reattaching the loosened strings to the tuning pegs, ensuring that each string is secured in its respective position. As you reattach the strings, it's important to maintain an even and balanced tension across the neck, promoting stability and uniform string action. Utilize a reliable guitar tuner to accurately tune each string to its designated pitch, ensuring that the instrument achieves the correct overall tuning.
As the strings are tuned, pay close attention to the response of the neck and the playability of the guitar. Assess the string action and fret clearance, noting any improvements in playability resulting from the neck adjustments. Additionally, strum the strings and play various chords to evaluate the sound quality and resonance of the instrument, observing any enhancements in tone and projection.
Periodically check the tuning stability of the guitar, monitoring for any signs of string slippage or tuning inconsistencies. If necessary, make minor tuning adjustments to fine-tune the string tension and ensure that the guitar maintains its correct pitch across all strings. This iterative tuning process allows you to gauge the impact of the neck adjustments on the overall stability and playability of the instrument, providing valuable feedback on the effectiveness of the adjustments made.
As the guitar is re-tuned and its playability and sound quality assessed, take the time to play through various musical passages and test the responsiveness of the instrument. Pay attention to the fretting accuracy, string resonance, and overall comfort of playing, noting any improvements resulting from the neck adjustments. By actively engaging with the instrument, you can gain a comprehensive understanding of the impact of the adjustments on its playability and sonic characteristics.
Upon completing the re-tuning process and evaluating the guitar's performance, you have successfully navigated through the comprehensive process of adjusting the neck of your acoustic guitar. The meticulous attention to detail and precision in the adjustment process have culminated in an instrument that is optimized for playability and sound quality, reflecting the dedication to maintaining a high standard of care for your acoustic guitar.
Conclusion
In conclusion, the process of adjusting the neck of an acoustic guitar is a fundamental aspect of guitar maintenance that directly impacts the instrument's playability, sound quality, and overall performance. By following the step-by-step guide outlined in this comprehensive article, you have gained valuable insights into the intricacies of neck adjustment and acquired the skills to effectively address common issues related to neck alignment and curvature.
Throughout the adjustment process, you have learned the importance of utilizing the right tools and materials, including the truss rod wrench, capo, guitar tuner, straightedge, and microfiber cloth, to facilitate a seamless and precise adjustment experience. These essential tools have empowered you to take a hands-on approach to guitar care, fostering a deeper connection with your instrument and a greater appreciation for its craftsmanship.
The process of loosening the strings, adjusting the truss rod, checking the neck alignment, and re-tuning the guitar has provided a holistic understanding of the intricate interplay between the neck, strings, and overall playability of the instrument. By carefully navigating each step and making incremental adjustments, you have effectively optimized the neck's curvature and alignment, resulting in an instrument that offers enhanced playability, improved string action, and superior sound projection.
Furthermore, the iterative nature of the adjustment process has allowed you to fine-tune the neck to align with your specific playing preferences, ensuring that the instrument complements your musical expression and performance style. The attention to detail and precision demonstrated throughout the adjustment process reflects a commitment to maintaining the optimal condition of your acoustic guitar, preserving its longevity and sonic integrity.
As you continue to explore the world of guitar maintenance and care, the knowledge and skills acquired through this guide will serve as a valuable foundation for future endeavors in maintaining and optimizing your acoustic guitar. By embracing a proactive approach to instrument care and taking the time to understand the nuances of neck adjustment, you are poised to cultivate a rewarding and enduring relationship with your guitar, unlocking its full potential and ensuring a consistently exceptional playing experience.
In essence, the art of neck adjustment embodies a harmonious blend of technical proficiency, craftsmanship, and a deep appreciation for the instrument's capabilities. By embracing this holistic approach to guitar care, you have not only enhanced the playability and sound quality of your acoustic guitar but also deepened your connection to the art of music and the timeless allure of the instrument.