Home>Instruments>Guitar>How To Straighten A Guitar Neck

Guitar
How To Straighten A Guitar Neck
Published: February 14, 2024
Learn how to straighten a guitar neck and improve playability with our step-by-step guide. Get expert tips for fixing neck issues and optimizing your guitar's performance.
(Many of the links in this article redirect to a specific reviewed product. Your purchase of these products through affiliate links helps to generate commission for AudioLover.com, at no extra cost. Learn more)
Table of Contents
Introduction
Welcome to the world of guitar maintenance! As a guitarist, you understand the importance of keeping your instrument in top-notch condition. One of the key components of a guitar that directly impacts playability and sound is the neck. Over time, various factors such as changes in temperature and humidity can cause the neck to warp or develop a bow, affecting the guitar's action and intonation. However, fear not, as understanding how to straighten a guitar neck is a valuable skill that can be learned and mastered.
In this comprehensive guide, we will delve into the intricacies of guitar neck maintenance, specifically focusing on the process of straightening a warped neck. Whether you're a seasoned guitarist or a beginner eager to expand your knowledge, this article will equip you with the essential know-how to assess, adjust, and fine-tune your guitar's neck, ultimately enhancing its playability and ensuring optimal performance.
Throughout this journey, we will explore the fundamental principles behind the guitar neck, discuss the methods for assessing its condition, and provide detailed steps for adjusting the truss rod to rectify any misalignments. Additionally, we will cover the importance of meticulous inspection to ensure the neck is properly aligned before concluding with the final setup and testing procedures. By the end of this guide, you will have the confidence and expertise to effectively straighten a guitar neck, restoring its functionality and playability.
So, grab your guitar, set aside any apprehensions, and let's embark on this enlightening exploration of guitar neck maintenance. Whether you're aiming to revive an old instrument or simply seeking to maintain your beloved guitar, the knowledge and skills you'll gain from this guide will undoubtedly elevate your guitar-playing experience. Let's dive in and unravel the art of straightening a guitar neck!
Understanding the Guitar Neck
Before delving into the intricacies of straightening a guitar neck, it’s essential to grasp the fundamental role that the neck plays in the overall functionality of the instrument. The neck of a guitar serves as a crucial structural and tonal component, housing the fretboard, frets, and truss rod, while also providing support for the strings and facilitating adjustments that directly influence playability.
At the heart of the guitar neck is the truss rod, a metal rod that runs along the length of the neck and is embedded beneath the fretboard. The primary function of the truss rod is to counteract the tension exerted by the strings, thereby maintaining the neck’s stability and preventing excessive bowing or warping. Understanding the truss rod’s significance is pivotal when addressing neck irregularities, as it serves as the primary mechanism for correcting misalignments and ensuring optimal playability.
Furthermore, comprehending the anatomy of the guitar neck, including its curvature and dimensions, is essential for identifying and rectifying any deviations from the ideal state. The neck’s profile, typically categorized as C-shaped, V-shaped, or U-shaped, contributes to the overall feel and comfort of the instrument, and deviations from the intended curvature can significantly impact the playability and intonation of the guitar.
Moreover, the material composition of the neck, whether it’s crafted from maple, mahogany, or other tonewoods, can influence its susceptibility to warping and require specific maintenance approaches. Additionally, factors such as environmental conditions, including temperature and humidity fluctuations, can exert considerable influence on the neck’s stability, necessitating periodic assessments and adjustments to ensure its optimal condition.
By gaining a comprehensive understanding of the guitar neck’s anatomy, the role of the truss rod, and the various factors that can impact its structural integrity, you’ll be better equipped to navigate the process of straightening a warped neck. Armed with this knowledge, you’ll approach the task with confidence and precision, ultimately enhancing the playability and tonal characteristics of your guitar.
Assessing the Neck
Before embarking on the process of straightening a guitar neck, it’s crucial to conduct a thorough assessment to accurately diagnose any irregularities or misalignments. This meticulous evaluation will provide valuable insights into the specific nature of the neck’s condition, guiding the subsequent corrective measures and ensuring an effective resolution.
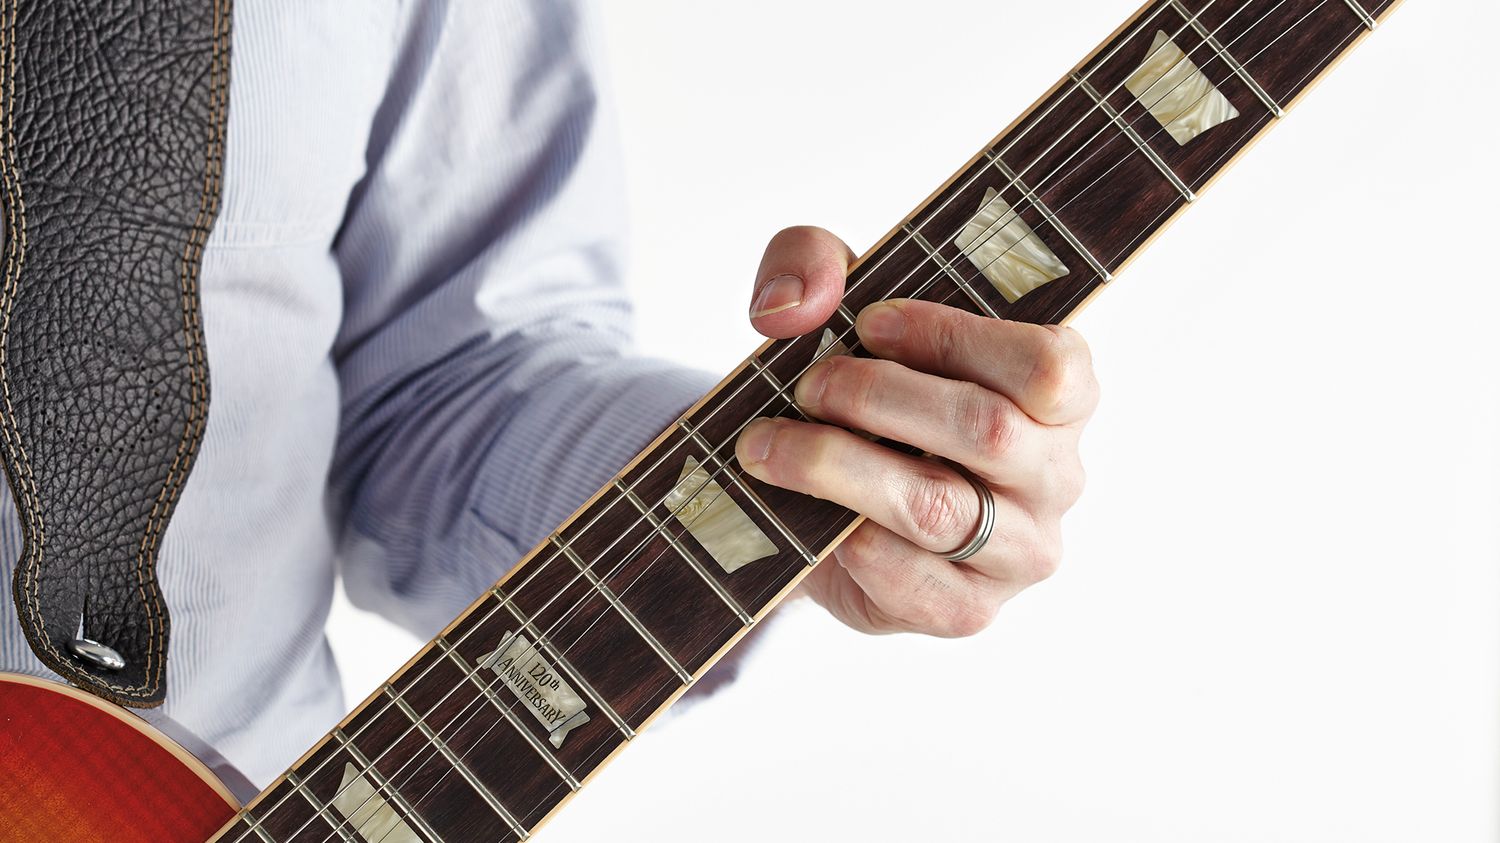
The initial step in assessing the neck involves visually inspecting its curvature and alignment. Placing the guitar in a well-lit area and sighting down the neck from the headstock to the body can reveal visible signs of bowing or warping. Look for deviations from the ideal straightness, such as a concave or convex curvature, which can manifest as a raised or sunken profile along the length of the neck.
Furthermore, running your fingers along the edges of the fretboard and observing the string action can provide tactile feedback regarding any unevenness or fret buzzing, indicative of potential neck irregularities. Additionally, playing each fret across the entire length of the neck and listening for buzzing or muted notes can offer valuable auditory cues, aiding in the assessment of the neck’s playability and overall condition.
Utilizing a straightedge, such as a long ruler or specialized straightedge tool, can provide a quantitative assessment of the neck’s curvature. By placing the straightedge along the fretboard and observing the gap between the straightedge and the frets, you can gauge the extent of any bowing or humps, facilitating a more precise evaluation of the neck’s alignment.
Moreover, assessing the neck’s response to adjustments in string tension and truss rod manipulation is integral to understanding its flexibility and resilience. By loosening or tightening the truss rod in incremental adjustments and observing the corresponding changes in the neck’s curvature, you can gain valuable insights into its responsiveness and the extent to which it can be effectively straightened.
By meticulously assessing the neck through visual, tactile, and quantitative means, you’ll develop a comprehensive understanding of its condition, laying the groundwork for informed decision-making and targeted corrective actions. This thorough evaluation will empower you to proceed with confidence as you embark on the journey of straightening the guitar neck, ultimately enhancing its playability and restoring its optimal functionality.
Adjusting the Truss Rod
When it comes to rectifying a warped guitar neck, the truss rod emerges as a pivotal tool for achieving the desired realignment and restoring the neck’s optimal curvature. Understanding the function and proper adjustment of the truss rod is essential for effectively addressing neck irregularities and ensuring the instrument’s playability and tonal integrity.
The truss rod, typically accessible through a small opening in the headstock or beneath a cover on the headstock, enables precise control over the neck’s curvature by counteracting the tension exerted by the strings. It’s important to emphasize that truss rod adjustments should be approached with caution and executed gradually, as excessive or abrupt manipulation can potentially damage the neck or compromise its structural integrity.
Prior to adjusting the truss rod, it’s advisable to relieve the tension on the guitar’s strings by loosening them, thereby minimizing the opposing forces that could impede the truss rod’s responsiveness. Once the strings are adequately slackened, the truss rod can be accessed for adjustment using a specialized hex key or wrench, ensuring a secure and proper fit to prevent slippage or damage to the truss rod’s adjustment mechanism.
When determining the direction and extent of truss rod adjustment, it’s crucial to consider the specific nature of the neck’s misalignment. For instance, a concave curvature, characterized by a sunken profile, may necessitate tightening the truss rod to exert greater counteracting force and straighten the neck, while a convex curvature may require loosening the truss rod to allow the neck to assume a more aligned position.
It’s important to approach truss rod adjustments incrementally, making subtle turns and periodically assessing the neck’s response to the changes. This gradual approach allows for precise control and minimizes the risk of overcorrection, enabling you to fine-tune the neck’s curvature with precision and care.
Throughout the adjustment process, it’s advisable to continually assess the neck’s alignment using visual and tactile methods, ensuring that the corrective measures are yielding the intended results. By maintaining a methodical and cautious approach to truss rod adjustment, you can effectively rectify the neck’s misalignments and restore its optimal curvature, ultimately enhancing the playability and tonal characteristics of the guitar.
By mastering the art of truss rod adjustment, you’ll gain a valuable skillset that empowers you to confidently address neck irregularities and maintain your guitar in peak playing condition, ensuring an enjoyable and rewarding musical experience.
Checking the Neck Alignment
Once the truss rod adjustments have been made to address the neck’s misalignments, it’s essential to conduct a comprehensive evaluation of the neck’s alignment to ensure that the corrective measures have effectively rectified any warping or bowing. This meticulous assessment serves as a crucial validation step, allowing you to confirm the success of the adjustments and make any necessary fine-tuning to achieve the desired neck alignment.
Visual inspection remains a fundamental aspect of checking the neck’s alignment, as it provides immediate indications of the neck’s curvature and straightness. Sighting down the neck from the headstock to the body, while observing the relationship between the fretboard and the strings, can reveal any residual signs of bowing or warping that require further attention. Look for a consistent and even gap between the strings and the fretboard, indicative of a well-aligned neck.
Utilizing a straightedge, such as a specialized straightedge tool or a long ruler, can offer a quantitative assessment of the neck’s alignment. By placing the straightedge along the length of the fretboard and observing the gap between the straightedge and the frets, you can gauge the uniformity of the neck’s curvature and identify any localized irregularities that may necessitate additional adjustments.
Playing the guitar across the entire fretboard and assessing the string action and intonation provides valuable tactile feedback regarding the neck’s playability and alignment. Listen for consistent string resonance and note clarity across all frets, ensuring that the neck’s alignment supports optimal intonation and minimizes fret buzz or uneven string action.
Furthermore, assessing the neck’s response to chord shapes and scale patterns across different positions on the fretboard can reveal any lingering issues related to the neck’s alignment. Pay attention to the ease of fretting chords and executing bends and vibrato, as these aspects directly reflect the neck’s playability and alignment.
By integrating visual, quantitative, and tactile assessments, you can confidently ascertain the success of the truss rod adjustments and verify the neck’s alignment. This meticulous validation process ensures that the corrective measures have effectively straightened the neck, ultimately enhancing the guitar’s playability and tonal characteristics.
Upon confirming the optimal alignment of the neck, you’re poised to proceed with the final setup and testing procedures, solidifying the success of the neck straightening process and ensuring that your guitar performs at its peak potential, delivering an exceptional playing experience.
Final Setup and Testing
As you near the culmination of the guitar neck straightening process, the final setup and testing phase assumes paramount significance, encompassing essential procedures to optimize the instrument’s playability, intonation, and overall performance. This pivotal stage allows you to fine-tune various elements of the guitar, ensuring that it is impeccably set up and poised to deliver an exceptional playing experience.
One of the key aspects of the final setup involves adjusting the guitar’s action, which refers to the height of the strings above the frets. By meticulously setting the action to your preferred specifications, you can tailor the playability and responsiveness of the instrument to suit your playing style, whether you prefer a low, fast action for effortless fretting or a slightly higher action for enhanced sustain and resonance.
Additionally, optimizing the guitar’s intonation is integral to achieving accurate pitch across all frets, ensuring that chords and notes ring true and harmonious. Through meticulous adjustments to the saddle positions on the bridge, you can fine-tune the intonation, mitigating any discrepancies between the open strings and their respective fretted notes, thereby achieving impeccable tuning stability and tonal integrity.
Conducting a comprehensive testing phase is indispensable for validating the success of the neck straightening process and the subsequent setup adjustments. Playing a diverse array of chord progressions, scales, and melodies across the entire fretboard allows you to assess the instrument’s playability, intonation, and overall tonal characteristics, ensuring that the guitar performs optimally in various musical contexts.
Listening attentively for consistent note clarity, sustain, and resonance across all frets and strings provides valuable insights into the instrument’s tonal coherence and playability. Additionally, executing techniques such as bends, vibrato, and chord voicings enables you to evaluate the guitar’s responsiveness and expressiveness, confirming that the final setup has effectively optimized its performance.
Furthermore, ensuring that the guitar retains stable tuning and exhibits minimal fret buzz or string choking under varying playing conditions validates the success of the setup adjustments and affirms the instrument’s readiness for musical endeavors.
By meticulously executing the final setup and conducting rigorous testing, you cement the success of the guitar neck straightening process, ensuring that the instrument is impeccably set up and primed to deliver an exceptional playing experience. Whether you’re embarking on intricate solos, expressive chord progressions, or dynamic rhythm playing, the meticulously optimized playability, intonation, and tonal characteristics of your guitar will empower you to unleash your musical creativity with confidence and finesse.