Home>Instruments>Guitar>How To Make A Guitar Pick
Guitar
How To Make A Guitar Pick
Modified: February 15, 2024
Learn how to make a guitar pick at home using various materials and techniques. Create custom picks for your guitar playing needs. Step-by-step guide for guitar enthusiasts.
(Many of the links in this article redirect to a specific reviewed product. Your purchase of these products through affiliate links helps to generate commission for AudioLover.com, at no extra cost. Learn more)
Table of Contents
Introduction
Welcome to the world of guitar playing! Whether you’re a seasoned guitarist or just starting out, one essential tool you’ll need is a guitar pick. While there are countless options available for purchase, there’s something special about crafting your own pick. Not only does it allow for customization, but it also provides a sense of connection to your instrument.
In this guide, we’ll explore the process of making a guitar pick from scratch. From selecting the right materials to shaping and refining the pick, you’ll learn the art of creating a personalized accessory that complements your playing style.
By crafting your own guitar pick, you can tailor its thickness, shape, and texture to suit your preferences, resulting in a unique playing experience. Additionally, this DIY approach allows for experimentation with various materials, opening the door to a world of creative possibilities.
Whether you’re seeking a budget-friendly alternative to store-bought picks or simply want to add a personal touch to your playing, making your own guitar pick is a rewarding and enjoyable endeavor. So, let’s dive in and discover the steps to create a custom pick that will enhance your musical journey.
Materials Needed
Before embarking on the journey of creating your own guitar pick, it’s essential to gather the necessary materials. Here’s what you’ll need:
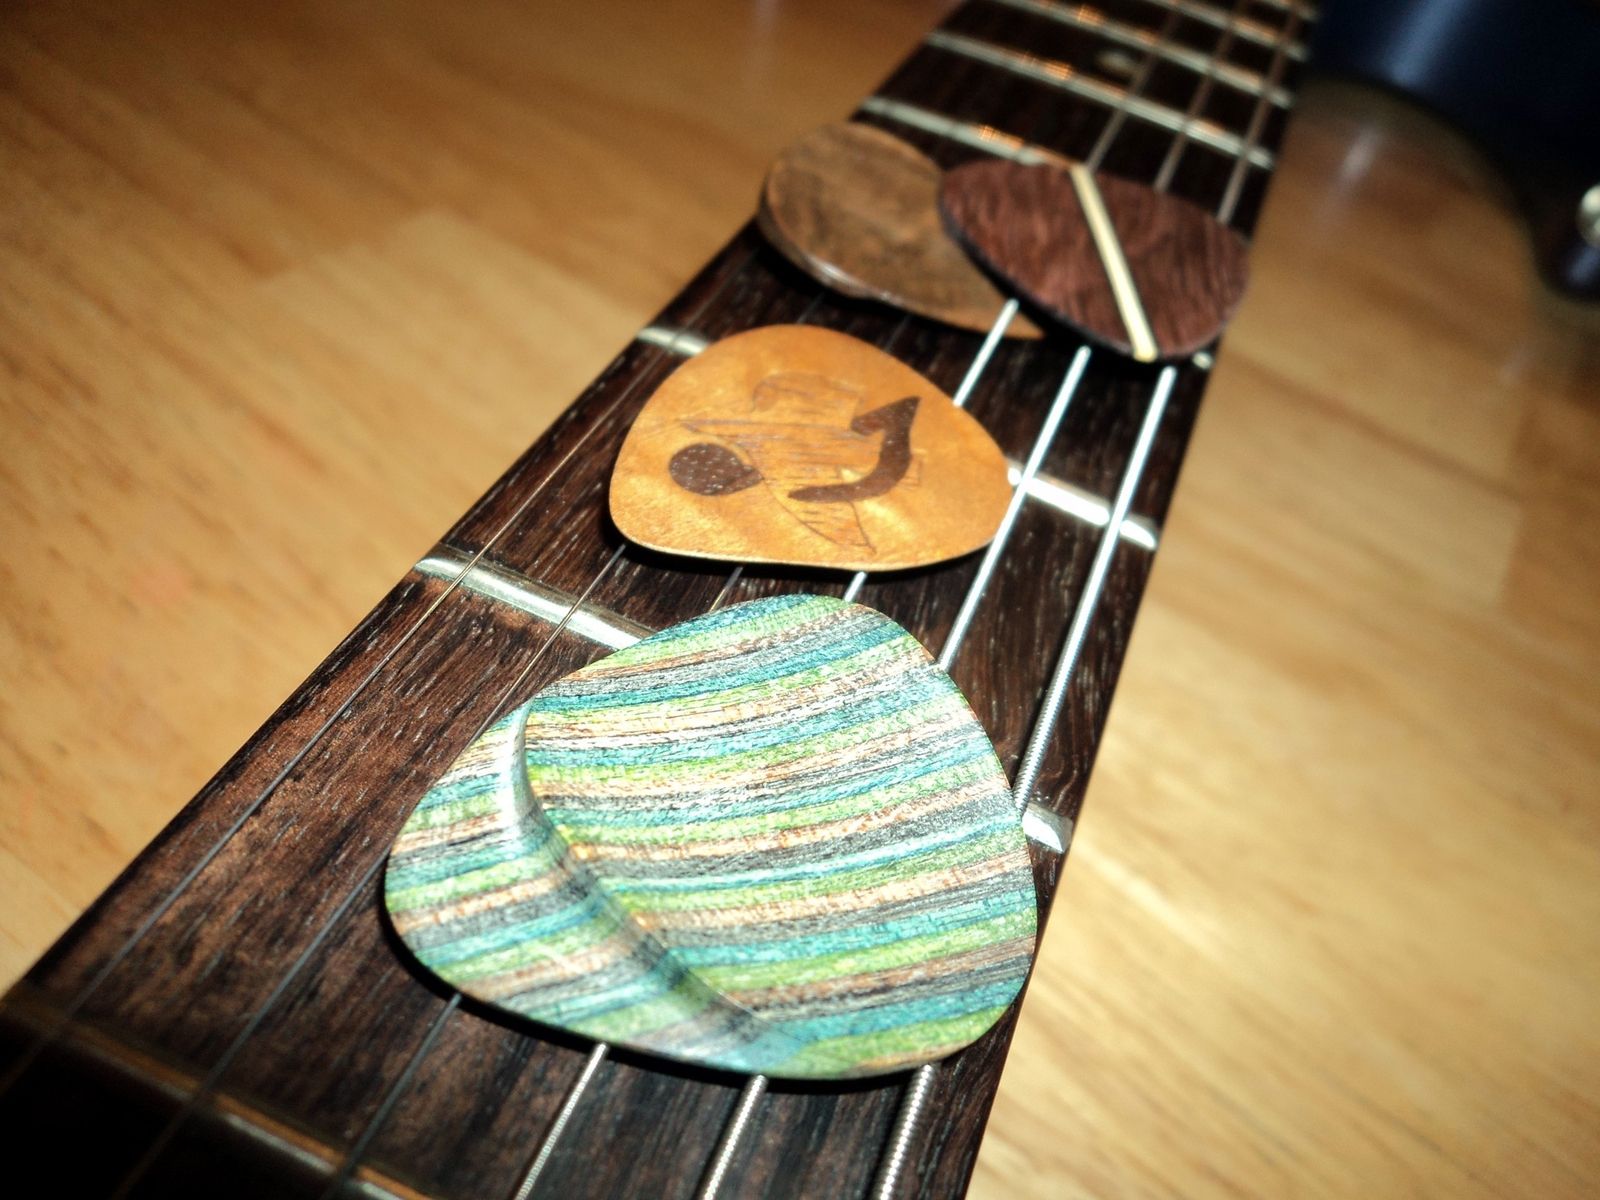
- Raw Material: The most common material for crafting guitar picks is celluloid, a type of plastic known for its durability and flexibility. Alternatively, you can explore materials such as acetal, nylon, or even repurposed credit cards for a unique touch.
- Template: While a standard guitar pick shape is often used, you can create a template from an existing pick or design a custom shape to suit your preferences. This template will serve as a guide for cutting the pick from the raw material.
- Utility Knife or Pick Punch: To cut the pick shape from the raw material, a sharp utility knife or a specialized pick punch can be used. The pick punch provides a convenient way to create picks with consistent shapes and sizes.
- Sandpaper or File: Once the pick shape is cut, sandpaper or a fine file will be needed to smooth the edges and refine the surface of the pick. This step is crucial for achieving a polished and comfortable playing surface.
- Optional: Drill and Drill Bits: If you prefer picks with grip holes or unique designs, a drill and suitable drill bits can be used to add these features to your custom picks.
By having these materials at your disposal, you’ll be well-equipped to begin the process of crafting your own guitar pick. The next steps will guide you through transforming these raw materials into a personalized accessory that enhances your guitar playing experience.
Cutting the Pick Shape
Now that you’ve assembled the necessary materials, it’s time to delve into the creative process of cutting the pick shape. This step forms the foundation of your custom pick, setting the stage for further refinement and personalization.
To begin, place the template of your desired pick shape onto the raw material. Whether you’re using celluloid, acetal, nylon, or repurposed materials, ensure that the template is securely positioned to facilitate accurate cutting. If you’re using a pick punch, align the template within the punch’s designated area, ready for precision cutting.
With your utility knife or pick punch in hand, carefully trace around the template, applying even pressure to ensure a clean and defined outline. If you’re using a pick punch, simply position it over the material and press down firmly to create the pick shape. This method provides a quick and consistent way to produce multiple picks with uniform shapes.
As you cut the pick shape, pay close attention to the edges, aiming for a smooth and even outline. This initial cutting stage lays the groundwork for the subsequent shaping and refining processes, so precision is key. Take your time to achieve the desired shape, as it will directly impact the playability and comfort of the finished pick.
Once the pick shape is cut from the raw material, you’re one step closer to holding a unique and personalized guitar pick. The next stage involves refining the edges and perfecting the surface to create a professional-looking accessory that reflects your individual style and preferences.
As you progress through the cutting process, envision the characteristics you want your pick to embody. Whether it’s a standard teardrop shape or a custom design, this stage sets the stage for infusing your playing experience with a touch of personal flair.
Shaping and Smoothing
With the pick shape successfully cut from the raw material, the next phase involves shaping and smoothing the edges to refine the overall look and feel of the pick. This step is crucial for ensuring a comfortable and precise playing experience, as well as adding a professional touch to your custom creation.
Begin by using sandpaper or a fine file to carefully smooth the edges of the pick. This process aims to eliminate any rough or jagged areas resulting from the cutting stage, creating a clean and polished outline. By maintaining a consistent motion and applying gentle pressure, you can gradually refine the edges, resulting in a professional-looking finish.
As you shape the edges, pay attention to the thickness of the pick, ensuring that it aligns with your preferred playing style. Whether you prefer a thinner, more flexible pick for strumming or a thicker, sturdier pick for precise picking, this is the opportune time to tailor the thickness to your liking. By carefully sanding or filing the edges, you can achieve the desired thickness while maintaining a smooth and uniform profile.
During the shaping process, consider the overall ergonomics of the pick. Smooth any sharp corners or angles to ensure a comfortable grip and seamless interaction with the strings. This attention to detail contributes to a pick that not only complements your playing technique but also feels natural and intuitive in your hand.
As you refine the edges and shape the pick, visualize the end result, envisioning a sleek and professional accessory that embodies your unique musical identity. This stage of the process allows for a personalized touch, as you craft a pick that aligns with your playing preferences and artistic expression.
By the time the shaping and smoothing phase is complete, your custom pick will have undergone a remarkable transformation, evolving from raw material to a refined accessory that enhances your guitar playing experience. The final steps will further elevate the pick, culminating in a personalized creation that resonates with your musical journey.
Finalizing the Pick
As you approach the final stages of creating your custom guitar pick, it’s time to add those defining touches that will elevate it from a raw material to a personalized accessory that reflects your musical style and preferences.
If you desire a pick with grip holes or a unique design, this is the opportune moment to incorporate these features. Using a drill and suitable drill bits, carefully create the desired patterns or perforations on the pick’s surface. Whether it’s a classic trio of grip holes or a more intricate design, this step allows for artistic expression and functional customization.
After adding any desired features, take a moment to assess the overall feel and playability of the pick. Run your fingers along the edges, checking for smoothness and comfort. Consider how the pick fits into your playing technique, ensuring that it aligns with your musical preferences and enhances your performance.
At this stage, you may also want to personalize the pick further by adding your initials, a meaningful symbol, or a decorative touch. Whether it’s a subtle engraving or a vibrant embellishment, this final detail can imbue the pick with a sense of individuality and significance, making it uniquely yours.
Once you’re satisfied with the pick’s appearance and feel, take a moment to appreciate the craftsmanship and creativity that have gone into its creation. From the initial selection of materials to the meticulous shaping and refining processes, your custom pick embodies a blend of artistry and functionality.
By finalizing the pick with your personal touches and ensuring its alignment with your playing style, you’ve transformed a simple piece of material into a meaningful and practical accessory. This custom creation is not only a reflection of your musical identity but also a testament to the art of craftsmanship and self-expression.
As you prepare to put your custom pick to use, anticipate the enhanced playing experience that awaits. Your personalized creation is poised to accompany you on your musical journey, adding a touch of creativity and individuality to every note and chord.
Conclusion
Congratulations on completing the journey of crafting your own guitar pick! Through the process of selecting materials, cutting the pick shape, shaping and smoothing, and adding personalized touches, you’ve embarked on a creative endeavor that has yielded a unique and personalized accessory for your musical pursuits.
As you hold your custom pick in hand, take a moment to appreciate the craftsmanship and attention to detail that have gone into its creation. This personalized accessory is not merely a tool for playing the guitar but a tangible expression of your musical identity and artistic sensibilities.
By crafting your own guitar pick, you’ve transcended the realm of standard accessories and delved into the realm of customization and self-expression. Your pick reflects your playing style, preferences, and individuality, serving as a constant companion on your musical journey.
Furthermore, the process of making your own pick has allowed for exploration and experimentation, from selecting materials to refining the shape and adding personal touches. This hands-on approach has provided insights into the craftsmanship behind a seemingly simple accessory, fostering a deeper connection to your musical tools.
As you integrate your custom pick into your playing routine, anticipate the enhanced comfort, precision, and sense of ownership it brings to your performances. Every strum, pluck, and chord will be accompanied by a pick that resonates with your artistic vision, adding a layer of creativity and individuality to your music.
Whether you’re a seasoned guitarist or just beginning your musical journey, the act of crafting your own guitar pick serves as a reminder of the boundless creativity and personalization that can enrich your musical experience. Embrace the spirit of craftsmanship and self-expression, and let your custom pick become a symbol of your musical identity and passion.
As you continue to explore the world of guitar playing, may your custom pick be a constant source of inspiration and a reflection of the artistry and dedication that define your musical pursuits. Let it serve as a reminder of the joy and fulfillment found in creating something that is uniquely yours.