Home>Instruments>Guitar>How To String A Bass Guitar

Guitar
How To String A Bass Guitar
Modified: February 15, 2024
Learn how to string a bass guitar with our step-by-step guide. Whether you're a beginner or experienced player, our tips will help you maintain your guitar for optimal performance. Discover the best techniques and tools for restringing your guitar today!
(Many of the links in this article redirect to a specific reviewed product. Your purchase of these products through affiliate links helps to generate commission for AudioLover.com, at no extra cost. Learn more)
Table of Contents
Introduction
So, you've finally decided to change the strings on your bass guitar. Congratulations! This simple yet crucial maintenance task can significantly impact the sound and playability of your instrument. Whether you're a seasoned bassist or just starting out, knowing how to properly string a bass guitar is an essential skill that every musician should master.
Changing the strings on your bass guitar not only ensures a crisp and vibrant tone but also contributes to the overall health and longevity of the instrument. Over time, strings accumulate dirt, sweat, and oils from your fingers, leading to a dull and lifeless sound. By regularly replacing the strings, you can rejuvenate your bass guitar's sonic character, making it a joy to play once again.
In this comprehensive guide, we'll walk you through the step-by-step process of stringing a bass guitar, covering everything from the tools and materials you'll need to the proper techniques for removing the old strings, preparing the new ones, and achieving optimal tuning. By the end of this tutorial, you'll feel confident and empowered to tackle this essential maintenance task with ease.
So, grab your bass guitar, roll up your sleeves, and let's dive into the wonderful world of bass stringing!
Tools and Materials Needed
Before embarking on the journey of restringing your bass guitar, it’s essential to gather the necessary tools and materials. Having the right equipment at your disposal will not only streamline the process but also ensure that you achieve optimal results. Here’s what you’ll need:
- Bass Guitar Strings: Select a high-quality set of bass guitar strings suitable for your playing style and musical preferences. Whether you prefer the warmth of flatwound strings or the versatility of roundwound strings, choosing the right set is crucial to achieving your desired tone.
- String Winder: A string winder is a handy tool that makes the task of winding the strings quicker and more efficient. It’s particularly useful for larger instruments like the bass guitar, where manually winding the strings can be time-consuming.
- Wire Cutters: Precision wire cutters are essential for trimming the excess string length once the new strings are installed. They ensure a clean and professional-looking result, preventing any sharp protrusions that could cause discomfort while playing.
- Tuner: A reliable tuner is indispensable for achieving accurate pitch and ensuring that your bass guitar is perfectly in tune once the new strings are in place. Whether you prefer a clip-on tuner, pedal tuner, or a smartphone app, having one on hand is essential.
- Clean Cloth: Before installing the new strings, it’s beneficial to have a clean cloth on hand to wipe down the fretboard and body of the bass guitar. This helps remove any accumulated grime and ensures a clean surface for the new strings.
- String Lubricant (Optional): While not essential, some bassists prefer to use a string lubricant to minimize friction at the nut and bridge, potentially improving tuning stability and prolonging the lifespan of the strings.
By ensuring that you have these tools and materials ready, you’ll be well-equipped to tackle the stringing process with confidence and precision. With everything in place, you’re now prepared to dive into the next steps of removing the old strings and preparing the bass guitar for its fresh set of strings.
Removing the Old Strings
Before you can install a new set of strings on your bass guitar, it’s essential to remove the old ones carefully. This process not only paves the way for the fresh strings but also allows you to inspect and clean the instrument, ensuring optimal playability and tone. Here’s a step-by-step guide to removing the old strings:
- Loosen the Tuning Pegs: Begin by turning the tuning pegs to slacken the tension of the strings. This can be done by turning the pegs in a counterclockwise direction, gradually reducing the tension until the strings are loose enough to be removed.
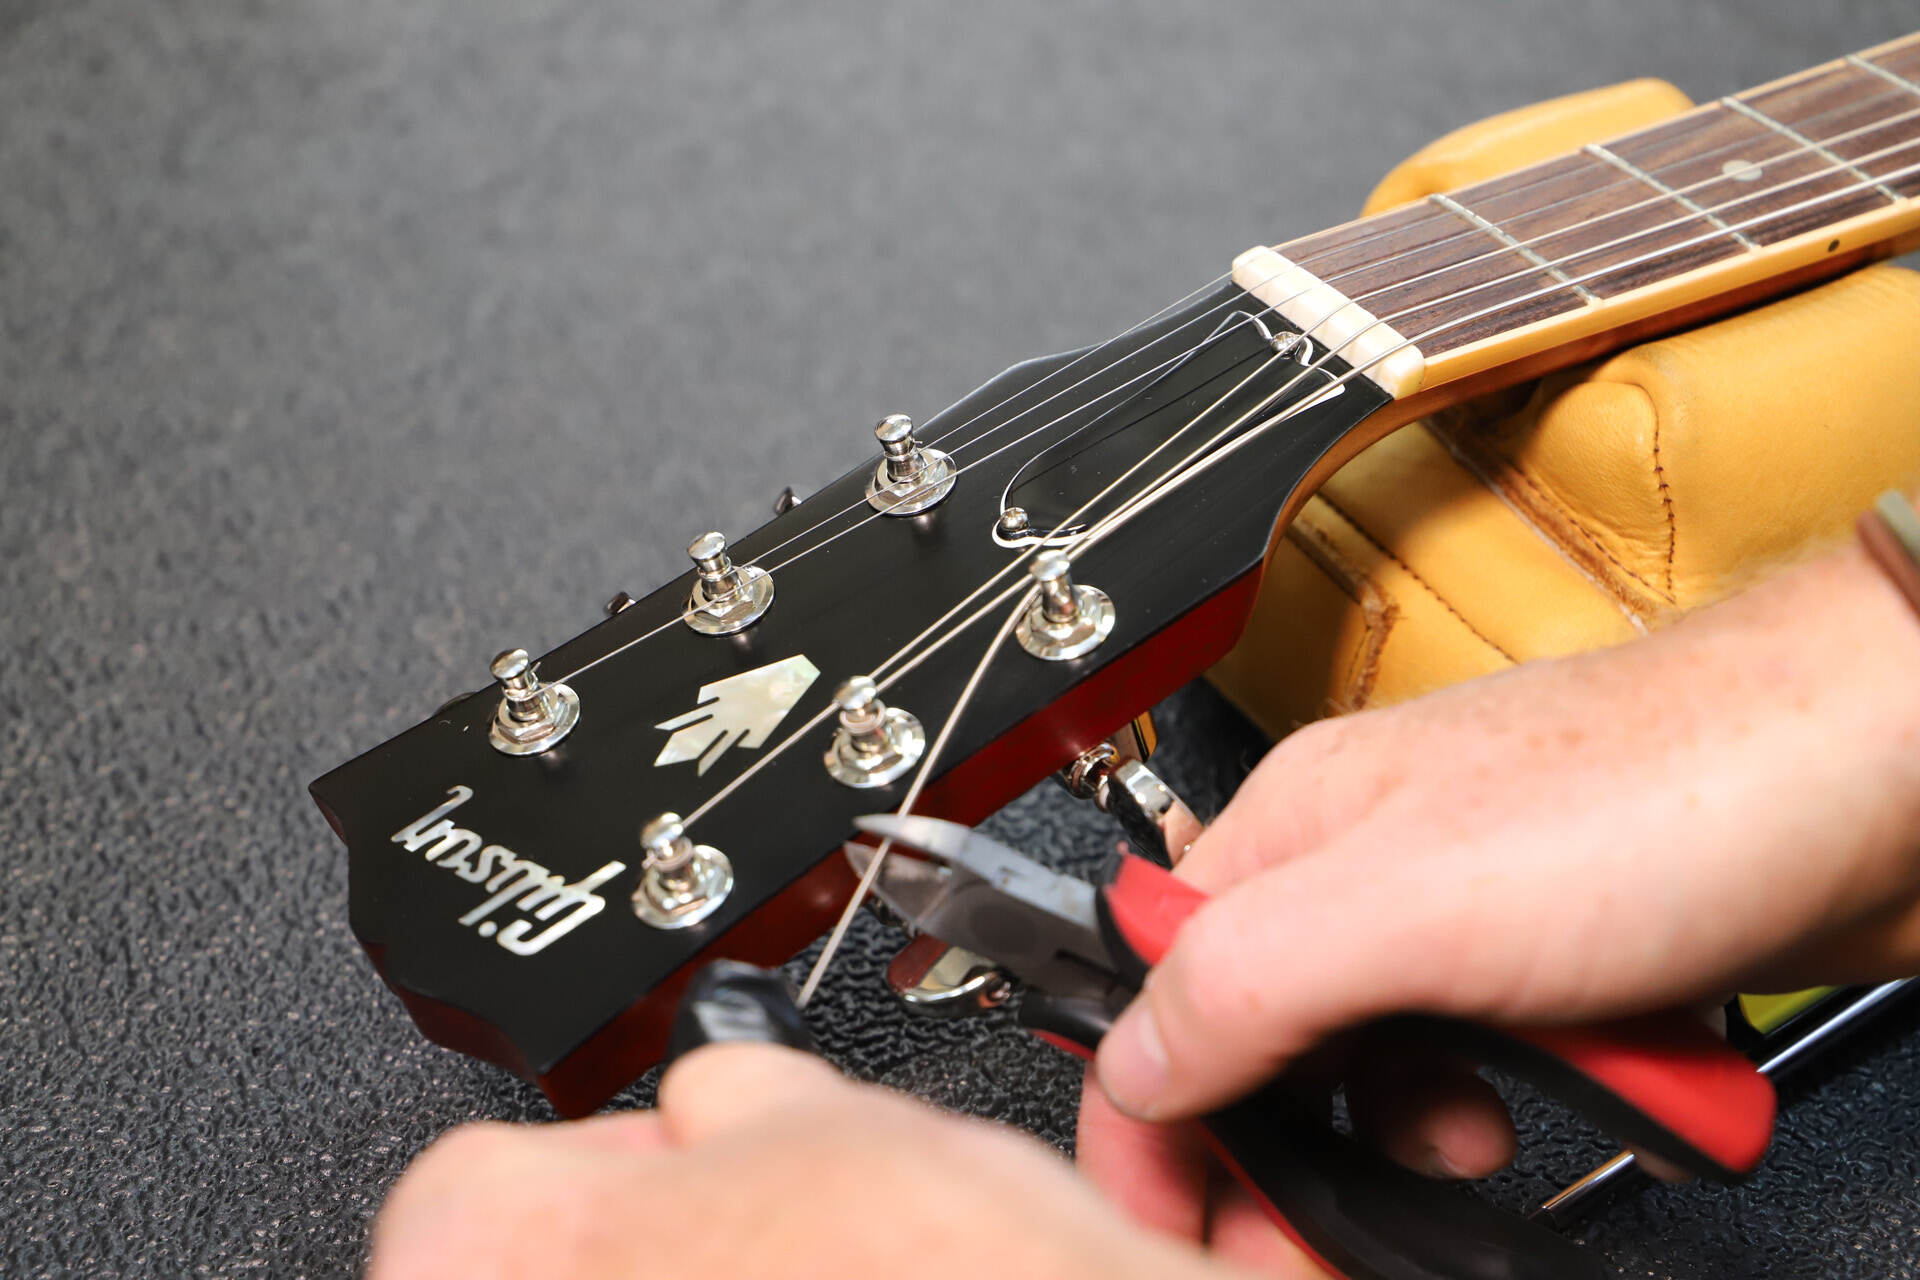
- Trim the Strings: Once the strings are sufficiently slack, use wire cutters to trim them near the tuning pegs. This will make it easier to unwind and remove the old strings without any unnecessary tangles or snags.
- Unwind the Strings: Unwind each string from its respective tuning peg, taking care to guide the string away from the guitar’s body to prevent any scratches or damage. As you unwind the strings, keep them neatly coiled to avoid tangling.
- Remove the Bridge End: After releasing the tension at the tuning pegs, unwind the other end of each string from the bridge. Depending on your bass guitar’s bridge design, this may involve feeding the strings through the body or releasing them from a bridge assembly.
- Clean the Guitar: With the old strings removed, take this opportunity to clean the fretboard, bridge, and body of the bass guitar. Use a clean cloth to wipe away any accumulated grime, sweat, or residue, ensuring that the instrument is ready to receive its new strings.
By following these steps, you’ll effectively remove the old strings from your bass guitar, setting the stage for the exciting process of installing a fresh set. With the instrument now free of its worn-out strings and given a thorough cleaning, you’re ready to move on to the next phase of preparing the new strings for installation.
Preparing the New Strings
Before you can begin stringing your bass guitar with a fresh set of strings, it’s crucial to prepare the new strings for installation. This involves unwinding and straightening the coiled strings, ensuring that they are ready to be securely attached to the instrument. Here’s a detailed guide to preparing the new strings:
- Uncoil the Strings: Carefully unwrap each new string from its packaging, taking care to prevent any kinks or tangles. Gently straighten the strings by running your fingers along their length, smoothing out any residual coiling to ensure they lie flat and uniform.
- Identify the Correct Strings: Bass guitar string sets typically consist of multiple strings of varying thicknesses, each corresponding to a specific pitch. Ensure that you correctly identify and organize the strings based on their intended placement on the bass guitar, typically ranging from the thickest (lowest pitch) to the thinnest (highest pitch).
- Inspect the Strings: Take a moment to inspect each string for any defects or irregularities. Check for any signs of damage, such as kinks, nicks, or corrosion, as these can affect the string’s performance and longevity. If any issues are detected, consider replacing the affected string with a spare from the set.
- Stretch the Strings (Optional): Some bassists prefer to gently stretch the new strings to minimize initial tuning instability. This can be done by grasping the string at both ends and applying gentle pressure along its length, repeating the process a few times to help the string settle into its final tension more quickly.
By meticulously preparing the new strings, you’ll ensure a smooth and trouble-free installation process, setting the stage for optimal tone and playability. With the strings now ready for mounting, you’re poised to embark on the exciting task of stringing your bass guitar and bringing forth its renewed sonic potential.
Stringing the Bass Guitar
With the old strings removed and the new ones prepared, it’s time to embark on the process of stringing your bass guitar. This pivotal step requires precision and attention to detail to ensure that the strings are securely fastened and properly seated, setting the stage for optimal tone and playability. Here’s a comprehensive guide to stringing your bass guitar:
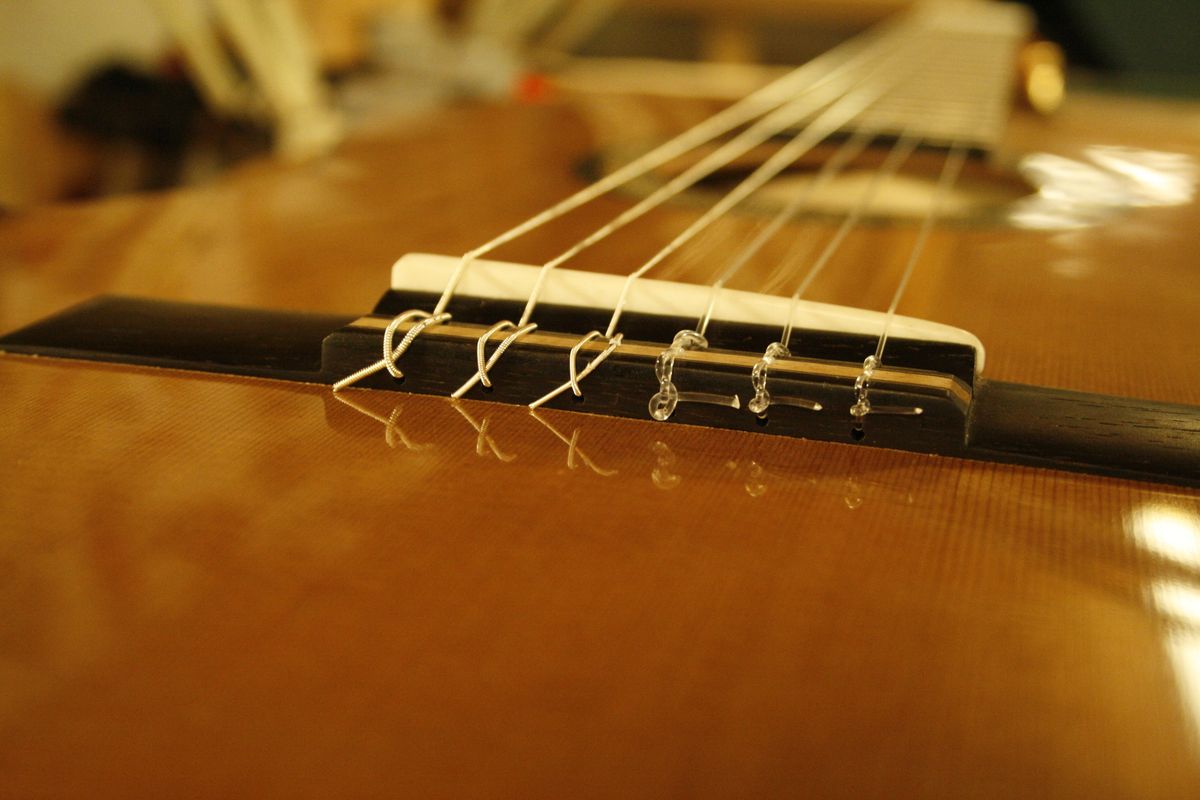
- Feed the String Through the Bridge: Begin by threading the end of the first string (typically the thickest, lowest-pitched string) through the appropriate bridge saddle, ensuring that it is seated securely and properly aligned.
- Guide the String to the Tuning Peg: Pull the string taut and guide it towards the corresponding tuning peg, ensuring that it follows the correct path and avoids any unnecessary twists or kinks along the way.
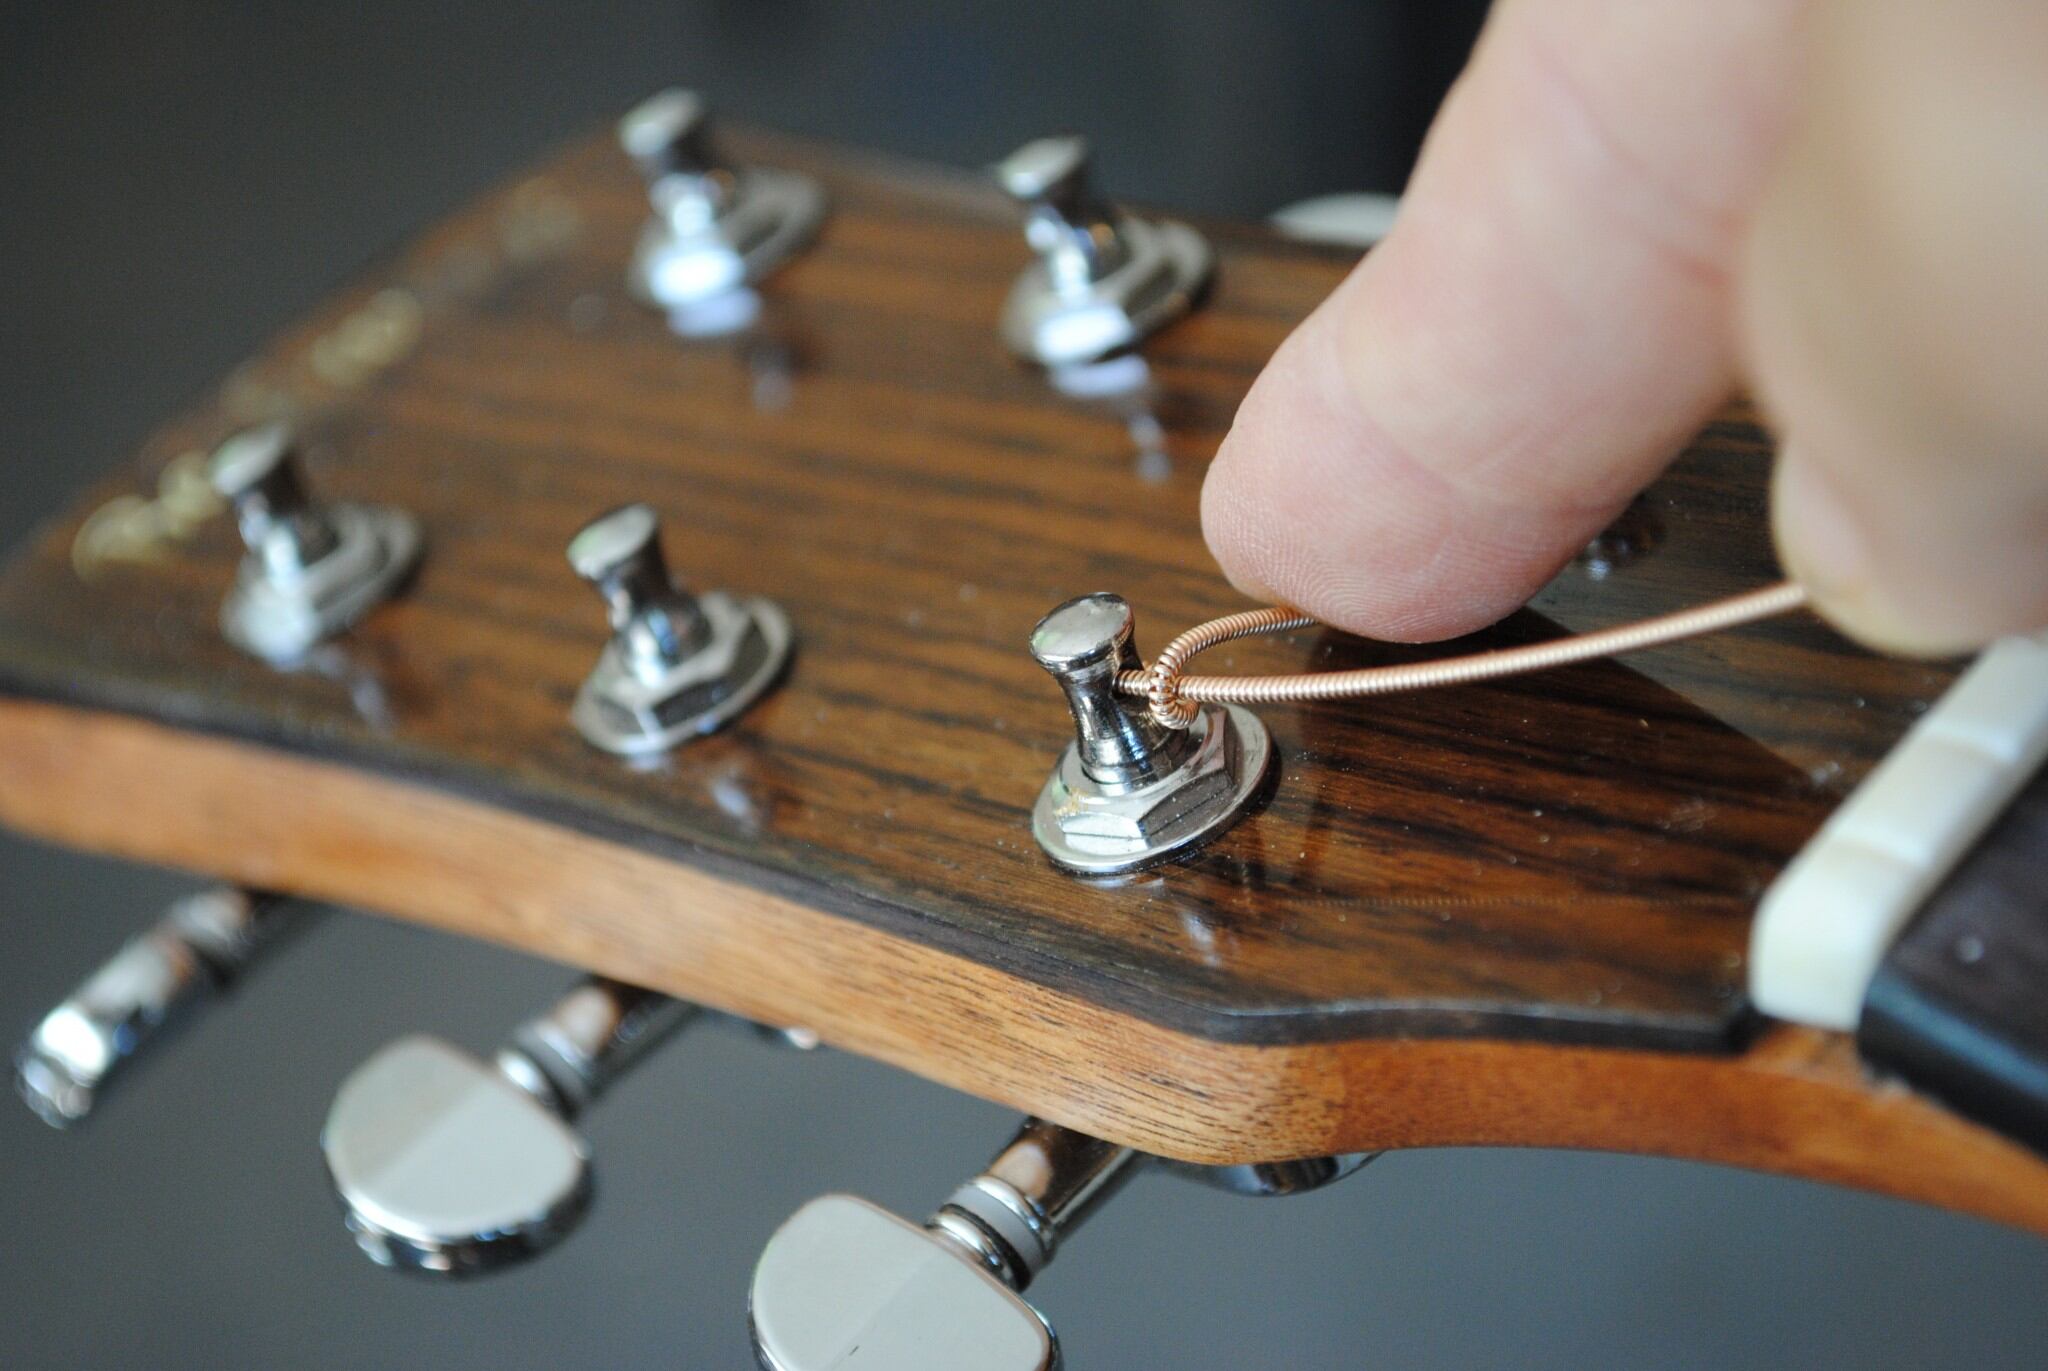
- Secure the String at the Tuning Peg: Once the string is aligned with the appropriate tuning peg, begin winding it in a clockwise direction around the peg. Leave a sufficient amount of slack near the bridge to allow for several winds around the peg, ensuring a secure grip and optimal tuning stability.
- Wind the String: Utilize a string winder or your fingers to carefully wind the string around the tuning peg, ensuring that each turn is neat and orderly. Maintain tension on the string as you wind it, keeping the coils close together to prevent slippage and ensure a consistent winding pattern.
- Cut Excess String: Once the string is securely wound and tuned to pitch, use wire cutters to trim the excess length, leaving a small amount of slack to prevent the string from unraveling. Take care to position the cut end away from the headstock to avoid any potential hazards.
- Repeat for Remaining Strings: Follow the same process for each subsequent string, ensuring that they are threaded through the appropriate bridge saddles, wound neatly around the tuning pegs, and trimmed to the correct length. Take your time to ensure that each string is securely fastened and tuned to the appropriate pitch.
By meticulously following these steps, you’ll effectively string your bass guitar with precision and care, setting the stage for a rejuvenated sonic experience. With the new strings securely in place, you’re now ready to fine-tune the instrument and bring forth its full tonal potential through the next crucial step: tuning the bass guitar.
Tuning the Bass Guitar
After successfully stringing your bass guitar with a fresh set of strings, the next critical step is to ensure that the instrument is accurately tuned. Proper tuning is essential for achieving the desired pitch and ensuring that the bass guitar produces harmonious and balanced tones across its strings. Here’s a detailed guide to tuning your bass guitar:
- Use a Tuner: Begin by activating your tuner and placing it within view, ensuring that it can detect the vibrations of the bass guitar’s strings accurately. Whether you’re using a clip-on tuner, pedal tuner, or a smartphone app, make sure it’s easily accessible.
- Tune One String at a Time: Starting with the thickest string (typically the E string), pluck the string and observe the tuner’s display. Adjust the tuning peg for that string to achieve the correct pitch, indicated by the tuner’s visual or audible feedback.
- Progress to the Next Strings: Once the thickest string is tuned to perfection, proceed to tune the remaining strings in ascending order, following the same process for each string. Take your time to ensure that each string is precisely tuned to the appropriate pitch.
- Check for Intonation: After tuning each string, it’s beneficial to check the bass guitar’s intonation by playing fretted notes at various positions along the neck. Use the tuner to verify that the pitches remain consistent across the fretboard, making any necessary saddle adjustments if intonation issues are detected.
- Double-Check the Tuning: Once you’ve tuned all the strings and verified the instrument’s intonation, revisit each string to confirm that it remains in tune. Factors such as string stretching and settling can affect tuning stability, so a final check ensures that the bass guitar is ready for action.
By meticulously tuning your bass guitar, you’ll ensure that it delivers the rich, resonant tones you seek, setting the stage for a rewarding playing experience. With the instrument now perfectly tuned and the new strings settled in, you’re poised to unleash its full sonic potential and embark on a musical journey filled with vibrant bass lines and captivating rhythms.
Conclusion
Congratulations! You’ve successfully navigated the art of stringing a bass guitar, a fundamental skill that not only enhances the instrument’s sonic capabilities but also contributes to its overall health and playability. By following the step-by-step process outlined in this guide, you’ve gained valuable insights into the meticulous art of maintaining and rejuvenating your bass guitar.
As you reflect on the journey of removing the old strings, preparing and installing the new ones, and meticulously tuning the instrument, take pride in the care and attention you’ve dedicated to your bass guitar. Through this essential maintenance task, you’ve not only revitalized the instrument’s tone but also deepened your connection with the music you create.
Moreover, the process of stringing a bass guitar offers a unique opportunity to bond with your instrument, gaining a deeper understanding of its construction and the intricate interplay between strings, hardware, and tonewood. This hands-on experience fosters a sense of intimacy and familiarity with your bass guitar, enriching your musical journey as a dedicated bassist.
By mastering the art of stringing your bass guitar, you’ve unlocked the potential for rich, resonant tones and expressive performances, empowering you to explore new musical horizons with confidence and creativity. As you embark on your next practice session, rehearsal, or live performance, the rejuvenated sound of your bass guitar will serve as a testament to your dedication and craftsmanship.
So, embrace the transformative power of fresh strings, revel in the vibrant tones they produce, and let your bass guitar become a conduit for your musical expression. With each note and rhythm, may you find joy and inspiration in the harmonious partnership between musician and instrument, knowing that your commitment to maintenance has paved the way for countless musical endeavors.
As you continue to explore the rhythmic depths and melodic possibilities of your bass guitar, remember that the journey of maintenance and care is an ongoing one. Regular string changes, meticulous tuning, and attentive upkeep will ensure that your bass guitar remains a steadfast companion, resonating with your passion and creativity for years to come.