Home>Instruments>Bass>How To Change Bass Strings
Bass
How To Change Bass Strings
Published: November 28, 2023
Learn how to change bass strings easily with our step-by-step guide. Keep your bass sounding its best with this simple DIY tutorial.
(Many of the links in this article redirect to a specific reviewed product. Your purchase of these products through affiliate links helps to generate commission for AudioLover.com, at no extra cost. Learn more)
Table of Contents
Introduction
Changing the strings on your bass guitar is an essential maintenance task for any bass player. Over time, the strings on your bass can become worn, lose their tone, and even break. By regularly changing your bass strings, you can ensure a crisp and vibrant sound, as well as improved playability.
In this article, we will guide you through the process of changing bass strings step-by-step. Whether you are a beginner or an experienced bassist, this guide will provide you with all the information you need to successfully change your bass strings.
Not only will changing your bass strings improve the sound quality of your instrument, but it can also prevent potential damage to the neck and body of your bass. When old strings become worn, they can corrode and leave residue on your fretboard, which can affect playability. Additionally, old strings are more prone to breakage, which can cause potential damage to other parts of your bass, such as the bridge or pickups.
By regularly changing your bass strings, you can maintain the optimal performance and longevity of your instrument. It is recommended to change your bass strings every few months, or sooner if you notice a decline in sound quality or playability.
Before we begin with the step-by-step process, let’s first gather the necessary tools for changing your bass strings.
Step 1: Gather the necessary tools
Before you can start changing your bass strings, you’ll need to gather a few essential tools. Having these tools ready will make the process much smoother and ensure that you have everything you need at hand. Here are the tools you’ll need:
- New bass strings: Make sure you have a set of bass strings that are suitable for your bass. There are various types of strings available, such as roundwound, flatwound, and half-round. Choose the type that suits your playing style and the sound you’re aiming for.
- String cutter or wire snips: You’ll need a tool to cut off the excess string length once they are installed. A dedicated string cutter or wire snips will make the job easier and give you a clean cut.
- Tuner: It’s important to have a tuner on hand to ensure that your bass strings are properly tuned once installed. You can use a dedicated electronic tuner or a tuner app on your smartphone.
- String winder: While not necessary, a string winder can be a helpful tool for quickly tightening the strings and reducing the time it takes to wind them around the tuning pegs.
- Clean cloth or microfiber towel: It’s always a good idea to have a clean cloth or microfiber towel on hand to wipe down your bass and keep it looking its best.
Once you have gathered all the necessary tools, you’re ready to move on to the next step: removing the old bass strings.
Step 2: Remove the old bass strings
Now that you have all the necessary tools, it’s time to remove the old bass strings. Follow these simple steps to safely remove the old strings:
- Loosen the strings: Start by loosening the tension on each string. Use your tuning pegs or a string winder to unwind the string until it is loose enough to be easily removed.
- Clip the strings: Once the strings are sufficiently loose, use a string cutter or wire snips to cut the strings close to the bridge. Be careful not to damage the instrument while cutting the strings.
- Remove the strings: Gently pull the cut ends of the strings through the bridge. If you encounter any resistance, double-check that the strings are fully loosened and try again. Once the strings are free from the bridge, repeat the process at the tuning peg end to completely remove the old strings from your bass.
- Clean the fretboard: With the old strings removed, take this opportunity to clean the fingerboard. Use a clean cloth or microfiber towel to remove any dust or grime that may have accumulated. This will help maintain the quality and playability of your instrument.
With the old strings removed and the fingerboard cleaned, you’re now ready to move on to the next step: installing the new bass strings.
Step 3: Clean the fingerboard
Before installing the new bass strings, it’s important to clean the fingerboard to ensure optimal playability and maintain the overall condition of your bass. Follow these steps to clean the fingerboard effectively:
- Remove dirt and grime: Use a clean cloth or microfiber towel to gently wipe away any dirt or grime from the fingerboard. Pay close attention to areas around the frets where buildup may be more prominent. Take care to avoid excessive moisture as it may damage the wood.
- Apply lemon oil (optional): If your fingerboard is made of wood, you may choose to apply a small amount of lemon oil to help condition and nourish the wood. Apply a few drops of lemon oil onto a clean cloth and gently rub it into the fingerboard. Be sure to follow the manufacturer’s instructions and use only a minimal amount of oil.
- Wipe off excess oil: After applying the lemon oil, use a separate clean cloth or microfiber towel to wipe off any excess oil from the fingerboard. It’s essential to remove any residue to avoid the buildup of sticky or greasy substances that can affect the playability.
- Inspect for any additional cleaning: Take a close look at the fingerboard and check if there are any stubborn stains or residue that require additional cleaning. In such cases, you can use a specialized guitar fingerboard cleaner or mild soap and water solution to remove them. However, exercise caution and follow the manufacturer’s instructions to prevent any damage to the wood or finish.
By ensuring that your fingerboard is clean and well-maintained, you’ll not only enhance the playability of your bass but also prolong its lifespan. Once the fingerboard is cleaned, you can proceed to the next step: installing the new bass strings.
Step 4: Install the new bass strings
With your fingerboard cleaned and prepped, it’s time to install the new bass strings. Follow these steps to properly install the new strings on your bass:
- Identify string gauges: Take note of the string gauges provided in your new set of bass strings. These gauges are typically represented by numbers and refer to the thickness of each string. Remembering or writing down the string gauges will help ensure that you install the strings in the correct order.
- Thread the strings through the bridge: Begin by threading the end of the first string through the bridge, starting from the bottom. Pull the string through until there is enough slack to wind around the tuning peg.
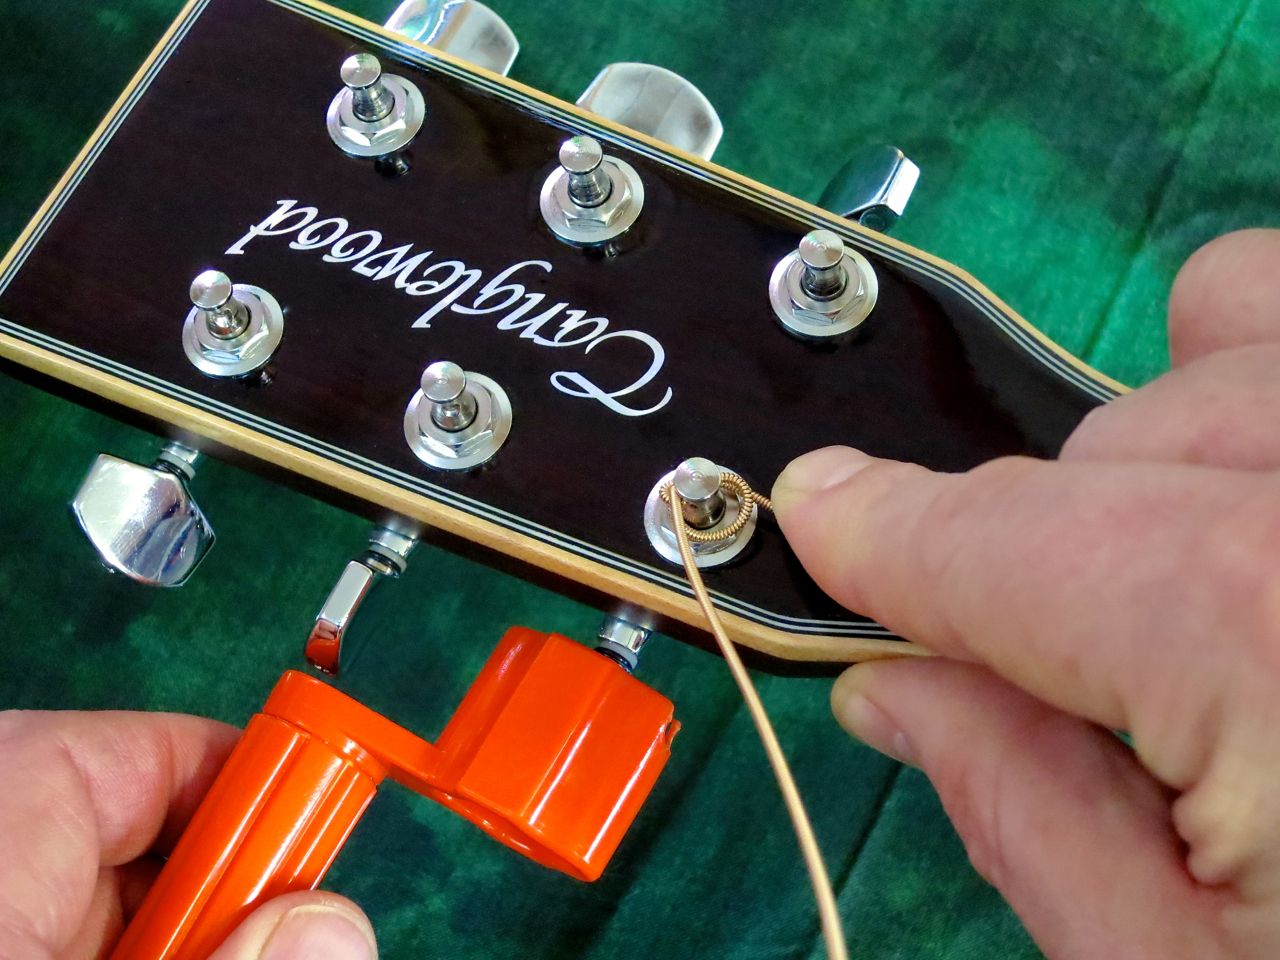
- Wrap the strings around the tuning pegs: Take the loose end of the string and wrap it around the corresponding tuning peg. Make sure to insert the end of the string through the hole in the tuning peg, securing it in place for winding.
- Begin winding the strings: Turn the tuning pegs clockwise to start winding the strings. As you wind, make sure the strings are properly seated in the nut slots and bridge saddles to avoid any unwanted buzzing or instability in the pitch.
- Tighten the strings: Continue winding the strings until they are properly tensioned. Use a combination of your fingers and a string winder, if available, to speed up the winding process. Take care not to overtighten the strings, as it can lead to string breakage or damage to your bass.
- Ensure proper string tension: Throughout the winding process, periodically check the tension of each string using a tuner. This will ensure that all strings are properly tuned and have consistent tension across the fingerboard.
- Cut off excess string length: Once the strings are properly tensioned and tuned, use a string cutter or wire snips to cut off the excess string length near the tuning pegs. Be cautious not to cut the strings too close to the peg, leaving enough room for fine-tuning if necessary.
By following these steps, you’ll successfully install the new bass strings onto your instrument. Now, it’s time to move on to the final step: tuning the bass strings.
Step 5: Tune the bass strings
After installing the new bass strings, it’s crucial to tune them properly to achieve the best sound and playability. Follow these steps to tune your bass strings:
- Prepare your tuner: Ensure that your tuner is ready for use. If you’re using an electronic tuner, turn it on and set it to the appropriate tuning mode. If you’re using a tuner app on your smartphone, open the app and select the bass guitar tuning option.
- Start with the lowest string: Begin by focusing on the lowest-pitched string, usually the E string. Pluck the string while observing the tuner, and adjust the tuning peg as necessary to bring the string to the correct pitch. Repeat this process for each string, working your way up to the highest-pitched string.
- Use reference points: As you tune each string, you can use reference points to guide you. For example, you can tune the A string to match the fifth fret of the E string, the D string to match the fifth fret of the A string, and so on. This can help you achieve a more accurate and in-tune result.
- Fine-tune as needed: Once all the strings are roughly in tune, play some chords or scales on your bass to evaluate the sound and make any necessary fine-tuning adjustments. Continuously check the tuning using your tuner or app until each string is precisely in tune.
- Check for stability: After tuning your bass strings, play some notes and chords with varying degrees of string bending or aggressive playing. This will help you ensure that the strings are stable and maintaining their pitch. If you notice any significant tuning issues, double-check the string winding and nut condition.
Remember to tune your bass strings regularly, as they may stretch and settle into their proper pitch over time. Regular tuning and maintenance will help you maintain a consistent and enjoyable playing experience.
With your bass strings properly tuned, you’re now ready to unleash your creativity and enjoy the rich and vibrant sound of your instrument. Congratulations on successfully changing and tuning your bass strings!
Conclusion
Changing the strings on your bass guitar is a fundamental skill that every bassist should master. By following the step-by-step process outlined in this guide, you can confidently and effectively change your bass strings, improving the sound quality, playability, and longevity of your instrument.
We began by emphasizing the importance of regularly changing bass strings to maintain optimal performance and prevent potential damage. We then discussed the necessary tools you’ll need for the string-changing process, including new bass strings, string cutters, a tuner, a string winder, and a clean cloth.
We then walked you through each step: removing the old bass strings, cleaning the fingerboard, installing the new strings, and tuning them. Each step was explained in detail to ensure a smooth and successful string-changing experience.
With your new bass strings properly installed and tuned, you can now enjoy a crisp and vibrant sound that will enhance your playing experience. Remember to periodically check your strings and adjust as needed, as strings can wear down and lose their tonal quality over time.
By regularly changing your bass strings and taking care of your instrument, you’ll not only achieve better sound and playability but also extend the life of your bass. So, don’t hesitate to dive into the string-changing process and enjoy the rewards of fresh, vibrant strings.
Now, go ahead, pick up your bass, and let the rhythm flow!