Home>Production & Technology>Acoustic>How To Change Strings On An Acoustic Guitar
Acoustic
How To Change Strings On An Acoustic Guitar
Published: March 12, 2024
Learn how to change strings on your acoustic guitar with our step-by-step guide. Keep your acoustic sounding great with our easy string-changing tips.
(Many of the links in this article redirect to a specific reviewed product. Your purchase of these products through affiliate links helps to generate commission for AudioLover.com, at no extra cost. Learn more)
Table of Contents
Introduction
Changing the strings on an acoustic guitar is an essential skill for any guitarist. Whether you're a seasoned musician or just starting out, knowing how to change your guitar strings is crucial for maintaining the instrument's sound quality and playability. Over time, strings can become worn, lose their tone, or even break, necessitating a replacement. Additionally, regular string changes can prevent the buildup of dirt and grime on the fretboard, ensuring a clean and smooth playing experience.
In this comprehensive guide, we will walk through the step-by-step process of changing the strings on your acoustic guitar. From gathering the necessary tools to tuning the newly installed strings, each step is crucial in ensuring that your guitar sounds its best and plays like a dream. Whether you're preparing for a performance, recording session, or simply want to refresh your instrument, mastering the art of string changing will serve you well in your musical journey.
By the end of this guide, you will not only have a clear understanding of how to change your acoustic guitar strings but also gain valuable insights into the maintenance and care of your instrument. So, grab your guitar, roll up your sleeves, and let's dive into the world of string changing – a fundamental skill that every guitarist should master.
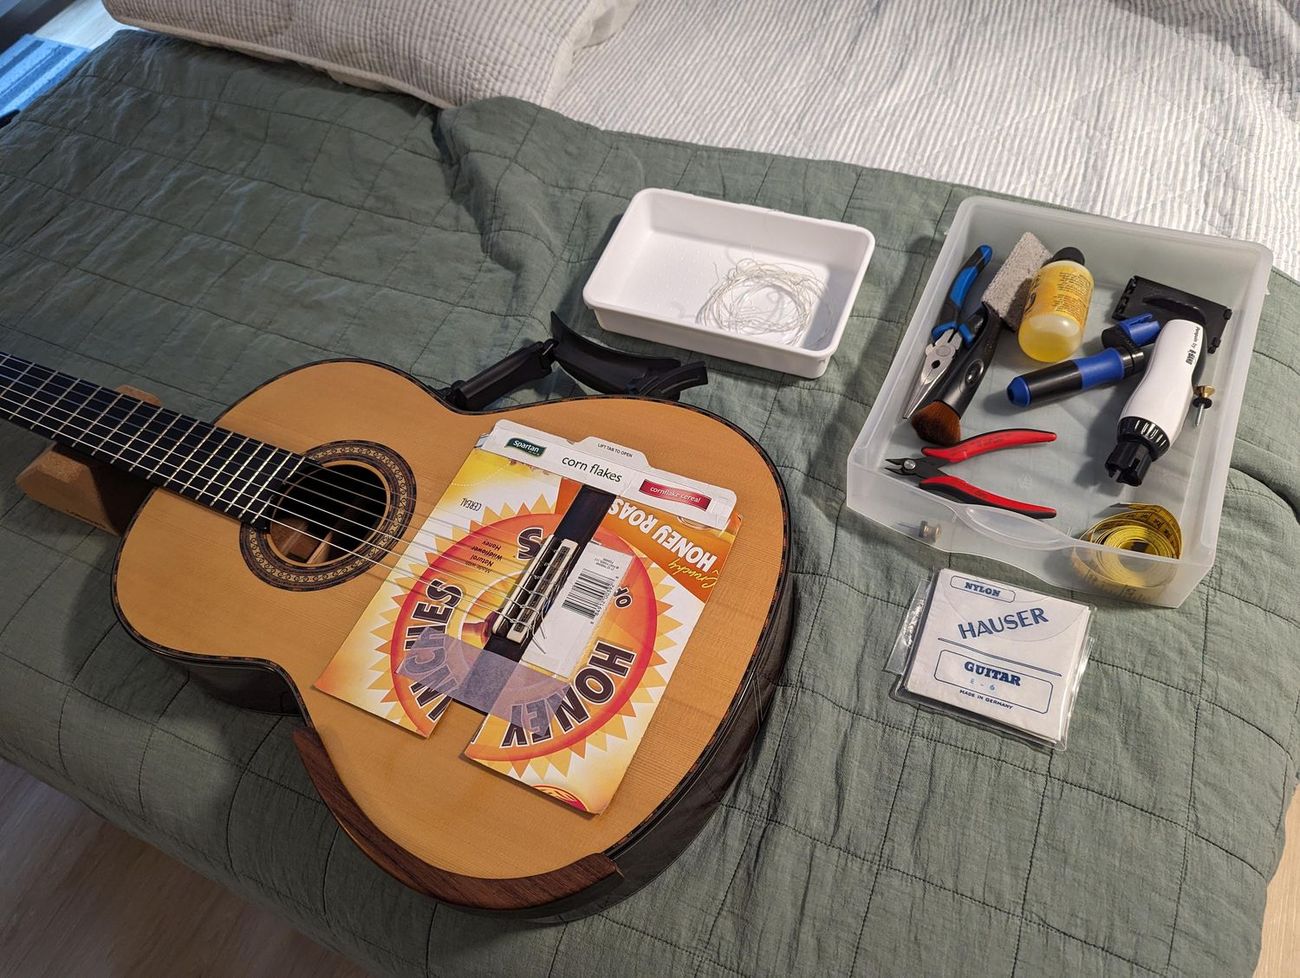
Step 1: Gather the necessary tools
Before embarking on the journey of changing the strings on your acoustic guitar, it's essential to gather the necessary tools to ensure a smooth and efficient process. Having the right tools at your disposal will not only make the task easier but also help maintain the integrity of your instrument. Here's a detailed look at the essential tools you'll need:
-
New Guitar Strings: The first and most crucial item on your list is a fresh set of guitar strings. When selecting new strings, consider factors such as gauge, material, and coating to suit your playing style and tonal preferences. Whether you prefer the bright sound of phosphor bronze or the warm tones of silk and steel, choosing the right strings is pivotal in achieving your desired sound.
-
String Winder: A string winder is a handy tool that significantly speeds up the process of removing and installing strings. It features a crank that fits over the tuning pegs, allowing for quick and effortless winding. This tool is especially useful when detensioning old strings and tightening new ones, saving you time and effort.
-
Wire Cutters: Precision wire cutters are essential for trimming the excess string length after installation. These cutters ensure a clean and neat finish, preventing any sharp edges that could cause discomfort while playing. Additionally, they come in handy for removing stubborn old strings that may have become lodged in the tuning pegs.
-
Tuner: A reliable tuner is indispensable for achieving accurate pitch and ensuring that your guitar is in tune after string installation. Whether you opt for a clip-on tuner, pedal tuner, or a smartphone app, having a tuner on hand will guarantee that your guitar sounds its best once the new strings are in place.
-
Clean Cloth: Keeping a clean cloth nearby is essential for wiping down the guitar body and fretboard. This helps remove any accumulated dust, oils, or residue, ensuring that your guitar remains in pristine condition throughout the string-changing process.
-
String Lubricant (Optional): While not essential, a string lubricant can be beneficial for reducing friction at contact points, such as the nut and bridge. This can enhance tuning stability and prolong the lifespan of your strings, especially in areas prone to binding.
By ensuring that you have these essential tools at your disposal, you'll be well-prepared to tackle the task of changing your acoustic guitar strings with confidence and ease. With the necessary tools in hand, you're ready to move on to the next step in this comprehensive guide.
Step 2: Remove the old strings
Removing the old strings from your acoustic guitar is a crucial step in the string-changing process. Over time, strings can accumulate dirt, lose their tone, or even break, necessitating their replacement. By carefully removing the old strings, you pave the way for installing fresh, vibrant strings that will breathe new life into your instrument. Here's a detailed walkthrough of the process:
-
Loosen the Strings: Begin by using a string winder to gradually loosen the tension of each string. Turning the tuning pegs counterclockwise will slacken the strings, making them easier to remove. It's important to unwind the strings in a controlled manner to prevent them from snapping or causing damage to the guitar.
-
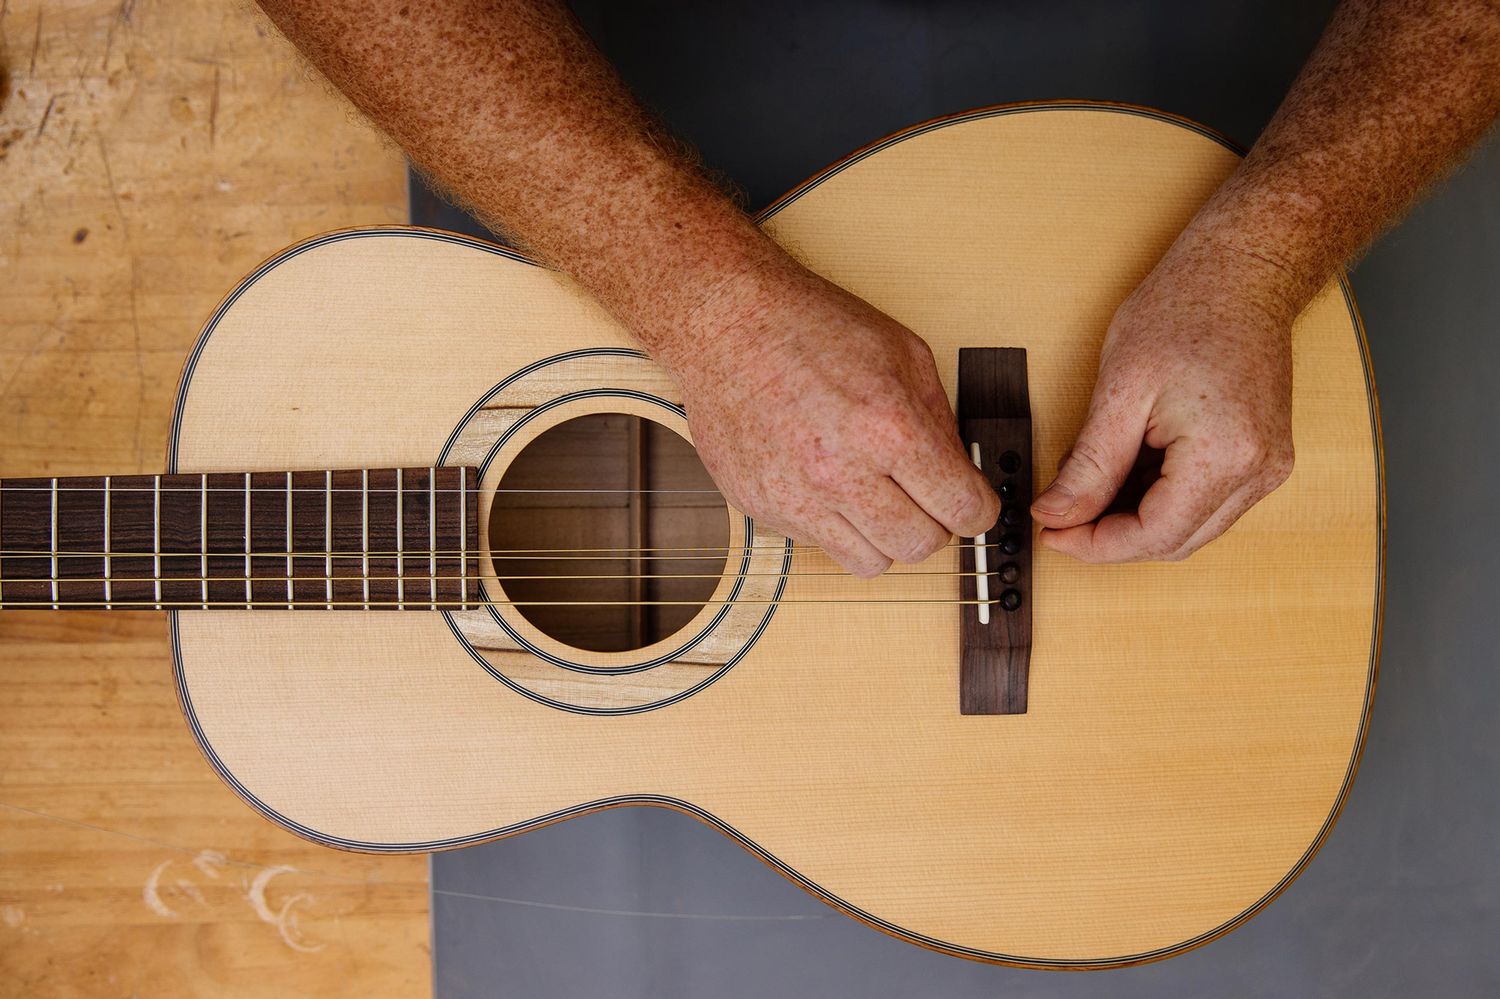
Remove the Bridge Pins: For guitars with bridge pins securing the strings, gently push the bridge pins inward while simultaneously pulling the old strings out. A bridge pin puller can be useful for this task, as it provides a firm grip and prevents damage to the bridge or the guitar's finish.
-
Unwind the Strings from the Tuning Pegs: Once the tension has been released, unwind the strings from the tuning pegs. Carefully guide the strings out of the pegs, taking care not to scratch the guitar's headstock or inadvertently damage the fretboard.
-
Discard the Old Strings: After successfully removing all the old strings, discard them responsibly. Old strings can be sharp and pose a safety hazard, so it's important to dispose of them properly to avoid any accidents.
-
Inspect the Guitar: With the old strings removed, take this opportunity to inspect the guitar's fretboard, bridge, and nut for any accumulated dirt or debris. A quick wipe with a clean cloth can help remove any residue, ensuring that your guitar is clean and ready for the installation of new strings.
By following these steps, you can safely and effectively remove the old strings from your acoustic guitar, setting the stage for the next phase of the string-changing process. With the old strings out of the way, you're now ready to move on to the subsequent steps and breathe new life into your instrument with a fresh set of strings.
Step 3: Clean the guitar
After removing the old strings from your acoustic guitar, it's essential to take the time to clean the instrument thoroughly. Cleaning the guitar not only enhances its appearance but also plays a crucial role in maintaining its playability and longevity. Here's a detailed guide on how to clean your acoustic guitar effectively:
-
Fretboard Cleaning: Start by using a clean, dry cloth to wipe down the fretboard. This helps remove any accumulated dirt, oils, or residue that may have built up over time. For stubborn grime or residue, a small amount of fretboard cleaner specifically designed for use on guitar fretboards can be applied to a cloth and gently rubbed onto the fretboard. It's important to use minimal moisture to avoid damaging the wood.
-
Body and Neck Wiping: Next, gently wipe down the guitar's body and neck with a clean cloth. This step helps remove any dust, fingerprints, or smudges that may have collected on the surface. Pay special attention to areas around the soundhole, bridge, and headstock, ensuring that no debris is left behind.
-
Polishing (Optional): If desired, you can use a guitar polish or cleaner specifically formulated for acoustic guitars to enhance the shine and luster of the instrument. Apply a small amount of polish to a soft, clean cloth and gently buff the guitar's body and neck, following the manufacturer's instructions. Be cautious not to apply polish to the fretboard or any unfinished wood surfaces.
-
Hardware Inspection: While cleaning, take the opportunity to inspect the guitar's hardware, including the tuning machines, bridge, and saddle. Ensure that no debris or buildup is affecting the functionality of these components. A quick wipe with a cloth can help maintain the hardware's condition and prevent any potential issues.
-
Hydration (Fretboard): If your guitar has a rosewood or ebony fretboard, you may consider applying a small amount of fretboard conditioner to hydrate the wood and prevent it from drying out. This step is particularly important in dry climates or if the guitar has been exposed to fluctuating humidity levels.
By taking the time to clean your acoustic guitar thoroughly, you not only maintain its aesthetic appeal but also contribute to its overall health and performance. A clean and well-maintained guitar not only looks impressive but also plays and sounds its best, ensuring that you can continue to enjoy making music with confidence and pride.
Step 4: Install the new strings
Installing new strings on your acoustic guitar is a transformative process that breathes new life into your instrument, revitalizing its tone and playability. With the old strings removed and the guitar thoroughly cleaned, the installation of fresh strings marks a pivotal moment in the maintenance and care of your beloved instrument. Here's a detailed guide on how to install the new strings with precision and finesse:
-
Selecting the Right Strings: Before diving into the installation process, ensure that you have the correct set of strings for your acoustic guitar. Consider factors such as string gauge, material, and coating to align with your playing style and tonal preferences. Whether you opt for light, medium, or heavy gauge strings, choosing the right set is crucial in achieving your desired sound and feel.
-
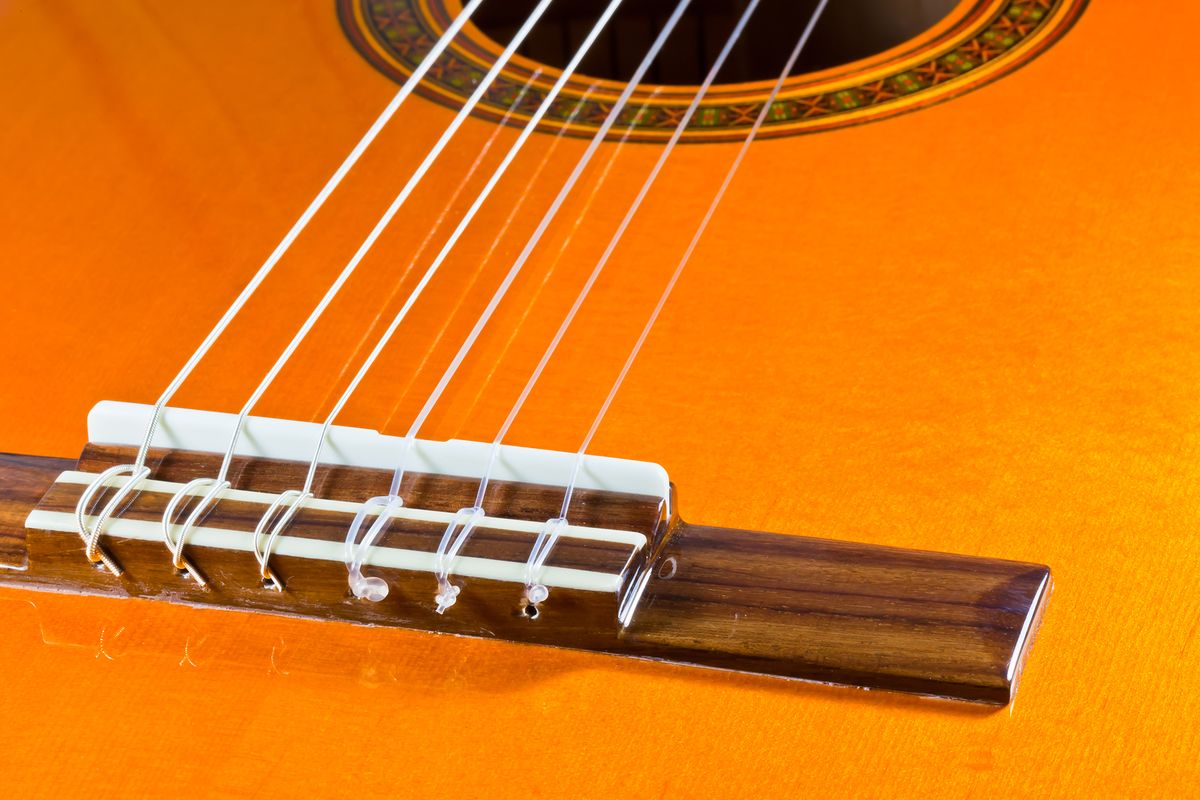
Thread the Strings Through the Bridge: Begin by threading the end of the string through the corresponding bridge hole, ensuring that the ball end is securely seated against the bridge plate. For guitars with bridge pins, gently insert the ball end of the string into the bridge pin hole and firmly press the pin into place, securing the string.
-
Wind the Strings onto the Tuning Pegs: With the opposite end of the string, guide it up to the corresponding tuning peg. Leave ample slack to allow for winding. Start winding the string onto the peg in a clockwise direction, ensuring that the coils are neat and evenly spaced. Use a string winder to expedite the winding process, making it efficient and hassle-free.
-
Tighten the Strings: As you wind the strings onto the tuning pegs, ensure that each string is tightened to the appropriate tension. This step is crucial in achieving stable tuning and optimal playability. Be mindful of maintaining consistent tension across all strings, creating a balanced and harmonious feel across the fretboard.
-
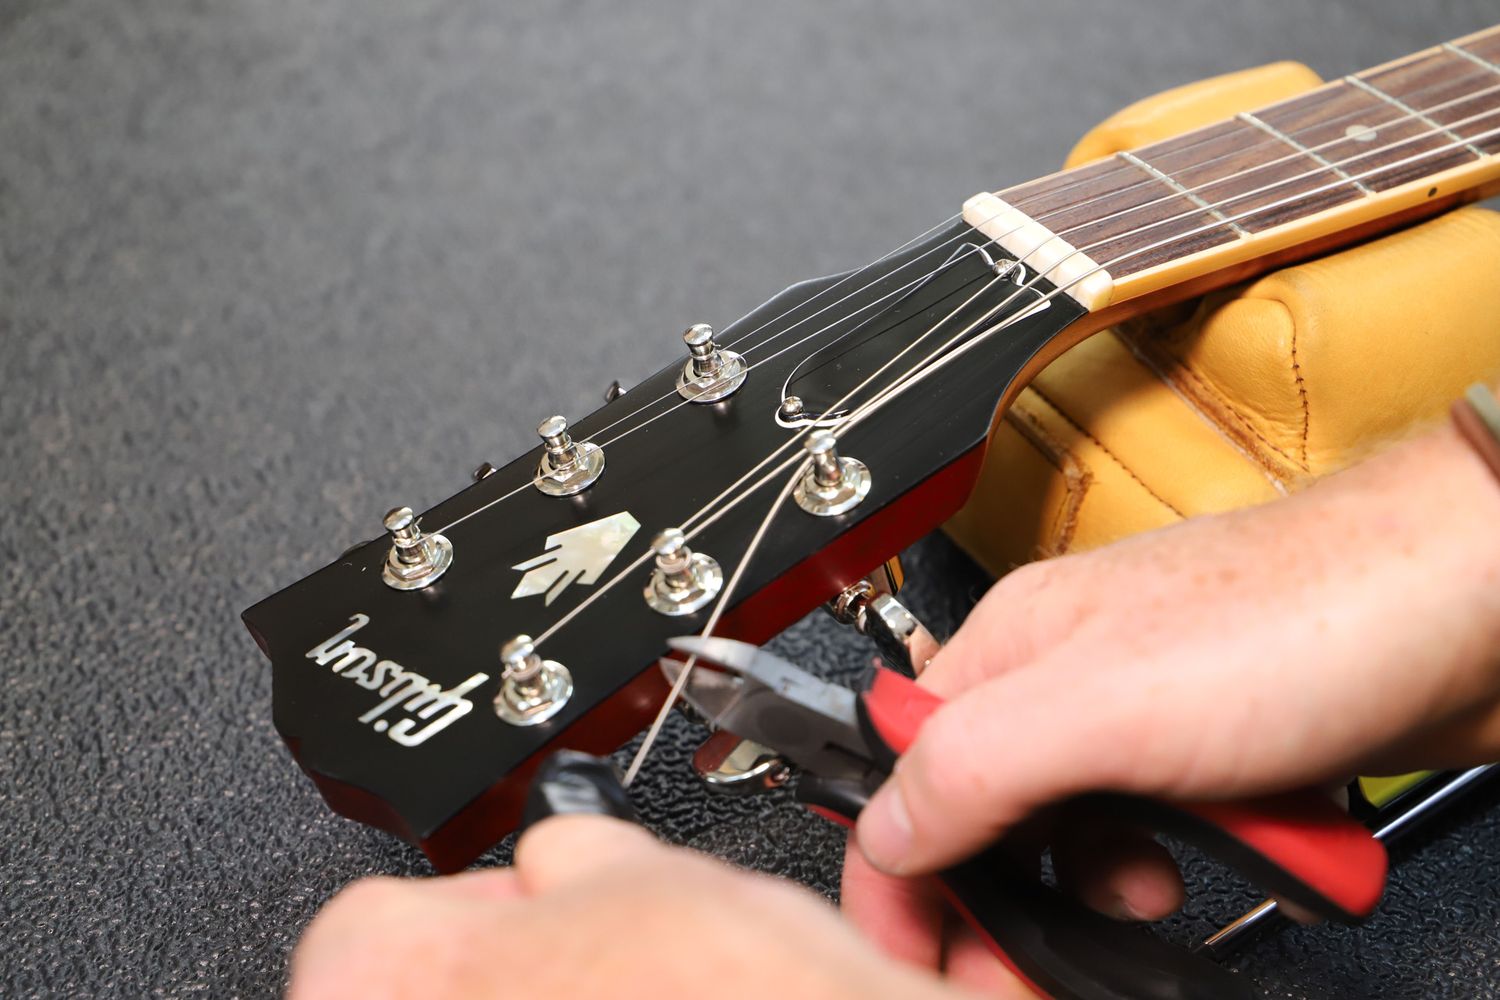
Trim Excess String Length: Once the strings are securely in place and tuned to pitch, use wire cutters to trim the excess string length. Leave a small amount of slack to prevent the strings from unraveling, and ensure that the cut ends are tucked away neatly to avoid any sharp protrusions.
-
Stretch and Tune the Strings: After installing the new strings, gently stretch each string to help settle the coils and stabilize the tuning. Gradually bring the strings up to pitch, using a tuner to ensure accurate tuning. Repeat the stretching and tuning process as needed until the strings hold their pitch reliably.
By meticulously following these steps, you can successfully install new strings on your acoustic guitar, ushering in a renewed sonic experience and a rejuvenated playing feel. With the new strings in place, your guitar is poised to deliver exceptional tone and responsiveness, inspiring you to explore new musical horizons with confidence and enthusiasm.
Step 5: Tune the guitar
Tuning your acoustic guitar is the final and crucial step in the string-changing process. Achieving accurate pitch and ensuring that each string is in tune is essential for producing harmonious chords and melodies. Whether you're a seasoned guitarist or a beginner, mastering the art of tuning by ear or using a digital tuner is fundamental to unlocking the full potential of your instrument.
Here's a detailed guide on how to tune your acoustic guitar effectively:
-
Using a Digital Tuner: If you're using a digital tuner, start by turning it on and selecting the standard tuning for a six-string guitar (EADGBE). Clip the tuner onto the headstock of your guitar, ensuring that it has a clear view of the strings. Pluck each string individually and observe the tuner's display. Adjust the tuning pegs for each string until the tuner indicates that the pitch is in tune. Repeat this process for all six strings, ensuring that each one is accurately tuned.
-
Tuning by Ear: Tuning by ear is a valuable skill that every guitarist should develop. Start by referencing a reliable tuning source, such as a piano, pitch pipe, or another tuned instrument. Begin with the low E string and compare its pitch to the reference note. Adjust the tuning peg until the string matches the desired pitch. Proceed to tune the remaining strings, using the previously tuned strings as a reference for the subsequent ones.
-
Checking Intonation: Once the strings are tuned to pitch, it's essential to check the guitar's intonation. Play a harmonic at the 12th fret of each string and compare it to the fretted note at the same position. If there is a discrepancy in pitch, adjustments to the saddle position may be necessary to ensure accurate intonation across the fretboard.
-
Fine-Tuning: After the initial tuning, play a few chords and individual notes to assess the overall tuning stability. Make any necessary minor adjustments to ensure that the guitar maintains its pitch across different fret positions and playing techniques. This step is crucial for achieving consistent and reliable tuning during practice sessions and performances.
By meticulously tuning your acoustic guitar, you ensure that it delivers the rich, resonant tones and harmonious chords that define its sonic character. Whether you opt for a digital tuner or prefer to tune by ear, the process of achieving accurate pitch is a rewarding endeavor that enhances your musical experience and sets the stage for countless hours of joyful playing.
With the guitar now tuned to perfection, you're ready to embark on a musical journey filled with creativity, expression, and the sheer joy of playing your newly refreshed acoustic instrument.
Conclusion
In conclusion, the process of changing the strings on an acoustic guitar is not only a maintenance task but a transformative ritual that breathes new life into the instrument. From the initial gathering of tools to the final tuning, each step plays a crucial role in ensuring that your guitar sounds its best and plays with optimal responsiveness. By following this comprehensive guide, you've not only gained valuable insights into the string-changing process but also deepened your connection with your beloved instrument.
As you embark on your musical journey with freshly installed strings, take a moment to appreciate the care and attention you've devoted to your acoustic guitar. The act of changing strings is a tangible expression of your commitment to maintaining the instrument's health and vitality, ensuring that it continues to inspire and accompany you on countless musical adventures.
Furthermore, the string-changing process offers an opportunity for introspection and connection with your instrument. As you clean the guitar and install new strings, you forge a deeper bond with the instrument, gaining a greater understanding of its intricacies and nuances. This hands-on approach to maintenance fosters a sense of ownership and pride, reinforcing the unique relationship between musician and instrument.
Moreover, the act of tuning the guitar marks the culmination of the string-changing journey, where the harmonious convergence of pitches signifies the beginning of a new chapter in your musical exploration. Whether you choose to tune by ear or with the aid of a digital tuner, the process of achieving accurate pitch is a testament to your dedication to producing captivating melodies and resonant chords.
As you strum the first chords on your newly reinvigorated acoustic guitar, revel in the vibrant tones and responsive feel that the fresh strings impart. The renewed sonic experience serves as a reminder of the enduring potential of your instrument and the boundless creativity it inspires.
In essence, the string-changing process transcends mere maintenance, evolving into a ritual of renewal and reconnection with your acoustic guitar. With each string change, you reaffirm your commitment to nurturing the instrument's vitality and ensuring that it remains a steadfast companion in your musical endeavors. So, as you embark on your next practice session or performance, let the rejuvenated sound of your acoustic guitar be a testament to the care and dedication you've invested in your musical craft.