Home>Production & Technology>Audiophile>How To Make Your Own Audiophile Ac Power Cord

Audiophile
How To Make Your Own Audiophile Ac Power Cord
Published: December 17, 2023
Learn how to make your own high-quality audiophile AC power cord for improved audio performance. Enhance your listening experience with this step-by-step guide.
(Many of the links in this article redirect to a specific reviewed product. Your purchase of these products through affiliate links helps to generate commission for AudioLover.com, at no extra cost. Learn more)
Table of Contents
- Introduction
- Understanding Audiophile Ac Power Cords
- Why Make Your Own Audiophile Ac Power Cord?
- Materials and Tools Needed
- Step 1: Choosing the Right Cable
- Step 2: Selecting the Connectors
- Step 3: Preparing the Cable
- Step 4: Terminating the Connectors
- Step 5: Testing and Finalizing the Power Cord
- Conclusion
Introduction
Welcome to the world of audiophile ac power cords, where the quest for perfect sound quality knows no bounds. Audiophiles are enthusiasts who seek the highest level of audio fidelity, and they believe that every component in the audio chain can have a significant impact on the overall sound quality, including the power cord. While it may seem like a simple and insignificant part of the setup, the power cord plays a crucial role in delivering clean and consistent power to your audio equipment.
In the audiophile community, there is a longstanding debate about the effectiveness and benefits of aftermarket power cords. Some argue that the difference they make is minimal, while others swear by their ability to enhance sonic performance and improve overall clarity, dynamics, and detail retrieval. Regardless of which side of the debate you fall on, there is no denying the importance of a well-designed power cord in ensuring optimal audio performance.
While there are various high-end power cords available on the market, many audiophiles prefer to take matters into their own hands and craft their own DIY audiophile power cords. This allows them to have complete control over the materials used, the design, and the overall performance. Making your own power cord is not only a rewarding DIY project but also a cost-effective alternative to purchasing expensive aftermarket options.
In this article, we will guide you through the process of creating your very own audiophile ac power cord. We will discuss the various factors to consider when choosing the right cable and connectors, provide a step-by-step guide on how to assemble the cord, and offer tips for testing and finalizing the power cord. Whether you are a seasoned audiophile looking to elevate your audio setup or a curious DIY enthusiast, this article will help you embark on your journey to creating a custom power cord that meets your specific audio needs.
Understanding Audiophile Ac Power Cords
Before we dive into the process of making your own audiophile ac power cord, it’s important to understand why these cords are so highly regarded in the audiophile community. The main purpose of an audiophile power cord is to deliver clean and consistent power to your audio equipment, minimizing any interference or noise that can degrade the audio quality.
When it comes to power cords, audiophiles believe that not all cables are created equal. They argue that the quality of the materials used, the construction, and the design of the power cord can have a noticeable impact on the overall sound reproduction. Audiophile power cords are designed to minimize electrical resistance and enhance power transfer, resulting in improved dynamics, clarity, and detail retrieval.
One of the key features of an audiophile power cord is its shielding. Shielding helps to protect the power cord from electromagnetic interference (EMI) and radio frequency interference (RFI) that can be introduced into the power lines. By minimizing the impact of these external disturbances, the power cord can deliver a cleaner and more stable power supply to your audio equipment.
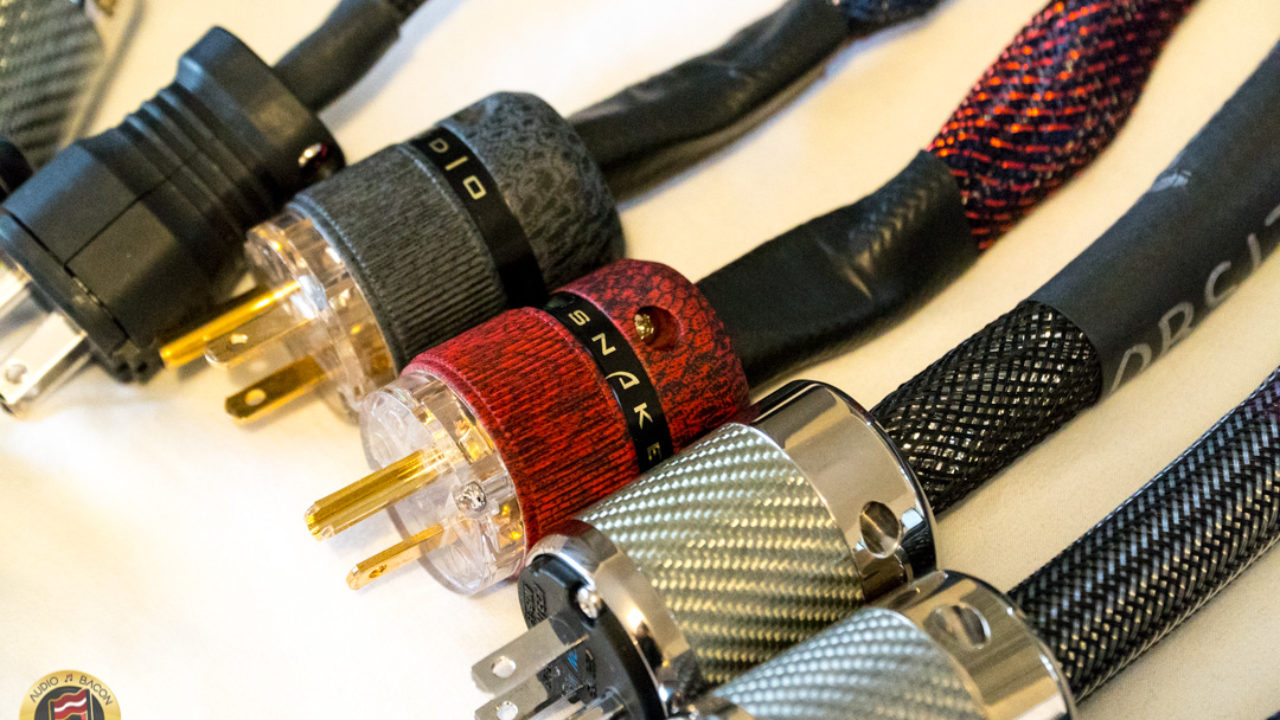
Another factor that sets audiophile power cords apart is the choice of connectors. Higher-end power cords often feature high-quality connectors that ensure a secure and reliable connection between the cord and the audio equipment. These connectors are designed to have low electrical resistance and excellent conductivity, further contributing to the overall performance of the power cord.
While some skeptics argue that the impact of a power cord on sound quality is negligible, many audiophiles swear by the sonic improvements they have experienced. They claim that an audiophile power cord can result in a more focused soundstage, improved instrument separation, and a smoother, more natural presentation of the music. However, it’s important to note that the perceived benefits of an audiophile power cord can vary depending on the specific audio system and personal preferences.
Understanding the basic principles behind audiophile power cords will provide you with a solid foundation as you embark on the journey of making your own cord. With this knowledge in mind, you can confidently choose the right materials and connectors to create a power cord that meets your audio needs and preferences.
Why Make Your Own Audiophile Ac Power Cord?
With the plethora of aftermarket power cords available on the market, you might be wondering why you should go through the trouble of making your own audiophile ac power cord. There are several compelling reasons why crafting your own power cord can be a worthwhile endeavor:
- Cost Savings: Purchasing high-end audiophile power cords can be quite expensive. By making your own, you have the opportunity to save a significant amount of money. The cost of individual components such as the cable and connectors is often much lower than a pre-made power cord.
- Customization: Making your own power cord allows you to have complete control over the design and materials used. You can tailor the cable length, choose specific connectors that suit your audio equipment, and select the types of wire and shielding that you prefer. This level of customization ensures that the power cord perfectly matches your unique audio system and personal preferences.
- Educational Experience: Crafting your own power cord is not only a practical project but also a great opportunity to learn more about the intricacies of audio systems and electrical connections. You can gain valuable knowledge about cable construction, grounding techniques, and the effect that different materials have on signal transmission.
- Quality Control: When you make your own power cord, you have full control over the quality and integrity of the components used. You can select high-quality cables and connectors that ensure optimal performance and durability. This level of quality control might be lacking in some mass-produced power cords.
- Satisfaction and Pride: There’s something incredibly satisfying about creating something with your own hands. Building your own power cord allows you to take pride in your craftsmanship and the end result. It’s a tangible expression of your passion for audio and DIY projects.
While making your own audiophile ac power cord requires some time, effort, and research, the benefits far outweigh the challenges. It allows you to save money, customize your setup, gain knowledge, ensure quality, and experience a sense of pride. So, if you’re ready to embark on a rewarding journey and take your audio system to the next level, creating your own power cord is definitely worth considering.
Materials and Tools Needed
Before you can start making your own audiophile ac power cord, you’ll need to gather the necessary materials and tools. Here’s a list of what you’ll need:
Materials:
- Audiophile-grade power cable – Choose a cable that meets your specific requirements in terms of conductor material, gauge, insulation, and shielding. Popular options include OFC (Oxygen-Free Copper) and silver-plated copper cables.
- Connectors – Select high-quality connectors that are compatible with your audio equipment. Common options include IEC connectors (for the equipment end) and plug connectors (for the wall outlet end).
- Heat shrink tubing – This tubing is used for insulating and protecting the cable connections.
- Electrical tape – Use electrical tape to secure the heat shrink tubing and provide additional protection.
- Wire stripper – A wire stripper is necessary for removing the insulation from the cable and preparing it for termination.
- Soldering iron and solder – If you plan to solder the cable connections, you’ll need a soldering iron and high-quality solder.
Tools:
- Wire cutters – Use wire cutters to trim the power cable to the desired length.
- Needle-nose pliers – These pliers are handy for gripping and bending the cable and connectors.
- Crimping tool – If you’re using crimp-style connectors, a crimping tool is essential for securely attaching the connectors to the cable.
- Heat gun – A heat gun is used to shrink the heat shrink tubing and provide a snug and protective cover over the cable connections.
- Multimeter – A multimeter is helpful for testing the continuity and polarity of the cable connections.
- Electrical tape – Use electrical tape to secure the heat shrink tubing and provide additional protection.
These are the basic materials and tools you’ll need to make your own audiophile ac power cord. Depending on your specific setup and preferences, you may require additional accessories such as cable sleeves, grounding wires, or cable management solutions. It’s important to ensure that all materials and tools are of high quality to achieve optimal performance and reliability in your power cord.
Step 1: Choosing the Right Cable
The first step in making your own audiophile ac power cord is selecting the right cable. The cable you choose will determine the signal transmission quality and overall performance of your power cord. Here are some factors to consider when choosing the cable:
- Conductor Material: The conductor material plays a crucial role in determining the conductivity and resistance of the cable. Copper is a common choice for power cables due to its excellent conductivity, but there are different grades of copper available. Oxygen-free copper (OFC) is highly regarded for its purity and conductivity. Some audiophiles also prefer silver-plated copper for its enhanced conductivity and detailed sound reproduction.
- Gauge: The gauge of the cable refers to its thickness. Thicker gauge cables have lower resistance and can deliver more power to your audio equipment. However, the gauge you choose should be suitable for the power requirements of your specific equipment. Generally, a thicker gauge between 12 and 16 AWG (American Wire Gauge) is recommended for audiophile power cords.
- Insulation: The insulation material of the cable should provide adequate protection against electrical interference and ensure safe operation. Look for insulation materials such as PVC (Polyvinyl Chloride), Teflon, or PE (Polyethylene) that offer good dielectric properties and durability.
- Shielding: Shielding helps protect the cable from electromagnetic interference (EMI) and radio frequency interference (RFI) that can degrade the audio signal. Foil shielding and braided shielding are commonly used in audiophile power cords. Foil shielding provides good protection against EMI and RFI, while braided shielding offers better overall coverage and durability.
- Length: Consider the length of the cable based on your audio system setup. It’s generally recommended to keep the length as short as possible to minimize signal loss and interference. However, ensure that the cable is long enough to reach the power outlet without causing strain.
When choosing a cable, take into account your specific audio setup, equipment power requirements, and personal preferences. Different combinations of conductor materials, gauges, insulation, and shielding can result in varying sonic characteristics. It’s a good idea to do some research, read reviews, and even consult with fellow audiophiles to gather insights and make an informed decision.
Once you have selected the cable that meets your requirements, you’re ready to move on to the next step – selecting the connectors for your audiophile ac power cord.
Step 2: Selecting the Connectors
After choosing the right cable for your audiophile ac power cord, the next step is to select the connectors that will ensure a secure and reliable connection between the cable and your audio equipment. The connectors play a crucial role in maintaining the integrity of the power transfer and minimizing any signal loss or interference. Here are some factors to consider when selecting the connectors:
- Compatibility: Ensure that the connectors you choose are compatible with your audio equipment. Check the specifications of your equipment to determine the type of connectors required. The most common connectors used in audiophile power cords are IEC connectors (for the equipment end) and plug connectors (for the wall outlet end).
- Construction and Material: Look for connectors that are well-constructed and made from high-quality materials. Connectors with gold or rhodium plating are often preferred for their superior conductivity and resistance to corrosion.
- Electrical Resistance: The connectors should have low electrical resistance to ensure efficient power transfer. High-quality connectors are designed to minimize resistance and provide a solid connection between the cable and your audio equipment.
- Tightness and Grip: Choose connectors that have a firm grip on the cable, ensuring a tight and secure connection. Connectors with good strain relief features will help prevent accidental disconnections and cable damage.
- Build Quality: It’s important to select connectors that have excellent build quality and durability. The connectors should be able to withstand regular use and provide reliable performance over time.
Depending on your budget and preferences, you can opt for high-end connectors from reputable brands that specialize in audio connectors. Research and read reviews to gather insights into the performance and reliability of different connectors.
It’s worth mentioning that some connectors require soldering to attach the cable, while others use crimp-style connections. Consider your own level of comfort and expertise with soldering when choosing the type of connectors. If you’re not confident in your soldering skills, crimp-style connectors may be a more suitable option.
Once you have selected the connectors, it’s time to move on to the next step – preparing the cable for termination.
Step 3: Preparing the Cable
Now that you have chosen the right cable and connectors for your audiophile ac power cord, it’s time to prepare the cable for termination. Proper preparation ensures a clean and secure connection, allowing for efficient power transfer and optimal audio performance. Here’s how to prepare the cable:
- Measure and Cut: Measure and cut the cable to the desired length, keeping in mind any space restrictions or positioning requirements of your audio equipment. Use a pair of wire cutters to make a clean and straight cut.
- Strip the Insulation: Use a wire stripper to remove the insulation from both ends of the cable. Be careful not to damage the conductors while stripping the insulation. Strip off enough insulation to expose the necessary length of the conductors for proper termination.
- Separate and Identify the Conductors: Once the insulation is removed, you’ll be able to see the individual conductors inside the cable. Separate and identify each conductor according to the color-coding or marking on the cable. It’s important to keep track of the polarity and ensure consistency between both ends of the cable.
- Prepare the Shielding: If your cable has shielding, you may need to prepare it for termination. This typically involves folding back the shielding and securing it with electrical tape along the length of the cable to prevent it from interfering with the connectors.
- Check for Stray Wires and Strands: Inspect the stripped ends of the conductors and the shielding (if applicable) for any stray wires or strands. Trim any excess or loose wires to ensure a neat and clean termination.
Properly preparing the cable ensures that you have a clean and well-organized set of conductors ready for termination. Take your time during this step to ensure accuracy and precision, as it will greatly impact the overall performance and reliability of your audiophile power cord.
Once the cable is prepared, you’re ready to move on to the next step – terminating the connectors on the cable.
Step 4: Terminating the Connectors
After preparing the cable, the next step in making your audiophile ac power cord is terminating the connectors. This involves attaching the connectors to the stripped ends of the cable conductors to create a secure and reliable connection. Here are the general steps to terminate the connectors:
- Soldering Method:
- Preheat the soldering iron and prepare a small amount of solder.
- Insert the stripped end of each conductor into the appropriate terminal of the connector.
- Apply heat to the terminal and conductor junction using the soldering iron.
- Once the junction is sufficiently heated, apply a small amount of solder to form a solid and secure bond.
- Repeat these steps for each conductor and connector terminal.
- Allow the soldered connections to cool and harden before moving on to the next step.
- Crimping Method:
- Slide the appropriate crimp-style connector onto the stripped end of each conductor.
- Position the crimp-style connector in the crimping tool according to the manufacturer’s instructions.
- Squeeze the crimping tool firmly to compress the connector around the conductor, creating a secure connection.
- Repeat these steps for each conductor and connector.
It’s important to follow the specific instructions provided by the connector manufacturer when terminating the connectors. This ensures proper alignment, secure connections, and optimal performance.
During the termination process, it’s also essential to maintain the correct polarity of the connectors. Check the marking on the connectors or refer to the documentation to ensure consistent polarity between the equipment end and the wall outlet end of the power cord.
Once all the connectors are properly terminated, it’s time to move on to the final step – testing and finalizing the power cord.
Step 5: Testing and Finalizing the Power Cord
After terminating the connectors on your audiophile ac power cord, the final step is to test and finalize the cord. This step ensures that the power cord is functioning correctly and ready for use. Follow these steps to complete the process:
- Visually Inspect the Connections: Examine each connector and the cable for any signs of loose connections, exposed wires, or other irregularities. Ensure that the heat shrink tubing is securely in place and covers the connections.
- Test for Continuity and Polarity: Use a multimeter to test the continuity and polarity of the power cord. Connect the multimeter probes to the corresponding terminals of the connectors, making sure to test both ends of the cord. The multimeter should show continuity, indicating that the power is flowing through the cord properly. Also, check that the polarity matches the markings on the connectors and is consistent throughout the cord.
- Perform a Functionality Test: Plug in the power cord to a suitable outlet and connect the equipment end to your audio system. Ensure that all connections are secure. Power on your audio equipment and verify that it is receiving power without any issues. Listen for any anomalies or disruptions in the audio signal.
- Make Adjustments if Needed: If you encounter any issues or notice any problems during the functionality test, troubleshoot the power cord connections. Check for loose connections, poor grounding, or any other potential causes. Make any necessary adjustments or repairs to ensure proper functionality.
- Finalize the Power Cord: Once you are satisfied with the performance and functionality of the power cord, finalize it by securing any loose or exposed wiring with electrical tape or additional heat shrink tubing. Ensure that the cable is properly organized and free from any strain or kinks. Label the cord if desired for easy identification.
By following these testing and finalization steps, you can ensure that your audiophile ac power cord is correctly assembled and ready to deliver clean and reliable power to your audio equipment.
Congratulations! You have successfully made your own audiophile ac power cord. Enjoy the enhanced audio performance and satisfaction that comes from using a power cord tailored to your specific needs and preferences.
Note: It is important to exercise caution and follow safety procedures when working with electricity. If you are not experienced or comfortable with electrical work, it is advisable to seek assistance from a professional.
Conclusion
Crafting your own audiophile ac power cord is a rewarding and fulfilling endeavor that allows you to have complete control over your audio setup. By carefully selecting the right cable and connectors, preparing and terminating them meticulously, and testing and finalizing the power cord, you can create a custom-made solution that meets your specific audio needs and preferences.
While there may be varying opinions on the impact of audiophile power cords on sound quality, many enthusiasts attest to the improvements they have experienced. Whether it’s a more focused soundstage, improved instrument separation, or overall clarity and detail, a thoughtfully constructed power cord can make a noticeable difference in your audio system.
Making your own power cord also offers cost savings, customization options, educational experiences, and the satisfaction of creating something with your own hands. It allows you to tailor the power cord to your unique audio setup and preferences while maintaining control over the quality of the components used.
However, it’s important to exercise caution and ensure safety when working with electricity. If you are not experienced or comfortable with electrical work, consider seeking assistance from a professional.
In conclusion, creating your own audiophile ac power cord is a journey that combines technical knowledge, craftsmanship, and a passion for audio. It empowers you to elevate your audio system and immerse yourself in the world of high-fidelity sound. So, grab your tools, unleash your creativity, and embark on the adventure of building a power cord that takes your audio experience to the next level.


