Home>Devices & Equipment>Music Box>How To Make Your Own Music Box

Music Box
How To Make Your Own Music Box
Published: January 11, 2024
Learn how to create your very own music box with our step-by-step guide. Discover the joy of crafting a unique music box that plays your favorite tunes.
(Many of the links in this article redirect to a specific reviewed product. Your purchase of these products through affiliate links helps to generate commission for AudioLover.com, at no extra cost. Learn more)
Table of Contents
Introduction
Welcome to the fascinating world of music boxes! These charming and enchanting devices have been captivating people for centuries with their delightful melodies and intricate designs. Whether you have a passion for music or simply appreciate the beauty of these ornamental pieces, learning how to make your own music box can be a rewarding and fulfilling experience.
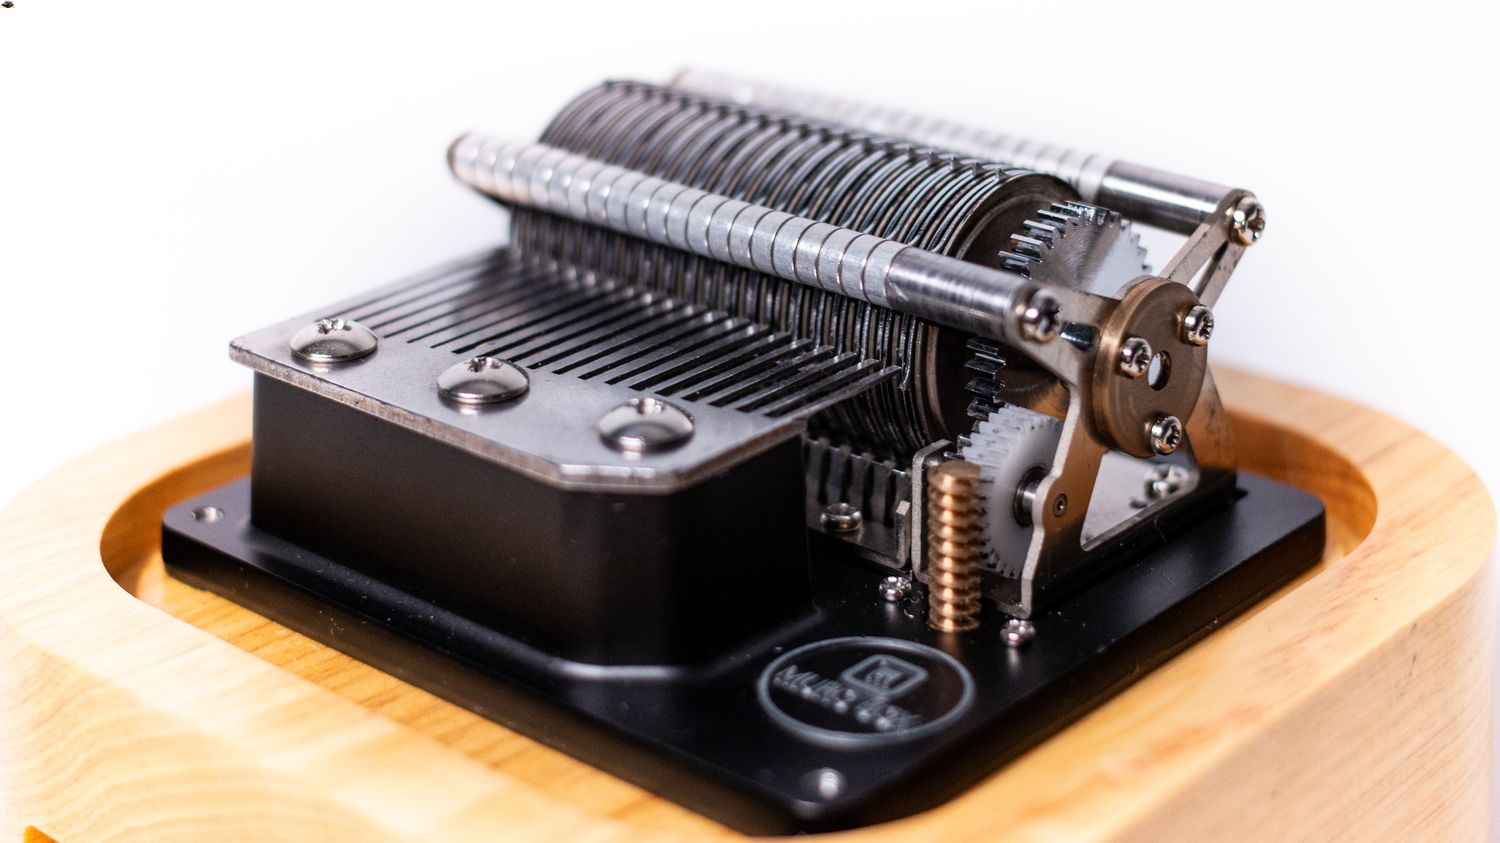
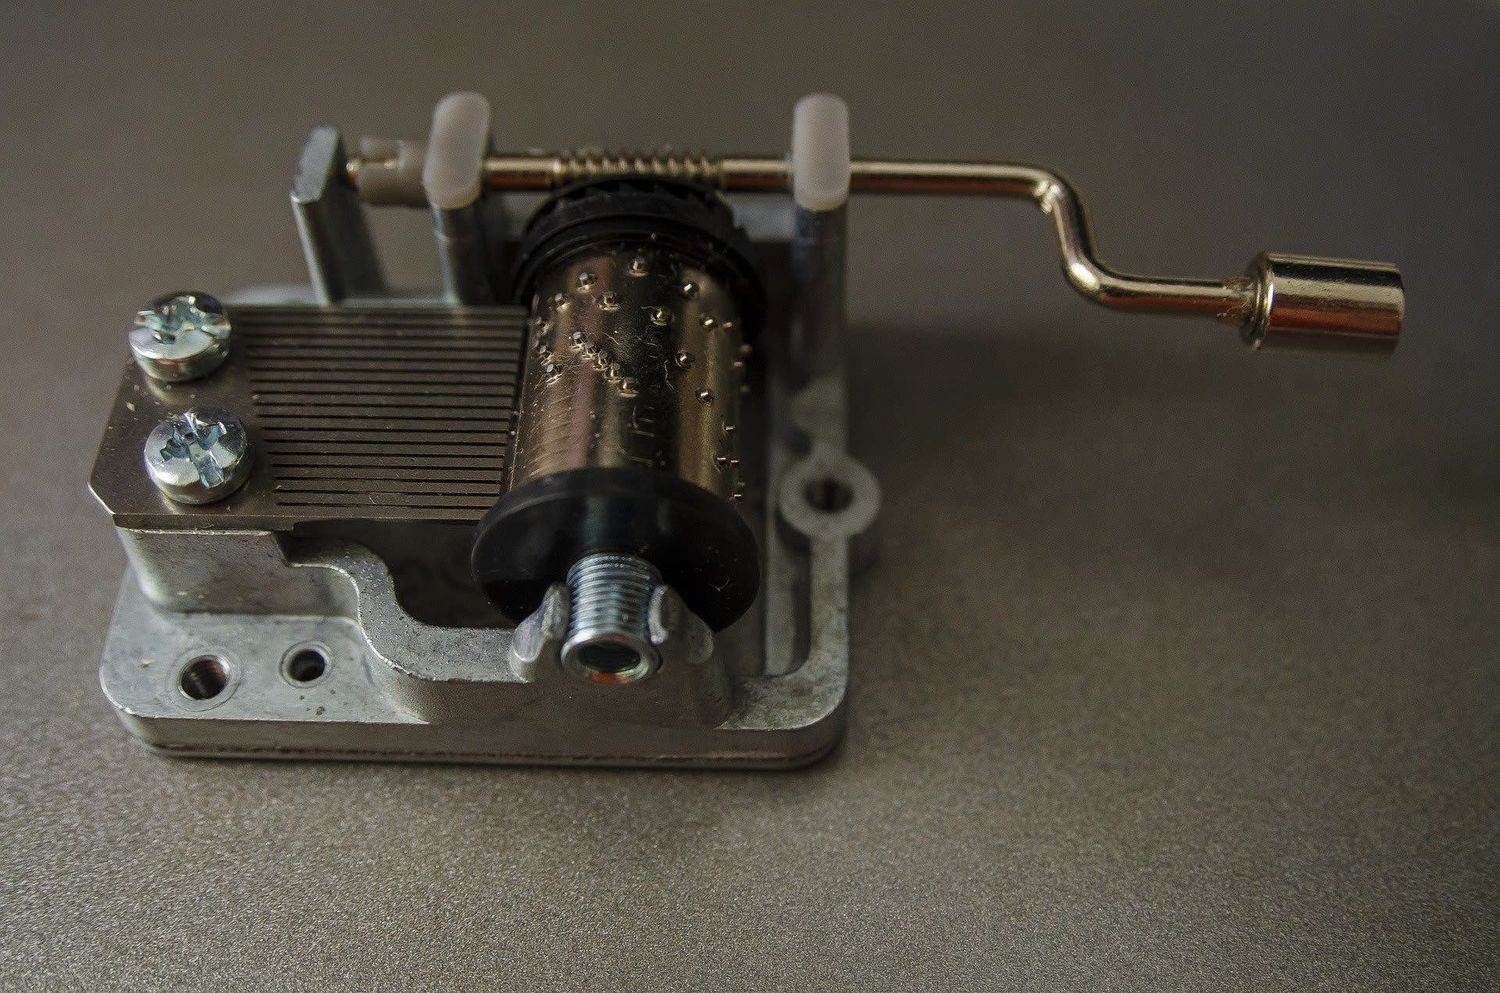
A music box is essentially a mechanical instrument that produces music when a series of metal pins on a revolving cylinder or disc pluck the tuned teeth of a metal comb. Traditionally, these boxes were made from wood or metal and adorned with intricate carvings or inlays. Today, however, you can unleash your creativity and personalize your music box to suit your own style and preferences.
In this comprehensive guide, we will take you through step-by-step instructions on how to make your own music box. From gathering the materials to designing and constructing the music box body, attaching the musical mechanism, decorating it, and finally testing and fine-tuning – we will cover it all.
Whether you are a seasoned craftsman or just starting with DIY projects, this guide is designed to be accessible and suitable for all skill levels. So, roll up your sleeves, let your imagination run wild, and get ready to embark on a musical journey as we dive into the intricacies of creating your very own music box.
Step 1: Gathering the Materials
Before you begin constructing your music box, it’s essential to gather all the necessary materials. Having everything in place will ensure a smooth and uninterrupted creative process. Here’s a list of the key items you’ll need:
- Wood or Metal: Choose a suitable material for your music box body. You can opt for lightweight plywood or solid hardwood for a traditional feel, or experiment with metal for a modern and sleek look.
- Musical Mechanism: The heart of your music box is the musical mechanism. You can easily find these online or at craft stores. Choose one that fits the size and style of your box.
- Cylinder or Disc: Depending on your musical mechanism, you’ll need a cylinder or disc with pre-drilled holes where the metal pins will be placed to create the melody.
- Metal Comb: This is the component that produces the sound. The teeth of the comb are plucked by the metal pins on the cylinder or disc.
- Decorative Materials: Decide how you want to decorate your music box. This can include paint, varnish, stain, wood veneer, or any other materials that help bring your vision to life.
- Tools: Make sure you have the necessary tools, such as a saw, sandpaper, drill, screws, screwdriver, and measuring tape.
- Additional Materials: Depending on your design, you may need glue, nails, hinges, and other hardware to assemble the music box.
Once you have gathered all the materials, double-check your inventory to ensure you have everything you need. It’s also a good idea to have some extra supplies on hand in case of any mishaps or design changes along the way.
Gathering the materials is an exciting step as it allows you to envision the final product and start planning the design. So, take your time to select high-quality materials that align with your vision, and get ready to bring your music box to life.
Step 2: Designing the Music Box
Now that you have all the materials, it’s time to let your creativity shine by designing your music box. The design process is crucial, as it determines the overall look, feel, and functionality of your creation. Here are some steps to guide you:
- Sketch your ideas: Begin by sketching out different design concepts. Consider the shape, size, and layout of the box, as well as any additional decorative elements you want to incorporate.
- Consider the musical mechanism: Take into account the size and shape of the musical mechanism when designing your box. Ensure that it fits snugly and that there’s enough space for the cylinder or disc to rotate smoothly.
- Choose a theme: Think about the theme or style you want for your music box. It could be vintage, nature-inspired, whimsical, or any other theme that speaks to your interests.
- Plan the compartments: If you want to add compartments or compartments with lids to your music box, consider their placement and size. These compartments can be used to store small trinkets or jewelry.
- Consider the finish: Decide how you want to finish your music box. This could include painting, staining, varnishing, or leaving it in its natural state.
- Think about the exterior: Consider adding decorative elements such as carvings, inlays, or painted designs to the exterior of the music box to enhance its visual appeal.
Designing your music box is a chance to let your imagination take flight. Don’t be afraid to experiment with different ideas and explore various possibilities. Sketch multiple designs and refine them until you find the one that resonates with you the most.
Remember, the design phase is where you can truly make your music box unique and personal. So, take your time, enjoy the process, and let your creativity guide you as you bring your vision to life.
Step 3: Constructing the Music Box Body
Now that you have finalized the design of your music box, it’s time to bring it to life by constructing the body. Follow these steps to construct the music box body:
- Cut the pieces: Measure and cut the wood or metal pieces according to your design. Use a saw or another appropriate cutting tool to ensure clean and precise cuts.
- Assemble the box: Begin by assembling the main body of the music box. Depending on your design, this may involve joining the pieces using glue, nails, or screws. Make sure the corners are aligned and the joints are secure.
- Create the compartments: If you have planned for compartments within the music box, cut and attach dividers or create separate sections accordingly.
- Drill holes: Drill holes in the appropriate places to accommodate the musical mechanism, as well as any additional features like compartments or decorative elements.
- Sand and finish: Smooth out any rough edges and surfaces using sandpaper. Apply the desired finish, whether it’s painting, staining, or varnishing, to protect and enhance the appearance of the music box.
- Attach the lid: If your design includes a lid, attach it securely using hinges. This will allow easy access to the musical mechanism and any compartments inside the box.
While constructing the music box body, pay attention to detail and ensure that all the components fit together seamlessly. Take the time to make any necessary adjustments before moving on to the next step.
Remember, the construction phase requires patience and precision. Take your time to ensure that the body of your music box is sturdy, well-crafted, and visually appealing.
Step 4: Attaching the Musical Mechanism
Now that the music box body is constructed, it’s time to attach the musical mechanism, the heart of your music box. Follow these steps to seamlessly integrate the mechanism into your creation:
- Measure and mark: Measure the dimensions of the musical mechanism and mark the exact location where it will be attached inside the music box.
- Create a platform: If necessary, create a platform or holder for the musical mechanism to rest on. This will ensure stability and proper alignment.
- Secure the mechanism: Use screws or other appropriate fasteners to securely attach the musical mechanism to the designated spot inside the music box.
- Align the cylinder or disc: Ensure that the pre-drilled holes on the cylinder or disc are properly aligned with the metal comb of the musical mechanism. This will allow the pins on the cylinder or disc to properly pluck the comb’s teeth and create the desired melody.
- Test the mechanism: Before proceeding further, test the musical mechanism to ensure that it produces the desired sound and functions correctly. Make any necessary adjustments to the alignment or positioning if needed.
Attaching the musical mechanism to the music box requires precision and attention to detail. Take your time to ensure that the mechanism is securely fastened and aligned properly to ensure optimal performance.
Remember, the musical mechanism is the heart and soul of your music box. Treat it with care and ensure that it is integrated seamlessly into the body of your creation.
Step 5: Decorating the Music Box
Now that the core components of the music box are in place, it’s time to let your creativity run wild and decorate your creation. Here’s how to add the finishing touches:
- Paint or stain: Apply your chosen paint or stain to the exterior and interior surfaces of the music box. Consider using multiple coats for a smooth and polished finish.
- Add decorative elements: Enhance the aesthetics of your music box with decorative elements such as carvings, inlays, or painted designs. These embellishments can truly make your music box one-of-a-kind.
- Personalize with engraving: Consider engraving your name, a special message, or a meaningful design onto the music box to add a personal touch.
- Attach hardware: If desired, add decorative hardware such as brass corners, handles, or knobs to further enhance the visual appeal of your music box.
- Apply a protective finish: To safeguard your music box and achieve a lasting shine, apply a clear varnish or lacquer as a protective topcoat.
When decorating your music box, let your imagination guide you. Consider the overall design and theme that you envisioned in the earlier steps and ensure that your decorative choices align with your vision.
Remember, the goal is to create a beautiful and unique music box that reflects your personal style and taste. Take your time during the decoration process to ensure that every detail is to your liking.
Once you have completed the decoration phase, step back and admire your handiwork. The transformation from a simple box to a personalized and aesthetically pleasing music box is truly gratifying.
Step 6: Testing and Fine-tuning
With the construction and decoration complete, it’s time to test your music box and make any necessary adjustments for optimal performance. Follow these steps to ensure that your music box plays the melodies flawlessly:
- Wind up the mechanism: If your musical mechanism requires winding, carefully wind it up to the appropriate tension following the manufacturer’s instructions.
- Activate the music: Gently turn the cylinder or disc to activate the music. Listen carefully to ensure that all the notes are played and that the melody flows smoothly.
- Adjust the pins: If there are any notes that are not being played or are producing an undesirable sound, adjust the pins on the cylinder or disc accordingly. Use a small tool to reposition or shave the pins as needed.
- Fine-tune the sound: If necessary, make minor adjustments to the metal comb by gently bending the teeth to achieve a clearer and more resonant sound.
- Check for any obstructions: Ensure that there are no obstructions or loose components inside the music box that could interfere with the mechanism or produce unwanted sounds.
- Repeat the testing: Repeat the testing process multiple times to ensure that the music plays correctly and consistently.
Testing and fine-tuning your music box may require some patience and trial and error. It’s important to have a keen ear and a delicate touch to make the necessary adjustments.
Remember, the goal is to achieve a beautiful and harmonious melody that showcases the craftsmanship of your music box. Take the necessary time to fine-tune it until you are satisfied with the results.
Congratulations! You have now completed all the steps involved in making your very own music box. Take a moment to appreciate your hard work and the unique creation that you have brought to life.
Conclusion
Congratulations on successfully creating your own music box! This journey has allowed you to tap into your creativity, hone your craftsmanship, and bring a truly unique and personalized piece of art to life.
Throughout this guide, we explored the step-by-step process of making a music box, from gathering the materials to designing, constructing, decorating, and fine-tuning. Each step presented an opportunity for you to express your individuality and showcase your skills.
By gathering the materials, designing the music box, constructing the body, attaching the musical mechanism, decorating, and testing and fine-tuning, you have experienced the joy of craftsmanship and the satisfaction of creating something truly special.
Remember, the beauty of making your own music box lies not only in the final product but also in the journey itself. Embrace the process, learn from any challenges you encountered, and celebrate your achievements along the way.
Your music box is now ready to delight and enchant with its mesmerizing melodies. Whether you choose to keep it for yourself or give it as a heartfelt gift, it will forever hold a special place in your heart and the hearts of those who come to admire it.
So go ahead, let the soothing melodies of your music box fill the air and transport you to a world of joy and nostalgia. And remember, the possibilities for future projects and creations are endless, so continue to explore, experiment, and let your imagination soar.