Home>Production & Technology>Soundproofing>How To Make Your Own Soundproofing
Soundproofing
How To Make Your Own Soundproofing
Published: January 27, 2024
Learn how to create effective soundproofing solutions for your home or office with our comprehensive guide. Improve your space's acoustics and minimize noise disturbances with our expert tips and techniques.
(Many of the links in this article redirect to a specific reviewed product. Your purchase of these products through affiliate links helps to generate commission for AudioLover.com, at no extra cost. Learn more)
Table of Contents
- Introduction
- Materials Needed
- Step 1: Assessing the Noise Sources
- Step 2: Choosing the Right Soundproofing Materials
- Step 3: Soundproofing Doors and Windows
- Step 4: Soundproofing Walls and Ceilings
- Step 5: Soundproofing Floors
- Step 6: Sealing Sound Leaks
- Step 7: Adding Acoustic Panels or Soundproof Curtains
- Step 8: Testing and Evaluating Soundproofing Effectiveness
- Conclusion
Introduction
Living in a noisy environment can be extremely frustrating, whether it’s the constant traffic sounds, loud neighbors, or the never-ending construction work. Fortunately, soundproofing is a practical solution to reduce unwanted noise and create a peaceful and quiet space. While hiring professionals may be an option, it can be expensive. But fear not! With a little knowledge and some DIY skills, you can easily create your own soundproofing setup without breaking the bank.
In this article, we will guide you through the process of creating your own soundproofing system. We will cover everything from assessing noise sources to selecting the right materials and implementing effective soundproofing techniques. So, whether you’re trying to make your home office more serene or want to create a soundproofed studio for your musical endeavors, this comprehensive guide will help you achieve your soundproofing goals.
Before we jump into the step-by-step process, it’s essential to understand that no soundproofing method can completely eliminate all noise. The goal is to reduce the amount of sound that enters or escapes the space, creating a more comfortable and quieter environment. So, let’s gather our materials and get started on your journey to a more serene and peaceful living space.
Materials Needed
Before you begin your DIY soundproofing project, it’s important to gather all the necessary materials. Here’s a list of commonly used items that you will need:
- Soundproofing Insulation: This can include materials such as mineral wool, acoustic foam, or cellulose insulation.
- Mass Loaded Vinyl (MLV): MLV is a specialized soundproofing material that adds mass and density to reduce sound transmission.
- Green Glue: This unique adhesive is used to create sound-dampening barriers when applied between layers of building materials.
- Sealant: A high-quality sealant like acoustic caulk is essential to fill gaps and cracks, preventing sound leaks.
- Acoustic Panels: These specialized panels are designed to absorb sound waves and are commonly used in recording studios or home theaters.
- Soundproof Curtains: These heavy-duty curtains are made with sound-absorbing materials and can be used to block noise from entering or leaving a room.
- Weatherstripping: Used to seal gaps around windows and doors, weatherstripping helps prevent sound leakage.
- Acoustic Sealant Tape: This tape is used to seal seams between soundproofing materials and create an airtight barrier.
- Tools: You will need tools such as a utility knife, screwdriver, measuring tape, caulking gun, and a staple gun for installation purposes.
It’s important to note that the specific materials you’ll need can vary depending on the area you’re soundproofing and the level of soundproofing you desire. Additionally, some materials may require specific installation techniques, so be sure to read and follow the manufacturer’s instructions.
Once you have gathered all the necessary materials, you’re ready to proceed to the next steps in creating your DIY soundproofing setup.
Step 1: Assessing the Noise Sources
Before you can effectively soundproof a room, it’s crucial to identify the sources of the noise. This step is essential because different noise sources require different soundproofing techniques. Here’s how you can assess the noise sources:
- Observe and Listen: Spend some time in the room and pay attention to the type and intensity of the noise. Is it coming from outside, such as traffic or construction? Is it airborne noise, like voices or music from neighboring spaces? Or is it impact noise, such as footsteps or objects being dropped?
- Identify Problem Areas: Once you identify the noise sources, pinpoint the areas where sound is entering or escaping the room. Common areas include doors, windows, walls, ceilings, and floors.
- Measure Noise Levels: Use a sound level meter to measure the intensity of the noise in decibels (dB). This will help you determine the level of soundproofing needed to achieve your desired results.
By thoroughly assessing the noise sources, you can determine the most effective soundproofing measures to implement in each specific area of the room.
For example, if the noise is mainly coming in through the windows, you may want to focus on soundproofing the windows with double glazing or soundproofing curtains. If the walls are thin and allow sound to pass through easily, you might consider adding mass loaded vinyl or acoustic panels to improve sound insulation.
Remember, the goal is to create a comprehensive soundproofing plan that targets the specific noise sources in your room. By taking the time to assess the noise sources, you’ll be able to customize your soundproofing approach and achieve optimal results.
Step 2: Choosing the Right Soundproofing Materials
Choosing the right soundproofing materials is crucial for effective noise reduction. There are various options available, each with its own properties and benefits. Here are some key considerations when selecting soundproofing materials:
- Noise Type: Consider the type of noise you’re dealing with, whether it’s airborne noise (sound waves traveling through the air) or impact noise (vibrations transmitted through surfaces). Different materials excel at reducing different types of noise, so choose accordingly.
- Noise Reduction Coefficient (NRC): The NRC rating of a material indicates its ability to absorb sound. Higher NRC values mean better sound absorption. Look for materials with high NRC ratings for optimal noise reduction.
- Sound Transmission Class (STC) Rating: The STC rating measures a material’s ability to block sound from entering or leaving a space. Higher STC ratings indicate better soundproofing performance. Consider the desired STC rating based on the level of noise reduction you need.
- Density and Mass: Soundproofing materials with higher density and mass are more effective at blocking sound. Look for materials with substantial weight to enhance their soundproofing capabilities.
- Installation Ease: Consider the ease of installation for the chosen materials. Some options may require professional installation, while others can be easily installed as a DIY project.
Commonly used soundproofing materials include acoustic foam panels, mass loaded vinyl, mineral wool insulation, and soundproof curtains. Acoustic foam panels are great for absorbing sound reflections in rooms with high reverberation, such as recording studios. Mass loaded vinyl is excellent for adding mass and reducing sound transmission through walls and floors. Mineral wool insulation provides excellent sound absorption and thermal insulation. Soundproof curtains are a convenient option for blocking noise from entering or leaving a room.
Consider a combination of these materials based on your specific needs and budget. For optimal results, you may also want to combine different materials to create a comprehensive soundproofing solution.
By choosing the right soundproofing materials, you can effectively reduce noise and create a quieter environment in your space.
Step 3: Soundproofing Doors and Windows
Doors and windows are common entry points for noise, so it’s essential to soundproof them to minimize sound transmission. Here are some effective techniques for soundproofing doors and windows:
- Weatherstripping: Install weatherstripping around the door frames and window sashes to create a tight seal. This will prevent both noise and air leaks.
- Door Sweeps: Install door sweeps at the bottom of doors to reduce the gap between the door and the floor. This helps block sound from entering or escaping through the bottom of the door.
- Window Inserts: Consider installing window inserts, which are acrylic or glass panels that fit snugly inside the existing window frame. These inserts provide an additional layer of sound insulation.
- Double Glazing: For windows, double glazing is an effective soundproofing option. This involves installing a second layer of glass with an air gap in between to block sound waves.
- Soundproof Curtains: Hang heavy-duty soundproof curtains over windows and doors to block noise from entering or leaving the room. These curtains are made with sound-absorbing materials to reduce sound transmission.
In addition to these techniques, you may also consider using soundproofing materials such as mass loaded vinyl or acoustic foam to line the doors or windows for added insulation. These materials can reduce the transmission of sound waves through the surfaces.
Remember to assess your specific noise source and choose the appropriate soundproofing technique for your doors and windows. Implementing these techniques will significantly reduce sound leakage and create a more peaceful and quiet environment inside your space.
Step 4: Soundproofing Walls and Ceilings
When it comes to soundproofing walls and ceilings, there are several effective techniques you can use to reduce noise transmission. Here are some options to consider:
- Add Mass: Increase the mass of the walls and ceilings by using dense materials such as mass loaded vinyl (MLV) or drywall with extra layers. The added mass helps to block and absorb sound waves.
- Decoupling: Create an air gap between the existing wall or ceiling and a new layer of drywall or plasterboard. This decoupling technique helps to isolate vibrations and prevents sound from traveling through the structure.
- Soundproof Insulation: Install soundproof insulation, such as mineral wool or cellulose insulation, within the wall or ceiling cavities. These materials absorb sound waves and prevent them from passing through the surface.
- Seal Cracks and Gaps: Use acoustic caulk or sealant to seal any cracks, gaps, or holes in the walls or ceilings. Even small openings can allow sound to leak through, so it’s important to ensure airtightness.
- Acoustic Panels: Install acoustic panels on the walls or ceilings to absorb sound reflections and reduce echo within the space. These panels are designed to absorb specific frequencies, improving the overall acoustics of the room.
It’s worth noting that different techniques may be suitable for different areas of your space, depending on the level of soundproofing required and the specific noise sources. For example, if you’re soundproofing a home office, you may want to focus on decoupling the walls to minimize impact noise. If you have a home theater, adding mass and installing acoustic panels can enhance sound quality and reduce reverberation.
Combining multiple soundproofing techniques can yield the best results, so feel free to mix and match according to your needs. Remember to follow proper installation guidelines and consider consulting experts if you’re unsure about any specific technique. By soundproofing your walls and ceilings, you can significantly reduce noise transmission and create a quieter and more comfortable living environment.
Step 5: Soundproofing Floors
Soundproofing floors is an important step in reducing impact noise and preventing sound from traveling between different levels of a building. Whether you’re dealing with footsteps, furniture movement, or airborne noise, here are some effective techniques for soundproofing your floors:
- Carpet or Rug: Adding a thick carpet or rug with a dense pad underneath can absorb and dampen impact noise. The soft surface helps reduce the sound of footsteps and other movements.
- Underlayment: Use a soundproof underlayment material, such as cork or rubber, beneath the flooring to reduce impact noise. These materials help to isolate vibrations and minimize sound transmission.
- Resilient Channels: Install resilient channels between the subfloor and floorboards to create an air gap that reduces the transfer of vibrations and sound. They effectively decouple the floor from the structure.
- Floating Floor: Create a floating floor system by installing a layer of soundproof underlayment or acoustic mats between the subfloor and the finished floor. This further isolates the flooring and prevents sound transmission.
- Seal Cracks and Gaps: Similar to soundproofing walls and ceilings, it is important to seal any cracks, gaps, or openings in the flooring. Use a sealant or acoustic caulk to ensure airtightness and prevent sound leaks.
The choice of soundproofing technique will depend on the type of flooring you have and the level of soundproofing desired. For instance, if you have hardwood or tile floors, adding a thick rug with a soundproof underlayment can be effective. On the other hand, if you are installing new flooring, you may want to consider using soundproofing materials during the installation process.
Remember that combining different soundproofing techniques can yield the best results. It’s also important to consider maintenance and durability when choosing soundproofing materials and flooring options. By soundproofing your floors, you can minimize impact noise and create a quieter living space.
Step 6: Sealing Sound Leaks
One of the most crucial steps in effective soundproofing is sealing any sound leaks in your space. Even the smallest gaps or openings can allow sound to pass through, reducing the effectiveness of your soundproofing efforts. Here are some techniques to help you seal sound leaks:
- Doors and Windows: Install weatherstripping along the edges of doors and windows to create a tight seal. This will prevent both air and sound from leaking in or out.
- Gaps and Cracks: Use acoustic caulk or sealant to fill any gaps, cracks, or holes in walls, floors, or ceilings. Pay attention to areas around electrical outlets, pipes, and vents, as these are common sources of sound leaks.
- Electrical Outlets: Install foam gaskets or putty pads behind electrical outlet covers to isolate them from the wall. This prevents sound from transmitting through the outlets and into adjacent spaces.
- Air Vents and Ducts: Use acoustic foam or insulation to line air vents and ducts, minimizing sound transmission through the ventilation system.
- Baseboards and Crown Molding: Ensure a tight fit between baseboards, crown molding, and the wall. Use caulk or adhesive to seal any gaps and prevent sound leaks.
It’s important to thoroughly inspect your space and identify all potential sound leak sources. Taking the time to seal these leaks will significantly improve the overall soundproofing effectiveness. Remember that sound can find its way through even the tiniest openings, so be meticulous in your sealing efforts.
Additionally, keep in mind that sealing sound leaks not only enhances your soundproofing but also improves energy efficiency by preventing drafts and reducing heat or cooling loss.
By sealing sound leaks, you can ensure that your soundproofing measures are working at their fullest potential, creating a more peaceful and quiet environment inside your space.
Step 7: Adding Acoustic Panels or Soundproof Curtains
To further enhance the soundproofing in your space, consider incorporating acoustic panels or soundproof curtains. These specialized products are designed to absorb or block sound waves, improving the overall acoustics of the room. Here’s how you can add them to your soundproofing setup:
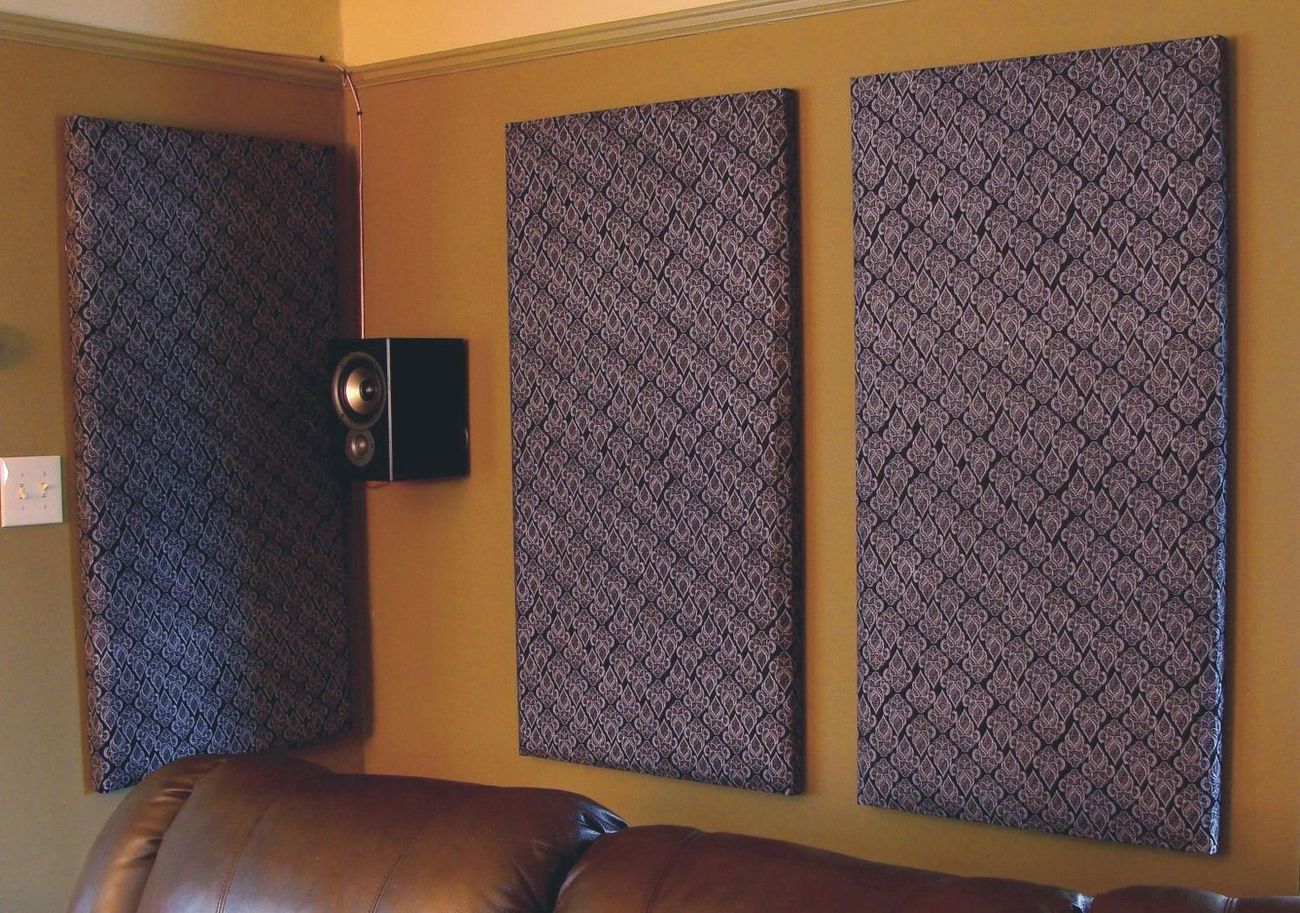
- Acoustic Panels: These panels are made from sound-absorbing materials, such as foam or fabric, and are effective at reducing echoes and reverberation. They come in various sizes, shapes, and designs, allowing you to choose options that complement your space visually while enhancing its acoustics. Install the panels on the walls or ceilings using adhesive or mounting hardware.
- Soundproof Curtains: Soundproof curtains are heavy-duty curtains that are specially designed to block sound. They are made with dense and insulating materials, and some may have multiple layers or a soundproofing liner. Hang these curtains over windows, doors, or other openings to reduce sound transmission. Soundproof curtains not only block external noise but can also prevent sound from leaving the room, making them an excellent choice for home theaters or recording studios.
Both acoustic panels and soundproof curtains provide a visually appealing way to enhance the soundproofing of your space. They can be particularly beneficial in rooms where sound reflections or external noise are a concern, such as home theaters, recording studios, or bedrooms.
Before installing acoustic panels or soundproof curtains, determine the specific areas where they will be most effective. Consider the shape and size of the room, as well as the location of the primary noise sources. You may opt to cover entire walls or focus on strategic areas depending on the room’s acoustics and your soundproofing goals.
When installing acoustic panels, follow the manufacturer’s instructions for proper placement and spacing. Experiment with different configurations to find the arrangement that provides the best sound absorption and balance in the room. Soundproof curtains can be easily hung on rods or tracks, just like regular curtains, but ensure they are fitted tightly to maximize their sound-blocking capabilities.
By incorporating acoustic panels or soundproof curtains, you can significantly enhance the soundproofing performance in your space while adding a touch of style.
Step 8: Testing and Evaluating Soundproofing Effectiveness
After completing your soundproofing project, it’s important to test and evaluate its effectiveness. This step will help you assess the level of noise reduction achieved and identify any areas that may require further improvement. Here’s how you can test and evaluate your soundproofing:
- Sound Meter: Use a sound meter to measure the noise levels in your space before and after soundproofing. This will allow you to objectively assess the difference in noise levels and determine the effectiveness of your soundproofing efforts.
- Sound Insulation Testing: Consider hiring a professional sound insulation tester to conduct a formal evaluation of your space. They will use specialized equipment and procedures to measure the sound insulation effectiveness of your walls, windows, doors, and other areas.
- Real-Life Assessment: Pay attention to your day-to-day experience in the soundproofed space. Notice if there is a significant reduction in noise from external sources or if sound leakage between rooms has been minimized. Take note of any areas that still seem to allow sound transmission.
- Feedback from Others: Seek feedback from family members, colleagues, or neighbors who have experienced the space before and after the soundproofing project. Their observations and input can provide valuable insights into the effectiveness of the soundproofing measures.
Based on the results of your evaluation, you can determine if any additional soundproofing adjustments or improvements are needed. This could involve reinforcing certain areas, adding extra layers of insulation, or considering additional soundproofing techniques specific to problem areas.
Keep in mind that complete soundproofing may not be achievable in all cases, especially in environments with persistent loud noise sources. However, a noticeable reduction in noise levels and improved sound insulation should be expected after effective soundproofing.
Regularly reassess and retest your soundproofing setup over time, as wear and tear or changes in the environment can impact its effectiveness. Make necessary adjustments or upgrades as needed to maintain and improve the soundproofing performance in your space.
By testing and evaluating the effectiveness of your soundproofing measures, you can ensure that your efforts have been successful in creating a quieter and more peaceful environment.
Conclusion
Congratulations on completing your DIY soundproofing project! By following the steps outlined in this guide, you have taken significant strides towards creating a more peaceful and quiet living space. Soundproofing doors, windows, walls, ceilings, floors, and sealing sound leaks are effective techniques that can significantly reduce noise transmission.
Remember, soundproofing is a multi-faceted process that requires careful consideration of the specific noise sources and areas in your space. By assessing noise sources, choosing the right materials, and implementing the appropriate techniques, you can effectively reduce noise and create a more comfortable environment.
Throughout the process, it’s important to test and evaluate the effectiveness of your soundproofing measures. Using sound meters, sound insulation testing, real-life assessments, and feedback from others, you can determine if any adjustments or improvements are needed.
While no soundproofing method can completely eliminate all noise, the goal is to minimize sound transmission and create a peaceful environment. By combining different soundproofing techniques and materials, you can significantly reduce noise levels and improve overall acoustics.
Remember to regularly maintain and reassess your soundproofing setup to ensure its continued effectiveness. Over time, you may need to make adjustments or upgrades as needed to address any changes in the environment or wear and tear of your soundproofing materials.
Enjoy the benefits of your soundproofed space, whether it’s a home office, recording studio, home theater, or simply a quiet and peaceful living area. Take pride in your DIY soundproofing accomplishments and relish in the tranquility it brings to your daily life.
Here’s to a quieter, more serene environment!