Home>Production & Technology>Digital>How To Make Music On CD Into Digital File

Digital
How To Make Music On CD Into Digital File
Published: March 10, 2024
Learn how to convert your music from CD to digital files easily. Follow our step-by-step guide to digitize your music collection today.
(Many of the links in this article redirect to a specific reviewed product. Your purchase of these products through affiliate links helps to generate commission for AudioLover.com, at no extra cost. Learn more)
Table of Contents
Introduction
In today's digital age, the convenience and portability of digital music have revolutionized the way we enjoy our favorite tunes. However, many of us still have cherished music collections stored on CDs, which are now considered outdated in the era of streaming and digital downloads. If you find yourself in possession of a beloved CD collection and wish to bring it into the digital realm, fear not! Converting your music from CD to digital files is a straightforward process that allows you to preserve and enjoy your favorite tracks in a modern, easily accessible format.
Whether you want to create a digital backup of your music library, transfer your favorite tracks to a portable device, or simply enjoy the convenience of digital music, the process of converting CD music to digital files is both simple and rewarding. By following a few straightforward steps, you can transform your physical CDs into digital files that can be stored, organized, and enjoyed across various devices.
In this comprehensive guide, we will walk you through the process of converting your music from CD to digital files, providing you with the knowledge and tools necessary to embark on this musical journey. From gathering the required materials to choosing the right CD ripping software and selecting the optimal file format and quality, each step is designed to empower you with the skills and confidence needed to seamlessly transition your music collection into the digital realm.
So, if you're ready to breathe new life into your CD collection and unlock the potential of digital music, join us as we delve into the step-by-step process of transforming your beloved CDs into digital files. Get ready to embark on a musical adventure that will not only preserve your cherished tunes but also enhance your listening experience in the digital age. Let's dive in and discover how to make music on CD into digital files!
Step 1: Gather Your Materials
Before embarking on the journey of converting your music from CD to digital files, it's essential to gather the necessary materials to ensure a smooth and efficient process. Here's what you'll need:
1. Computer or Laptop:
You'll need a computer or laptop with a CD drive to read the music from your CDs. Ensure that the computer is in good working condition and has sufficient storage space to accommodate the digital music files you'll be creating.
2. Blank CDs (Optional):
If you plan to create backup copies of your music or transfer the digital files to another CD, having blank CDs on hand will be beneficial. This step is optional but can provide an extra layer of security for your music collection.
3. CD Ripping Software:
Selecting the right CD ripping software is crucial for the conversion process. There are various software options available, both free and paid, each offering different features and capabilities. Research and choose a reliable CD ripping software that aligns with your preferences and technical requirements.
4. Internet Connection (Optional):
While not mandatory, having an internet connection can be beneficial for downloading and installing CD ripping software, accessing online tutorials or troubleshooting guides, and exploring additional resources related to the conversion process.
5. Patience and Enthusiasm:
While not a tangible material, patience and enthusiasm are essential for this endeavor. Converting music from CD to digital files may require time and attention to detail, especially if you have a large music collection. Approach the process with a positive mindset and a willingness to explore the world of digital music.
By gathering these materials, you'll be well-prepared to embark on the exciting journey of converting your music from CD to digital files. With the necessary tools at your disposal, you can proceed to the next steps with confidence and enthusiasm, knowing that you have everything you need to bring your music collection into the digital age.
Step 2: Choose a CD Ripping Software
Selecting the right CD ripping software is a pivotal decision in the process of converting music from CD to digital files. With a myriad of options available, each offering unique features and functionalities, it's essential to consider several factors before making your choice.
When evaluating CD ripping software, consider the following aspects:
-
User-Friendly Interface: Look for software that offers an intuitive and user-friendly interface. This ensures that the process of ripping CDs and managing digital files is straightforward and accessible, even for those with limited technical expertise.
-
Supported File Formats: Check the supported file formats of the software. Ideally, the software should offer a variety of file formats, including popular options such as MP3, WAV, FLAC, and AAC. Having flexibility in file formats allows you to choose the one that best suits your preferences and device compatibility.
-
Audio Quality Options: A good CD ripping software should provide options for adjusting audio quality settings. This includes the ability to select the bitrate and sample rate, allowing you to balance file size and audio fidelity based on your preferences and storage capacity.
-
Metadata Retrieval: Consider software that can automatically retrieve and embed metadata for your digital music files. This includes song titles, artist names, album information, and track numbers. Accurate metadata enhances the organization and accessibility of your digital music library.
-
Customization Features: Look for software that offers customization features, such as the ability to create custom file naming conventions, organize music into specific folders, and apply personalized tags to your digital files. These features contribute to a tailored and organized digital music collection.
-
Compatibility and Updates: Ensure that the CD ripping software is compatible with your operating system and receives regular updates and support. Compatibility issues and outdated software can hinder the overall experience and functionality of the ripping process.
-
Reviews and Recommendations: Research user reviews and recommendations for CD ripping software. Platforms such as forums, tech websites, and software review sites can provide valuable insights into the performance, reliability, and user satisfaction of different software options.
By carefully considering these factors, you can make an informed decision when choosing CD ripping software. Whether you opt for a free, open-source solution or a feature-rich paid software, prioritizing usability, flexibility, and customization will set the stage for a seamless and enjoyable CD-to-digital conversion experience.
Step 3: Install and Set Up the Software
Once you have chosen the ideal CD ripping software for your music conversion journey, the next crucial step is to install and set up the software on your computer. This process is essential to ensure that the software is properly configured and ready to commence the CD-to-digital file conversion. Here's a detailed guide on how to install and set up the software:
1. Download the Software:
Begin by visiting the official website of the selected CD ripping software. Look for the designated download section or page, where you can access the installation files. Ensure that you download the software from a reputable source to mitigate the risk of downloading potentially harmful or compromised files.
2. Installation Process:
Once the software installation file is downloaded, locate the file on your computer and initiate the installation process. Follow the on-screen instructions provided by the installation wizard. Typically, this involves agreeing to the software's terms and conditions, selecting the installation location, and choosing any additional preferences or settings offered during the installation.
3. Configuration and Setup:
After the software is successfully installed, launch the application to begin the setup process. Depending on the software, you may be prompted to configure certain settings, such as designating the default storage location for ripped music files, adjusting audio quality preferences, and customizing metadata retrieval options. Take the time to review and adjust these settings according to your preferences and requirements.
4. Software Updates:
Check for any available software updates or patches to ensure that you are using the latest version of the CD ripping software. Many software applications offer automatic update checks, while others may require manual initiation of the update process. Keeping the software up to date is essential for accessing new features, performance improvements, and security enhancements.
5. Test Run:
Before proceeding to rip your entire music collection, consider conducting a test run with a single CD. This allows you to familiarize yourself with the software's interface, verify the accuracy of metadata retrieval, and ensure that the audio quality settings align with your expectations. Testing the software with a single CD provides an opportunity to make any necessary adjustments before initiating the full conversion process.
By following these steps to install and set up the CD ripping software, you can establish a solid foundation for the subsequent stages of converting your music from CD to digital files. With the software properly configured and ready for action, you are poised to embark on the exciting journey of transforming your cherished CD collection into a versatile and accessible digital music library.
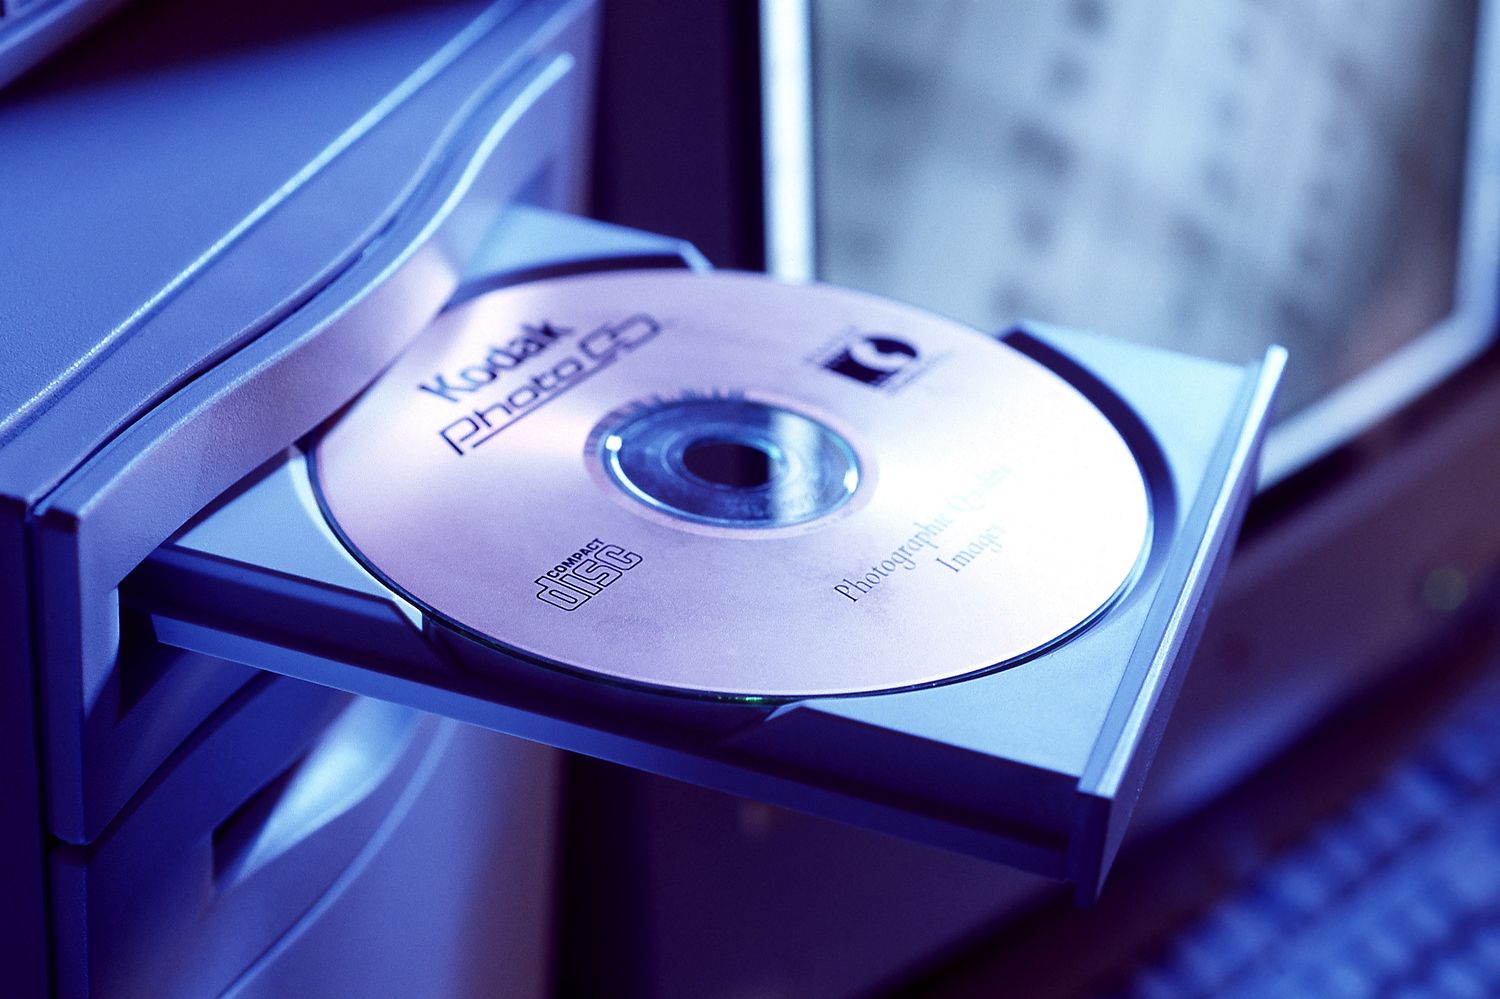
Step 4: Insert the CD and Start Ripping
With the CD ripping software installed and configured, it's time to initiate the process of converting your music from CD to digital files. This pivotal step involves inserting the CD into your computer's CD drive and utilizing the CD ripping software to extract the audio tracks and convert them into digital files. Here's a detailed guide on how to seamlessly execute this essential phase of the conversion process:
-
Launch the CD Ripping Software:
Begin by launching the installed CD ripping software on your computer. Depending on the software, you may be greeted with a welcoming interface that provides options for initiating the ripping process. Familiarize yourself with the software's layout and navigation to ensure a smooth and efficient experience. -
Insert the CD:
Carefully insert the CD containing the music you wish to convert into the CD drive of your computer. Once inserted, the CD ripping software should detect the presence of the CD and display relevant information such as the album title, track listing, and other pertinent details. Take a moment to verify that the correct CD and album information are recognized by the software. -
Select Tracks for Ripping:
If the CD contains multiple tracks, the software may present you with the option to select specific tracks for ripping. This flexibility allows you to choose individual songs or the entire album for conversion into digital files. Make your selections based on your preferences and the tracks you wish to include in your digital music library. -
Initiate the Ripping Process:
With the CD recognized and the desired tracks selected, it's time to initiate the ripping process. Depending on the software, this may involve clicking a "Rip" or "Convert" button to commence the extraction and conversion of audio tracks from the CD. The software will begin reading the CD's contents and converting the audio into digital files based on the settings and preferences you configured during the setup phase. -
Monitor the Progress:
As the ripping process unfolds, the software will provide real-time updates on the progress of each track being converted. You may observe a visual representation of the ripping process, including the status of individual tracks and the overall completion percentage. Take this opportunity to monitor the process and ensure that the conversion is proceeding as expected. -
Verify Metadata and Quality:
Upon completion of the ripping process, the software may prompt you to review and confirm the retrieved metadata for the digital files. This includes song titles, artist names, album information, and track numbers. Additionally, verify that the audio quality settings align with your preferences and the desired file format is selected.
By following these steps, you can seamlessly insert the CD and initiate the ripping process, transforming the audio tracks into digital files that can be stored, organized, and enjoyed across various devices. With the conversion process underway, you are one step closer to embracing the convenience and versatility of digital music while preserving your cherished CD collection.
Step 5: Choose Your File Format and Quality
Selecting the appropriate file format and audio quality is a crucial decision when converting music from CD to digital files. The chosen file format and quality settings will directly impact the storage space required, the compatibility with various devices, and the overall listening experience. Here's a detailed exploration of the factors to consider when making these pivotal choices.
File Format Options:
When it comes to file formats for digital music, several options are commonly utilized, each with its unique characteristics and considerations:
-
MP3: MP3 files are widely compatible and offer a good balance between file size and audio quality. They are suitable for most devices and platforms, making them a popular choice for digital music libraries.
-
WAV: WAV files are known for their uncompressed, high-quality audio. They preserve the original audio data from the CD without compression, resulting in larger file sizes. WAV files are ideal for audiophiles and those seeking the utmost fidelity.
-
FLAC: FLAC (Free Lossless Audio Codec) files provide high-quality audio while maintaining a smaller file size compared to WAV. They offer lossless compression, meaning that no audio data is lost during the compression process. FLAC is favored by those who prioritize audio quality and file size efficiency.
-
AAC: AAC (Advanced Audio Coding) files are known for their efficient compression and high-quality audio. They are commonly used in the iTunes ecosystem and are compatible with a wide range of devices and platforms.
Audio Quality Settings:
When configuring the audio quality settings, consider the following aspects:
-
Bitrate: The bitrate determines the amount of data used to represent a given length of audio. Higher bitrates result in better audio quality but also lead to larger file sizes. Common bitrate options include 128 kbps, 192 kbps, 256 kbps, and 320 kbps.
-
Sample Rate: The sample rate defines the number of samples of audio carried per second. A higher sample rate can capture more audio detail, especially in higher frequencies. Common sample rate options include 44.1 kHz and 48 kHz.
Considerations for Selection:
When choosing the file format and audio quality, consider the storage capacity of your devices, the playback devices you intend to use, and your personal preferences regarding audio fidelity. For portable devices with limited storage, a balance between file size and audio quality may be preferred, making formats like MP3 or AAC at moderate bitrates a practical choice. On the other hand, for a dedicated music library on a computer or high-fidelity audio system, formats like FLAC or WAV at higher bitrates and sample rates may be more suitable to preserve the original audio quality.
By carefully considering these factors, you can make informed decisions when selecting the file format and audio quality for your digital music files. These choices will ultimately shape your listening experience and the versatility of your digital music library, ensuring that your favorite tunes are preserved in a format that aligns with your preferences and technical requirements.
Step 6: Organize and Save Your Digital Files
Once you have successfully converted your music from CD to digital files, the final step involves organizing and saving these digital treasures in a manner that enhances accessibility and enjoyment. Here's a comprehensive guide on how to effectively organize and save your newly minted digital music collection:
1. File Organization:
Begin by organizing your digital music files into a logical and intuitive structure. Create dedicated folders for different artists, albums, or genres, allowing for easy navigation and retrieval of specific tracks. Consider implementing a consistent naming convention for your files, including track numbers and relevant metadata, to maintain a structured and organized library.
2. Backup and Storage:
Prioritize the creation of backup copies of your digital music files to safeguard against potential data loss. Consider utilizing external hard drives, cloud storage services, or dedicated backup software to create redundant copies of your music collection. By implementing a robust backup strategy, you can ensure the long-term preservation of your digital music library.
3. Metadata Management:
Verify and enhance the metadata associated with your digital music files. This includes song titles, artist names, album information, and genre classifications. Utilize specialized music management software or media players to edit and refine the metadata, ensuring accurate and comprehensive details for each track in your collection.
4. Integration with Music Libraries:
Integrate your digital music collection with popular music management applications or media players. Platforms such as iTunes, Windows Media Player, or dedicated music library software offer features for organizing, categorizing, and playing digital music files. Take advantage of playlist creation, smart categorization, and library management tools to further enhance the accessibility and enjoyment of your music collection.
5. Explore Music Tagging:
Consider implementing music tagging to enrich the organization and discoverability of your digital music library. Music tagging allows you to assign descriptive tags and attributes to your music files, enabling advanced search and filtering capabilities. Tags such as mood, tempo, and instrumentation can provide valuable insights and facilitate personalized music exploration.
6. Quality Control and Maintenance:
Regularly review and maintain your digital music library to ensure optimal quality and organization. This includes periodically checking for duplicate files, updating metadata, and verifying the integrity of stored files. By conducting routine quality control measures, you can uphold the excellence and coherence of your digital music collection.
By following these steps, you can effectively organize and save your digital music files, creating a well-structured and accessible music library that aligns with your preferences and enhances your listening experience. Embrace the versatility and convenience of digital music while preserving the essence of your cherished CD collection in a modern and dynamic format.
Conclusion
In conclusion, the process of converting music from CD to digital files offers a transformative journey that seamlessly bridges the gap between traditional physical media and the modern era of digital music. By embarking on this endeavor, music enthusiasts can unlock a myriad of benefits, including enhanced accessibility, portability, and preservation of their cherished music collections.
The journey begins with the gathering of essential materials, including a computer or laptop with a CD drive, blank CDs for optional backup, and the selection of reliable CD ripping software. The choice of CD ripping software is a pivotal decision, as it sets the stage for the subsequent steps and influences the overall experience of the conversion process. Factors such as user-friendly interface, supported file formats, audio quality options, metadata retrieval, and customization features should be carefully considered when choosing the ideal software.
Upon selecting the software, the installation and setup phase ensures that the software is properly configured and ready to commence the CD-to-digital file conversion. This involves downloading the software from a reputable source, configuring settings, checking for updates, and conducting a test run to familiarize oneself with the software's interface and functionality.
The pivotal step of inserting the CD and initiating the ripping process marks the transition from physical to digital, as the software extracts audio tracks and converts them into digital files. This step requires attention to detail, ensuring that the correct tracks are selected, and the ripping process unfolds smoothly, resulting in accurate metadata and desired audio quality.
Choosing the appropriate file format and audio quality is a critical decision, as it directly impacts the storage space required, compatibility with various devices, and the overall listening experience. Factors such as file format options, audio quality settings, and considerations for selection guide users in making informed choices that align with their preferences and technical requirements.
Finally, the organization and storage of the digital music files complete the journey, ensuring that the newly minted digital music collection is structured, accessible, and preserved for long-term enjoyment. By implementing file organization, backup strategies, metadata management, integration with music libraries, music tagging, and quality control measures, users can create a dynamic and personalized digital music library that reflects their musical preferences and enhances their listening experience.
In essence, the process of converting music from CD to digital files empowers music enthusiasts to embrace the convenience and versatility of digital music while preserving the essence of their cherished CD collections. It represents a seamless transition into the digital realm, where music can be enjoyed, organized, and shared across various platforms and devices, enriching the overall musical experience in the digital age.