Home>Production & Technology>MP3>How To Convert CD Music To MP3


MP3
How To Convert CD Music To MP3
Modified: January 22, 2024
Learn how to easily convert CD music to MP3 format and enjoy your favorite tunes on any device. Step-by-step guide for beginners.
(Many of the links in this article redirect to a specific reviewed product. Your purchase of these products through affiliate links helps to generate commission for AudioLover.com, at no extra cost. Learn more)
Table of Contents
- Introduction
- Step 1: Gathering the necessary tools and software
- Step 2: Installing a CD ripping software
- Step 3: Configuring the settings for MP3 conversion
- Step 4: Inserting the CD and opening the ripping software
- Step 5: Selecting the tracks to convert
- Step 6: Choosing the destination folder for the MP3 files
- Step 7: Adjusting the quality settings
- Step 8: Initiating the conversion process
- Step 9: Monitoring the progress and completion
- Step 10: Transferring the converted MP3 files to a device or storage
- Conclusion
Introduction
Music has the power to touch our emotions, lift our spirits, and transport us to a different time and place. For many of us, our collection of CDs holds a treasure trove of beloved songs and cherished memories. However, with the advancement of digital technology, many music lovers are now opting to convert their CD collection into the popular MP3 format for easy accessibility and portability.
Converting CD music to MP3 not only allows you to play your favorite tracks on various devices like smartphones, tablets, and MP3 players, but also provides the convenience of creating personalized playlists and sharing your music library with friends and family.
In this comprehensive guide, I will walk you through the step-by-step process of converting CD music to MP3. Whether you’re a beginner or a tech-savvy user, this guide will provide all the necessary information and tips to ensure a successful and hassle-free conversion.
Before we dive into the conversion process, there are a few things you’ll need:
- A computer with a CD/DVD drive: This is essential for reading your CDs and extracting the audio tracks.
- CD ripping software: This software will allow you to convert the audio tracks on your CD into MP3 files.
- Enough storage space: Make sure you have enough space on your computer’s hard drive or an external storage device to store the converted MP3 files.
Now that you have all the necessary tools and software, let’s embark on the journey of converting your CD music to the versatile and widely supported MP3 format. So grab your CDs, get comfortable, and let’s get started!
Step 1: Gathering the necessary tools and software
Before you can start converting your CD music to MP3, you need to ensure that you have all the necessary tools and software. Here’s what you’ll need:
- A computer with a CD/DVD drive: Make sure that your computer has a functioning CD or DVD drive. Most modern computers come equipped with built-in drives, but if you have a newer model that doesn’t have one, you may need to purchase an external CD/DVD drive.
- CD ripping software: This is the essential software that will allow you to extract the audio tracks from your CD and convert them into MP3 files. There are several CD ripping software options available, both free and paid, so choose one that suits your needs and preferences.
- Enough storage space: Converting your CD music into MP3 files will require storage space on your computer’s hard drive or an external storage device. Make sure that you have sufficient space to accommodate the converted files.
Once you have gathered all the necessary tools and software, you’re ready to proceed to the next step of installing a CD ripping software.
Remember, having a reliable CD ripping software is crucial for the success of your conversion process. Take some time to research and choose a reputable software that offers a user-friendly interface, customizable settings, and excellent audio quality. Reading reviews and seeking recommendations from other users can help you make an informed decision.
With the tools and software in hand, you’re well-prepared to embark on your CD to MP3 conversion journey. So let’s move on to the next step and install a CD ripping software on your computer.
Step 2: Installing a CD ripping software
Now that you have gathered all the necessary tools, it’s time to install a CD ripping software on your computer. Follow these steps to get started:
- Research and choose a CD ripping software: As mentioned earlier, there are various CD ripping software options available. Take the time to explore different software and choose the one that best suits your needs, whether it’s a free or paid version.
- Download the CD ripping software: Once you have decided on a software, visit the official website or a trusted software download platform to download the installation file. Make sure to download the appropriate version for your operating system.
- Run the installation file: Locate the downloaded file on your computer and double-click on it to run the installation process. Follow the on-screen prompts and instructions to proceed with the installation.
- Customize the installation settings (if available): Some CD ripping software may give you options to customize the installation settings. This can include choosing the installation directory, creating desktop shortcuts, or selecting additional software components. Review the options and make your preferred selections.
- Complete the installation: Once you have customized the settings (if applicable), click on the “Install” or “Next” button to proceed with the installation. Wait for the installation process to complete.
- Launch the CD ripping software: After the installation is finished, the CD ripping software should be ready to use. Look for the software icon on your desktop or in the start menu and double-click on it to launch the program.
That’s it! You have successfully installed a CD ripping software on your computer. Now you’re one step closer to converting your prized CD music into MP3 files. In the next step, we’ll focus on configuring the settings for MP3 conversion. So let’s move on to Step 3.
Step 3: Configuring the settings for MP3 conversion
Now that you have installed a CD ripping software on your computer, it’s time to configure the settings for MP3 conversion. Follow these steps to ensure optimal output:
- Open the CD ripping software: Launch the CD ripping software that you installed in the previous step. The software’s interface should appear on your screen.
- Access the settings menu: Look for a “Settings” or “Preferences” option within the software’s interface. This option is usually located in the top menu bar or in a drop-down menu. Click on it to access the settings menu.
- Select the output format: In the settings menu, locate the option to choose the output format. Since our goal is to convert CD music to MP3, select “MP3” as the output format. Some software may provide additional settings for bit rate, sample rate, and audio quality. Adjust these settings according to your preferences, keeping in mind that higher quality settings may result in larger file sizes.
- Set the destination folder: Next, specify the folder where you want the converted MP3 files to be saved. You can either choose an existing folder or create a new one specifically for your MP3 files. It’s helpful to select a location that is easily accessible for future reference.
- Configure any other desired settings: Depending on the CD ripping software, you may have additional configuration options available. These could include metadata tagging, file naming conventions, or automatic file organization. Customize these settings according to your preferences.
- Save the settings: Once you have configured the settings to your liking, click on the “Save” or “Apply” button within the settings menu. This will save your changes and ensure that the software follows the specified settings when converting CD music to MP3.
By configuring the settings for MP3 conversion, you are now ready to extract the audio tracks from your CDs and convert them into the preferred format. In the next step, we will learn how to insert the CD and open the ripping software. So let’s move on to Step 4.
Step 4: Inserting the CD and opening the ripping software
Now that you have configured the settings for MP3 conversion, it’s time to insert the CD and open the ripping software. Follow these steps to proceed:
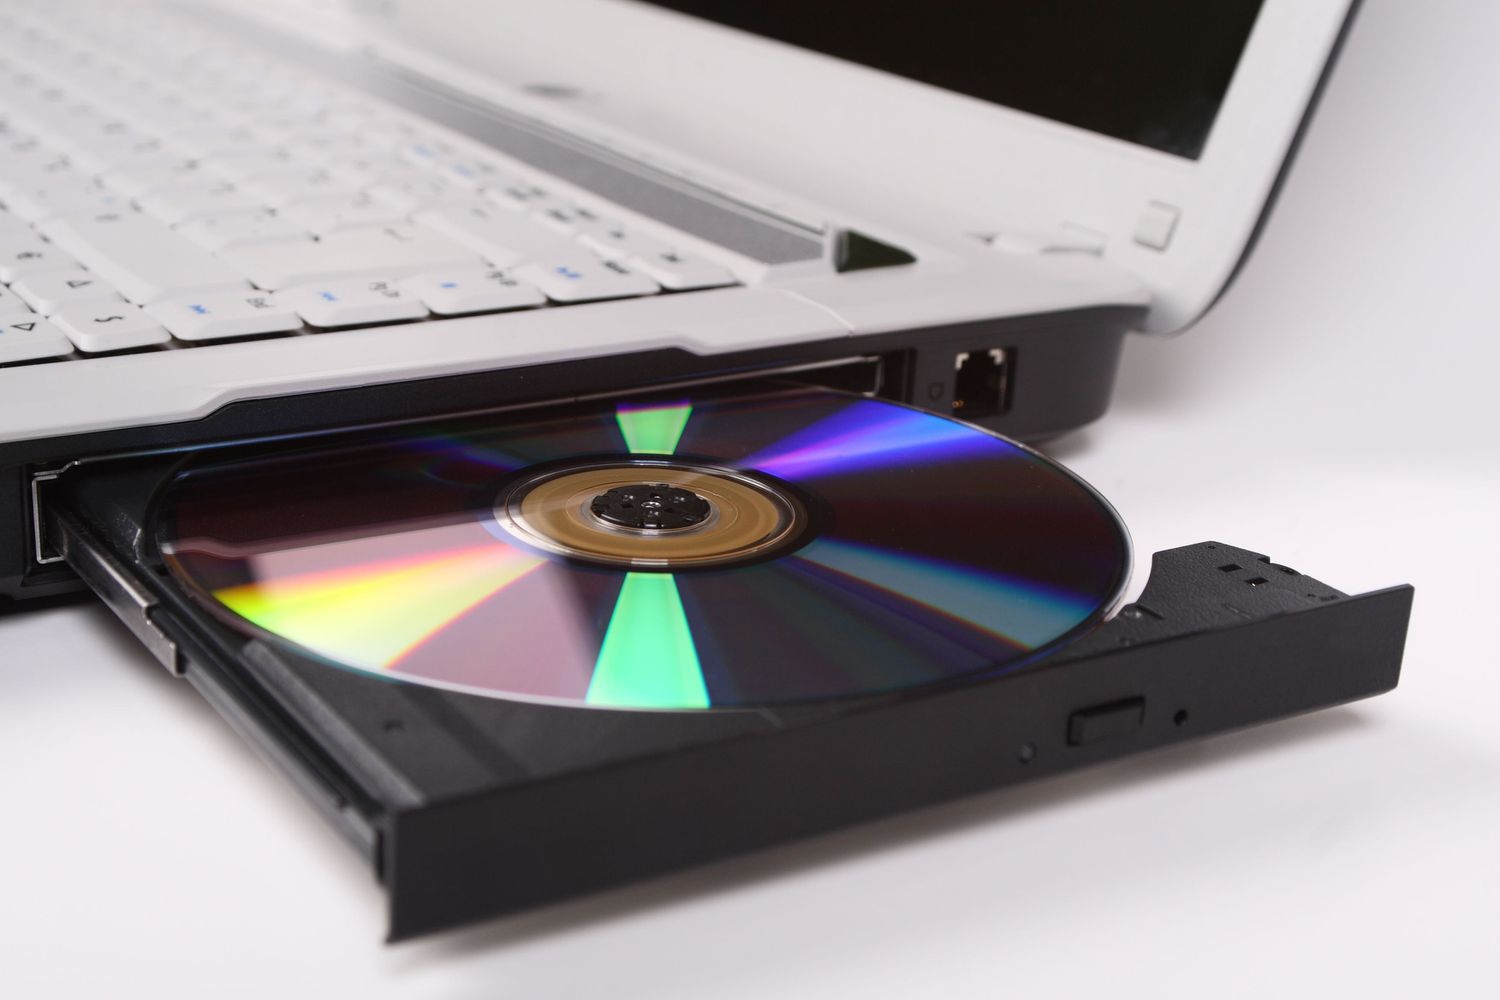
- Locate the CD drive: On your computer, locate the CD or DVD drive where you will insert the CD. This is usually located on the front or side of your computer tower, or on the side of your laptop.
- Insert the CD: Gently push the CD into the CD drive until it is fully inserted. The CD should sit securely inside the drive.
- Wait for the computer to recognize the CD: Once the CD is inserted, your computer will recognize it and may open an autoplay dialog box. Close any unnecessary windows or pop-ups that appear.
- Open the CD ripping software: Now, go ahead and open the CD ripping software that you installed in the previous steps. Look for the software icon on your desktop or in the start menu and double-click on it to launch the program. The software’s interface should appear on your screen.
- Choose the CD to rip: Within the CD ripping software, look for an option to select or load the CD you want to rip. This option is usually labeled with a CD or disc icon. Click on it to access the CD.
- Wait for the CD to be recognized: The CD ripping software will now analyze and recognize the contents of the CD. This process may take a few moments, depending on the speed of your computer and the size of the CD.
Once the CD has been recognized by the ripping software, you are ready to proceed with selecting the tracks you wish to convert. In the next step, we will explore how to choose the tracks for conversion. So let’s move on to Step 5.
Step 5: Selecting the tracks to convert
Now that you have inserted the CD and opened the ripping software, it’s time to select the tracks you want to convert into MP3 format. Follow these steps to proceed:
- View the list of tracks: Within the CD ripping software, you should see a list or display of the tracks available on the CD. This list may include track names, durations, and other information about each song.
- Choose the desired tracks: Review the track list and select the songs you want to convert into MP3. Most CD ripping software allows you to either select individual tracks or select all tracks at once. You can typically do this by clicking on the checkbox next to each track or by using a “Select All” option.
- Remove unwanted tracks (if necessary): If you have accidentally selected any unwanted tracks, most ripping software also provides an option to deselect or remove specific tracks from the conversion process. Take a moment to double-check your selection and remove any unwanted tracks.
- Arrange the track order (optional): Some CD ripping software allows you to rearrange the order in which the tracks will be converted. This can be useful if you want your MP3 files to be organized in a specific sequence. Simply drag and drop the tracks in the desired order if this feature is available.
Once you have selected the tracks you wish to convert, you are ready to proceed to the next step of choosing the destination folder for the MP3 files. In the next section, we will explore how to set the destination folder. So let’s move on to Step 6.
Step 6: Choosing the destination folder for the MP3 files
After selecting the tracks you want to convert, it’s time to choose the destination folder where your converted MP3 files will be saved. Follow these steps to proceed:
- Locate the destination field: Within the CD ripping software, look for an option or field that allows you to specify the location where the converted MP3 files will be saved. This field is typically labeled as “Destination” or “Output Folder”.
- Browse for a destination folder: Click on the field or the folder icon associated with it to browse your computer’s file system. Navigate to the desired location where you want to save your MP3 files.
- Create a new folder (optional): If you want to create a new folder specifically for your converted MP3 files, right-click within the file system window and select the option to create a new folder. Give it a meaningful name and select it as the destination folder.
- Confirm the destination: Once you have selected the destination folder, verify that the correct path is displayed in the field or window. Double-check to ensure that you have chosen the desired location.
By choosing the destination folder, you are now ready to proceed with the conversion process. In the next step, we will explore the option to adjust the quality settings for your MP3 files. So let’s move on to Step 7.
Step 7: Adjusting the quality settings
Now that you have chosen the destination folder for your MP3 files, it’s time to adjust the quality settings to ensure optimal sound and file size. Follow these steps to adjust the quality settings:
- Locate the quality settings: Within the CD ripping software, look for an option or tab that allows you to adjust the quality settings for the MP3 conversion. This option may be labeled as “Quality”, “Bitrate”, or “Audio Settings”.
- Select the desired bitrate: The bitrate determines the quality of the MP3 file. Higher bitrates result in better sound quality but larger file sizes, while lower bitrates sacrifice some quality for smaller file sizes. Choose the bitrate that strikes the right balance for your preferences and needs.
- Adjust any other available settings: Depending on the CD ripping software, you may have additional settings available such as sample rate or audio channels. Customize these settings if necessary, but keep in mind that higher sample rates and more audio channels will also result in larger file sizes.
- Preview the quality settings (optional): Some CD ripping software allows you to preview the effect of the quality settings on a sample track. If this feature is available, use it to listen to the difference in sound quality at different settings, and make an informed decision based on your preferences.
- Save the quality settings: Once you have adjusted the quality settings to your satisfaction, save the changes. This ensures that the software applies the chosen settings to the MP3 conversion process.
By adjusting the quality settings, you can strike the right balance between sound quality and file size for your converted MP3 files. In the next step, we will initiate the actual conversion process and monitor its progress. So let’s move on to Step 8.
Step 8: Initiating the conversion process
With all the necessary settings configured, it’s time to initiate the actual conversion process and transform your CD tracks into MP3 files. Follow these steps to get started:
- Verify the settings: Before proceeding, double-check that all the settings, including the output format, destination folder, and quality settings, are properly configured. This will ensure that the converted MP3 files meet your desired specifications.
- Start the conversion: Look for a “Start” or “Convert” button within the CD ripping software. Once you are ready to begin the conversion process, click on this button to initiate the conversion.
- Monitor the progress: The CD ripping software will now start extracting the audio tracks from the CD and converting them into MP3 format. You will typically see a progress bar or indicator that shows the conversion status. Monitor this progress and wait for the software to complete the conversion.
- Avoid interrupting the process: While the conversion is in progress, it’s important not to interrupt or close the CD ripping software. Doing so may result in incomplete or corrupted MP3 files. Allow the software to complete its task undisturbed.
- Wait for the conversion to finish: The duration of the conversion process will depend on various factors, such as the speed of your computer and the number of tracks being converted. Patience is key during this step, so sit back and wait for the software to complete the conversion.
Once the conversion process is finished, you’re one step closer to having your CD music in the versatile MP3 format. In the next step, we will discuss how to monitor the progress and completion of the conversion. So let’s move on to Step 9.
Step 9: Monitoring the progress and completion
While the CD ripping software is converting your CD tracks into MP3 format, it’s important to monitor the progress and ensure successful completion. Follow these steps to effectively monitor the conversion:
- Watch the progress bar: Most CD ripping software will display a progress bar or indicator that shows the current status of the conversion process. Keep an eye on this bar to track the progress of the conversion. Depending on the software, you may also see the number of tracks or the percentage of conversion completed.
- Check the remaining time (if available): Some CD ripping software estimates the remaining time needed to complete the conversion process. This can give you an idea of how much longer you need to wait. However, keep in mind that the estimated time may vary depending on your computer’s performance and the number of tracks being converted.
- Avoid interrupting the process: It’s crucial not to interrupt the conversion process or close the CD ripping software prematurely. Doing so may result in incomplete or corrupted MP3 files. Allow the software to continue working until it signals the completion of the conversion.
- Review any error messages: Occasionally, there may be errors or glitches during the conversion process. If you encounter any error messages, take note of them and try to troubleshoot or seek assistance as needed. Resolving any errors will ensure a successful and seamless conversion.
- Wait for the completion notification: Once the CD ripping software finishes converting all the selected tracks, it will typically display a completion notification. This notification may be in the form of a pop-up message, a sound signal, or a change in the status bar. Ensure that the software confirms the conversion process is complete before proceeding.
By monitoring the progress and completion of the conversion, you can ensure that all the CD tracks have been successfully converted into MP3 files. In the next step, we will explore how to transfer the converted MP3 files to a device or storage. So let’s move on to Step 10.
Step 10: Transferring the converted MP3 files to a device or storage
Now that you have successfully converted your CD tracks into MP3 files, it’s time to transfer them to a device or storage medium for easy playback and accessibility. Follow these steps to complete the process:
- Locate the converted MP3 files: Open the destination folder where the CD ripping software saved the converted MP3 files. This is the folder you specified in the settings. Take a moment to verify that all the desired tracks are present and properly converted.
- Connect your device or storage: Depending on the device or storage medium you want to transfer the MP3 files to, connect it to your computer. This could be a USB flash drive, an external hard drive, a smartphone, or an MP3 player. Follow the manufacturer’s instructions for proper connection.
- Copy or transfer the MP3 files: In your computer’s file system, navigate to the location of the converted MP3 files. Select the files you want to transfer and either drag them directly to the connected device or storage, or use copy-paste commands to transfer them. The transfer process may take a few moments.
- Disconnect the device or storage: Once the transfer is complete, safely disconnect the device or storage from your computer. Follow the recommended procedure to ensure that no data is lost or corrupted during the disconnection process.
With the MP3 files successfully transferred to your device or storage, you can now enjoy your favorite CD tracks anytime and anywhere. Whether you’re listening to them on your smartphone during a workout or playing them through your car stereo while on a road trip, the convenience and portability of MP3 files make your music collection readily accessible.
Congratulations! You have completed the 10-step process of converting CD music to MP3 and transferring the files to a device or storage medium. Now you can sit back, relax, and enjoy the music that holds a special place in your heart.
Remember to properly store your original CDs to ensure their longevity. Additionally, make sure to back up your digital MP3 files to prevent any loss or accidental deletion.
Thank you for following this comprehensive guide. I hope it has been helpful and has allowed you to enjoy your CD music in the popular and versatile MP3 format. Happy listening!
Conclusion
Converting your CD music to the widely supported MP3 format not only provides convenience and portability but also allows you to rediscover and enjoy your favorite tracks in a digital era. Throughout this comprehensive guide, we have walked through the step-by-step process of converting CD music to MP3, from gathering the necessary tools and software to transferring the converted files to a device or storage medium.
By following these steps, you are now equipped with the knowledge and skills to preserve and access your cherished CD collection with ease. You can now listen to your favorite songs on various devices such as smartphones, tablets, MP3 players, or even through your car’s audio system.
Remember to choose a reliable CD ripping software, configure the settings for MP3 conversion, select the desired tracks for conversion, choose the appropriate destination folder, adjust the quality settings, and monitor the progress and completion of the conversion process. Finally, transfer the converted MP3 files to your preferred device or storage medium for seamless playback.
While converting CD music to MP3 offers great convenience, it’s important to remember to store your original CDs properly to ensure their longevity. Additionally, consider backing up your digital MP3 files to prevent loss or accidental deletion.
Now it’s time to sit back, relax, and immerse yourself in the joy of your favorite tunes. Whether you’re reliving cherished memories or discovering new music, the world of MP3 provides endless possibilities for your music listening journey.
Thank you for following this guide, and I hope it has been insightful and helpful in your quest to convert CD music to MP3. Happy listening!


