Home>Production & Technology>MIDI>How To Convert A Fight Stick Into A MIDI Fighter

MIDI
How To Convert A Fight Stick Into A MIDI Fighter
Published: February 21, 2024
Learn how to convert a fight stick into a MIDI fighter and unleash your creativity with MIDI controls. Transform your gaming gear into a powerful music production tool today!
(Many of the links in this article redirect to a specific reviewed product. Your purchase of these products through affiliate links helps to generate commission for AudioLover.com, at no extra cost. Learn more)
Table of Contents
Introduction
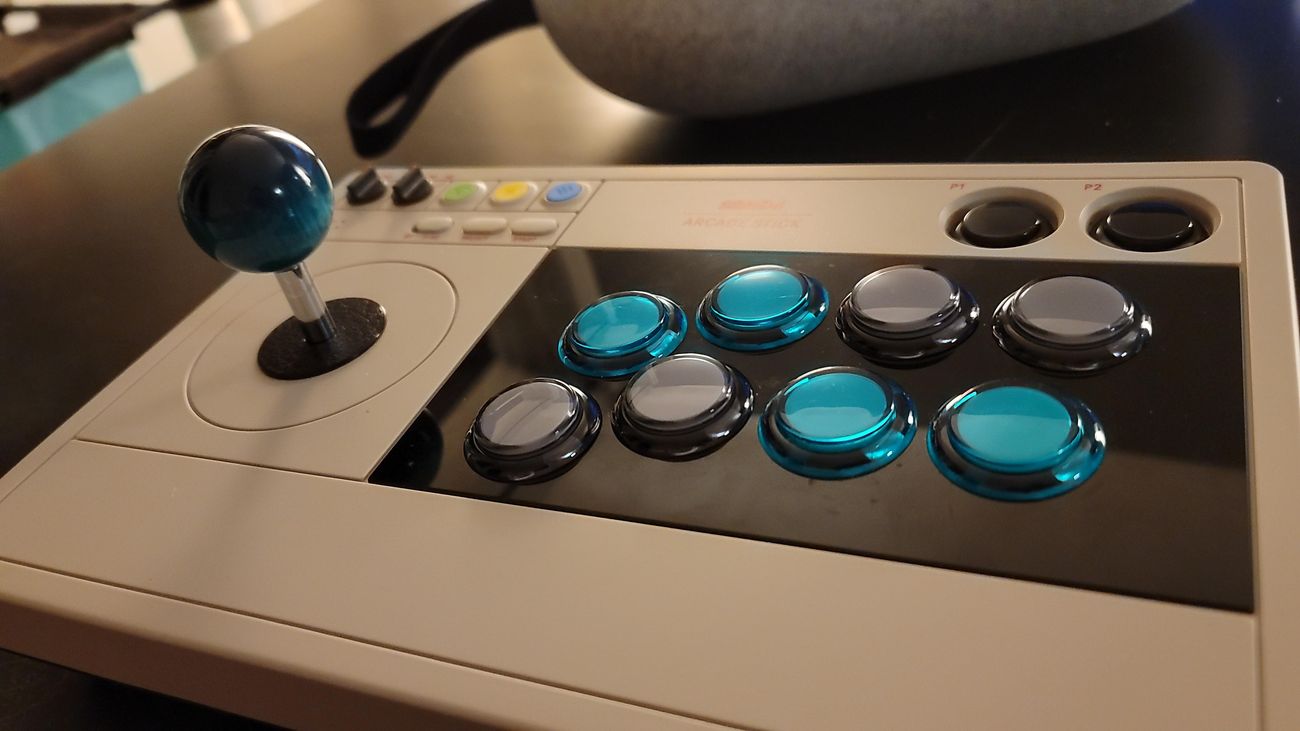
Converting a fight stick into a MIDI fighter is a creative and rewarding project that combines the worlds of gaming and music production. By repurposing a fight stick, typically used for arcade or fighting games, into a MIDI controller, you can unlock a new realm of musical possibilities. MIDI (Musical Instrument Digital Interface) controllers are widely used in music production and performance to trigger sounds, control parameters, and manipulate music software.
This transformation not only breathes new life into an old or underutilized fight stick but also provides a unique and personalized MIDI controller for your music production needs. Whether you're a gamer with a passion for music or a music enthusiast looking for a distinctive MIDI controller, this project offers an exciting opportunity to blend two diverse interests into a single, innovative creation.
In this comprehensive guide, we will walk through the step-by-step process of converting a fight stick into a MIDI fighter. From gathering the necessary materials to testing and calibrating the MIDI fighter, each stage of the conversion process will be thoroughly explained. By following these instructions, you can embark on a journey that merges gaming and music, resulting in a one-of-a-kind MIDI controller tailored to your preferences.
So, if you're ready to embark on a unique DIY project that combines gaming and music production, let's dive into the fascinating world of transforming a fight stick into a MIDI fighter. Get ready to unleash your creativity and technical skills as we embark on this exciting venture together.
Step 1: Gather the Necessary Materials
Before embarking on the journey of converting a fight stick into a MIDI fighter, it's essential to gather all the required materials. This step lays the foundation for a successful and seamless transformation process. Here's a comprehensive list of the necessary materials to kickstart your project:
Fight Stick:
The core component of this project is the fight stick itself. Ensure that you have a compatible fight stick that you are willing to repurpose for this endeavor. The fight stick should be in good working condition, as it will serve as the physical framework for the MIDI fighter.
MIDI Controller Components:
You will need a MIDI controller kit, which typically includes a circuit board, buttons, and wiring. The circuit board serves as the brain of the MIDI fighter, translating physical inputs into MIDI signals. Additionally, ensure that the kit includes high-quality buttons that are responsive and durable, as they will be the primary interface for triggering MIDI commands.
Tools:
Gather a set of essential tools to facilitate the conversion process. This may include a screwdriver set, wire cutters, soldering iron, solder, and electrical tape. These tools will be instrumental in disassembling the fight stick, installing the MIDI controller components, and ensuring a secure and reliable connection.
USB Cable:
An appropriate USB cable will be required to connect the MIDI fighter to a computer or music production setup. Ensure that the USB cable is of sufficient length and quality to provide a stable connection for transmitting MIDI data.
Optional Add-ons:
Depending on your preferences and technical capabilities, you may consider additional components such as LED lights, custom artwork for the fight stick, or extra buttons for extended functionality. These optional add-ons can personalize the MIDI fighter to align with your aesthetic and functional preferences.
By gathering these materials, you will be well-equipped to commence the conversion process with confidence and preparedness. With the necessary components at your disposal, you are ready to move on to the next step of disassembling the fight stick in preparation for the integration of MIDI controller components.
Step 2: Disassemble the Fight Stick
Disassembling the fight stick is a crucial phase in the conversion process, as it sets the stage for integrating the MIDI controller components. To begin, carefully examine the fight stick to identify the screws and fasteners holding it together. Use a suitable screwdriver to remove these fasteners, ensuring that they are safely stored to prevent misplacement.
As you disassemble the fight stick, take note of the internal layout and the placement of components such as the joystick, buttons, and wiring harness. It's essential to handle the disassembly process with care, as this will facilitate a smooth reassembly and minimize the risk of damaging any components.
Once the outer casing and internal components are separated, set them aside in an organized manner to maintain clarity during the reassembly phase. Take this opportunity to inspect the condition of the internal components, such as the buttons and joystick, and assess whether any maintenance or replacement is necessary.
As you progress through the disassembly, document the process by taking photographs or making notes. This documentation can serve as a valuable reference during the reassembly phase, especially if the fight stick has intricate internal wiring or a complex layout.
As the fight stick is disassembled, you will gain a deeper understanding of its internal structure and the space available for integrating the MIDI controller components. This insight will inform the placement of the MIDI circuit board, buttons, and wiring, ensuring a seamless and ergonomic configuration within the fight stick's framework.
By methodically disassembling the fight stick and maintaining a systematic approach, you will lay the groundwork for a successful integration of the MIDI controller components. With the fight stick disassembled and its internal layout understood, you are now prepared to move on to the next phase of installing the MIDI controller components, bringing you closer to the realization of your custom MIDI fighter.
Step 3: Install the MIDI Controller Components
With the fight stick disassembled and the groundwork laid, the next pivotal step is to install the MIDI controller components. This phase involves integrating the MIDI circuit board, buttons, and wiring within the framework of the fight stick, transforming it into a fully functional MIDI fighter.
Integration of MIDI Circuit Board:
Carefully assess the available space within the fight stick to determine the optimal placement for the MIDI circuit board. The circuit board serves as the central hub, translating physical button inputs into MIDI signals that can be recognized by music production software or hardware.
Securely mount the MIDI circuit board within the fight stick, ensuring that it is positioned in a manner that facilitates easy access to the buttons while maintaining a clean and organized layout. Utilize appropriate fasteners or adhesive mounts to affix the circuit board, providing stability and minimizing movement during operation.
Button Installation and Wiring:
Following the placement of the MIDI circuit board, proceed to install the buttons that will serve as the trigger points for MIDI commands. Align the buttons in a strategic and ergonomic configuration, considering factors such as finger reach and operational comfort. Ensure that the buttons are securely attached to the fight stick's framework, promoting durability and reliability during use.
With the buttons in place, meticulously connect the wiring from each button to the corresponding input points on the MIDI circuit board. Exercise precision and attention to detail during the wiring process to avoid cross-connections or loose connections that could compromise the functionality of the MIDI fighter.
Cable Management and Secure Fastening:
As the components are integrated, prioritize effective cable management to organize and secure the wiring within the fight stick. Utilize cable ties or adhesive clips to neatly bundle and route the wiring, minimizing clutter and potential interference with the internal components.
Conduct thorough checks to ensure that the wiring is neatly arranged and free from any strain or tension that could lead to disconnection or malfunction. Additionally, verify that the buttons are responsive and reliably transmit signals to the MIDI circuit board, confirming the successful integration of the MIDI controller components.
By methodically installing the MIDI controller components and paying meticulous attention to detail, you will transform the fight stick into a fully operational MIDI fighter, ready to unleash its musical potential.
With the MIDI controller components seamlessly integrated, the stage is set for the final phase of reassembling the fight stick and testing the functionality of the newly transformed MIDI fighter. This marks a significant milestone in the conversion process, bringing you closer to experiencing the fusion of gaming and music through your personalized MIDI controller.
Step 4: Reassemble the Fight Stick
Reassembling the fight stick is a pivotal stage in the transformation process, marking the culmination of meticulous disassembly, integration of MIDI controller components, and the transition towards a fully functional MIDI fighter. This phase requires a methodical approach to ensure the seamless restoration of the fight stick's physical structure while accommodating the newly integrated MIDI components.
Begin by referencing any documentation or photographs taken during the disassembly phase to guide the reassembly process. This visual reference will serve as a valuable aid in reinstating the internal components, wiring, and fasteners in their original positions within the fight stick's framework.
Carefully align the internal components, such as the joystick, buttons, and wiring harness, in accordance with their original layout. Exercise caution to avoid damaging any components during the reassembly, ensuring that the internal framework of the fight stick is reinstated with precision and care.
As you progress through the reassembly, verify that each component is securely fastened and aligned to maintain the structural integrity of the fight stick. Utilize the appropriate fasteners and screws to secure the outer casing, encapsulating the integrated MIDI controller components within the revitalized framework of the fight stick.
During the reassembly process, prioritize attention to detail and precision, ensuring that each component is reinstated with accuracy and stability. This meticulous approach will contribute to the overall durability and reliability of the MIDI fighter, safeguarding its functionality during use.
Upon completing the reassembly, conduct a thorough inspection to confirm that all components are securely fastened, the wiring is neatly organized, and the external casing is restored to its original state. This comprehensive evaluation will validate the successful reassembly of the fight stick, marking a significant milestone in the transformation process.
With the fight stick effectively reassembled, the integration of MIDI controller components is seamlessly harmonized with the physical structure, culminating in the realization of a fully functional MIDI fighter. This achievement paves the way for the final phase of testing and calibrating the MIDI fighter, bringing you one step closer to experiencing the fusion of gaming and music through your personalized MIDI controller.
Step 5: Test and Calibrate the MIDI Fighter
With the MIDI fighter fully assembled, the pivotal phase of testing and calibration awaits. This critical step ensures that the integrated MIDI controller components function seamlessly, allowing for precise and responsive interaction with music production software or hardware.
Initiate the testing phase by connecting the MIDI fighter to a computer or music production setup using the USB cable. Upon establishing the connection, verify that the computer recognizes the MIDI fighter as a MIDI input device. This fundamental check confirms the essential communication between the MIDI fighter and the connected system.
Proceed to test each button on the MIDI fighter, triggering MIDI commands and observing the corresponding response within music production software. Verify that each button functions as intended, transmitting accurate and consistent MIDI signals. This comprehensive button test validates the operational integrity of the MIDI fighter, ensuring that it effectively translates physical inputs into MIDI commands.
Following the button test, evaluate the responsiveness and precision of the joystick or any additional control elements integrated into the MIDI fighter. Assess the joystick's range of motion and sensitivity, ensuring that it provides smooth and accurate control over MIDI parameters. This evaluation guarantees that the MIDI fighter offers versatile and dynamic control capabilities, enhancing its utility in music production workflows.
Upon confirming the functionality of individual components, engage in a comprehensive system test to evaluate the MIDI fighter's overall performance. Trigger a variety of MIDI commands and observe the real-time response within music production software, affirming the MIDI fighter's ability to accurately convey user inputs and facilitate creative expression.
Calibration plays a crucial role in optimizing the MIDI fighter's performance. Utilize MIDI mapping software to assign specific MIDI commands to the buttons and control elements, tailoring the MIDI fighter to align with your preferred workflow and creative requirements. This customization empowers you to configure the MIDI fighter according to your unique musical endeavors, enhancing its versatility and adaptability.
Throughout the testing and calibration process, maintain a keen eye for any anomalies or inconsistencies in the MIDI fighter's performance. Address any identified issues promptly, ensuring that the MIDI fighter operates flawlessly and consistently across various musical applications and performance scenarios.
By meticulously testing and calibrating the MIDI fighter, you validate its seamless integration into music production setups, unlocking a realm of creative possibilities and musical expression. This phase marks the culmination of the transformation journey, bringing to fruition a personalized MIDI controller that seamlessly merges the worlds of gaming and music, embodying your creative vision and technical prowess.
Conclusion
In conclusion, the transformation of a fight stick into a MIDI fighter represents a captivating fusion of gaming and music, culminating in the creation of a personalized MIDI controller tailored to individual preferences and creative aspirations. This transformative journey, encompassing the meticulous disassembly, integration of MIDI controller components, reassembly, and rigorous testing and calibration, yields a unique and versatile instrument that transcends traditional boundaries.
The process of repurposing a fight stick into a MIDI fighter not only breathes new life into a gaming peripheral but also unlocks a realm of musical exploration and expression. By seamlessly integrating the components of a MIDI controller within the framework of the fight stick, enthusiasts and creators alike can harness the tactile familiarity of arcade controls to shape and manipulate musical compositions, performances, and live productions.
The convergence of gaming and music through the MIDI fighter exemplifies the boundless creativity and innovation that thrives within the do-it-yourself (DIY) community. This transformative endeavor empowers individuals to transcend conventional limitations, repurposing existing technology to serve novel and unforeseen purposes, thereby fostering a culture of ingenuity and resourcefulness.
The personalized nature of the MIDI fighter, tailored to individual preferences and technical capabilities, underscores the inherent versatility and adaptability of this unique instrument. Whether utilized in studio environments, live performances, or creative experimentation, the MIDI fighter stands as a testament to the harmonious coalescence of diverse passions and interests, exemplifying the limitless potential of DIY innovation.
As enthusiasts embark on their journey to convert a fight stick into a MIDI fighter, they not only engage in a technical endeavor but also immerse themselves in a captivating narrative that intertwines the realms of gaming and music. This narrative unfolds through the meticulous disassembly, the integration of MIDI components, and the realization of a fully functional MIDI fighter, culminating in a tangible manifestation of creativity and technical prowess.
Ultimately, the conversion of a fight stick into a MIDI fighter transcends its technical aspects, embodying a narrative of creativity, innovation, and the seamless convergence of diverse passions. It serves as a testament to the transformative power of DIY projects, inspiring individuals to embark on their own unique journeys of repurposing and reinvention, thereby enriching the creative landscape with personalized and innovative creations.

