Home>Production & Technology>Soundproofing>How To Soundproofing A Room
Soundproofing
How To Soundproofing A Room
Published: January 26, 2024
Learn how to soundproof a room effectively with our expert tips and techniques. Create a peaceful and noise-free environment with proven soundproofing methods.
(Many of the links in this article redirect to a specific reviewed product. Your purchase of these products through affiliate links helps to generate commission for AudioLover.com, at no extra cost. Learn more)
Table of Contents
- Introduction
- Step 1: Assessing the Noise Source
- Step 2: Sealing Air Gaps
- Step 3: Adding Mass and Density
- Step 4: Installing Soundproofing Materials
- Step 5: Soundproofing the Walls
- Step 6: Soundproofing the Windows
- Step 7: Soundproofing the Doors
- Step 8: Soundproofing the Floors
- Step 9: Soundproofing the Ceiling
- Step 10: Controlling Vibrations
- Step 11: Soundproofing with Decorative Elements
- Conclusion
Introduction
Whether you live in a bustling city apartment, have noisy neighbors, or are setting up a home recording studio, soundproofing a room can make a world of difference in creating a peaceful and quiet environment. Soundproofing is the process of reducing or eliminating unwanted noise, allowing you to enjoy a quieter and more comfortable living space.
There are various reasons why soundproofing a room is beneficial. It can improve sleep quality, reduce stress levels, increase concentration, and enhance the overall comfort and privacy of your space. Additionally, if you’re a musician, podcaster, or content creator, soundproofing a room is essential for creating professional-quality recordings while minimizing external noise interference.
In this comprehensive guide, we will take you through the step-by-step process of soundproofing a room. We’ll cover everything from identifying the noise sources to choosing the right soundproofing materials and implementing effective techniques. So, whether you’re a DIY enthusiast or seeking professional advice, this article will equip you with the knowledge and tools to create a soundproof sanctuary.
Before we dive into the nitty-gritty details, it’s important to note that while soundproofing can significantly reduce noise, it is not always possible to achieve complete silence. However, by following the tips and techniques outlined in this guide, you can dramatically minimize unwanted noise and enjoy a more peaceful environment.
Step 1: Assessing the Noise Source
The first step in soundproofing a room is to identify and assess the sources of noise. Understanding where the noise is coming from will help you determine the most effective soundproofing strategies to implement.
Start by taking a thorough inventory of the different types of noise that infiltrate your space. Is it primarily external noise like traffic, construction, or neighbors? Or is it internal noise originating from within your own home, such as appliances, HVAC systems, or footsteps?
Once you have determined the sources of noise, you can categorize them into two main types: airborne noise and impact noise. Airborne noise refers to sound waves that travel through the air, while impact noise is caused by vibrations transmitted through surfaces.
To assess the noise level coming from each source, you can use a sound level meter. This device measures the intensity of sound in decibels (dB). By measuring the noise levels, you can prioritize the areas where soundproofing efforts will make the most significant impact.
Remember to consider the specific characteristics of each noise source. For example, low-frequency sounds like heavy bass or rumbling require different soundproofing techniques compared to higher-frequency sounds like voices or loud music.
It’s also important to consider the time of day when noise is most prevalent. This will help you determine whether the noise is intermittent or continuous, and whether you need to focus on soundproofing specific areas for better noise control.
By thoroughly assessing the noise sources, you’ll be able to tailor your soundproofing approach to effectively address the specific types and frequencies of noise that are most disruptive in your space.
Step 2: Sealing Air Gaps
One of the most important steps in soundproofing a room is to seal any air gaps or openings that allow noise to enter or exit. These gaps can be found around windows, doors, electrical outlets, gaps in walls or floors, and even through ventilation systems.
Air gaps are a common pathway for sound waves to travel through, allowing noise to easily penetrate into or out of a room. By sealing these gaps, you can significantly reduce the transmission of sound and improve the overall soundproofing effectiveness.
To start, inspect the room for any visible gaps or cracks. Pay close attention to the areas around windows and doors, as these are often major sources of noise leakage. Apply caulking or weatherstripping to fill in any gaps and create a tight seal. This will not only help with soundproofing but also improve energy efficiency by preventing drafts.
Another area to focus on is electrical outlets and switch plates. These can be a common source of sound leaks due to the gaps between the outlet box and the wall. Install foam or rubber gaskets behind the outlet covers to create a better seal and prevent sound from passing through.
If you have windows that are not acoustically insulated, consider adding window seals or weatherstripping to create a more airtight seal. Additionally, using soundproof curtains or adding a second layer of glazing to the windows can further improve sound insulation.
Keep in mind that while sealing air gaps is an essential step in soundproofing, it may not completely eliminate all noise. It is just one part of the overall soundproofing process.
By taking the time to seal air gaps effectively, you’ll significantly reduce the amount of noise that can enter or escape from the room, creating a quieter and more peaceful environment.
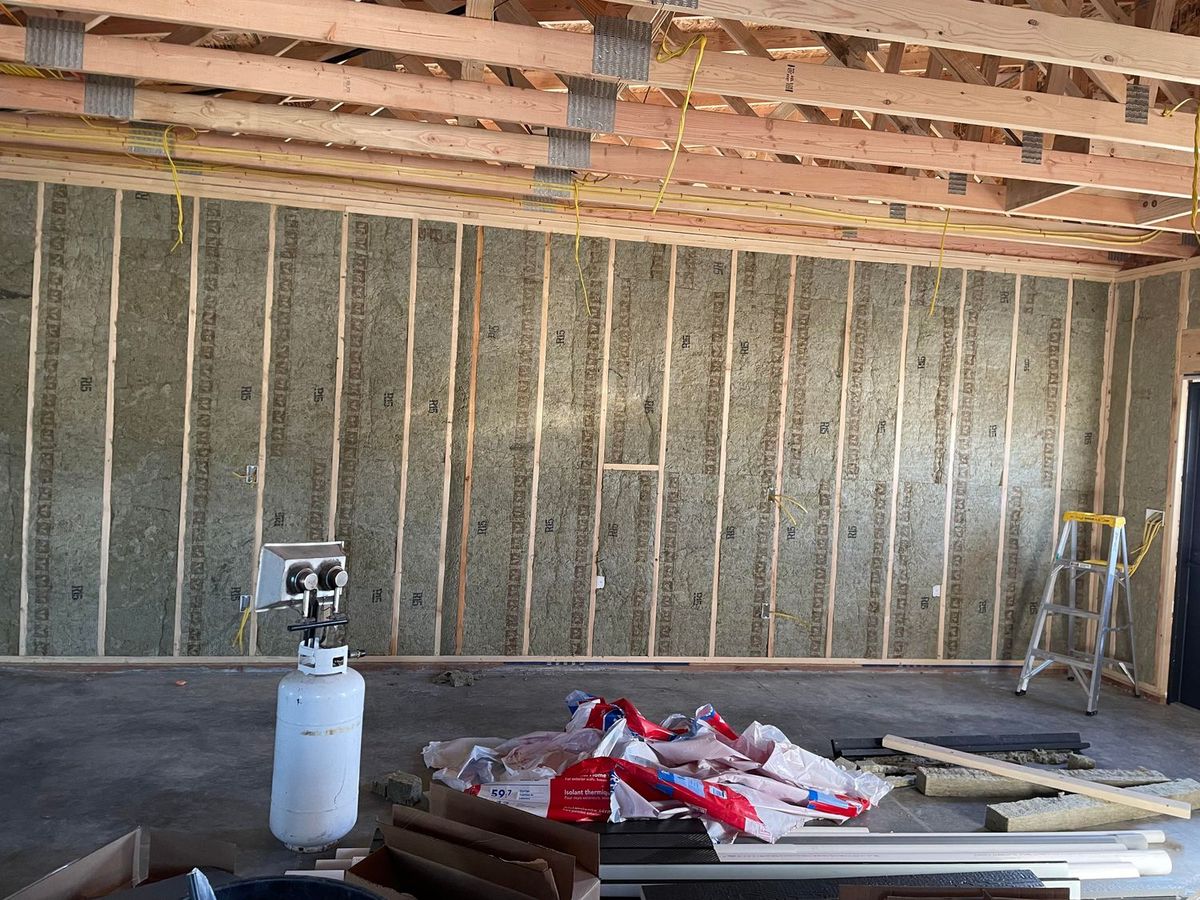
Step 3: Adding Mass and Density
Adding mass and density to the surfaces of your room is an effective strategy to reduce the transmission of sound. Sound waves can easily pass through lightweight and thin materials, but they get absorbed or reflected by denser and thicker materials.
To enhance the soundproofing capabilities of your room, consider adding materials that have high mass and density. Some common options include mass-loaded vinyl (MLV), acoustic panels, and drywall.
Mass-loaded vinyl is a flexible material that is designed to add mass to walls, ceilings, and floors. You can hang MLV like wallpaper or attach it to existing surfaces using adhesive. This dense material helps to block sound transmission and reduce noise levels effectively.
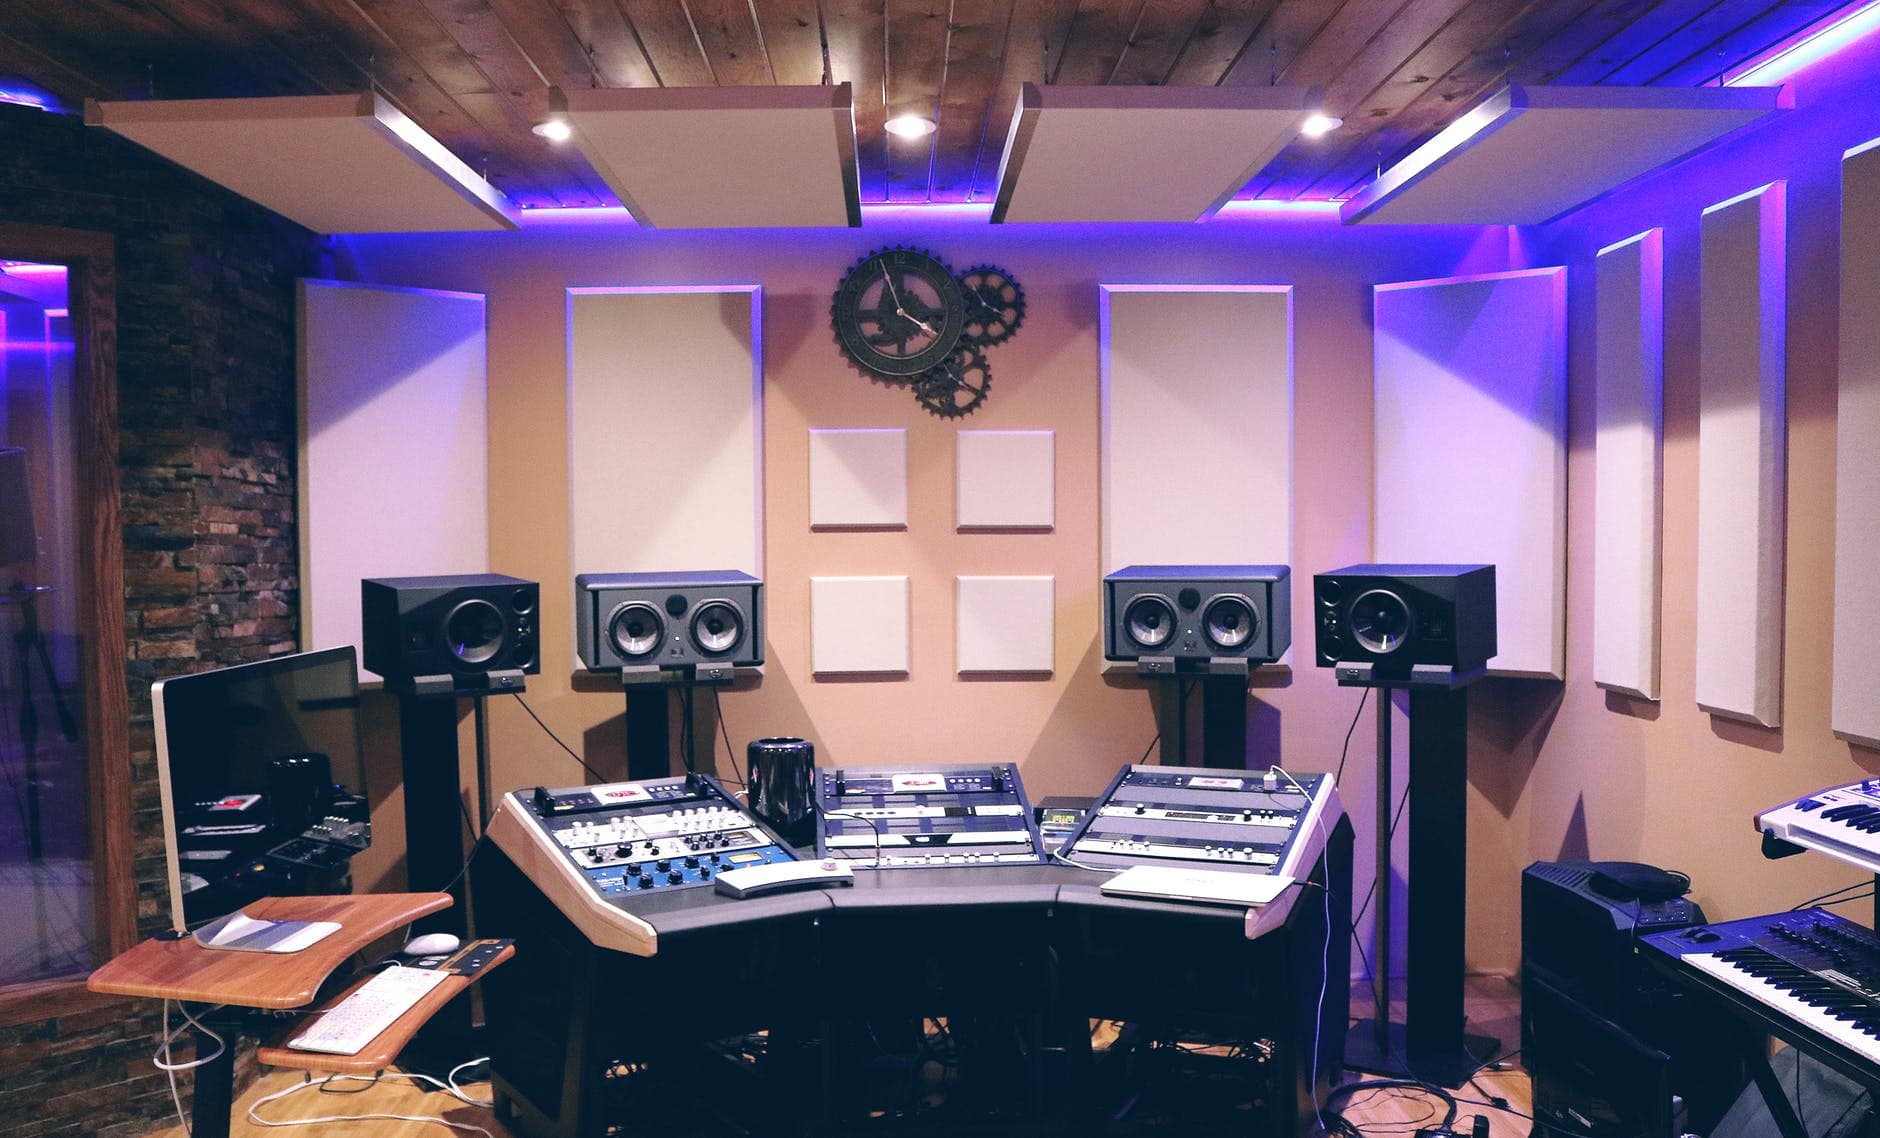
Acoustic panels are another popular option for adding mass and density. These panels are made of dense materials, such as mineral wool or fiberglass, and are designed to absorb sound waves. They can be installed directly onto walls or ceilings to improve the overall acoustic performance of the room.
When it comes to drywall, using thicker and denser drywall can significantly improve soundproofing. Opt for multiple layers of drywall with different thicknesses, or consider using specialized soundproof drywall that incorporates sound-dampening materials.
In addition to adding mass and density, it’s important to consider the placement of these materials. Focus on covering the surfaces that contribute most to sound transmission, such as the walls facing the main noise source or common walls between rooms.
Remember that proper installation is crucial to achieve optimal soundproofing results. Ensure that the materials are securely fastened and that there are no gaps or seams that could compromise their effectiveness.
By adding mass and density to the surfaces of your room, you’ll create barriers that help block and absorb sound waves, resulting in improved soundproofing and a quieter environment.
Step 4: Installing Soundproofing Materials
Once you have sealed air gaps and added mass to the surfaces, the next step in soundproofing a room is to install dedicated soundproofing materials. These materials are designed specifically to absorb, block, or dampen sound waves, further reducing noise transmission.
There are various soundproofing materials available on the market, each with its own unique properties and applications. Here are a few popular options:
- 1. Soundproofing Insulation: Install soundproofing insulation, such as mineral wool or cellulose, within the walls, ceilings, and floors. These materials help absorb sound and reduce its transmission.
- 2. Acoustic Foam Panels: Acoustic foam panels, also known as soundproofing foam or egg crate foam, are designed to absorb and dissipate sound waves. They are commonly used in recording studios, home theaters, and other noise-sensitive areas.
- 3. Soundproof Curtains: Soundproof curtains are heavy, dense curtains designed to block noise and minimize sound reflection. They can be an effective solution for reducing external noise from entering through windows or doors.
- 4. Resilient Channels: Resilient channels are metal strips that are installed between the existing surface and a new layer of drywall. They help decouple the surfaces, reducing sound transmission by inhibiting vibrations.
- 5. Green Glue: Green Glue is a viscoelastic compound that is applied between layers of drywall or other building materials. It helps convert sound energy into heat, effectively reducing noise transmission.
When installing soundproofing materials, it’s essential to follow the manufacturer’s instructions and guidelines. Proper installation techniques ensure that the materials perform optimally and provide the desired soundproofing benefits.
It’s also important to consider the specific needs of your space. Assess the overall noise level, the frequency of the noise, and the type of sound you want to control. This information will help you choose the most suitable soundproofing materials for your particular situation.
By installing dedicated soundproofing materials, you can further enhance the soundproofing capabilities of your room and create a more peaceful environment.
Step 5: Soundproofing the Walls
When it comes to soundproofing a room, the walls play a crucial role in blocking or reducing noise transmission. Sound can easily penetrate through thin walls, so taking steps to soundproof them can make a significant difference in creating a quieter space.
Here are some effective strategies for soundproofing walls:
- 1. Add Mass: Increase the mass of your walls by adding additional layers of drywall. Use a combination of different thicknesses of drywall, or consider using soundproof drywall that has sound-dampening properties.
- 2. Insulate the Walls: Install soundproofing insulation, such as mineral wool or cellulose, within the wall cavities. This helps absorb sound waves and reduces their transmission through the walls.
- 3. Use Decoupling Techniques: Decoupling involves creating a gap or airspace between the existing wall and a new layer of drywall. This helps to isolate the two surfaces and minimize sound transmission. One way to achieve this is by installing resilient channels or using a staggered stud construction method.
- 4. Apply Acoustic Panels: Install acoustic panels on the walls to absorb sound waves. These panels are made of dense materials that help reduce echo and reverberation.
- 5. Seal Wall Penetrations: Make sure to seal any gaps or cracks in the walls, such as around electrical outlets, light switches, and baseboards. Use caulking or weatherstripping to create an airtight seal and prevent sound leaks.
- 6. Hang Soundproof Curtains: Consider hanging soundproof curtains on the walls. These heavy and dense curtains can help absorb and block sound waves, reducing noise transmission.
It’s important to note that the effectiveness of soundproofing techniques may vary depending on the thickness and construction of your walls as well as the specific noise sources you’re dealing with. Combining multiple strategies can yield better results than relying on a single method.
Remember, soundproofing is a cumulative process, so it’s beneficial to address all aspects of the room, including the walls, floor, ceiling, windows, and doors, for maximum noise reduction.
By implementing these soundproofing strategies for your walls, you can significantly reduce noise transmission and create a more peaceful and quiet environment.
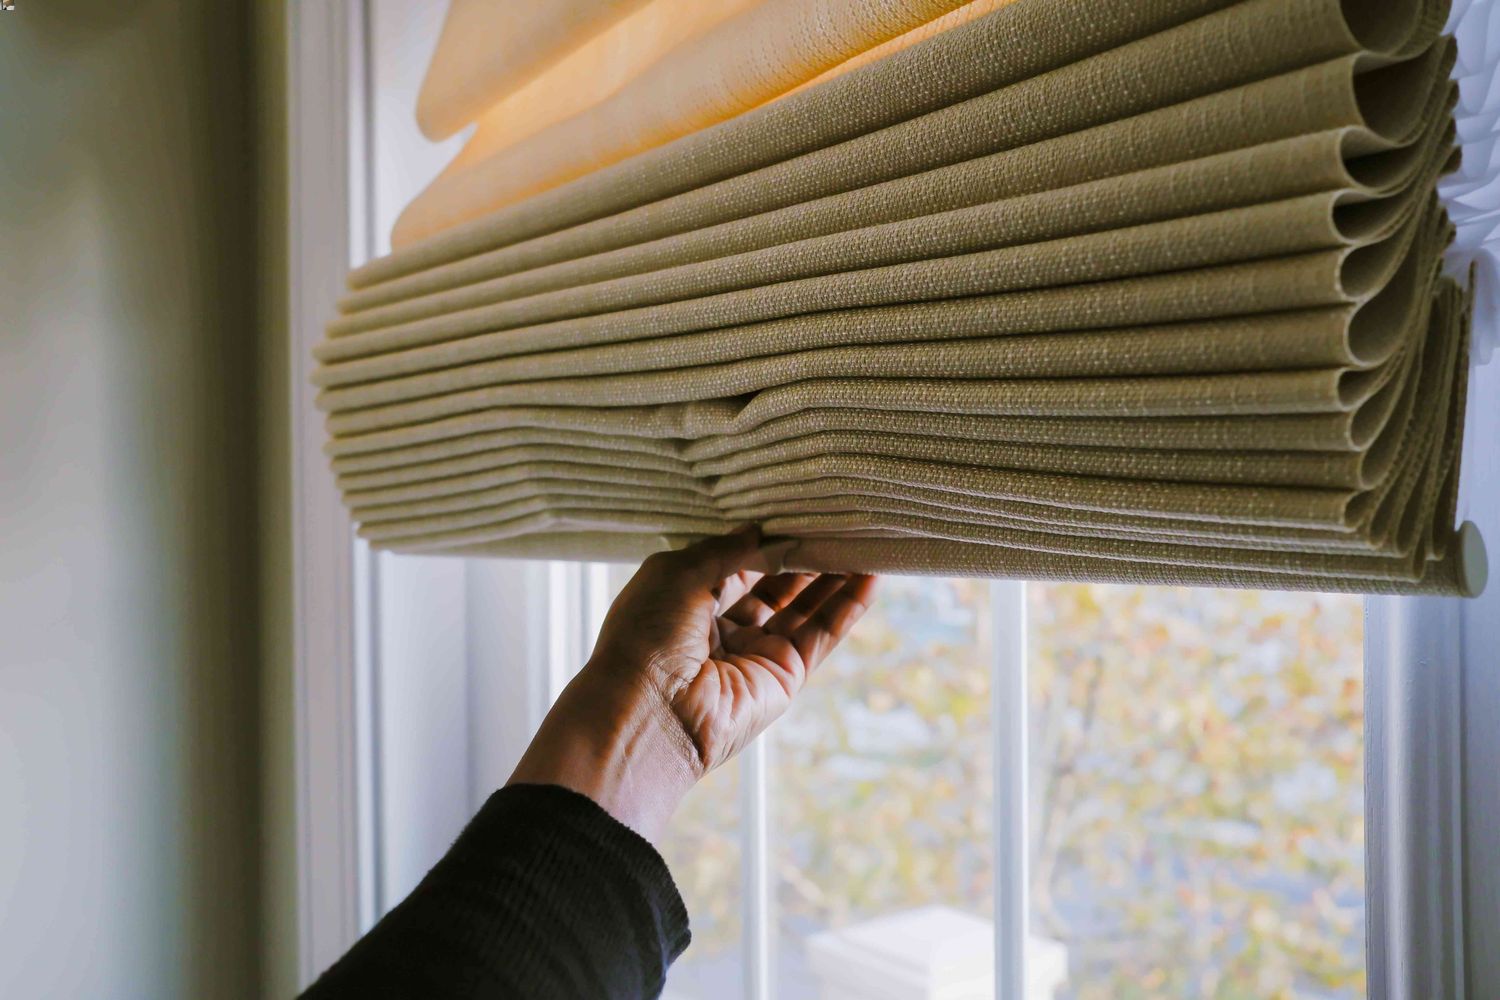
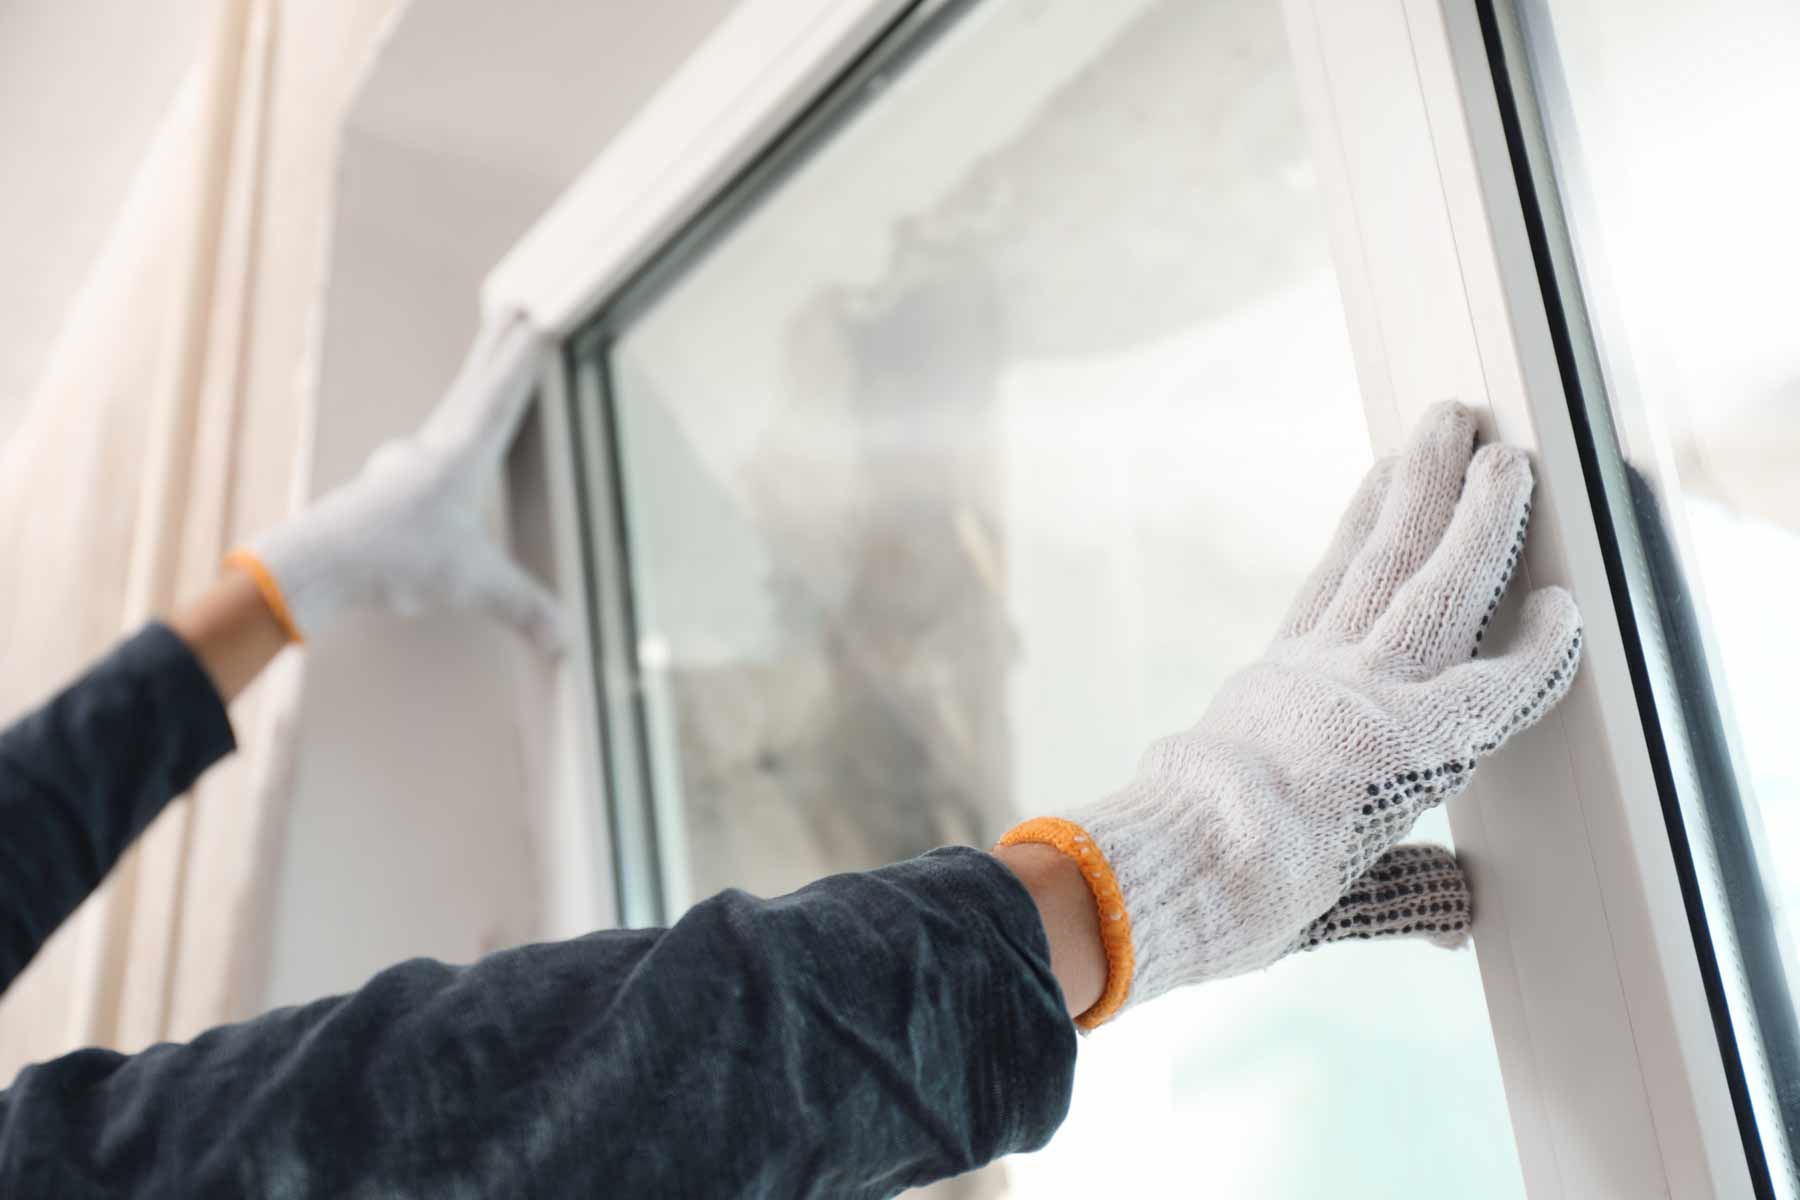
Step 6: Soundproofing the Windows
Windows are a common entry point for external noise, and soundproofing them can greatly improve the overall soundproofing effectiveness of a room. By employing various techniques, you can minimize noise transmission through windows and create a quieter indoor environment.
Here are several strategies for soundproofing windows:
- 1. Install Weatherstripping: Apply weatherstripping around the window frames to create a tight seal. This helps prevent sound from leaking through any gaps or cracks around the windows.
- 2. Double Glazing: Consider replacing single-pane windows with double-glazed or triple-glazed windows. The additional layers of glass, along with the insulating layer of air or gas between them, act as a barrier against sound transmission.
- 3. Use Soundproof Curtains: Hang thick, heavy curtains made of soundproofing materials to block and absorb sound waves. These curtains create an additional barrier that helps to reduce noise entering through the windows.
- 4. Apply Window Films: Apply soundproofing window films on the glass surfaces. These films are designed to reduce noise by adding a layer of mass to the windows, helping to block sound waves.
- 5. Install Window Inserts: Window inserts are secondary window panels that fit inside the existing window frame. They create an air gap between the existing window and the insert, providing additional insulation against noise.
- 6. Use Acoustic Caulk or Sealant: Apply acoustic caulk or sealant around the window frame where it meets the wall. This helps reduce sound leaks and improves the overall soundproofing performance of the windows.
Combining multiple soundproofing techniques can yield the best results. For instance, using double-glazed windows along with soundproof curtains can provide a higher level of noise reduction.
It’s important to note that while these soundproofing methods can significantly reduce noise transmission, they may also affect the natural light and ventilation coming through the windows. Consider finding a balance between soundproofing and maintaining desired lighting and airflow.
By soundproofing your windows, you can create a more peaceful and quieter indoor environment by minimizing the noise that enters through this vulnerable area.
Step 7: Soundproofing the Doors
Doors are another common source of noise infiltration in a room, as sound waves can easily pass through the gaps and thin materials. Soundproofing your doors can significantly reduce noise transmission and create a more peaceful and quiet environment.
Here are several effective strategies for soundproofing doors:
- 1. Weatherstripping: Apply weatherstripping around the door frame to create a tight seal. This helps to block sound from entering or exiting through any gaps or cracks around the door.
- 2. Door Sweep: Install a door sweep at the bottom of the door to seal the gap between the door and the floor. This prevents sound from traveling underneath the door.
- 3. Door Gaskets or Seals: Use door gaskets or seals around the edges of the door. These materials create a cushioning effect and enhance the soundproofing capabilities of the door.
- 4. Solid Core Door: Consider replacing hollow-core doors with solid core doors. Solid core doors are denser and provide better sound insulation compared to their lighter counterparts.
- 5. Soundproofing Blankets: Hang soundproofing blankets on the back of the door or on the door itself. These blankets help absorb sound waves and prevent them from passing through the door.
- 6. Acoustic Panels: Install acoustic panels on the door surface to absorb sound and reduce echo. These panels are made of dense materials and can effectively minimize noise transmission.
It’s also essential to ensure that the door fits properly within the door frame. If there are any gaps between the door and the frame, use a door soundproofing kit, which typically includes foam or rubber seals, to close the gaps and create a better seal.
Remember to address all sides of the door, including the top and sides, as sound can easily pass through these areas as well. By implementing these soundproofing techniques, you can significantly reduce noise transmission through your doors and create a more serene space.
Step 8: Soundproofing the Floors
Soundproofing the floors plays a crucial role in reducing noise transmission between different levels of a building or from outside sources. Whether you live in an apartment building or have noisy footsteps echoing in your home, soundproofing the floors can help create a quieter and more peaceful environment.
Here are several strategies for soundproofing floors:
- 1. Carpeting or Rugs: Adding carpets or area rugs to the floor can help absorb and dampen sound waves. The thicker the carpet or rug, the better it will be at reducing impact noise.
- 2. Underlayments: Use soundproof underlayments or floor mats underneath the carpet or laminate flooring. These materials provide an additional layer of sound insulation and help reduce noise transmission.
- 3. Resilient Soundproofing Materials: Install resilient soundproofing materials, such as rubber or cork, beneath the flooring. These materials help absorb vibrations and reduce impact noise from footsteps or other sources.
- 4. Floating Floors: Consider installing a floating floor system, where the flooring material is not directly attached to the subfloor. This helps to isolate the floor from the structure, reducing sound transmission.
- 5. Seal Floor Gaps: Fill in any gaps or cracks in the floor using acoustic sealant. This helps prevent sound from traveling through the gaps and improves overall soundproofing efficiency.
- 6. Acoustic Underlayment: Lay down an acoustic underlayment between the subfloor and your flooring material. This specialized material helps absorb impact noise and reduce sound transmission.
Keep in mind that the choice of flooring material can also impact soundproofing. Carpeting, cork, or rubberized flooring tend to be more effective at absorbing and reducing noise compared to hard surfaces like hardwood or tile.
It’s important to note that soundproofing the floors may not completely eliminate all noise. However, it can significantly reduce the impact of footsteps, vibrations, and airborne sounds, creating a more peaceful living environment.
By applying these soundproofing techniques to your floors, you can enjoy a quieter space and minimize noise transmission throughout your home.
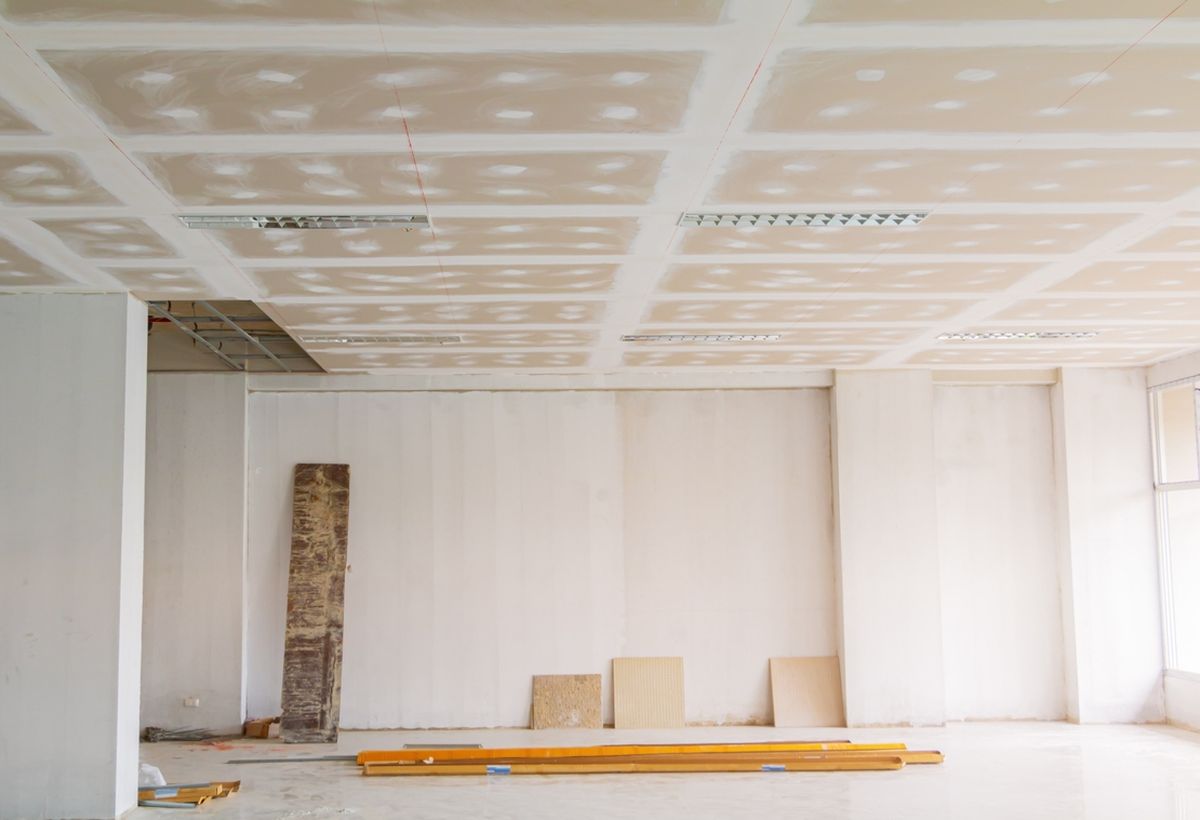
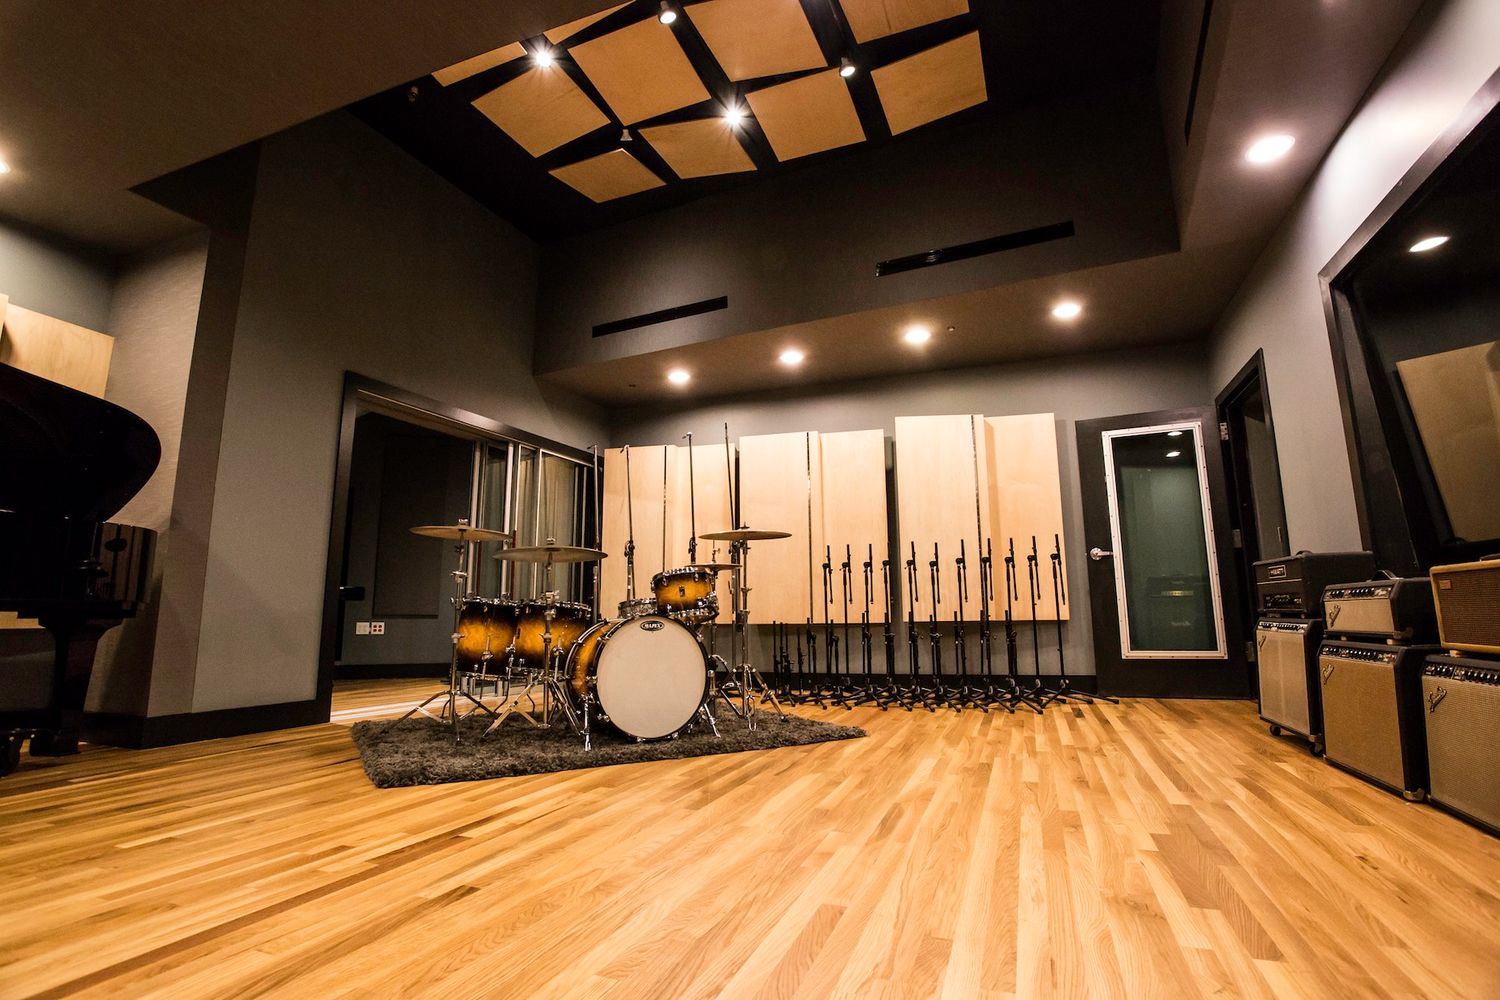
Step 9: Soundproofing the Ceiling
Soundproofing the ceiling is an essential step in reducing noise transmission from the floor above or from outside sources. By implementing effective soundproofing techniques, you can create a quieter and more tranquil environment within your space.
Here are several strategies for soundproofing the ceiling:
- 1. Acoustic Insulation: Install acoustic insulation in the ceiling to absorb sound waves. Materials like mineral wool or fiberglass batts are effective in reducing noise transmission through the ceiling.
- 2. Resilient Channels: Use resilient channels to hang drywall. These metal strips create a gap between the drywall and the ceiling, reducing sound vibrations and minimizing noise transmission.
- 3. Mass-Loaded Vinyl: Install mass-loaded vinyl (MLV) in the ceiling for added mass and density. MLV is a flexible material that effectively blocks sound waves and reduces noise transmission.
- 4. Double-Layered Drywall: Consider adding an additional layer of drywall to the ceiling. Using two layers with an air gap in between can help improve sound insulation and reduce noise penetration.
- 5. Acoustic Ceiling Panels: Install acoustic ceiling panels to absorb sound and reduce echo. These panels are designed to trap and dissipate sound waves, improving the overall acoustic performance of the room.
- 6. Seal Cracks and Gaps: Use acoustic sealant to fill in any cracks or gaps in the ceiling. This helps prevent sound leakage and improves the overall soundproofing efficiency.
When soundproofing the ceiling, it’s important to consider the impact on the ceiling height and aesthetics of the space. Some methods, like resilient channels and double-layered drywall, may require more space and may not be suitable for all situations.
Additionally, if noise is coming from above, it may be beneficial to address the source of the noise as well. This could involve addressing noisy neighbors, installing sound-absorbing materials on the floor above, or creating acoustic barriers to block sound transmission.
By implementing these soundproofing techniques for the ceiling, you can effectively reduce noise transmission from above and create a more peaceful and quiet atmosphere within your room.
Step 10: Controlling Vibrations
In addition to addressing airborne and impact noise, controlling vibrations is an essential step in comprehensive soundproofing. Vibrations can be transmitted through various surfaces, such as walls, floors, and ceilings, leading to a significant increase in noise levels. By implementing strategies to control vibrations, you can further enhance the effectiveness of your soundproofing efforts.
Here are several techniques for controlling vibrations:
- 1. Use Vibration Isolation Pads: Place vibration isolation pads or rubber mats beneath heavy appliances, such as washing machines or speakers. These pads help absorb vibrations and prevent them from transferring to surrounding surfaces.
- 2. Install Decoupled Structures: Decouple walls, floors, and ceilings to minimize vibrations. This involves creating a gap or using resilient materials to separate surfaces and inhibit the transmission of vibration.
- 3. Opt for Floating Floors: Consider installing a floating floor system, which uses resilient materials to isolate the flooring from the structure. This helps reduce vibrations caused by footsteps or other impacts.
- 4. Apply Damping Compound: Use damping compound, such as Green Glue, between layers of building materials to dissipate vibrations. This compound converts vibration energy into heat, effectively reducing noise transmission.
- 5. Tighten Loose Hardware: Check for loose screws, bolts, or other hardware in your space. Tighten these components to reduce vibrations that may be amplified and contribute to excess noise.
- 6. Consider Mass and Density: Increasing the mass and density of surfaces can help control vibrations. Add additional layers of dense materials, such as drywall or mass-loaded vinyl, to absorb and dampen vibrations.
Vibration control is particularly important if you have appliances, machinery, or entertainment systems in your space that generate vibrations. By implementing these techniques, you can effectively minimize vibrations and reduce the resulting noise.
Remember to assess your specific situation and identify the sources of vibrations that are contributing to the overall noise levels. By addressing vibrations, you can achieve a more comprehensive and effective soundproofing solution.
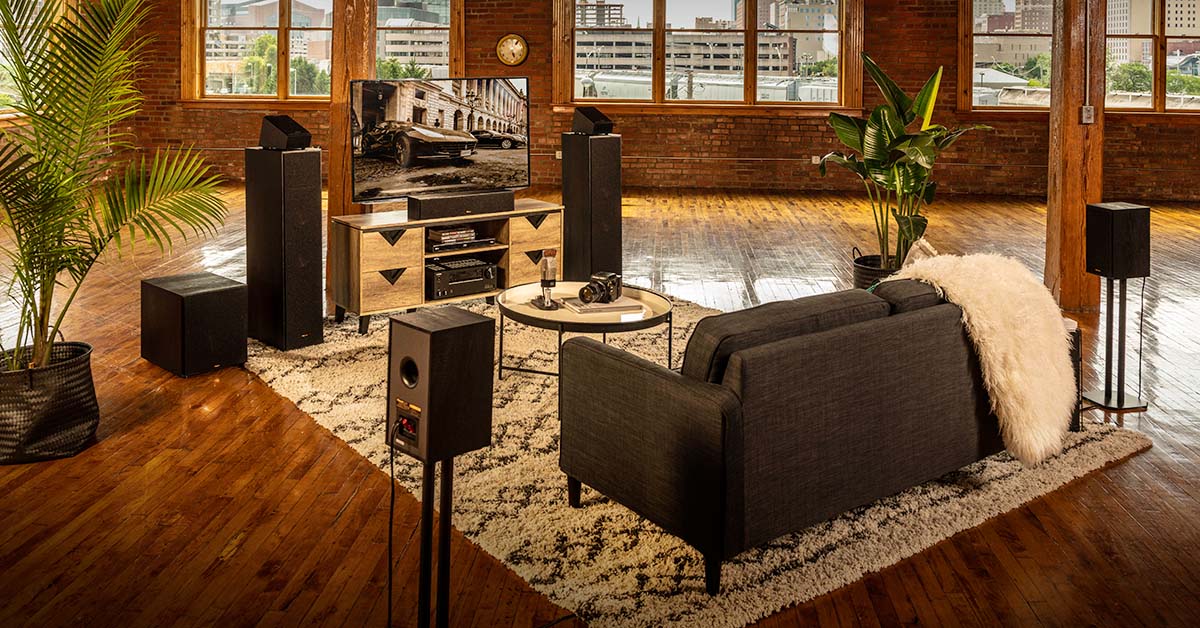
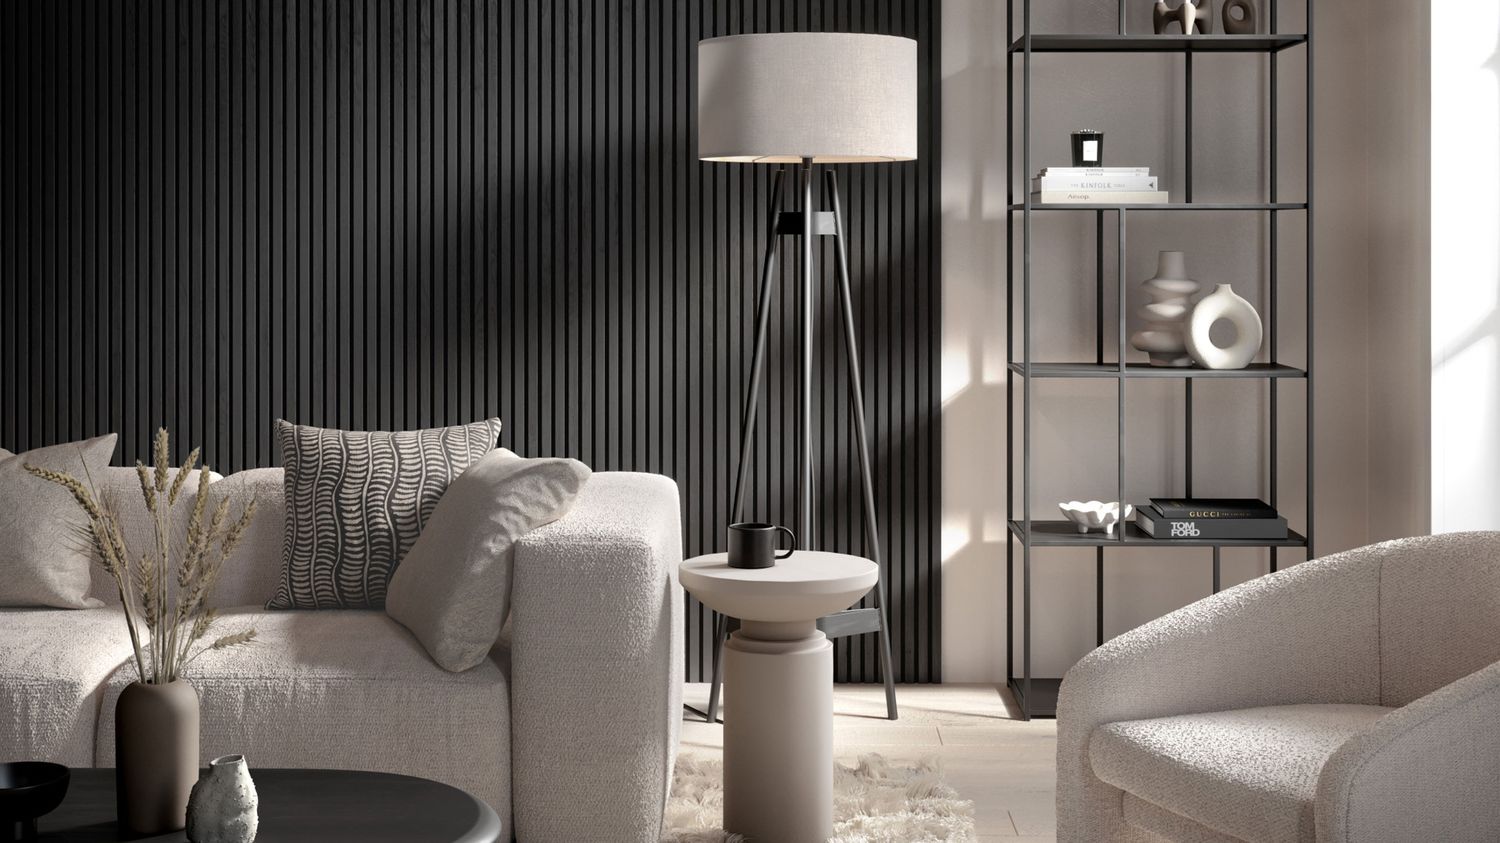
Step 11: Soundproofing with Decorative Elements
While the primary focus of soundproofing is to reduce noise transmission, it doesn’t mean you have to sacrifice aesthetics. Incorporating decorative elements that also have sound-absorbing properties can be a creative and effective way to enhance the soundproofing performance of your room.
Here are several decorative elements that can contribute to soundproofing:
- 1. Acoustic Panels: Acoustic panels come in various designs and colors, making them a versatile option for both soundproofing and enhancing the aesthetics of a room. They effectively absorb sound while adding visual interest to the walls.
- 2. Textured Fabrics: Incorporating textured fabrics in the form of curtains, drapes, or wall hangings can help reduce sound reflections and echoes. Fabrics with a thicker weave or texture provide better sound absorption.
- 3. Wall Art and Decorations: Hanging artwork or decorations on the walls not only adds visual appeal but also helps break up sound waves and reduce reverberation. Consider using softer materials or acoustic panels behind the artwork for better sound absorption.
- 4. Furniture and Upholstery: Choose furniture pieces with thick and plush upholstery, as they can absorb and dampen sound. Avoid hard and reflective surfaces, as they tend to reflect sound waves and contribute to more noise in the room.
- 5. Area Rugs and Carpets: Adding area rugs or carpets not only enhances the aesthetic appeal of a room but also helps absorb impact noise and reduce sound transmission through the floor. Opt for thicker and denser materials for better soundproofing properties.
- 6. Bookshelves and Bookcases: Filling bookshelves or bookcases with books can effectively act as both a decorative element and a sound-absorbing feature. The presence of books helps break up sound waves and minimize echo in the room.
By strategically incorporating these decorative elements, you can enhance the overall soundproofing performance of your room while creating an inviting and visually appealing space.
Remember that while these decorative elements contribute to sound absorption, they may not serve as the primary method of soundproofing. It’s important to combine them with other soundproofing techniques, such as insulation, sealing, and using dedicated soundproofing materials, for optimal noise reduction.
With careful consideration and creativity, you can achieve a harmonious blend of soundproofing and aesthetics in your space.
Conclusion
Soundproofing a room is a worthwhile investment for creating a peaceful and quiet environment, whether you’re dealing with external noise, internal noise, or the need for professional sound control. By following the step-by-step guide outlined in this article, you can significantly reduce noise transmission and enjoy a more tranquil living or working space.
Starting with assessing the noise sources and sealing air gaps, you can fortify your room against unwanted noise. Adding mass and density to surfaces, such as walls and floors, helps block and absorb sound waves, while installing dedicated soundproofing materials further enhances noise reduction.
Addressing specific areas like windows, doors, and ceilings is crucial for comprehensive soundproofing. Sealing gaps, installing double glazing, and using sound-absorbing materials significantly minimize noise infiltration. Furthermore, controlling vibrations and incorporating decorative elements with sound-absorbing properties add an extra layer of soundproofing effectiveness.
It’s important to remember that achieving absolute silence may not always be possible, but by implementing the techniques shared in this guide, you can create a significant improvement in reducing noise and enjoying a quieter environment.
Soundproofing not only enhances comfort and privacy within your space but also improves sleep quality, concentration, and overall well-being. Whether you’re seeking a peaceful bedroom, a productive home office, or a professional recording studio, soundproofing techniques can make a notable difference.
Lastly, it’s valuable to tailor your soundproofing approach to your specific needs and situation. Consider factors such as the type and frequency of noise, the size of the room, and your budget. Consulting with soundproofing professionals or conducting further research can provide additional insights and guidance.
By following these soundproofing steps and implementing effective techniques, you can create a sanctuary from unwanted noise and enjoy a quieter, more enjoyable living or working space.