Home>Production & Technology>Stereo>How Long Does It Take To Install A Car Stereo
Stereo
How Long Does It Take To Install A Car Stereo
Modified: January 22, 2024
Learn how long it takes to install a car stereo and enhance your driving experience. Install a new stereo system quickly and efficiently.
(Many of the links in this article redirect to a specific reviewed product. Your purchase of these products through affiliate links helps to generate commission for AudioLover.com, at no extra cost. Learn more)
Table of Contents
Introduction
A car stereo is an essential component of any vehicle, providing entertainment and connectivity on the go. Whether you enjoy listening to music, podcasts, or audiobooks during your commute, having a high-quality car stereo system can significantly enhance your driving experience. However, if you’re looking to upgrade or replace your car stereo, you might be wondering how long the installation process will take.
The time it takes to install a car stereo can vary depending on several factors, including the complexity of the installation, your experience with car electronics, and the type of vehicle you have. While some installations may be relatively straightforward and take a few hours, others may require more time and expertise.
In this article, we will explore the various factors that can affect the installation time of a car stereo. We’ll discuss the steps involved in removing the old stereo, wiring and connections, mounting the new stereo, and testing and finalizing the installation. By understanding these factors, you’ll have a better idea of what to expect when it comes to installing a new car stereo.
Factors Affecting Installation Time
Several factors can influence the installation time of a car stereo. It’s important to consider these factors before starting the installation process to ensure a smooth and efficient experience. Here are some key factors that can affect the time it takes to install a car stereo:
- Experience: Your level of experience with car electronics can play a significant role in installation time. If you’re familiar with electrical systems and have previous experience installing car stereos, you may be able to complete the installation more quickly. On the other hand, if you’re a beginner, it may take you longer to understand the wiring and connections required.
- Complexity of the Installation: The complexity of the installation can vary depending on the features and functionality of the new car stereo. For example, if you’re installing a basic single-DIN stereo without any additional components, the installation process may be straightforward and relatively quick. However, if you’re installing a double-DIN stereo with additional features like GPS navigation, Bluetooth connectivity, or a backup camera, it may require more time and effort to complete the installation.
- Vehicle Type: The type of vehicle you have can also impact the installation time. Some vehicles have easily accessible stereo systems, with wiring and connectors that are relatively simple to work with. In contrast, other vehicles may have more complex dashboards or integrated infotainment systems, requiring additional time and expertise to remove the old stereo and install the new one.
- Additional Components: If you’re planning to install additional components along with the car stereo, such as amplifiers, subwoofers, or speaker upgrades, it will naturally increase the installation time. These additional components require extra wiring and configuration, adding complexity to the installation process.
- Tools and Equipment: Having the necessary tools and equipment readily available can help streamline the installation process. If you have the right tools, such as wire cutters, crimpers, electrical tape, and panel removal tools, you can work more efficiently and minimize potential delays.
By considering these factors, you can better estimate the time required to install a new car stereo. It’s important to allocate enough time for the installation to ensure that you can complete the process without rushing or encountering unexpected challenges along the way.
Removing the Old Stereo
Before you can install a new car stereo, you’ll need to remove the old one. This step involves disconnecting the wiring harness, removing any mounting screws or brackets, and carefully taking out the old stereo from the dashboard. Here’s a breakdown of the process:
- Gather the necessary tools: To remove the old stereo, you’ll typically need a set of panel removal tools, a screwdriver or socket wrench, and possibly wire strippers or crimpers depending on your specific vehicle and stereo model.
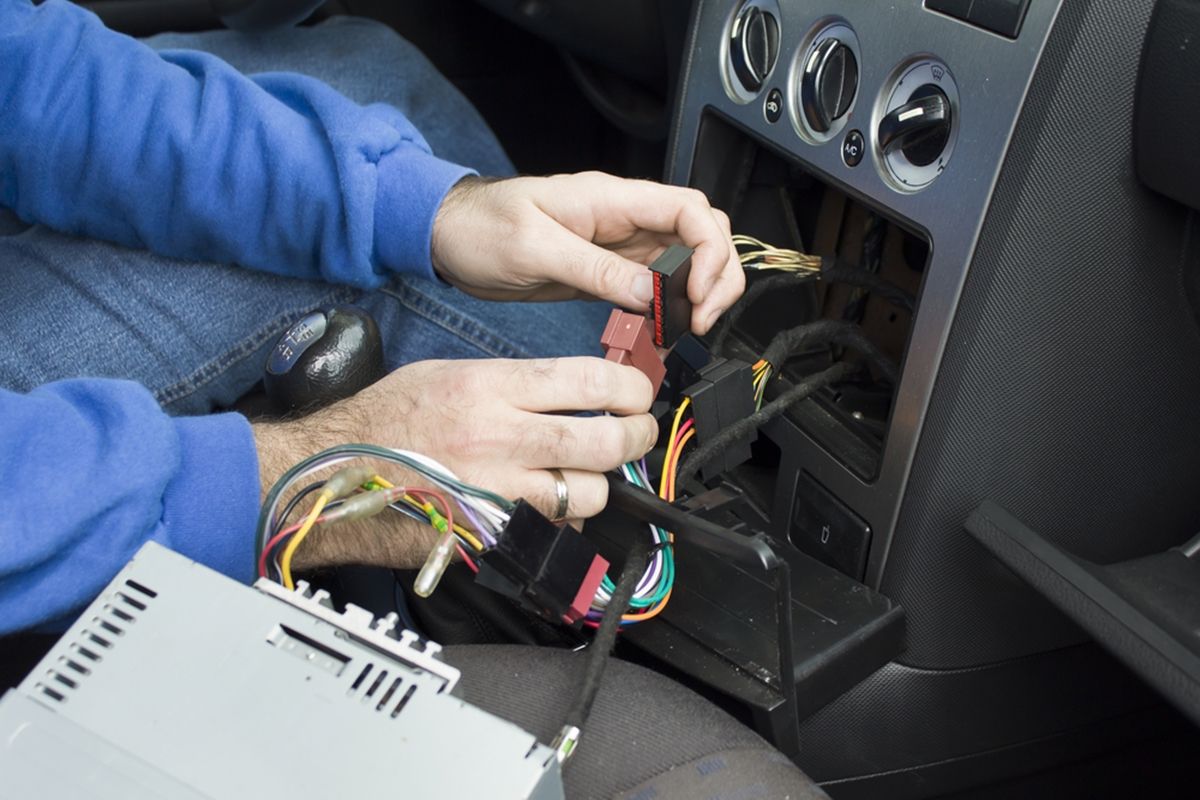
- Disconnect the wiring harness: Start by disconnecting the wiring harness that connects the stereo to the vehicle’s electrical system. This harness is typically located at the back of the stereo and can be disconnected by pressing a release tab or using a small flat-head screwdriver to gently pry it loose.
- Remove any mounting screws or brackets: Depending on your vehicle and stereo model, there may be mounting screws or brackets securing the stereo in place. Use a screwdriver or socket wrench to carefully remove these screws or brackets, taking care not to strip them or damage any surrounding components.
- Take out the old stereo: Once the wiring harness and mounting screws or brackets are removed, you can carefully pull the old stereo out of the dashboard. Be cautious not to force it out or damage any wiring or connectors behind the stereo.
The time it takes to remove the old stereo can vary depending on several factors, including the accessibility of the wiring and mounting components, as well as your experience with panel removal and electrical disconnection. On average, this step can take anywhere from 15 minutes to an hour.
It’s essential to take your time during this step to avoid any damage to the vehicle’s interior or electrical system. In some cases, you may need to consult the vehicle’s manual or seek professional assistance if you encounter any difficulties or complex wiring configurations.
Wiring and Connections
Once the old stereo has been successfully removed, the next step is to wire and connect the new car stereo. This step involves connecting the wiring harness, antenna, and any additional components, such as amplifiers or subwoofers. Here’s a detailed breakdown of the process:
- Prepare the wiring harness: If your new car stereo came with a wiring harness, you’ll need to connect it to the harness that matches the vehicle’s electrical system. This step may require matching wire colors and using crimp connectors or electrical tape to secure the connections.
- Connect the antenna: Attach the antenna cable from the vehicle to the antenna input on the back of the new stereo. Ensure that it is securely connected to maintain a strong radio signal.
- Additional component connections: If you’re installing amplifiers, subwoofers, or other additional components, you’ll need to wire them according to the manufacturer’s instructions. This may involve connecting RCA cables, power cables, and speaker wires to the appropriate ports on the new stereo and the additional components.
- Secure the connections: Once all the wiring connections are made, it’s important to secure them properly. Use electrical tape, zip ties, or wire loom to ensure that the wires are neatly organized and protected from potential damage or interference.
The time required for this step can vary depending on the complexity of the wiring configurations and the number of additional components being installed. On average, wiring and connection can take anywhere from 30 minutes to a few hours.
During this step, it’s crucial to double-check all the connections and ensure that they are secure. Loose or improperly connected wires can cause issues with the functionality of the new stereo or even pose a safety hazard. If you’re unsure about any wiring or connection, it’s always recommended to consult the installation manual or seek professional assistance.
Mounting the New Stereo
After the wiring and connections are complete, the next step is to mount the new car stereo securely in the dashboard. Proper mounting ensures stability and prevents any vibrations or movement while driving. Here’s a step-by-step guide on how to mount the new stereo:
- Select the appropriate mounting kit: Depending on your vehicle’s make and model, you may need a mounting kit to install the new stereo in the dashboard. This kit includes a faceplate or trim that matches your vehicle’s interior and helps secure the stereo in place. Follow the instructions provided with the mounting kit to ensure proper installation.
- Attach the mounting brackets: If your mounting kit includes brackets, attach them to both sides of the new stereo. These brackets will align with the mounting holes in the dashboard and help secure the stereo in place. Use the appropriate screws or bolts to fasten the brackets securely.
- Insert the new stereo into the dashboard: Carefully slide the new stereo with the attached brackets into the dashboard opening. Align the mounting holes on the stereo with the holes in the dashboard. Ensure that the stereo fits snugly and is level with the dashboard surface.
- Fasten the new stereo: Once the stereo is properly aligned, use the screws or bolts provided with the mounting kit to secure it to the dashboard. Tighten the screws or bolts just enough to hold the stereo in place without over-tightening, which can cause damage.
- Test the stereo: After the new stereo is securely mounted, it’s important to test its functionality. Verify that all the buttons, knobs, and touchscreen (if applicable) work properly. Check that the audio outputs, radio reception, and any other features are functioning as intended.
The time required for mounting the new stereo can vary depending on the complexity of the mounting kit and the accessibility of the mounting holes in the dashboard. On average, this step can take anywhere from 30 minutes to an hour.
It’s crucial to follow the instructions provided with the mounting kit and ensure that the stereo is securely fastened. Loose or improperly mounted stereos can rattle or shift while driving, resulting in a poor audio experience and potential damage to the dashboard or surrounding components.
Testing and Finalizing the Installation
After mounting the new car stereo, the final step is to test its functionality and ensure that everything is working as expected. This step includes testing audio playback, radio reception, and any additional features or settings. Here’s what you should do:
- Power on the stereo: Turn on the car’s ignition and power on the new stereo. Make sure it boots up successfully and displays the appropriate screen or menu.
- Check audio playback: Test the audio playback by playing music from various sources, such as AM/FM radio, CDs, USB drives, Bluetooth streaming, or auxiliary input. Verify that the sound is clear and balanced through all the speakers.
- Tune to radio stations: Test the radio reception by tuning into different radio stations. Ensure that the stereo can pick up signals clearly without any static or interference.
- Test additional features: If your new stereo has additional features like Bluetooth connectivity, GPS navigation, or smartphone integration, test these features to ensure they function correctly.
- Adjust settings: Explore the stereo’s settings menu to customize preferences, adjust audio settings, and configure any additional options according to your preferences.
The time required for testing and finalizing the installation can vary depending on your familiarity with the new stereo’s features and settings. On average, this step can take anywhere from 30 minutes to an hour.
Take the time to familiarize yourself with the new stereo’s controls and settings, and make any necessary adjustments to optimize your audio experience. If you encounter any issues or difficulties during the testing process, refer to the stereo’s user manual or seek professional assistance for troubleshooting.
Once you’re satisfied with the performance and functionality of the new stereo, you can finalize the installation by reassembling any panels or trim pieces that were removed during the process. Double-check that all the wiring connections are secure, and ensure that the stereo is firmly mounted in the dashboard.
With the installation completed and the stereo fully tested, you can now enjoy your upgraded car audio system and make the most of the enhanced entertainment and connectivity options it provides.
Conclusion
Installing a new car stereo can be a rewarding project that enhances your driving experience with improved audio quality and advanced features. However, it’s essential to understand the factors that can affect the installation time and prepare accordingly. By considering factors such as experience, the complexity of the installation, vehicle type, additional components, and the availability of tools, you can estimate the time required and ensure a successful installation.
Remember that the time it takes to install a car stereo can vary depending on individual circumstances, including your familiarity with car electronics, the specific model of the stereo, and any additional components you choose to install. Therefore, it’s crucial to allocate sufficient time and avoid rushing through the process to maintain quality and accuracy.
Following a systematic approach, starting with removing the old stereo, wiring and connections, mounting the new stereo, and testing and finalizing the installation, will help you complete the installation smoothly and efficiently. Take your time during each step to ensure proper connections, secure mounting, and thorough testing of the stereo’s functionality.
If you encounter any challenges or difficulties during the installation process, it’s always recommended to refer to the stereo’s user manual, consult online resources, or seek professional assistance. Proper installation ensures optimal performance, longevity, and safety.
Once the installation is complete and the new car stereo is functioning as intended, you can enjoy an upgraded audio experience and take advantage of the various entertainment and connectivity options available to you while on the road.
So, if you’re ready to transform your vehicle’s audio system, gather the necessary tools, select a high-quality car stereo that meets your needs, and follow the steps outlined in this article. With some patience, careful planning, and attention to detail, you’ll be cruising in style with a new and improved car audio system in no time.