Home>Production & Technology>Stereo>How To Connect A Car Stereo To A House Plug

Stereo
How To Connect A Car Stereo To A House Plug
Modified: January 22, 2024
Learn how to connect a car stereo to a house plug and enjoy your favorite tunes at home. Step-by-step guide for hassle-free stereo connectivity.
(Many of the links in this article redirect to a specific reviewed product. Your purchase of these products through affiliate links helps to generate commission for AudioLover.com, at no extra cost. Learn more)
Table of Contents
Introduction
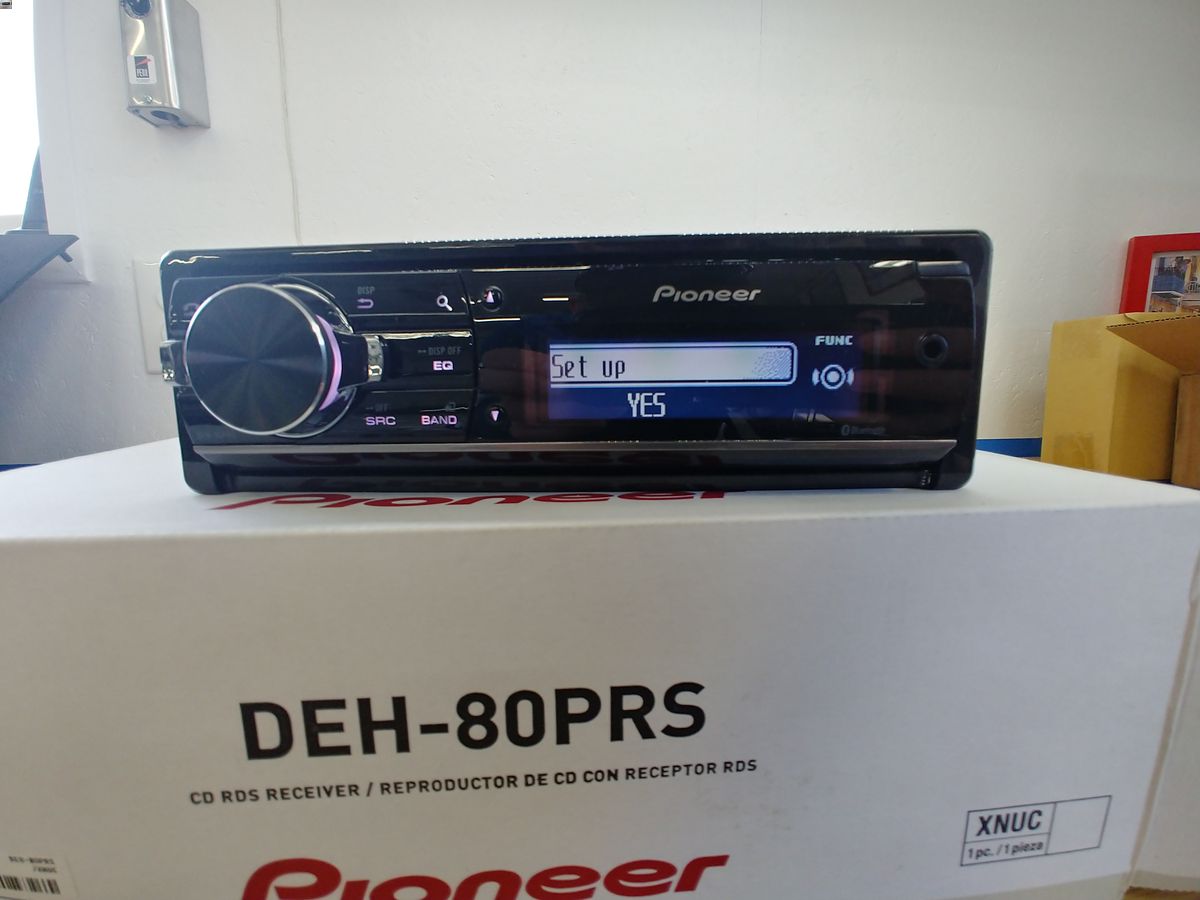
Connecting a car stereo to a house plug may seem like an unusual idea, but there are times when it can come in handy. Perhaps you have an old car stereo lying around and want to repurpose it for home use, or maybe you’re in a situation where you need a portable audio solution but can only access a house plug. Whatever the reason may be, with the right knowledge and materials, you can make it happen.
Before we dive into the technical steps, it’s important to understand a few key concepts. Car stereos typically operate on 12-volt DC power, while house plugs provide 120-volt AC power. This difference in voltage means that simply plugging a car stereo into a house outlet won’t work; you’ll need to make some adjustments to safely power the device.
In this guide, we’ll walk you through the process of connecting a car stereo to a house plug. We’ll cover everything from understanding the power requirements to gathering the necessary materials and performing the wiring. By the end, you’ll have a functional setup that allows you to enjoy your car stereo’s audio capabilities in the comfort of your home.
Before we get started, it’s essential to note that working with electrical components can be dangerous if not done correctly. Always exercise caution, follow safety guidelines, and consult a professional if you’re unsure about any step of the process.
Understanding the Power Requirements
Before attempting to connect a car stereo to a house plug, it’s crucial to understand the power requirements of both the car stereo and the house plug. This knowledge will help you ensure compatibility and make the necessary adjustments for a safe and functioning setup.
Car stereos typically operate on 12-volt DC power, which is significantly lower than the 120-volt AC power supplied by house plugs. Simply plugging a car stereo into a house outlet without any modifications can damage the stereo and pose a safety hazard.
Fortunately, there are ways to safely bridge this power gap. One popular option is to use a power inverter, which converts the AC power from the house plug into the DC power that car stereos require. Power inverters come in various sizes and wattages, so it’s important to choose one that can handle the power demands of your car stereo.
When selecting a power inverter, consider factors such as the stereo’s power consumption, the number of devices you plan to connect, and any additional features you may require. It’s advisable to choose an inverter that has a higher wattage rating than the total power consumption of your car stereo to ensure stable and reliable operation.
Some car stereos may also require additional accessories, such as a power supply module or a voltage regulator, to function properly with a house plug. These accessories help regulate the voltage and protect the stereo from potential power surges or fluctuations.
It’s essential to carefully read the specifications of your car stereo and consult the manufacturer’s guidelines to ensure compatibility with a power inverter or any additional accessories. Additionally, be mindful of the power limitations of your house plug and ensure that it can support the power demands of your car stereo and other connected devices.
Once you have a clear understanding of the power requirements and the necessary equipment, you’re ready to gather the materials for connecting your car stereo to a house plug.
Gathering the Required Materials
Before you can begin connecting your car stereo to a house plug, you’ll need to gather a few essential materials. Having everything you need on hand will make the process smoother and more efficient. Here are the key items you’ll need:
- Car Stereo: Make sure you have a functional car stereo that you want to connect to a house plug. Check its power requirements and any additional accessories needed for compatibility.
- Power Inverter: Look for a power inverter that can convert the AC power from the house plug to the DC power required by your car stereo. Consider the wattage rating and features to ensure it meets your stereo’s power demands.
- AC Power Cord: You’ll need an AC power cord to connect the power inverter to the house plug. Ensure that it’s long enough to reach the nearest outlet comfortably.
- Wire Cutters and Strippers: These tools will come in handy for cutting and stripping the necessary wires during the wiring process.
- Electrical Tape: Electrical tape is essential for securing and insulating the connections. Choose a high-quality electrical tape to ensure durability and safety.
- Wire Connectors or Soldering Iron: Depending on your preference and skill level, you can use wire connectors or a soldering iron to securely join the necessary wires.
Additionally, make sure you have a safe and well-ventilated workspace to perform the wiring. It’s important to work on a stable surface and keep any flammable materials away from the area.
By gathering these materials in advance, you’ll have everything you need to connect your car stereo to a house plug. With the materials on hand, you can proceed to the next step of the process: disconnecting the car stereo.
Disconnecting the Car Stereo
Before you can connect your car stereo to a house plug, you’ll first need to disconnect it from your vehicle. This step is necessary to ensure a safe and successful transition to a home setup. Here’s how you can disconnect the car stereo:
- Gather the necessary tools: Depending on your car’s make and model, you may need specific tools to remove the stereo unit. Common tools include a trim removal tool, screwdriver, or socket wrench.
- Consult the car’s manual: Different car models have varying procedures for removing the stereo unit. Refer to your car’s manual or search for model-specific instructions online to ensure the correct removal process.
- Remove any trim or panels: In many cases, you’ll need to remove surrounding trim pieces or panels to access the stereo unit. Use the appropriate tools to carefully remove these components without causing any damage.
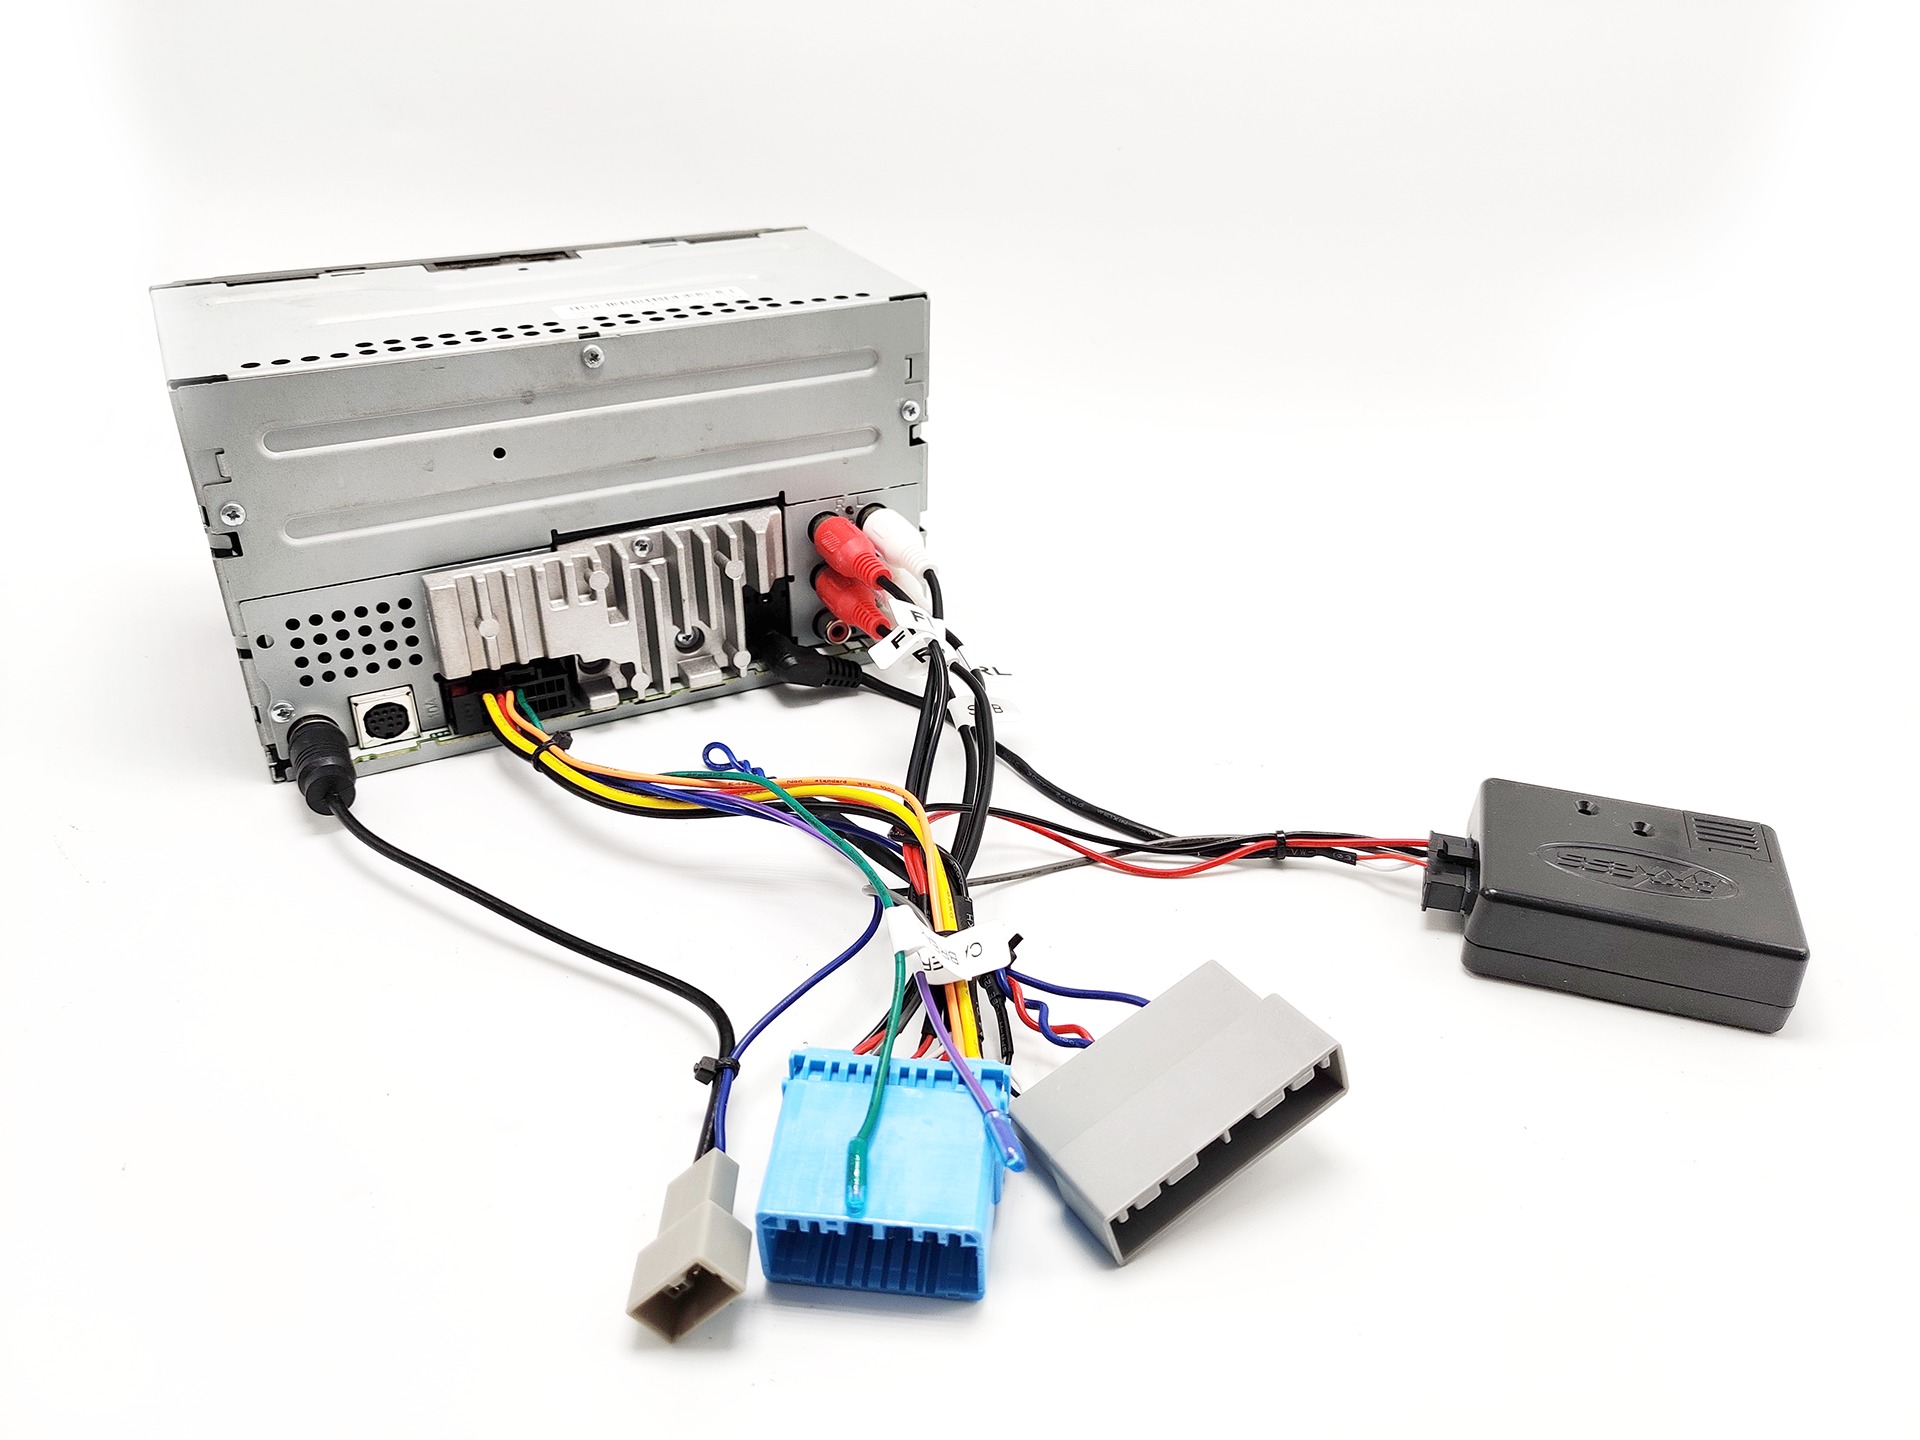
- Disconnect the wiring harness: The car stereo is connected to the wiring harness, which provides power and audio signals. Locate the wiring harness and carefully disconnect it by gently pulling apart the connector. Take note of the specific connections and their colors for future reference.
- Remove the mounting screws: The stereo unit is usually secured to the dash or mounting bracket with screws. Use the appropriate tools to remove these screws, taking care not to drop them into the interior of the vehicle.
- Slide out the stereo unit: Once the screws are removed, gently slide out the stereo unit from its mounting location. Be cautious not to pull or twist any wires during this process to avoid damaging the wiring harness.
Once the car stereo is disconnected from your vehicle, you’re ready to move on to the next step: wiring the car stereo to a house plug.
Wiring the Car Stereo to a House Plug
Now that you have your car stereo disconnected from your vehicle, it’s time to wire it to a house plug. This process involves connecting the power inverter to the car stereo and the house plug to provide the necessary power. Follow these steps to wire your car stereo to a house plug:
- Locate a suitable position: Find a safe and convenient location to place your car stereo. Make sure it’s a stable surface and provides easy access to the necessary connections.
- Connect the power inverter: Plug the AC power cord from the power inverter into a nearby house outlet. Ensure that the inverter is turned off before making any connections.
- Connect the power inverter to the car stereo: Depending on your power inverter model, it may have specific input connections for the car stereo. Follow the manufacturer’s instructions to make the appropriate connections. This typically involves using the provided cables to connect the DC output of the inverter to the power input of the car stereo.
- Secure the connections: Once the connections are made, use wire connectors or a soldering iron to securely join the wires. Insulate the connections with electrical tape to ensure safety and prevent any short circuits.
- Double-check the wiring: Take a moment to review the wiring connections to ensure everything is properly connected and insulated. This step is crucial to prevent any electrical hazards or damage.
It’s important to follow the manufacturer’s instructions for both the power inverter and the car stereo when making the connections. The specific wiring process may vary depending on the model and brand. If you’re unsure about any step, consult the manuals or seek professional assistance to ensure a safe and correct wiring setup.
Once the car stereo is successfully wired to the power inverter, you’re almost ready to test the connection. However, it’s crucial to perform a thorough check before powering on the system.
Checking the Connection
After wiring your car stereo to a house plug, it’s essential to perform a thorough check to ensure that all connections are secure and ready for use. This step will help prevent any potential issues or accidents when you power on the system. Here’s how you can check the connection:
- Inspect the wiring: Carefully examine all the wiring connections to make sure they are secure and properly insulated. Check for any loose connections, exposed wires, or signs of damage. If you notice any issues, address them before proceeding.
- Verify the power inverter settings: Ensure that the power inverter is set to the appropriate voltage and frequency for your region. Incorrect settings can lead to malfunctions or damage to your car stereo.
- Perform a functionality test: Connect a speaker or headphones to the car stereo and power on the system. Test the audio output to ensure it is working correctly. Adjust the volume and other settings as needed.
- Check for any unusual noise or interference: Listen carefully to the audio output for any unusual noise, distortion, or interference. These issues may indicate a faulty connection or improper wiring.
- Ensure input compatibility: If you plan to connect external devices, such as smartphones or MP3 players, make sure they are compatible with the car stereo’s audio input. Test the connections and verify that the audio signal is being properly received.
During the checking process, pay attention to any warning signs or indications of problems. If you encounter any issues, recheck the connections, consult the manuals, and consider seeking professional assistance if necessary. It’s essential to address any issues before regular use to ensure a safe and optimal audio experience.
Once you’re satisfied that the connection is secure and functioning properly, you’re ready to move on to the final step: testing the car stereo.
Testing the Car Stereo
After verifying the connection and ensuring everything is in order, it’s time to test your car stereo to ensure it’s functioning as expected. Testing the system will help you gauge the audio quality and make any necessary adjustments. Follow these steps to test your car stereo:
- Select a suitable audio source: Choose an audio source, such as a CD, USB drive, or auxiliary device, to test the car stereo. Ensure that the source is compatible and properly connected to the stereo.
- Turn on the car stereo: Power on the car stereo and check for any indicators or display lights that confirm it is functioning.
- Play audio: Start playing audio from the selected source and listen for the sound output. Adjust the volume to a comfortable level.
- Check audio quality: Listen attentively to the audio output and evaluate the sound quality. Pay attention to clarity, balance, and any distortion or noise. Make note of any issues or adjustments you may need to address.
- Test different features and settings: Explore the various features and settings of the car stereo, such as equalizers, presets, and audio modes. Test these features to ensure they are functioning correctly and adjust them to your desired preferences.
- Test connectivity: If you have connected external devices, test their functionality with the car stereo. Verify that they are recognized and able to play audio through the system.
- Make necessary adjustments: If you encounter any audio issues or find that certain settings need tweaking, make the necessary adjustments to improve the sound quality. Refer to the car stereo’s manual for guidance on specific adjustments.
During the testing phase, take the time to listen to different genres of music, as well as audio from different sources, to get a comprehensive understanding of the car stereo’s performance. You may also want to test the system at different volume levels to ensure consistent audio quality throughout the range.
If you encounter any significant issues or find that the audio quality is not satisfactory, double-check your wiring connections and consult the car stereo’s manual for troubleshooting tips. In some cases, seeking professional assistance may be necessary to address more complex issues.
Once you’re satisfied with the functionality and audio quality of your car stereo, you can begin enjoying your favorite music and audio content in the comfort of your home.
Conclusion
Connecting a car stereo to a house plug may not be a common practice, but with the right knowledge and equipment, it is certainly possible. By understanding the power requirements, gathering the necessary materials, disconnecting the car stereo from your vehicle, and properly wiring it to a house plug, you can create a functional setup that allows you to enjoy your car stereo’s audio capabilities at home.
Throughout the process, it’s crucial to prioritize safety and follow guidelines to prevent electrical hazards. Always double-check your connections, insulate them properly, and consult professionals or manufacturer’s instructions if needed.
By adhering to the steps outlined in this guide, you’ll be able to safely and effectively connect your car stereo to a house plug. Remember to test the connection thoroughly and make any adjustments necessary to ensure optimal audio quality.
Connecting a car stereo to a house plug can open up new possibilities for using your car stereo beyond the confines of your vehicle. Whether you want to repurpose an old car stereo or need a portable audio solution, this process allows you to enjoy your favorite music and audio content in a different setting.
While connecting a car stereo to a house plug requires some technical knowledge and careful execution, it can be a rewarding DIY project. With the right approach, you can create a unique audio experience that enhances your home entertainment setup.
Remember, if you ever feel unsure or uncomfortable with any aspect of the process, it’s always best to consult professionals or seek expert advice. Following safety guidelines and taking necessary precautions will ensure a successful and enjoyable outcome.
So go ahead, gather the materials, disconnect your car stereo, wire it to a house plug, and enjoy the immersive audio experience that your car stereo now brings to your home environment!

