Home>Devices & Equipment>Earbuds>Why Are My Earbuds Connecting Separately

Earbuds
Why Are My Earbuds Connecting Separately
Modified: January 22, 2024
Discover why your earbuds keep connecting separately and learn how to fix this common issue with our helpful troubleshooting guide.
(Many of the links in this article redirect to a specific reviewed product. Your purchase of these products through affiliate links helps to generate commission for AudioLover.com, at no extra cost. Learn more)
Table of Contents
- Introduction
- Understanding Earbud Connectivity
- Possible Reasons for Earbuds Connecting Separately
- Issue 1: Bluetooth Interference
- Issue 2: Outdated or Incompatible Bluetooth Version
- Issue 3: Incorrect Pairing Process
- Issue 4: Low Battery or Charging Issues
- Issue 5: Hardware or Firmware Problems
- Troubleshooting Steps to Fix Separate Earbud Connectivity
- Step 1: Ensure Proper Pairing
- Step 2: Check Bluetooth Settings and Compatibility
- Step 3: Reset and Recharge Your Earbuds
- Step 4: Update Firmware or Software
- Step 5: Contact Manufacturer Support
- Conclusion
Introduction
Welcome to the world of earbuds, where music meets mobility and convenience. Earbuds have become an essential accessory for millions of people around the world, allowing them to enjoy their favorite tunes or podcasts on the go. However, at times, you may encounter an issue where your earbuds connect separately, causing frustration and inconvenience. But fear not, as we’re here to shed light on this common problem and provide you with solutions to get your earbuds back in sync.
Earbuds are designed to establish a wireless connection with your device via Bluetooth technology, allowing you to enjoy a tangle-free audio experience. In an ideal scenario, both earbuds should connect simultaneously, providing stereo sound and a seamless listening experience. However, when your earbuds connect separately, either only one earbud connects while the other remains disconnected, or each earbud connects as a separate audio device.
There can be several reasons why your earbuds are connecting separately. It could be due to Bluetooth interference, outdated Bluetooth versions, an incorrect pairing process, low battery, or even hardware or firmware issues. Understanding these reasons will help you troubleshoot and resolve the problem effectively.
In this article, we will delve deeper into the possible causes behind earbuds connecting separately and provide you with step-by-step troubleshooting solutions to fix this issue. Whether you’re a tech-savvy individual or just starting your journey with earbuds, this guide will help you get your earbuds back on track so you can enjoy your audio content with full stereo sound and convenience.
Understanding Earbud Connectivity
Before we dive into the reasons behind earbuds connecting separately, let’s first understand how earbud connectivity works. Earbuds, often referred to as true wireless earbuds, rely on Bluetooth technology to establish a wireless connection with your device.
Bluetooth is a wireless communication protocol that allows devices to exchange data and audio wirelessly over short distances. When you pair your earbuds with your smartphone, tablet, or any other Bluetooth-enabled device, they create a secure connection that allows for the transmission of audio signals.
Earbuds typically consist of two separate units, one for each ear. Each unit, known as an earbud, contains a built-in speaker, a battery, a microphone (for calls), and a Bluetooth chip. The Bluetooth chip enables the earbuds to connect to your device wirelessly, ensuring a seamless audio experience.
When you play audio on your device, the signal is transmitted via Bluetooth to both earbuds simultaneously. This allows you to hear music or other audio content in stereo, with the left and right channels distributed evenly between the two earbuds.
In an ideal scenario, both earbuds will connect simultaneously to your device, ensuring synchronized audio playback. However, if your earbuds connect separately, it means that one or both of the earbuds are not establishing a proper connection with your device, resulting in an imbalance or lack of stereo sound.
Now that we have a general understanding of earbud connectivity, let’s explore the possible reasons why your earbuds might be connecting separately and how to troubleshoot these issues.
Possible Reasons for Earbuds Connecting Separately
When your earbuds connect separately, it can be frustrating, especially when you’re expecting a seamless audio experience. There are several potential reasons why this issue may occur. Let’s explore some of the common culprits:
- Bluetooth Interference: Bluetooth signals can be disrupted by other electronic devices in close proximity, such as Wi-Fi routers, microwave ovens, or even other Bluetooth devices. This interference can cause one or both of your earbuds to connect separately.
- Outdated or Incompatible Bluetooth Version: If your earbuds have an outdated or incompatible Bluetooth version with your device, it may lead to connectivity issues. It’s essential to check if your earbuds and the device you’re pairing them with are compatible with each other’s Bluetooth versions.
- Incorrect Pairing Process: Sometimes, the earbud pairing process may not be executed correctly. This can result in only one earbud connecting while the other remains disconnected. It’s crucial to follow the correct pairing instructions provided by the manufacturer to ensure both earbuds connect properly.
- Low Battery or Charging Issues: If one of your earbuds has a low battery or charging issue, it may fail to connect properly. Uneven battery levels between the two earbuds can also cause them to connect separately.
- Hardware or Firmware Problems: In some cases, hardware or firmware issues within the earbuds themselves can lead to separate connectivity. This can include faulty Bluetooth chips, software glitches, or other internal malfunctions.
It’s essential to identify the specific reason why your earbuds are connecting separately to effectively troubleshoot and resolve the issue. In the following sections, we will provide step-by-step solutions for each possible cause, allowing you to regain the full functionality and enjoyment of your earbuds.
Issue 1: Bluetooth Interference
One of the common reasons why your earbuds may connect separately is Bluetooth interference. Bluetooth signals operate on a specific frequency and can be affected by other electronic devices or wireless networks in the vicinity. Here are some steps you can take to mitigate Bluetooth interference:
- Reduce Nearby Interference: Move away from other electronic devices that may cause interference, such as Wi-Fi routers, microwave ovens, cordless phones, or other Bluetooth devices. Increasing the distance between your earbuds and these devices can help improve the connection.
- Turn Off Other Bluetooth Devices: If you have multiple Bluetooth devices paired with your device, turning off the ones you’re not using can reduce the interference. This will allow your earbuds to establish a stronger connection without conflicting signals from other devices.
- Change Wi-Fi Channel: If you’re experiencing severe interference from your Wi-Fi network, try changing the channel on your router. This can help minimize potential signal overlap with Bluetooth frequencies, improving the connection stability of your earbuds.
- Restart Devices: Sometimes, simply restarting your earbuds, as well as the device it’s connected to, can resolve temporary interference issues. Powering off and on the devices can help refresh the Bluetooth connection and establish a stronger and more stable link between them.
By following these steps, you can minimize Bluetooth interference and increase the likelihood of your earbuds connecting properly. If the issue persists, it’s important to explore other potential causes to determine the root of the problem.
Issue 2: Outdated or Incompatible Bluetooth Version
If your earbuds are connecting separately, it’s essential to check if there is a compatibility issue between the Bluetooth version of your earbuds and the device you’re pairing them with. Here’s what you can do to address this problem:
- Confirm Bluetooth Version: Check the Bluetooth version of your earbuds and your device. The Bluetooth version can usually be found in the specifications or settings of your earbuds or device. Ensure that both devices are using a compatible Bluetooth version. For example, if your earbuds support Bluetooth 5.0, make sure that your device also supports at least Bluetooth 5.0 for optimal performance.
- Update Device’s Bluetooth Firmware: If your device’s Bluetooth version is outdated, check if there are any firmware updates available. Manufacturers often release updates to improve Bluetooth compatibility and performance. Update your device’s firmware to the latest version to ensure seamless connectivity with your earbuds.
- Upgrade Your Earbuds: If your earbuds are outdated and not compatible with the Bluetooth version of your device, you may need to consider upgrading them. Newer earbud models often come with the latest Bluetooth technology and improved compatibility, increasing the chances of a successful and synchronized connection.
- Use an Adapter: In some cases, you may be able to overcome compatibility issues by using a Bluetooth adapter. These adapters connect to your device and allow you to pair your earbuds with Bluetooth technology that is compatible with both your earbuds and device. Research and choose an adapter that is suitable for your specific needs.
Addressing the compatibility issue between your earbuds and device is crucial for ensuring a stable and synchronized connection. By following these steps and updating your Bluetooth firmware or devices if necessary, you can increase the chances of your earbuds connecting properly and providing you with the intended audio experience.
Issue 3: Incorrect Pairing Process
An incorrect pairing process can also cause your earbuds to connect separately. When the pairing process is not executed properly, only one earbud may connect while the other remains disconnected. To ensure a successful pairing, follow these steps:
- Reset Earbuds: Begin by resetting your earbuds. Check the user manual or manufacturer’s website for specific instructions on how to reset your earbuds. The reset process usually involves pressing and holding a button on the earbuds for a certain duration until a light or indicator confirms the reset.
- Put Earbuds in Pairing Mode: With the earbuds reset, put them into pairing mode. Again, refer to the user manual for the correct method. Typically, this involves pressing and holding a button on the earbuds until a light or indicator flashes rapidly, indicating that the earbuds are in pairing mode.
- Pair with Device: On your device, navigate to the Bluetooth settings and search for available devices. Look for the name of your earbuds in the list of available devices and select it to initiate the pairing process. Follow any on-screen prompts to complete the pairing process.
- Confirm Proper Pairing: Once the pairing process is complete, check if both earbuds are connected and functioning properly. Test the audio by playing a song or video that should produce stereo sound. If only one earbud is connected or the sound is unbalanced, repeat the pairing process.
It’s important to carefully follow the manufacturer’s instructions for pairing your specific earbud model. If the issue persists even after executing the correct pairing process, there may be other underlying causes that need to be addressed.
By correctly resetting your earbuds and executing the proper pairing process, you increase the chances of both earbuds connecting simultaneously, ensuring a balanced and synchronized audio experience.
Issue 4: Low Battery or Charging Issues
If one or both of your earbuds have a low battery or charging-related problems, it can lead to separate connectivity. To address this issue, follow these steps:
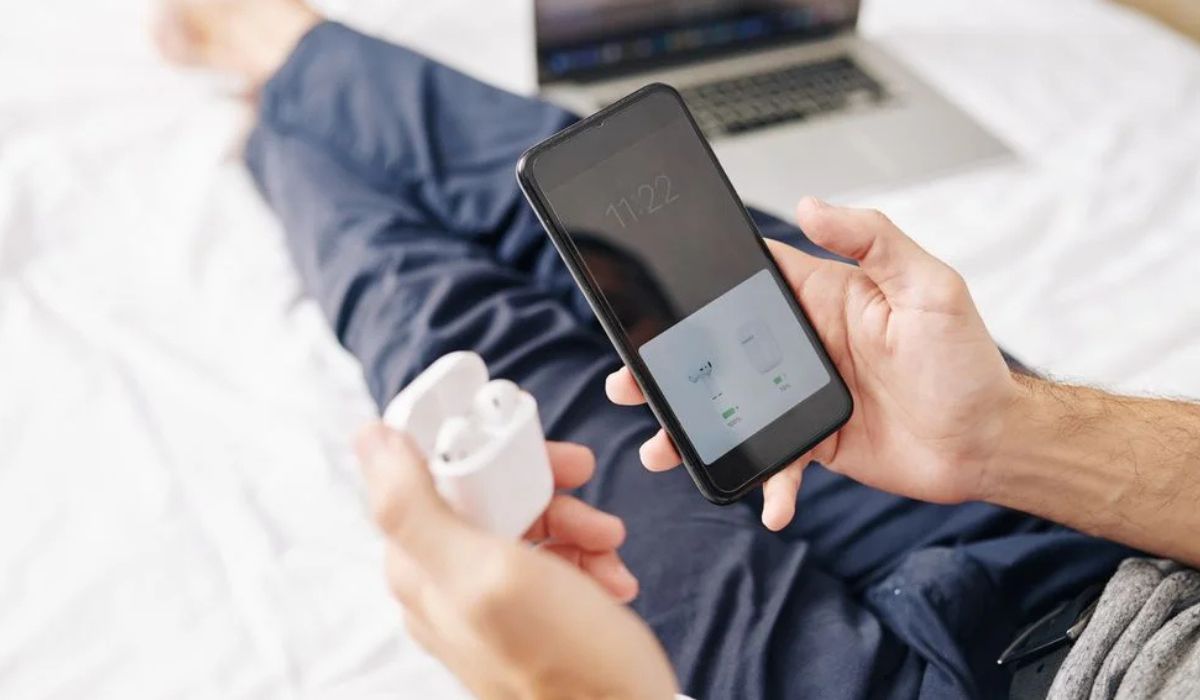
- Check Battery Levels: Ensure that both earbuds have a sufficient battery charge. Most earbuds come with LED indicators that display the battery level. If one earbud has a significantly lower charge than the other, it may cause connectivity problems. Charge both earbuds until they reach a comparable battery level.
- Clean Charging Contacts: Dirt or debris on the charging contacts of your earbuds can hinder proper charging. Use a clean, dry cloth or Q-tip to gently clean the charging contacts on both the earbuds and the charging case. Ensure that there is no obstruction preventing a solid connection.
- Reposition Earbuds in Charging Case: Make sure that the earbuds are properly positioned in the charging case. Align the charging contacts of the earbuds with the corresponding contacts in the case to ensure a secure connection. Improper placement can lead to incomplete charging and potential connectivity issues.
- Reset Charging Case: If the charging case itself is experiencing issues, reset it according to the manufacturer’s instructions. This can refresh the charging circuitry and resolve any charging-related problems.
- Replace Batteries or Charging Case: If the battery levels are consistently imbalanced, or if the charging case is not functioning correctly, you may need to replace the batteries or the entire charging case. Contact the earbud manufacturer for assistance or consider purchasing compatible replacement parts.
By ensuring that both earbuds have sufficient battery charge and addressing any charging-related issues, you can enhance the likelihood of both earbuds connecting simultaneously. This will enable you to enjoy a balanced, uninterrupted audio experience.
Issue 5: Hardware or Firmware Problems
In some cases, separate earbud connectivity may be caused by hardware or firmware problems within the earbuds themselves. Here’s what you can do to address this issue:
- Check for Software Updates: Visit the manufacturer’s website or use their designated app to check for any available firmware updates for your earbuds. Keeping your earbuds up to date with the latest software can resolve compatibility issues and improve performance. Follow the manufacturer’s instructions to download and install any updates.
- Perform a Factory Reset: If you’re experiencing persistent issues with your earbuds, perform a factory reset. The process can vary depending on the brand and model, so refer to the user manual or contact the manufacturer for specific instructions. A factory reset can reset the earbuds to their default settings and resolve certain hardware or firmware issues.
- Contact Manufacturer Support: If the issues persist even after updating the firmware or performing a factory reset, reach out to the manufacturer’s support team. They have the expertise to assist with troubleshooting and may provide further guidance or offer a solution such as a repair or replacement if necessary.
- Consider Warranty Coverage: If your earbuds are still under warranty and you suspect hardware or firmware problems, check the terms of your warranty. If the issues you’re experiencing are covered, you may be eligible for a repair or replacement at no additional cost. Contact the manufacturer or check their website for warranty information and instructions on how to proceed.
It’s important to address hardware or firmware problems promptly, as they can significantly impact the performance and functionality of your earbuds. By following these steps and seeking assistance from the manufacturer, you can identify and resolve any underlying issues affecting the separate connectivity of your earbuds.
Troubleshooting Steps to Fix Separate Earbud Connectivity
Experiencing separate earbud connectivity can be frustrating, but there are several troubleshooting steps you can take to resolve the issue. Follow these steps to get your earbuds back in sync:
Step 1: Ensure Proper Pairing
Make sure you’re following the correct pairing process as outlined by the manufacturer. Reset your earbuds and put them into pairing mode. Pair them with your device again and ensure both earbuds are connected.
Step 2: Check Bluetooth Settings and Compatibility
Verify that both your device and earbuds have compatible Bluetooth versions. Update your device’s firmware if necessary. Ensure that there are no other Bluetooth devices interfering with the connection. Turn off any unnecessary Bluetooth devices and adjust your Wi-Fi channel if needed.
Step 3: Reset and Recharge Your Earbuds
If one or both of your earbuds have low battery levels, charge them until they’re fully powered. Clean the charging contacts on both the earbuds and the charging case. Ensure proper positioning of earbuds in the charging case to ensure a secure connection.
Step 4: Update Firmware or Software
Check for any available firmware updates for your earbuds. Download and install the updates following the manufacturer’s instructions. Keeping your earbuds up to date can address compatibility issues and improve overall performance.
Step 5: Contact Manufacturer Support
If the issue persists after trying the troubleshooting steps, reach out to the manufacturer’s support team for further assistance. They can provide specific troubleshooting guidance and may offer additional solutions or warranty support if necessary.
By following these troubleshooting steps, you can increase the chances of resolving separate earbud connectivity issues. Remember to refer to the user manual or manufacturer’s website for detailed instructions specific to your earbud model.
Step 1: Ensure Proper Pairing
The first step in addressing separate earbud connectivity is to ensure proper pairing between your earbuds and the device you’re using. Follow these steps to ensure a successful pairing:
- Reset Your Earbuds: Start by resetting your earbuds. Consult the user manual or visit the manufacturer’s website for specific instructions on how to reset your earbuds. Typically, this involves pressing and holding a button on the earbuds for a designated period until a light or indicator confirms the reset.
- Put Earbuds in Pairing Mode: Once the earbuds are reset, put them into pairing mode. Again, refer to the user manual for the correct procedure. Typically, this involves pressing and holding a button on the earbuds until a light or indicator rapidly flashes, indicating that the earbuds are in pairing mode.
- Pair with Your Device: On your device, navigate to the Bluetooth settings and search for available devices. Look for the name of your earbuds in the list of available devices and select them to initiate the pairing process. Follow any on-screen prompts to complete the pairing process.
- Confirm Proper Pairing: Once the pairing process is complete, check if both earbuds are connected and functioning correctly. Play a song or video to ensure that the audio is outputting in stereo, with both earbuds working simultaneously. If only one earbud is connected or the sound is imbalanced, repeat the pairing process.
It’s crucial to follow the manufacturer’s instructions for the specific model of earbuds you’re using. Properly resetting your earbuds and executing the correct pairing process will increase the chances of both earbuds connecting simultaneously, resulting in a balanced and enjoyable audio experience.
Step 2: Check Bluetooth Settings and Compatibility
When encountering separate earbud connectivity, it’s important to check the Bluetooth settings and ensure compatibility between your earbuds and your device. Follow these steps to address any Bluetooth-related issues:
- Check Bluetooth Versions: Verify the Bluetooth version of both your earbuds and the device you’re pairing them with. This information can usually be found in the specifications or settings menu. Ensure that both devices are compatible and meet the minimum Bluetooth version requirements.
- Update Your Device’s Firmware: If your device has an outdated Bluetooth version, check for any available firmware updates. Manufacturers often release updates to improve Bluetooth compatibility and performance. Update your device’s firmware to the latest version to ensure optimal connectivity with your earbuds.
- Minimize Interference: Reduce potential Bluetooth interference by moving away from other electronic devices, Wi-Fi routers, or other Bluetooth devices. These devices can disrupt the Bluetooth signal and cause connectivity issues. Increasing the distance between your earbuds and potential sources of interference can help improve the stability of the connection.
- Turn Off Other Bluetooth Devices: If you have multiple Bluetooth devices paired with your device, turn off the ones that are not in use. This will reduce potential conflicts and allow your earbuds to establish a stronger connection without interference from other devices.
By checking the Bluetooth settings and ensuring compatibility between your earbuds and device, you can minimize potential connectivity issues. Updating firmware, reducing interference, and managing multiple Bluetooth devices can all contribute to a more stable and synchronized connection for your earbuds.
Step 3: Reset and Recharge Your Earbuds
If your earbuds are connecting separately, it’s important to check and reset their battery levels. Follow these steps to reset and recharge your earbuds:
- Check Battery Levels: Verify the battery levels of both earbuds. Most earbuds have LED indicators that display the battery status. If one earbud has significantly lower battery life than the other, it may cause connectivity issues. Ensure that both earbuds are adequately charged.
- Reset Your Earbuds: Resetting your earbuds can help resolve any temporary glitches or issues. However, the reset process can vary depending on the model and manufacturer. Check the user manual or visit the manufacturer’s website to find specific instructions for your earbuds. Typically, this involves pressing and holding a button on the earbuds for a certain duration until a light or indicator confirms the reset.
- Put Earbuds in the Charging Case: After resetting the earbuds, place them back into the charging case. Ensure that they are properly aligned with the charging contacts to establish a secure connection for charging.
- Charge Your Earbuds: Connect the charging case to a power source using the provided charging cable. Allow the earbuds to charge until they reach a full battery level. Most cases have LED indicators that show the charging progress. Check the user manual for the estimated charging time.
- Reposition the Earbuds in the Charging Case: If you encounter connectivity issues even after charging, reposition the earbuds in the charging case. Ensure that they are securely seated and aligned with the charging contacts. Proper alignment will ensure a reliable connection and optimum charging performance.
By resetting and charging your earbuds, you can address any battery-related issues that may be causing separate connectivity. It’s important to ensure both earbuds have adequate battery levels and are properly positioned in the charging case to establish a stable and balanced connection.
Step 4: Update Firmware or Software
If your earbuds are connecting separately, it’s worth checking for firmware or software updates. Manufacturers often release updates to address bugs, improve performance, and enhance compatibility. Follow these steps to update the firmware or software of your earbuds:
- Check for Updates: Visit the manufacturer’s website or use their designated app to check for any available firmware or software updates for your specific earbud model. Look for the “Support” or “Downloads” section for the latest updates.
- Download and Install Updates: Follow the instructions provided by the manufacturer to download and install the updates. This could involve connecting your earbuds to your computer or following a specific process detailed in the user manual or on the manufacturer’s website.
- Follow Update Instructions: Carefully follow the instructions provided by the manufacturer during the update process. This may involve connecting your earbuds to your computer via USB, using a specialized app, or following specific steps outlined in the user manual.
- Restart Your Earbuds and Device: After the firmware or software update is complete, restart both your earbuds and the device you’re pairing them with. Powering off and on the devices can help ensure that the updates take effect properly.
- Reconnect and Test: Reconnect your earbuds to your device using the proper pairing process. Check if both earbuds connect simultaneously and if the audio is balanced and synchronized. Test the audio with a song or video to ensure optimal functionality.
By updating the firmware or software of your earbuds, you can address any potential compatibility issues and improve their overall performance. Remember to follow the manufacturer’s instructions carefully and ensure that your earbuds and device are compatible with the latest updates.
Step 5: Contact Manufacturer Support
If you have tried the previous troubleshooting steps and are still experiencing separate earbud connectivity issues, it’s time to reach out to the manufacturer’s support team. Here’s what you can do:
- Collect Information: Before contacting support, gather any relevant information about your earbuds, such as the model, serial number, and details about the issue you’re facing. This will help the support team assist you more effectively.
- Visit the Manufacturer’s Website: Start by visiting the manufacturer’s website. Look for a “Support” or “Contact Us” section to find information on how to reach their support team. Many manufacturers provide online chat support, email support, or a support hotline.
- Explain the Issue: When contacting support, clearly explain the separate earbud connectivity issue you’re facing. Provide any relevant details, such as when the problem started, any troubleshooting steps you have already taken, and the specific error messages or symptoms you are encountering.
- Follow Support Instructions: The support team may provide specific instructions or additional troubleshooting steps to try. Follow their guidance carefully and provide any requested information or documentation promptly.
- Consider Warranty Coverage: If your earbuds are still under warranty and the separate connectivity issue is not resolved through troubleshooting, inquire about warranty coverage. Depending on the situation, the manufacturer may offer a repair or replacement, subject to the terms and conditions of the warranty.
Contacting the manufacturer’s support team can provide you with expert assistance tailored to your specific earbud model and situation. They will have in-depth knowledge of their products and may offer personalized solutions or warranty support if necessary.
Conclusion
Experiencing separate earbud connectivity can be frustrating, but by following the troubleshooting steps outlined in this guide, you can resolve the issue and get your earbuds back in sync. From ensuring proper pairing and checking Bluetooth settings to resetting and recharging your earbuds, each step addresses a potential cause of separate connectivity.
Bluetooth interference, outdated Bluetooth versions, incorrect pairing processes, low battery levels, and hardware or firmware problems are common culprits behind this issue. By identifying the specific cause affecting your earbuds, you can implement the appropriate solution.
Remember, it’s important to carefully follow the instructions provided by the manufacturer for your specific earbud model. Additionally, contacting the manufacturer’s support team can provide valuable assistance if the problem persists or if your earbuds are still under warranty.
By addressing separate earbud connectivity, you can restore a seamless and enjoyable audio experience. Whether you’re using your earbuds for music, podcasts, or calls, having both earbuds connect simultaneously ensures a well-balanced and immersive sound experience.
So don’t let separate earbud connectivity dampen your audio enjoyment. Follow the steps outlined in this guide, troubleshoot the specific issues affecting your earbuds, and get ready to experience the full potential of your wireless earbuds once again.

