Home>Devices & Equipment>Earbuds>Why Won’t My Samsung Earbuds Connect

Earbuds
Why Won’t My Samsung Earbuds Connect
Modified: January 22, 2024
Having trouble connecting your Samsung earbuds? Learn how to troubleshoot and fix common issues preventing your earbuds from connecting.
(Many of the links in this article redirect to a specific reviewed product. Your purchase of these products through affiliate links helps to generate commission for AudioLover.com, at no extra cost. Learn more)
Table of Contents
Introduction
Samsung earbuds are a popular choice for those who enjoy wireless audio experiences. With their sleek design, excellent sound quality, and convenient Bluetooth connectivity, these earbuds offer a seamless listening experience. However, there may be instances where you encounter issues with connecting your Samsung earbuds to your device.
Experiencing difficulties in connecting your Samsung earbuds can be frustrating, especially when you’re eager to enjoy your favorite music or answer a phone call hands-free. But fear not, as there are several troubleshooting steps you can take to resolve this issue and get your earbuds connected again.
In this article, we will explore the potential reasons why your Samsung earbuds won’t connect and provide step-by-step instructions on how to troubleshoot and resolve the problem. Whether you’re using the Galaxy Buds, Galaxy Buds Pro, or any other Samsung earbuds model, these troubleshooting steps are applicable.
By following these troubleshooting methods, you can quickly identify the underlying issue and get your earbuds connected, allowing you to enjoy your audio experience without any interruptions. So, let’s dive into the troubleshooting steps and get your Samsung earbuds connected in no time!
Troubleshooting Steps
When your Samsung earbuds aren’t connecting to your device, it’s important to go through a series of troubleshooting steps to diagnose and resolve the issue. Here are the steps you can follow:
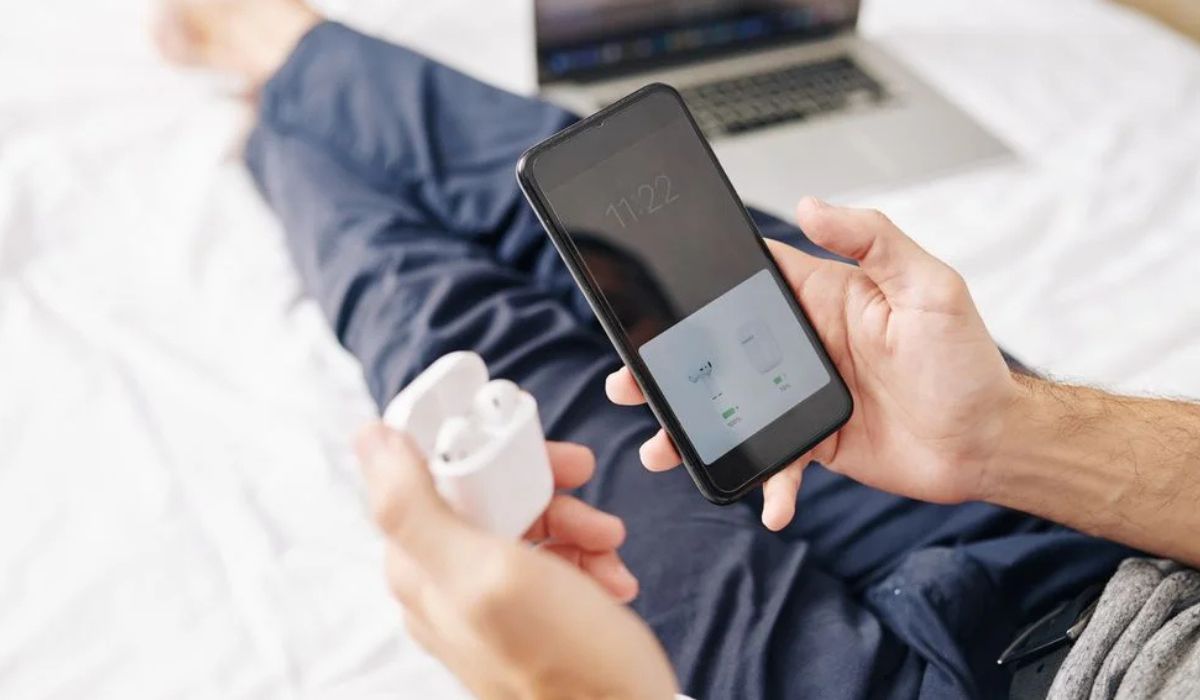
- Check Bluetooth Connection: Firstly, ensure that the Bluetooth on your device is turned on and in pairing mode. Make sure that your earbuds are in the vicinity and within range of your device.
- Reset Earbuds: If the initial connection attempts fail, try resetting your Samsung earbuds. Usually, this involves pressing and holding a reset button on the charging case or following a specific sequence of button presses on the earbuds themselves. Refer to the user manual or the Samsung website for detailed instructions on how to reset your specific earbuds model.
- Update Software: Outdated software can sometimes cause connectivity issues. Check if there are any available software updates for your Samsung earbuds and your device itself. Keeping both up to date can help resolve any compatibility issues.
- Charge the Earbuds: Make sure your earbuds have enough charge to establish a connection. Place them in the charging case and ensure that both the earbuds and the case are sufficiently charged. A drained battery can sometimes hinder the connection process.
- Clear Pairing History: If your earbuds have been previously connected to multiple devices, it’s possible that they are trying to connect to a different device. Clearing the pairing history can help ensure a clean connection attempt. You can usually find this option in the Bluetooth settings of your device.
- Try Connecting to a Different Device: To troubleshoot further, try connecting your Samsung earbuds to a different device. This can help determine whether the issue lies with the earbuds themselves or the original device you were trying to connect to.
- Contact Customer Support: If all else fails, it’s recommended to reach out to Samsung’s customer support for assistance. They have dedicated teams who can provide technical support and help you resolve any persistent connectivity issues.
By following these troubleshooting steps, you can effectively troubleshoot and resolve the issue of your Samsung earbuds not connecting. It’s important to go through each step carefully and methodically to pinpoint the underlying cause and find the appropriate solution.
Step 1: Check Bluetooth Connection
The first step in troubleshooting your Samsung earbuds connectivity issue is to check the Bluetooth connection on your device. Here’s what you can do:
1. Ensure that Bluetooth is turned on: Open the settings on your device and navigate to the Bluetooth settings. Make sure that the Bluetooth toggle is switched to “On.” If it’s already on, try toggling it off and back on again to reset the connection.
2. Check for device compatibility: Samsung earbuds are generally compatible with a wide range of devices. However, it’s worth confirming that your earbuds are compatible with your specific device. Refer to the device’s documentation or consult the Samsung website for a list of compatible devices.
3. Ensure your earbuds are in pairing mode: Most Samsung earbuds enter pairing mode automatically when removed from the charging case. However, if your earbuds don’t seem to be in pairing mode, refer to the user manual or the Samsung website for instructions on how to activate pairing mode.
4. Bring the earbuds and device closer together: Sometimes, the Bluetooth connection can be weak if there is significant distance or obstruction between your device and the earbuds. Try bringing them closer together and see if that improves the connection.
5. Restart your device: If you’ve followed the above steps and the connection issue persists, try restarting your device. This can help refresh the Bluetooth settings and potentially resolve any temporary connectivity glitches.
Once you’ve completed these steps, attempt to connect your Samsung earbuds to your device again. If the connection is successful, you can proceed to enjoy your audio experience. However, if the issue persists, it’s time to move on to the next troubleshooting step.
Remember, checking the Bluetooth connection is often the first and simplest step in troubleshooting your Samsung earbuds connectivity issue. Ensure that Bluetooth is turned on, your earbuds are in pairing mode, and both devices are within range of each other. By doing so, you increase the chances of establishing a successful connection.
Step 2: Reset Earbuds
If you’re still experiencing connectivity issues with your Samsung earbuds, the next step is to reset them. Resetting your earbuds can help clear any temporary glitches and restore them to their default settings. Here’s how you can reset your Samsung earbuds:
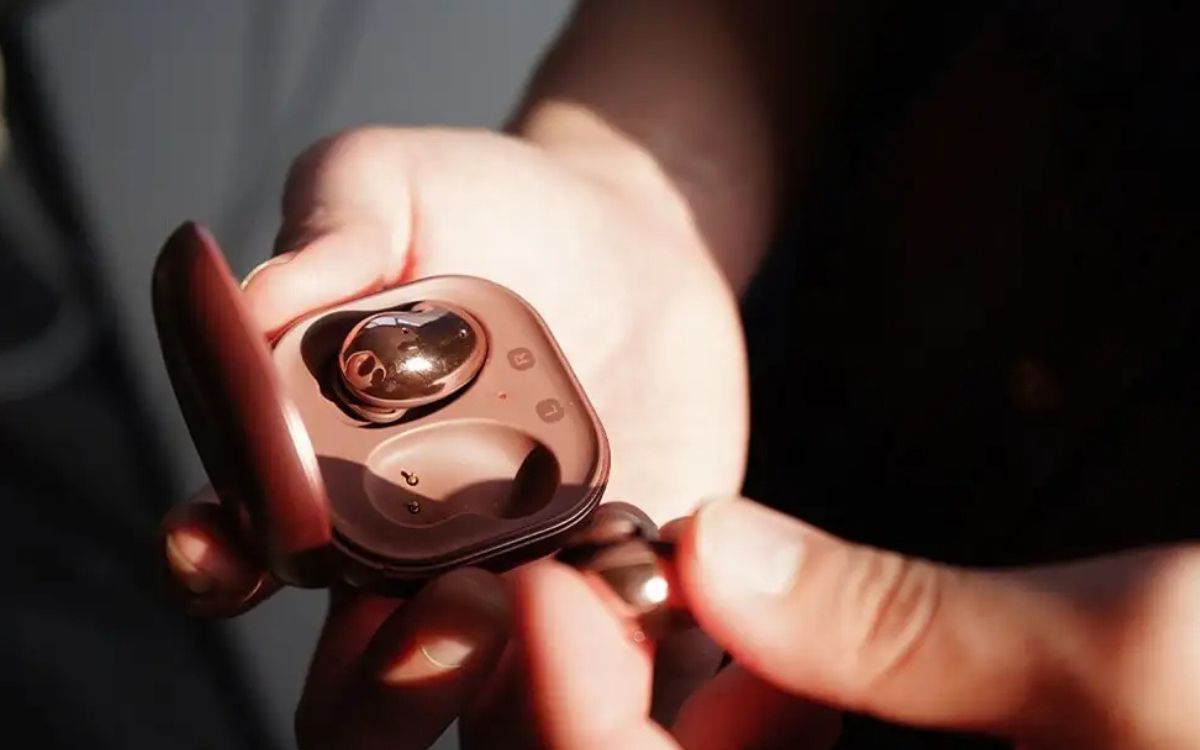
1. Place the earbuds in the charging case: Start by placing both earbuds back into the charging case. Ensure they are properly seated and make proper contact with the charging pins.
2. Locate the reset button: Depending on the model of your Samsung earbuds, you may need to find the reset button on the charging case or the earbuds themselves. Consult the user manual or visit the Samsung website for specific instructions on where to find the reset button for your earbuds.
3. Press and hold the reset button: Once you’ve located the reset button, press and hold it for about 10-15 seconds. The LED indicator on the charging case may flash or change color to indicate that the reset process has started.
4. Release the reset button: After holding the reset button for the specified time, release it. The earbuds will now reset and go back to their default settings.
5. Re-pair the earbuds: After the reset, you’ll need to re-pair the earbuds with your device. Open the Bluetooth settings on your device and initiate the pairing process. Follow the on-screen instructions or refer to the user manual for your specific device to complete the pairing.
Once you’ve completed the steps mentioned above, attempt to connect your Samsung earbuds to your device again. Resetting the earbuds can often resolve any software or configuration issues that may be causing the connectivity problems. If the connection is successful, you can continue enjoying your audio experience. However, if the issue persists, it’s important to proceed to the next troubleshooting step.
Remember, resetting your Samsung earbuds can help get them back to a fresh state, potentially resolving any connectivity issues that may have arisen. By following the reset process, you give your earbuds a chance to start anew and establish a clean connection with your device.
Step 3: Update Software
Updating the software of your Samsung earbuds and your device can address compatibility issues and improve the overall performance of your earbuds. Here’s how you can update the software:
1. Check for software updates on your device: Start by checking if there are any available software updates for your device. Go to the settings menu, navigate to the software update section, and check for any updates. If an update is available, follow the on-screen instructions to download and install it.
2. Check for software updates for your Samsung earbuds: In addition to updating the device software, it’s important to ensure that your earbuds are running on the latest firmware. Open the Samsung Galaxy Wearable app or the Galaxy Buds app on your device, navigate to the settings for your earbuds, and check for any available software updates. If an update is available, follow the prompts to install it.
3. Restart your device: After updating the software on your device and earbuds, it’s a good practice to restart your device. This can help refresh the system and ensure that the updates are applied properly.
4. Attempt to connect the earbuds again: Once your device has restarted, try connecting your Samsung earbuds again. The software updates may have resolved any compatibility issues, allowing for a successful connection.
By keeping both your device and earbuds up to date, you ensure that you have the latest features, bug fixes, and performance improvements. Software updates often include optimizations that can enhance the overall connectivity and functionality of your Samsung earbuds. If the connection is still not working after updating the software, move on to the next troubleshooting step.
Remember, updating the software of both your device and Samsung earbuds is an essential troubleshooting step to ensure compatibility and optimal performance. By staying up to date, you can address any known issues and improve the overall connectivity and functionality of your earbuds.
Step 4: Charge the Earbuds
When your Samsung earbuds are not connecting, it’s important to ensure that they have sufficient charge. Low battery levels can hinder the connection process. Here’s what you can do:
1. Place the earbuds in the charging case: Start by placing both earbuds back into the charging case. Ensure they are properly seated and make proper contact with the charging pins.
2. Connect the charging case to a power source: Use the provided charging cable and connect the charging case to a power source, such as a wall outlet or a USB port on your computer or laptop.
3. Verify charging status: Check the LED indicators on the charging case to verify that the earbuds are charging. The LEDs may flash or display a specific color to indicate the charging status. Refer to the user manual or the Samsung website for your specific earbuds model to understand the charging indicators.
4. Charge for a sufficient timeframe: Ensure that you leave the earbuds in the charging case for a long enough period to allow them to charge fully. The charging time can vary depending on the model, so refer to the user manual or the Samsung website for the recommended charging duration.
5. Check the charging case’s battery level: Some Samsung earbuds models come with a charging case that has its own battery. Ensure that the charging case itself has enough charge to provide power to the earbuds. If the case is running low on battery, charge it separately until it reaches an appropriate level.
Once you’ve charged the earbuds adequately, remove them from the charging case and attempt to connect them to your device again. Adequate charging can often resolve connection issues caused by low battery levels. However, if the problem persists, it’s time to move on to the next troubleshooting step.
Remember, charging your Samsung earbuds is a crucial step in troubleshooting connectivity issues. Ensuring that they have sufficient power allows the earbuds to establish and maintain a stable connection with your device. Regularly charging your earbuds also ensures that they are always ready for use when you need them.
Step 5: Clear Pairing History
If you have previously connected your Samsung earbuds to multiple devices, it’s possible that they are trying to connect to a different device instead of the one you’re currently using. Clearing the pairing history can help remove any conflicting connections and allow for a clean connection attempt. Here’s how you can clear the pairing history:
1. Open Bluetooth settings: Go to the Bluetooth settings on your device. The method to access the Bluetooth settings may vary depending on your device’s operating system. Typically, you can find the Bluetooth settings in the system settings or by swiping down from the top of the screen and accessing the quick settings panel.
2. Locate the paired devices list: Look for the list of paired devices in the Bluetooth settings. This list displays all the devices your phone or tablet has previously connected to.
3. Remove the earbuds from the list: Find the entry corresponding to your Samsung earbuds in the paired devices list. Tap on the “Forget,” “Remove,” or “Unpair” option next to the earbuds’ name. This will remove the previous pairing information from your device.
4. Reset the earbuds: After clearing the pairing history on your device, follow the steps outlined in the earlier section to reset your Samsung earbuds. This ensures that any previous connections are properly cleared from the earbuds as well.
5. Re-pair the earbuds: Once the pairing history is cleared and the earbuds are reset, initiate the pairing process again. Put your earbuds into pairing mode and select them from the list of available Bluetooth devices on your device. Follow the on-screen prompts to complete the pairing process.
By clearing the pairing history, you eliminate any potential conflicts between your Samsung earbuds and previously connected devices. This allows for a fresh, uninterrupted connection attempt. If the connection is successful after clearing the pairing history, you can proceed to enjoy your Samsung earbuds. However, if the issue persists, it’s time to move on to the next troubleshooting step.
Remember, clearing the pairing history is a crucial step in troubleshooting connectivity issues. It helps ensure that your Samsung earbuds are connecting to the intended device and not trying to pair with a previously connected device. By following this step, you can establish a clean connection and enjoy your audio experience without any hindrances.
Step 6: Try Connecting to a Different Device
If you’ve tried the previous troubleshooting steps and are still unable to connect your Samsung earbuds to your device, it’s worth trying to connect them to a different device. This step can help determine whether the issue lies with the earbuds themselves or the original device you were trying to connect to. Here’s how you can proceed:
1. Select a different device: Find another device such as a smartphone, tablet, or computer that supports Bluetooth connectivity. Ideally, choose a device that you know is compatible with your Samsung earbuds.
2. Put the earbuds into pairing mode: Place your Samsung earbuds into pairing mode. Consult the user manual or the Samsung website for your specific earbuds model to understand how to activate pairing mode.
3. Open the Bluetooth settings on the new device: Go to the Bluetooth settings on the new device. This can usually be found in the system settings or the quick settings panel.
4. Pair the earbuds with the new device: Look for the Samsung earbuds in the list of available Bluetooth devices on the new device. Once you spot them, select them to initiate the pairing process. Follow the on-screen prompts to complete the pairing.
5. Test the connection: After successfully pairing the earbuds with the new device, play some audio or make a phone call to test the connection. Ensure that the audio plays through the earbuds and that the call quality is satisfactory. This will help determine if the earbuds are functioning properly.
By connecting your Samsung earbuds to a different device, you can isolate the issue and identify whether the problem lies with the earbuds or the original device you were trying to connect to. If the earbuds connect and function properly with the new device, it suggests that the issue may be with the original device. However, if you still experience connectivity problems, it’s time to consider the final troubleshooting step.
Remember, trying to connect your Samsung earbuds to a different device can provide valuable insight into the source of the connectivity issue. By doing so, you can narrow down the problem and determine the appropriate solution. Whether it’s the earbuds or the device itself, this step can help guide you towards resolving the issue.
Step 7: Contact Customer Support
If you have followed all the previous troubleshooting steps and are still unable to connect your Samsung earbuds, it’s time to reach out to customer support for assistance. Contacting customer support can provide you with expert guidance and troubleshooting tailored to your specific issue. Here’s how you can proceed:
1. Gather relevant information: Before contacting customer support, gather all the relevant information related to your Samsung earbuds. This includes the model number, serial number, and any error messages or specific details about the issue you are facing.
2. Visit the Samsung support website: Start by visiting the official Samsung support website. Look for the support section or the contact/customer service page. Here, you will likely find an option to chat with a representative, send an email, or call customer support.
3. Explain the issue: When communicating with customer support, provide a clear and detailed description of the problem you are experiencing. Mention the troubleshooting steps you have already tried and the results you have observed. This will help the representative understand your situation better and provide more accurate assistance.
4. Follow the instructions provided: The customer support representative may guide you through additional troubleshooting steps or provide specific instructions to address the connectivity issue. Follow their instructions carefully and provide feedback on the results after each step.
5. Warranty and repair options: If the representative determines that your Samsung earbuds require further examination or repair, they will guide you through the warranty and repair process. Ensure that you have the necessary proof of purchase and any warranty documents readily available for reference.
Remember, customer support is there to assist you in resolving any issues you encounter with your Samsung earbuds. They have the expertise and knowledge to provide you with the necessary guidance and solutions. Don’t hesitate to reach out to them for help when other troubleshooting steps have been unsuccessful.
By contacting customer support, you can receive personalized assistance to address the connectivity issue with your Samsung earbuds. They may provide additional troubleshooting steps, warranty coverage, or repair options based on the specific circumstances. Stay patient, provide all the necessary information, and work together with customer support to find a resolution.
Conclusion
Experiencing connectivity issues with your Samsung earbuds can be frustrating, but with the right troubleshooting steps, you can often resolve the problem and get back to enjoying your audio experience. Throughout this article, we have discussed several troubleshooting steps to help you overcome connectivity issues with your Samsung earbuds.
We began by checking the Bluetooth connection on your device, ensuring that it is turned on and in pairing mode. We then moved on to resetting the earbuds, updating the software on both the earbuds and your device, and making sure the earbuds are adequately charged. Clearing the pairing history and trying to connect to a different device were also important troubleshooting steps we covered. Finally, if none of the previous steps were successful, we recommended contacting customer support for further assistance.
Remember, troubleshooting connectivity issues may require a combination of these steps or even repeating them in different scenarios. It’s crucial to stay patient, follow the instructions carefully, and provide relevant information when seeking assistance.
By following these troubleshooting steps, you can effectively address connectivity issues with your Samsung earbuds, whether they are Galaxy Buds, Galaxy Buds Pro, or any other model. However, if you encounter persistent connectivity problems beyond your control, it may be necessary to seek professional support or explore warranty and repair options.
Ultimately, Samsung earbuds offer a convenient and enjoyable wireless audio experience. By employing the troubleshooting steps outlined in this article, you can overcome connectivity hurdles and continue to enjoy your music, podcasts, and calls with ease.

