Home>Devices & Equipment>Earbuds>How Do I Connect My Earbuds To My Laptop


Earbuds
How Do I Connect My Earbuds To My Laptop
Modified: January 22, 2024
Learn how to easily connect your earbuds to your laptop and enjoy seamless audio experience. Follow our step-by-step guide to connect earbuds effortlessly.
(Many of the links in this article redirect to a specific reviewed product. Your purchase of these products through affiliate links helps to generate commission for AudioLover.com, at no extra cost. Learn more)
Table of Contents
Introduction
Earbuds have become an essential accessory for many of us, offering a convenient and immersive way to enjoy music, podcasts, and other audio content. While they are commonly used with smartphones and portable music players, you may also want to connect your earbuds to your laptop for a more personalized and engaging audio experience.
Connecting earbuds to a laptop may seem like a daunting task, especially if you are not familiar with the process. However, with the right knowledge and a few simple steps, you can easily connect your earbuds to your laptop and start enjoying high-quality audio in no time.
In this guide, we will walk you through the step-by-step process of connecting your earbuds to your laptop. Whether you have wireless Bluetooth earbuds or wired earbuds, we will cover everything you need to know to establish a seamless connection and begin enjoying your favorite audio content.
Before we dive into the steps, it is important to note that the process may vary slightly depending on the make and model of your earbuds and laptop. However, the general steps presented here should work for most earbuds and laptops.
So, without further ado, let’s get started on the journey of connecting your earbuds to your laptop and unlocking a world of immersive audio experiences!
Step 1: Check compatibility
Before attempting to connect your earbuds to your laptop, it is crucial to ensure that they are compatible with each other. Not all earbuds are compatible with all laptops, so taking a moment to verify compatibility will save you frustration later on.
Firstly, check if your laptop has Bluetooth capability. Most modern laptops come equipped with Bluetooth functionality, but older models may not have this feature. To confirm, look for the Bluetooth symbol on your laptop’s keyboard or check the specifications in the user manual or manufacturer’s website.
If your laptop does not have built-in Bluetooth, don’t worry! You can still connect your earbuds using a Bluetooth adapter. These small USB devices can be plugged into your laptop’s USB port to enable Bluetooth connectivity.
Next, check the compatibility of your earbuds. If you have wireless Bluetooth earbuds, they should generally work with any laptop that supports Bluetooth connectivity. However, it’s always a good idea to consult the user manual or the manufacturer’s website to ensure compatibility.
For wired earbuds, you will need to check if your laptop has a headphone jack or an audio input/output port. Most laptops have a 3.5mm headphone jack, but some newer models may only have a USB-C or Thunderbolt 3 port. In such cases, you will need a compatible adapter or connector to connect your wired earbuds to your laptop.
Once you have confirmed that your earbuds and laptop are compatible, you are ready to move on to the next step and put your earbuds in pairing mode.
Step 2: Put your earbuds in pairing mode
In order to connect your earbuds to your laptop, you need to put them in pairing mode. Pairing mode allows your earbuds to be discoverable by other devices, such as your laptop, so that they can establish a wireless connection.
The process of entering pairing mode may vary depending on the make and model of your earbuds. However, here are some general steps that you can follow:
- Refer to the user manual: The user manual that came with your earbuds is the best resource for finding specific instructions on how to enter pairing mode. It will provide step-by-step guidance tailored to your earbuds’ make and model.
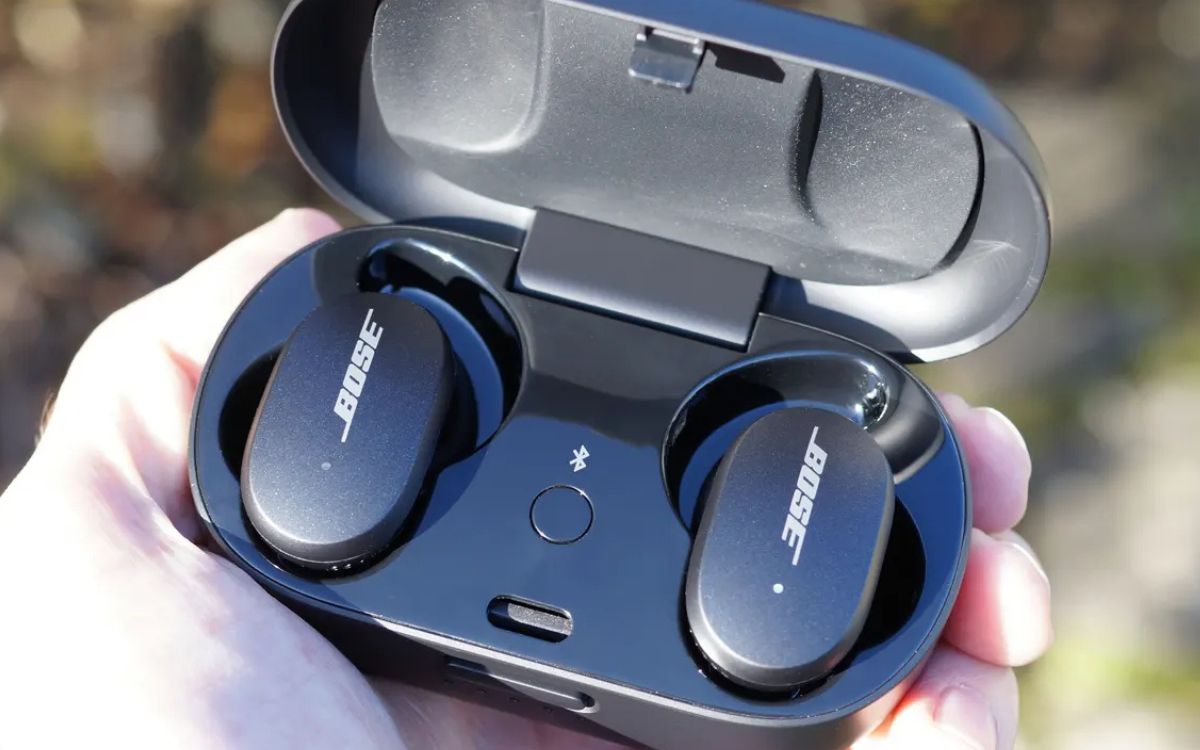
- Check for a dedicated button: Some earbuds have a dedicated button or switch that lets you enter pairing mode. Look for a button with a Bluetooth symbol or a switch that can be toggled to activate pairing mode.
- Use the touch controls: If your earbuds have touch-sensitive controls, there may be specific gestures or combinations of taps that activate pairing mode. Consult the user manual or manufacturer’s website to find out the correct gestures.
- Try a specific sequence: In some cases, you may need to press and hold the power button or a combination of buttons for a certain period of time to put your earbuds in pairing mode. Experiment with different sequences until you see the earbuds blinking or hear a pairing prompt.
Remember to be patient and follow the instructions carefully. It may take a few tries to successfully enter pairing mode, but once you do, you are one step closer to connecting your earbuds to your laptop.
Now that your earbuds are in pairing mode, it’s time to proceed to the next step and open the Bluetooth settings on your laptop.
Step 3: Open Bluetooth settings on your laptop
To connect your earbuds to your laptop, you need to access the Bluetooth settings on your laptop. These settings allow you to search for and connect to available Bluetooth devices, including your earbuds.
Here’s how you can open the Bluetooth settings on your laptop:
- Click on the Start menu or press the Windows key on your keyboard to open the Start menu.
- Look for the Settings icon, which looks like a gear. Click on it to open the Settings menu.
- In the Settings menu, look for the “Devices” option and click on it.
- In the Devices menu, you should see a subcategory called “Bluetooth & other devices.” Click on it to open the Bluetooth settings.
Alternatively, depending on the operating system of your laptop, you may also find the Bluetooth settings in the Control Panel or the System Preferences menu.
Once you have opened the Bluetooth settings, you will see a list of available Bluetooth devices that your laptop can connect to. At this stage, it’s important to make sure that your earbuds are still in pairing mode, as discussed in the previous step.
In the Bluetooth settings, you may also have the option to turn on or off the Bluetooth functionality of your laptop. Ensure that Bluetooth is turned on so that your laptop can detect and connect to your earbuds.
Now that you have opened the Bluetooth settings on your laptop, it’s time to move on to the next step and scan for available devices to connect.
Step 4: Scan for available devices
Once you have opened the Bluetooth settings on your laptop, the next step is to scan for available devices. This will allow your laptop to search for and display the nearby Bluetooth devices, including your earbuds, that are ready to connect.
Here’s how you can scan for available devices:
- In the Bluetooth settings on your laptop, look for an option that says “Add Bluetooth or other device” or something similar. Click on it to start the scanning process.
- Your laptop will now start searching for nearby Bluetooth devices. This process may take a few moments, so be patient.
- During the scanning process, make sure that your earbuds are still in pairing mode, as discussed in step 2. This will ensure that your earbuds are discoverable by your laptop.
- Once the scan is complete, a list of available Bluetooth devices will be displayed on your laptop’s screen.
Keep in mind that the list of available devices may include other Bluetooth-enabled devices in your vicinity, such as smartphones, tablets, or other laptops. Make sure to identify your earbuds in the list based on their make and model or any unique identifier.
If you don’t see your earbuds in the list, try the following:
- Click on the “Refresh” or “Scan” button in the Bluetooth settings to conduct another scan.
- Ensure that your earbuds are sufficiently charged to be detected by your laptop.
- Check if there are any obstacles or interferences, such as walls or other electronic devices, that may be affecting the Bluetooth signal.
Once you have identified your earbuds in the list of available devices, you are ready to proceed to the next step and connect your earbuds to your laptop.
Step 5: Connect your earbuds to your laptop
After scanning for available devices in the Bluetooth settings on your laptop, it’s time to connect your earbuds to your laptop. This step establishes a wireless connection between the two devices, allowing you to stream audio from your laptop directly to your earbuds.
Follow these steps to connect your earbuds to your laptop:
- In the list of available devices in the Bluetooth settings on your laptop, locate your earbuds.
- Click on your earbuds’ name or icon in the list to initiate the connection process.
- Your laptop will now attempt to establish a connection with your earbuds. It may take a few seconds for the connection to complete.
- If prompted, enter any necessary passcode or PIN to authenticate the connection. This step ensures that only authorized devices can connect to your earbuds.
- Once the connection is established, your laptop will display a notification or indicator confirming the successful pairing with your earbuds.
Keep in mind that the exact steps may vary slightly depending on the operating system of your laptop and the user interface of your Bluetooth settings.
Some earbuds may also have additional features or settings that can be adjusted through the Bluetooth settings on your laptop. These may include options to enable or disable certain audio profiles, adjust the volume, or customize audio settings according to your preference. Explore the available settings to maximize the functionality of your earbuds.
Congratulations! You have successfully connected your earbuds to your laptop. Now, let’s move on to the final step and test the connection to ensure everything is working as expected.
Step 6: Test the connection
Once you have connected your earbuds to your laptop, it is important to test the connection to ensure that everything is working properly. Testing the connection will allow you to verify the audio quality, functionality of the controls, and overall performance of your earbuds.
Here are a few things you can do to test the connection:
- Play audio: Open your favorite music player or streaming service on your laptop and play some music. Make sure the audio is coming through your earbuds and not the laptop’s speakers. Adjust the volume and listen for clarity, depth, and any potential distortions.
- Test the controls: If your earbuds have touch controls or buttons, try using them to play/pause music, skip tracks, or adjust the volume. Ensure that the controls are responsive and working as expected.
- Make a call: If your earbuds have a built-in microphone, you can test it by making a call using a communication app like Skype or Zoom. Check if the other person can hear you clearly, and make sure that the call audio is routed through your earbuds.
- Move around: Walk around your room or move to a different area while wearing your earbuds. This will help you determine the range and stability of the Bluetooth connection. Ideally, the connection should remain strong and uninterrupted within a reasonable distance from your laptop.
If you encounter any issues during the testing phase, try the following troubleshooting steps:
- Make sure your earbuds are properly charged.
- Ensure that both your laptop and earbuds are within the recommended Bluetooth range, typically around 33 feet (10 meters).
- Restart your laptop and earbuds. Sometimes a simple reboot can resolve connectivity issues.
- Check for software updates for both your laptop and earbuds. Updating to the latest firmware or driver versions can address compatibility or performance issues.
- Consult the user manual or manufacturer’s website for further troubleshooting steps specific to your earbuds.
By thoroughly testing the connection, you can ensure a seamless and enjoyable audio experience with your earbuds and laptop.
With the successful test of the connection, you have reached the end of the process! You are now ready to revel in the immersive audio experience that your earbuds offer, whether it’s while listening to music, watching movies, or participating in online meetings and calls with crystal-clear sound.
Enjoy your newfound audio bliss!
Conclusion
Connecting your earbuds to your laptop opens up a world of possibilities, allowing you to enjoy high-quality audio and immerse yourself in your favorite music, podcasts, and videos. Though the process may seem daunting at first, following a few simple steps can enable a seamless connection between your earbuds and laptop.
In this guide, we covered the essential steps to connect your earbuds to your laptop. We started by checking compatibility between your earbuds and laptop, ensuring that both devices support the necessary Bluetooth connectivity or have the required audio ports.
We then walked you through putting your earbuds in pairing mode, a crucial step that allows your laptop to detect and establish a connection with your earbuds. Opening the Bluetooth settings on your laptop and scanning for available devices followed this, enabling you to locate your earbuds in the list of nearby Bluetooth devices.
With your earbuds identified, we proceeded to the connection phase, where you initiated the pairing process and authenticated the connection if necessary. Finally, we emphasized the importance of testing the connection to ensure optimal audio quality, control responsiveness, and stability of the Bluetooth connection between your earbuds and laptop.
By following these steps and troubleshooting any potential issues, you can enjoy a seamless audio experience that combines the convenience of your earbuds with the versatility of your laptop’s audio capabilities.
So, what are you waiting for? Connect your earbuds to your laptop and embark on a journey of immersive sound, whether it’s for entertainment, work, or communication purposes. Enjoy the freedom and flexibility that comes with having your personal audio sanctuary right at your fingertips.

