Home>Devices & Equipment>Radio>How To Make A Radio Transmitter
Radio
How To Make A Radio Transmitter
Modified: January 22, 2024
Learn how to make a radio transmitter from scratch with this step-by-step guide. Discover the basics of radio technology and unleash your inner DIY enthusiast.
(Many of the links in this article redirect to a specific reviewed product. Your purchase of these products through affiliate links helps to generate commission for AudioLover.com, at no extra cost. Learn more)
Table of Contents
Introduction
Welcome to the world of radio! Radio broadcasting has been a staple in our lives for decades, providing entertainment, information, and a connection to the world beyond our immediate surroundings. While most of us enjoy the benefits of traditional radio stations, did you know that you can also create your own radio transmitter?
In this article, we will guide you through the process of making a radio transmitter from scratch. It’s a fun and educational project that will allow you to understand the inner workings of a radio transmitter and give you the ability to broadcast your own content within a limited range.
Before we begin, it’s important to note that building your own radio transmitter comes with a set of legal regulations and restrictions. Be sure to check your country’s rules and regulations regarding radio transmissions to ensure compliance.
Now, let’s dive into the exciting world of radio and explore the step-by-step process of building your very own radio transmitter!
Materials and Tools Needed
Before you can start building your radio transmitter, you’ll need to gather the necessary materials and tools. Here’s a list of what you’ll need:
- RF oscillator circuit
- Power supply circuit
- Antenna
- Resistors and capacitors
- Inductors
- Transistors
- Breadboard or PCB (Printed Circuit Board)
- Connecting wires
- Soldering iron and solder
- Multimeter
- Power source
- Antenna tuner
- Antenna stand or mast
These materials can be easily obtained from electronics stores, online retailers, or salvaged from old electronic devices. Make sure you have everything on this list before proceeding to the next steps.
In addition to the materials, you’ll also need a set of tools to assemble and test your radio transmitter. Here are the essential tools:
- Screwdriver set
- Wire strippers
- Needle-nose pliers
- Desoldering pump or solder wick
- Heat shrink tubing
- Tweezers
- Safety goggles
- Workbench or a clean workspace
Having these tools readily available will make the assembly process smoother and more efficient.
Once you have all the necessary materials and tools, you’re ready to move on to the next step of building your radio transmitter. Let’s dive into the process of constructing the essential circuits for your transmitter!
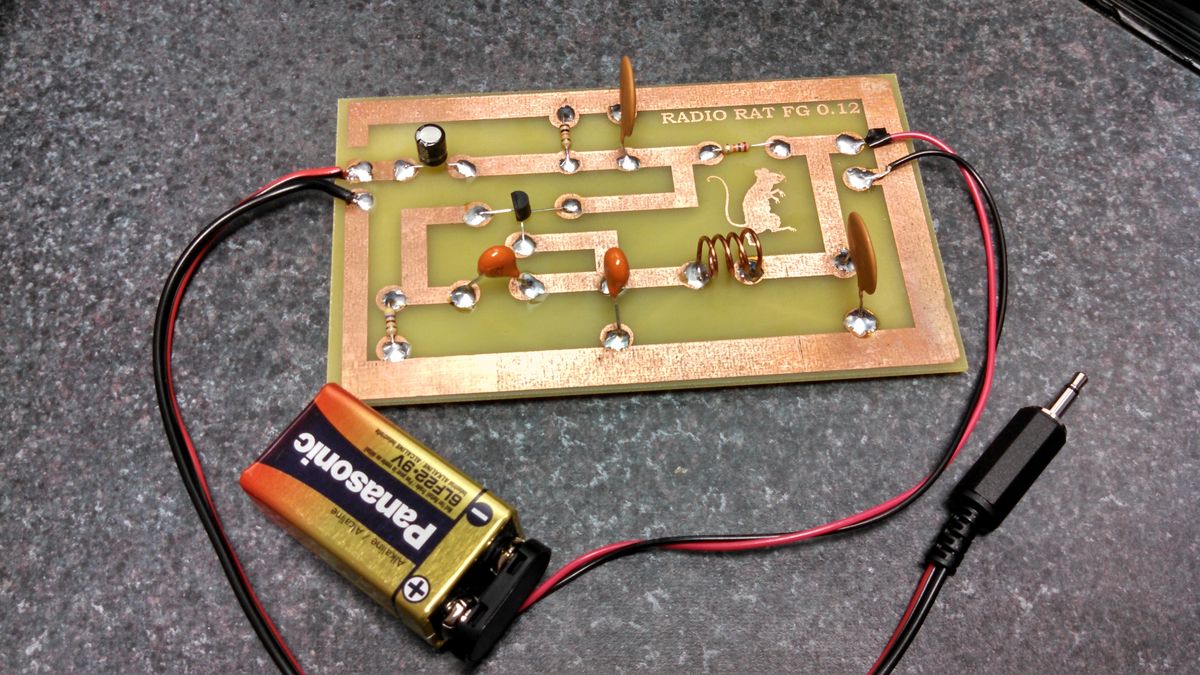
Step 1: Gathering the Components
Before you start building your radio transmitter, it’s important to gather all the necessary components. Here’s a list of the essential components you’ll need:
- RF oscillator circuit: This is the heart of your radio transmitter. It generates the radio frequency signal that will be transmitted.
- Power supply circuit: This circuit provides the necessary power to the oscillator circuit and other components.
- Antenna: The antenna is responsible for transmitting the radio waves to be received by radios in the vicinity.
- Resistors and capacitors: These electronic components are used to control and regulate the flow of electricity in the circuits.
- Inductors: Inductors help in tuning the frequency of the transmitter.
- Transistors: Transistors amplify and control the flow of current in the oscillator circuit.
- Breadboard or PCB (Printed Circuit Board): These are platforms on which you’ll assemble the various components of your transmitter.
- Connecting wires: Wires are used to establish electrical connections between different components.
- Soldering iron and solder: These tools are essential for soldering the components onto the breadboard or PCB.
- Multimeter: A multimeter is used to measure voltage, current, and resistance during the testing phase.
- Power source: You’ll need a power source, such as a battery or DC power supply, to power your transmitter.
- Antenna tuner: An antenna tuner helps in fine-tuning the antenna for optimal transmission.
- Antenna stand or mast: To mount the antenna at an elevated position for better transmission.
It’s crucial to gather all of these components before you move on to the next steps. You can purchase these components from electronics stores, online retailers, or salvage them from old electronic devices.
Once you have all the components ready, you can proceed to the next step of building your radio transmitter: constructing the oscillator circuit.
Step 2: Building the Oscillator Circuit
In this step, we will focus on building the oscillator circuit for your radio transmitter. The oscillator circuit is responsible for generating the radio frequency signal that will be transmitted.
Here are the general steps to build the oscillator circuit:
- Start by referring to the circuit diagram or schematic for the oscillator circuit. This will provide you with the layout and connections of the components.
- Using your breadboard or PCB, place the components on the board according to the schematic. Make sure to follow the correct orientation for diodes, transistors, and capacitors.
- Connect the components together using connecting wires. Ensure that the connections are secure and free from any short circuits.
- Solder the components onto the board to make the connections permanent. Be careful not to overheat the components and use heat shrink tubing to insulate the soldered connections.
- Once the circuit is assembled, double-check all the connections and make sure there are no loose or faulty connections.
- Connect the power source to the oscillator circuit and turn it on.
- Use a multimeter to measure the voltage and check if the circuit is functioning properly.
It is important to note that the specific components and their values will depend on the design of your oscillator circuit. You can find various oscillator circuit designs online or refer to electronics books to choose the best one for your needs.
Once you have successfully built the oscillator circuit, you are ready to move on to the next step of assembling the power supply circuit.
Step 3: Assembling the Power Supply Circuit
In this step, we will focus on assembling the power supply circuit for your radio transmitter. The power supply circuit is responsible for providing the necessary power to the oscillator circuit and other components.
Follow these steps to assemble the power supply circuit:
- Refer to the circuit diagram or schematic specific to the power supply circuit design you have chosen. This will guide you in placing the components correctly.
- Using your breadboard or PCB, position the components on the board according to the schematic. Make sure to follow the correct orientation for diodes, capacitors, and other components.
- Connect the components together using connecting wires, ensuring that the connections are secure and free from any short circuits.
- Solder the components onto the board to make the connections permanent. Take care not to overheat the components and use heat shrink tubing to insulate the soldered connections.
- Double-check all the connections and ensure there are no loose or faulty connections.
- Connect the power source to the power supply circuit and turn it on.
- Measure the voltage using a multimeter to ensure the circuit is functioning properly.
The specific components and their values will depend on the design of your power supply circuit. It’s important to choose components that are capable of supplying the required voltage and current for your radio transmitter.
Once the power supply circuit is assembled and functioning correctly, you are ready to move on to the next step of connecting the antenna.
Step 4: Connecting the Antenna
In this step, we will focus on connecting the antenna to your radio transmitter. The antenna is a vital component as it is responsible for transmitting the radio waves to be received by radios in the vicinity.
Follow these steps to connect the antenna:
- Determine the type of antenna you will be using for your radio transmitter. Common types include a dipole antenna, monopole antenna, or a loop antenna. Choose an antenna design that suits your needs and frequency requirements.
- Position the antenna stand or mast in a suitable location where it can be raised above ground level. Ensure that the antenna has sufficient clearance and is oriented in the desired direction for transmission.
- Connect the antenna to the output of the oscillator circuit. This is typically done by soldering one end of a wire to the output terminal of the oscillator circuit and attaching the other end to the antenna element or terminal.
- If using a dipole antenna, make sure the two antenna elements are properly connected and at the correct length for the desired frequency.
- Secure the antenna in place using clamps, brackets, or any other appropriate mounting mechanism. Ensure that the antenna is stable and properly aligned.
It’s important to note that the length and design of the antenna will depend on the frequency you intend to transmit on. Different frequencies require different antenna dimensions to achieve optimal performance.
Once the antenna is properly connected and secured, you are ready to move on to the next step of testing and troubleshooting your radio transmitter.
Step 5: Testing and Troubleshooting
In this step, we will focus on testing and troubleshooting your radio transmitter to ensure it is functioning properly and producing the desired results.
Here are the steps to test and troubleshoot your radio transmitter:
- Check all the connections in your circuit. Make sure there are no loose or faulty connections that could be affecting the performance of your transmitter.
- Connect a power source to the power supply circuit and turn it on. Ensure that the voltage is within the expected range.
- Measure the output voltage of the oscillator circuit using a multimeter. This will help you determine if the oscillator is generating the desired radio frequency signal.
- Connect an audio source, such as a microphone or audio player, to the input of the oscillator circuit. This will modulate the signal and add audio to the transmission.
- Use a radio receiver tuned to the same frequency as your transmitter to test the transmission. Ensure that you are within the legal transmission range and that the signal is clear and audible.
- If the transmission is weak or distorted, check the antenna connection and positioning. Adjust the antenna length, orientation, or location to improve the signal quality.
- If you encounter any other issues, refer to the circuit diagram and double-check the component values and connections. Test each component individually to identify any faulty components that may need to be replaced.
It’s essential to carefully observe and analyze the results of your testing to identify any areas that need improvement or troubleshooting. Remember that building a radio transmitter requires patience and attention to detail.
Once you have tested and successfully troubleshooted your radio transmitter, you can move on to the next step of fine-tuning the frequency.
Step 6: Fine-Tuning the Frequency
In this step, we will focus on fine-tuning the frequency of your radio transmitter to ensure optimal performance and compliance with regulations.
Follow these steps to fine-tune the frequency:
- Refer to the circuit diagram or documentation specific to your oscillator circuit. Locate the components or tuning mechanisms that control the frequency.
- If your oscillator circuit has adjustable capacitors or inductors, carefully adjust their values to achieve the desired frequency. Small changes in component values can have a significant impact on the transmitted frequency.
- Use a frequency counter or a radio receiver with frequency display capabilities to monitor the output frequency of your transmitter.
- Make incremental adjustments to the tuning components and observe the change in frequency. Fine-tune the frequency until it matches your desired target frequency.
- Keep in mind that any changes made to the oscillator circuit may affect the stability and performance of the transmitter. Take measurements and monitor the signal quality during the tuning process.
It’s important to note that when fine-tuning the frequency, you should stay within the legal limits set by your country’s regulations to avoid interference with other radio communications.
Once you have successfully fine-tuned the frequency of your radio transmitter, you are ready to move on to the final step of ensuring FCC compliance.
Step 7: Ensuring FCC Compliance
Ensuring FCC (Federal Communications Commission) compliance is a crucial step in building a radio transmitter. Compliance with FCC regulations helps prevent interference with other radio communications and ensures the legal operation of your transmitter.
Here are some key points to consider when ensuring FCC compliance:
- Familiarize yourself with the FCC regulations regarding radio transmissions in your country. Understand the power limits, frequency range, and any other requirements specific to your region.
- Ensure that the output power of your transmitter is within the legal limits set by the FCC. Use a power meter or other measurement tools to verify the output power.
- Make sure that your transmitter operates on authorized frequencies and does not interfere with licensed radio services.
- Stay informed about any frequency bands that may be restricted or reserved for specific purposes, such as emergency services or aviation.
- Consider using an antenna tuner to maximize the effectiveness of your transmitter’s antenna and reduce the risk of interference.
- Periodically monitor your transmission to ensure it remains within the authorized frequency range and does not exceed the approved power limits.
- Keep accurate records of your transmitter’s specifications, including the frequencies used, power output, and any modifications made to the circuit.
By following these guidelines, you can ensure that your radio transmitter operates legally and responsibly, without causing interference or violating any regulations.
It’s important to note that FCC compliance may vary between countries, so it’s essential to consult the relevant regulatory authority in your region for specific guidelines and requirements.
With compliance measures in place, you can confidently enjoy your self-built radio transmitter and the exciting world of radio broadcasting!
Conclusion
Congratulations! You have successfully learned how to build your own radio transmitter from scratch. By following the steps outlined in this article, you have gained valuable insights into the process of constructing an oscillator circuit, assembling a power supply circuit, connecting an antenna, testing and troubleshooting, fine-tuning the frequency, and ensuring FCC compliance.
Building your own radio transmitter is not only a fun and educational project but also allows you to have a deeper understanding of the inner workings of radio technology. You can now enjoy the thrill of broadcasting your own content within a limited range.
However, it’s important to note that building and operating a radio transmitter come with legal considerations and requirements. Always ensure compliance with your country’s regulations and obtain any necessary licenses or permits before transmitting. Respecting the frequencies and power limits set by regulatory authorities helps prevent interference with other radio communications and promotes responsible broadcasting.
Remember, radio broadcasting has a rich history and continues to play a significant role in connecting people across the globe. By delving into the world of radio and creating your own transmitter, you become a part of this longstanding tradition.
Have fun exploring the possibilities and possibilities that your radio transmitter offers. Whether you want to share your music collection, experiment with radio waves, or simply satisfy your curiosity, your self-built radio transmitter opens up a world of exciting possibilities.
So, go ahead and unleash your creativity, embrace the power of radio, and enjoy the journey of being a radio broadcaster!