Home>Devices & Equipment>Radio>How To Make A Radio Control Car At Home
Radio
How To Make A Radio Control Car At Home
Modified: January 22, 2024
Learn how to make a radio control car at home with our easy-to-follow guide. Discover the joy of building and driving your own radio-controlled vehicle.
(Many of the links in this article redirect to a specific reviewed product. Your purchase of these products through affiliate links helps to generate commission for AudioLover.com, at no extra cost. Learn more)
Table of Contents
Introduction
Welcome to the exciting world of radio control cars! If you’re a DIY enthusiast and a fan of remote-controlled vehicles, building your own radio control car at home can be a fulfilling and rewarding project. Not only do you get to exercise your creativity and technical skills, but you also get the satisfaction of seeing your creation come to life.
In this article, we will guide you through the process of making a radio control car from scratch. We’ll cover everything from gathering the necessary components to assembling and customizing your car. So, whether you’re a beginner or an experienced hobbyist, get ready to embark on this thrilling journey.
Before we dive into the details, it’s important to understand the basics of how a radio control car works. These vehicles are powered by electric motors and are controlled wirelessly through a radio transmitter and receiver system. The transmitter sends signals to the receiver, which in turn instructs the car on how to move.
Building a radio control car requires patience, attention to detail, and a basic understanding of electronics and mechanics. However, don’t be intimidated if you’re new to this. With some research, practice, and the right materials, you’ll be able to create your very own customized car that suits your preferences.
In the following sections, we’ll provide you with a step-by-step guide on how to make a radio control car at home. You’ll learn about the necessary materials, the process of building the chassis, connecting the electronics, wiring the motor, assembling the radio control system, testing and troubleshooting, and even customizing your car with additional features.
So, put on your DIY hat, roll up your sleeves, and get ready to unleash your creativity as we embark on this exciting journey of building a radio control car!
Materials Needed
Before you start building your radio control car, it’s important to gather all the necessary materials. Having everything prepared in advance will ensure a smooth and efficient building process. Here’s a list of the materials you’ll need:
- Chassis: The foundation of your car, which can be made of metal or plastic. Look for a durable chassis that suits your desired car model.
- Motor: An electric motor that will power your car. Choose a motor based on the speed and torque requirements of your car.
- Battery: A rechargeable battery pack that will provide the necessary power to the motor. Consider the voltage and capacity of the battery to ensure sufficient runtime.
- ESC (Electronic Speed Controller): This device controls the speed and direction of the motor. Make sure to choose an ESC that is compatible with your motor and transmitter.
- Transmitter and Receiver: The radio control system that allows you to wirelessly control your car. Look for a transmitter with multiple channels for greater control.
- Servo: A servo motor that will control the steering mechanism of your car. Consider the torque and speed of the servo when making your selection.
- Wheels and Tires: Choose wheels and tires that are appropriate for your car’s terrain and intended use. Consider factors such as grip, durability, and size.
- Suspension System: Depending on your car model and desired performance, you may need a suspension system to absorb shocks and improve stability.
- Body Shell: The outer casing of your car, which can be made of lexan or ABS plastic. Select a body shell that suits your aesthetic preferences.
- Paint and Decals: If you want to customize the appearance of your car, you’ll need paint and decals to add a personal touch.
- Tools: A variety of tools will be necessary for assembly, such as screwdrivers, pliers, wire cutters, and soldering equipment.
This is a basic list of materials needed to build a radio control car. Depending on your specific design and customization preferences, you may need additional components. It’s always a good idea to do some research and consult online forums or hobby shops for guidance and recommendations on specific materials for your project.
Now that you have gathered all the necessary materials, let’s move on to the next step: building the chassis of your radio control car.
Step 1: Gathering the Components
Before you can start building your radio control car, it’s important to gather all the necessary components. Taking the time to source high-quality materials will ensure that your car performs well and lasts for a long time.
Here are the essential components you’ll need to gather:
- Chassis: The chassis is the backbone of your car and provides a sturdy foundation. You can choose from various materials such as metal or plastic, depending on your preference and budget.
- Motor: The motor is the heart of your radio control car, responsible for its speed and power. There are different types of motors available, including brushed and brushless motors. Consider factors such as power output, efficiency, and compatibility with your chosen electronics.
- Battery: A rechargeable battery will supply the necessary power to your motor and electronics. Look for batteries with a suitable voltage and capacity to meet your car’s power requirements.
- Electronic Speed Controller (ESC): The ESC regulates the speed and direction of the motor. Select an ESC that is compatible with your motor’s specifications and provides the features you desire, such as programmability or built-in failsafes.
- Transmitter and Receiver: The transmitter allows you to control your car wirelessly, while the receiver receives the signals and relays them to the servo and ESC. Choose a transmitter with enough channels for your desired functionalities and a receiver compatible with your chosen transmitter.
- Servo: The servo is responsible for steering the car. Consider the torque and speed requirements of your car when choosing a servo. High torque servos are ideal for off-road vehicles, while high-speed servos are better suited for on-road racing.
- Wheels and Tires: The wheels and tires provide traction and allow your car to move. Depending on your driving style and terrain, choose the appropriate wheels and tires. On-road tires are designed for smooth surfaces, while off-road tires have more grip for rough terrains.
- Body: The body of your car adds the finishing touch and protects the internal components. Choose a body shell that appeals to you and is compatible with your chosen chassis.
- Tools and Accessories: To assemble your car, you’ll need various tools such as screwdrivers, pliers, wire cutters, and possibly a soldering iron. It’s also helpful to have zip ties, connectors, and other accessories for secure wiring and customization.
Once you have gathered all the necessary components, you’re ready to move on to the next step: building the chassis of your radio control car.
Step 2: Building the Chassis
Now that you have gathered all the necessary components, it’s time to start building the chassis of your radio control car. The chassis serves as the framework that holds all the other components together, providing stability and support.
Here are the steps to follow when building the chassis:
- Choose the Chassis: Select a chassis that suits your specific car model and desired performance. Consider factors such as material, durability, and compatibility with your chosen components.
- Prepare the Chassis: Clean the chassis thoroughly to remove any dirt and debris. This will ensure a proper fit and smooth assembly.
- Attach the Motor Mount: Install the motor mount onto the chassis using the provided screws. Make sure it is securely attached and aligned properly.
- Mount the Motor: Attach the motor to the motor mount using the appropriate screws or brackets. Ensure that the motor is positioned correctly and aligned with the gear mesh for optimal performance.
- Install the Battery Tray: Depending on your chassis design, you may need to install a battery tray to hold your rechargeable battery securely.
- Secure Electronics: Mount the ESC and receiver onto the chassis using double-sided tape or Velcro straps. Ensure that they are positioned in a way that allows for easy access for future maintenance or adjustments.
- Connect the Servo: Attach the servo to the chassis using servo mounts or brackets. Make sure it is securely fastened and aligned with the steering mechanism.
- Install Suspension Systems: If your chassis supports a suspension system, follow the manufacturer’s instructions to install the shocks and other suspension components.
- Attach Wheels and Tires: Install the wheels onto the axles and secure them with the provided wheel nuts. Then, mount the appropriate tires onto the wheels for optimal traction.
- Check for Stability: Double-check all connections, screws, and fasteners to ensure that your chassis is stable and all components are securely in place.
Building the chassis is a crucial step in creating your radio control car, as it sets the foundation for the rest of the assembly. Take your time to ensure that everything is properly aligned and securely attached. Once your chassis is built, you’re ready to move on to the next step: connecting the electronics.
Step 3: Connecting the Electronics
With the chassis built, it’s time to connect the electronics of your radio control car. This step involves wiring the components together to establish the electrical connections that will allow your car to function.
Here’s how to proceed with connecting the electronics:
- Identify the Components: Take a moment to familiarize yourself with the various electronic components, such as the ESC, receiver, servo, and motor. This will help you understand where each component needs to be connected.
- Refer to Wiring Diagrams: Locate the wiring diagrams provided with your components or look for online resources specific to your car model. These diagrams will guide you in making the proper connections.
- Connect the Battery: Attach the positive (+) and negative (-) leads of the battery to the corresponding terminals on the ESC. Ensure a secure connection and double-check the polarity to avoid any accidental damage.
- Connect the ESC and Receiver: Use servo wires or connectors to link the ESC and receiver. Follow the specified channel assignments to ensure proper communication between the two components.
- Connect the Servo: Use servo wires to connect the servo to the receiver. Follow the labeled slots on the receiver to ensure the correct connection.
- Wire the Motor: Connect the motor to the ESC using motor wires or connectors. Check the motor specifications and the ESC manual for proper wire orientation.
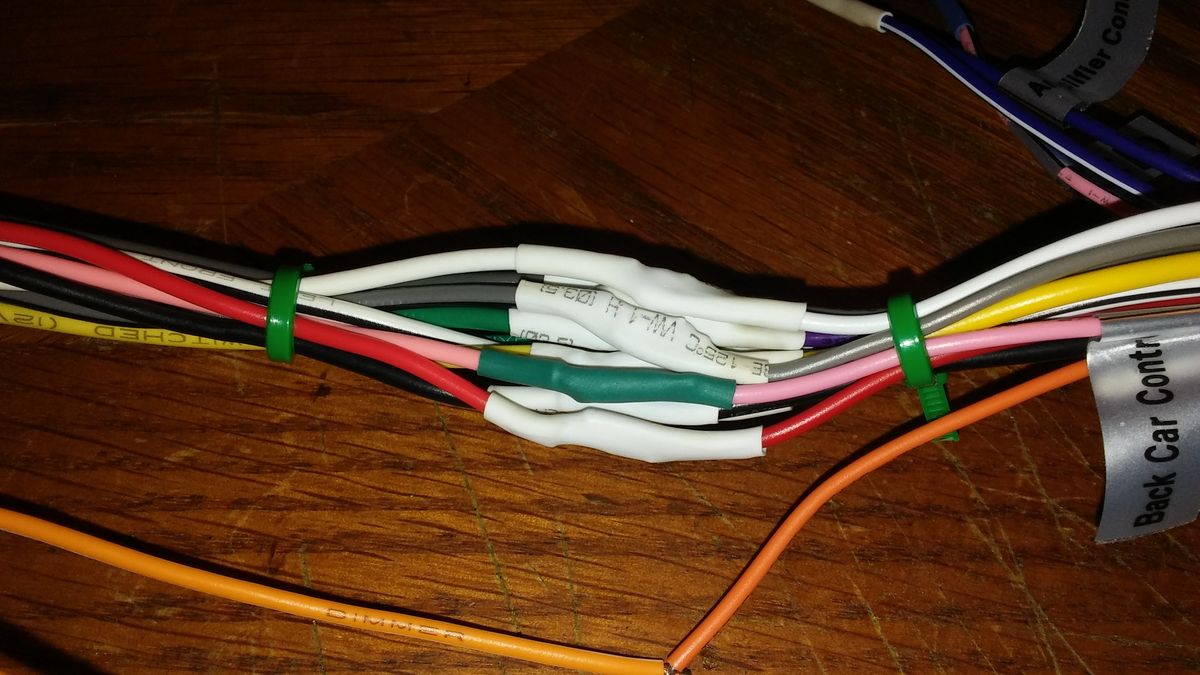
- Secure the Wiring: Use zip ties or adhesive tape to neatly organize and secure the wires along the chassis. This will prevent any interference with the moving components and protect the wires from damage.
- Check the Connections: Once all the connections are made, double-check them to ensure that everything is properly connected, and there are no loose or misplaced wires.
It’s important to follow the wiring diagrams and guidelines provided with your specific components as they may vary slightly depending on the brand and model. Taking your time to make proper connections will prevent any potential issues and ensure a smooth functioning of your radio control car.
With the electronics connected, you’re one step closer to completing your car. In the next step, we’ll cover wiring the motor to bring your radio control car to life.
Step 4: Wiring the Motor
Now that the electronics are connected, it’s time to wire the motor of your radio control car. The motor is responsible for the car’s movement, so it’s important to ensure that it is properly wired and functioning correctly.
Here’s how to wire the motor:
- Identify the Motor Wires: Begin by identifying the motor wires. Most motors have three wires – two for power and one for ground. Refer to the motor’s documentation or markings to determine which wires correspond to power and ground.
- Prepare the Wires: Use wire cutters to trim the motor wires to the appropriate length, leaving a bit of extra wire for flexibility. Strip the insulation off the ends of the wires to expose the strands.
- Connect the Motor Wires to the ESC: Identify the motor wires on the ESC and match them with the motor wires. Twist the corresponding wires together and secure them using soldering or connectors, depending on your preferred method.
- Check the Wire Polarities: Double-check the wire polarities to ensure that the positive wire on the motor is connected to the corresponding positive wire on the ESC, and the same for the negative wires. Incorrect wiring can lead to malfunctions or damage to the components.
- Secure the Connections: Once the wires are securely connected, insulate them with heat shrink tubing or electrical tape to protect the connections and prevent any short circuits or interference.
- Check the Motor Rotation: Test the motor rotation by giving a small throttle input from your transmitter. The motor should spin smoothly and in the correct direction. If the rotation is incorrect, you may need to reverse the motor wires on the ESC.
- Secure the Motor: Use mounting screws or brackets to secure the motor onto the motor mount of the chassis. Ensure that it is properly aligned and securely fastened.
Wiring the motor correctly is crucial for the proper functioning and performance of your radio control car. Take your time to ensure that the wires are connected securely, and the motor rotation is correct. Double-check all the connections before proceeding to the next step.
In the next step, we’ll cover the process of assembling the radio control system for your car, allowing you to wirelessly control its movements.
Step 5: Assembling the Radio Control System
With the motor wired and the chassis prepared, it’s time to assemble the radio control system of your radio control car. The radio control system consists of the transmitter, which you hold in your hands, and the receiver, which is installed in the car and receives signals from the transmitter to control its movements.
Here’s how to assemble the radio control system:
- Power Up the Transmitter: Install the required batteries or charge the transmitter if necessary. Make sure the transmitter is turned off before proceeding.
- Install the Receiver: Locate the receiver and find an appropriate spot on the chassis to install it. Use double-sided tape or Velcro to secure the receiver in place.
- Connect the Receiver: Connect the receiver to the ESC and servo using the appropriate connectors or servo wires. Follow the labels on the receiver to ensure the correct connections.
- Bind the Transmitter and Receiver: Follow the transmitter’s instructions to bind it with the receiver. This process establishes a secure connection between the two, allowing the transmitter to control the car’s movements.
- Calibrate the Servo: Turn on the transmitter and receiver, and hold the transmitter in a neutral position. Use the transmitter’s calibration feature to center the steering servo and ensure it responds accurately to the transmitter’s input.
- Test the Radio Control System: With the transmitter and receiver connected and calibrated, test the radio control system by using the transmitter’s controls to steer and accelerate the car. Ensure that all the movements are smooth and responsive.
Assembling the radio control system is a crucial step as it allows you to wirelessly control your car’s movements. Take your time to carefully connect and calibrate the transmitter and receiver, ensuring a reliable and accurate control experience.
In the next step, we’ll cover the important process of testing and troubleshooting your radio control car to ensure its optimal performance.
Step 6: Testing and Troubleshooting
After assembling the radio control system, it’s essential to thoroughly test and troubleshoot your radio control car to ensure its optimal performance. Testing allows you to identify any issues or potential problems and make necessary adjustments before taking your car out for a spin.
Here’s how to effectively test and troubleshoot your radio control car:
- Check Component Functionality: Go through each component, including the motor, servo, ESC, and radio control system, to ensure they are functioning correctly. Test the steering, acceleration, and braking to make sure they respond accurately to the transmitter’s commands.
- Test Range and Signal: Take your car to an open area and test the range and signal strength of your radio control system. Walk away from the car while operating the controls to determine how far you can go before losing control. Ensure that the signal remains strong and consistent within a reasonable range.
- Observe Motor Performance: Monitor the performance of the motor during testing. Ensure that it doesn’t overheat or make any unusual noises. If the motor gets excessively hot or exhibits strange behavior, it may indicate a problem with the gearing, motor settings, or electrical connections.
- Check for Binding or Interference: Keep an eye out for any binding or interference between moving components, such as the servo, wheels, and suspension. Ensure that they move freely without any obstructions or unnecessary friction.
- Address Any Issues: If you encounter any issues or problems during testing, take the time to troubleshoot and identify the cause. Check for loose connections, damaged components, or any configuration or calibration errors. Make the necessary adjustments or replacements to rectify the issues.
- Re-test and Fine-tune: After making any necessary adjustments or repairs, re-test your car to ensure that the issues have been resolved and all components are functioning correctly. Fine-tune any settings such as throttle response, steering sensitivity, or suspension setup to achieve the desired performance.
Testing and troubleshooting are crucial steps to ensure that your radio control car performs optimally and safely. By identifying and addressing any issues early on, you’ll be able to enjoy a smooth and enjoyable driving experience.
Once you’re satisfied with the performance and functionality of your radio control car, you can move on to the final step: customization and adding additional features to personalize your creation.
Step 7: Customization and Additional Features
Now that your radio control car is fully functional, it’s time to have some fun and add your personal touch through customization and the addition of additional features. Customization allows you to make your car unique and tailor it to your preferences, while additional features can enhance its performance and functionality.
Here are some ways you can customize and add additional features to your radio control car:
- Paint and Decals: Give your car a custom paint job using RC-specific paint or decals to add style and personality. Let your creativity shine and design a unique look for your car.
- Lights and Accessories: Install LED lights to enhance visibility during low-light conditions or add accessories like spoilers, bumpers, or roll cages to improve the car’s appearance and functionality.
- Suspension Tuning: Fine-tune the suspension system by adjusting shock positions, spring rates, and oil viscosity. This allows you to optimize the car’s handling and performance according to different terrains and driving styles.
- Upgrade Components: Consider upgrading certain components, such as the motor, ESC, or servo, to improve performance. Choose high-quality aftermarket parts that are compatible with your car model for enhanced speed, power, or durability.
- Personalize the Body Shell: Add personal touches to the body shell, such as decals, stickers, or even custom-made designs, to make your car stand out and reflect your style.
- Add Cameras or Wireless Modules: Incorporate cameras or wireless modules to capture videos or enable first-person view (FPV) driving, allowing you to experience the thrill of driving your car from a more immersive perspective.
- Sound Systems: For a more realistic experience, you can install sound systems that emulate engine sounds or add various audio effects to enhance your driving experience.
Remember to choose customization options and additional features that are compatible with your car model and won’t negatively impact its performance. Take your time to research and explore various options to create the car of your dreams.
By customizing and adding additional features, you’ll not only have a unique and personalized radio control car but also enhance its performance and enjoyment. Enjoy the process of making your car truly one-of-a-kind!
With the completion of Step 7, you have successfully built and customized your radio control car. Now it’s time to go out and enjoy the thrill of controlling your creation on various terrains and tracks. Have fun, stay safe, and let your imagination drive you to new adventures!
Conclusion
Congratulations! You have completed the journey of building your very own radio control car. Throughout this process, you have acquired valuable knowledge and skills in electronics, mechanics, and customization. By following the step-by-step guide and employing your creativity, you have transformed a collection of components into a unique and personalized vehicle that reflects your style and preferences.
Building a radio control car at home not only provides a sense of accomplishment but also opens up a world of endless possibilities. You can continue to refine and improve your car by experimenting with different components, setups, and customization options. The satisfaction of seeing your car perform flawlessly and the joy of driving it will make all your efforts worthwhile.
Remember to always prioritize safety while operating your radio control car. Follow local regulations and choose appropriate locations for driving, ensuring the safety of yourself and others. Regular maintenance and inspection of your car will also help keep it in optimal condition, extending its lifespan and performance.
Building and customizing radio control cars is a hobby that brings people together. Engage with the vibrant community of radio control enthusiasts, attend events, and participate in races. You’ll have the opportunity to connect with like-minded individuals, share experiences, and learn from each other.
Now that you have the knowledge and experience, you can explore other possibilities in the world of radio control vehicles. Consider building different types of vehicles like planes, boats, or even drones. Each new project will present its own unique challenges and rewards.
Embrace the excitement and enjoy the journey of building and driving your radio control car. Whether you choose to race, perform stunts, or simply enjoy the thrill of speeding around, remember to have fun and savor every moment. Happy driving!