Home>Devices & Equipment>Radio>How To Build A Radio
Radio
How To Build A Radio
Published: November 10, 2023
Learn how to build a radio from scratch with our step-by-step guide. Create your own customized radio and enjoy endless hours of entertainment.
(Many of the links in this article redirect to a specific reviewed product. Your purchase of these products through affiliate links helps to generate commission for AudioLover.com, at no extra cost. Learn more)
Table of Contents
Introduction
Radio has been an integral part of our lives for decades, connecting us to news, music, and entertainment. While modern technology has given us portable radios that fit in the palm of our hands, building your own radio can be a rewarding and educational experience.
This article will guide you through the process of building your own radio from scratch. From gathering the necessary materials to assembling and testing the final product, you’ll learn the fundamentals of radio circuitry and gain a deeper understanding of how this timeless device works.
Building a radio not only allows you to customize its design and features, but it also gives you the opportunity to appreciate the complex engineering behind this everyday device. By taking on this project, you’ll develop your soldering skills, learn about electronic components, and gain hands-on experience in circuit design.
Whether you’re a hobbyist looking to expand your electronics knowledge or simply curious about how radios work, this step-by-step guide will take you through the process of building a basic AM/FM radio. So let’s get started with gathering the materials you’ll need!
Step 1: Gather Materials
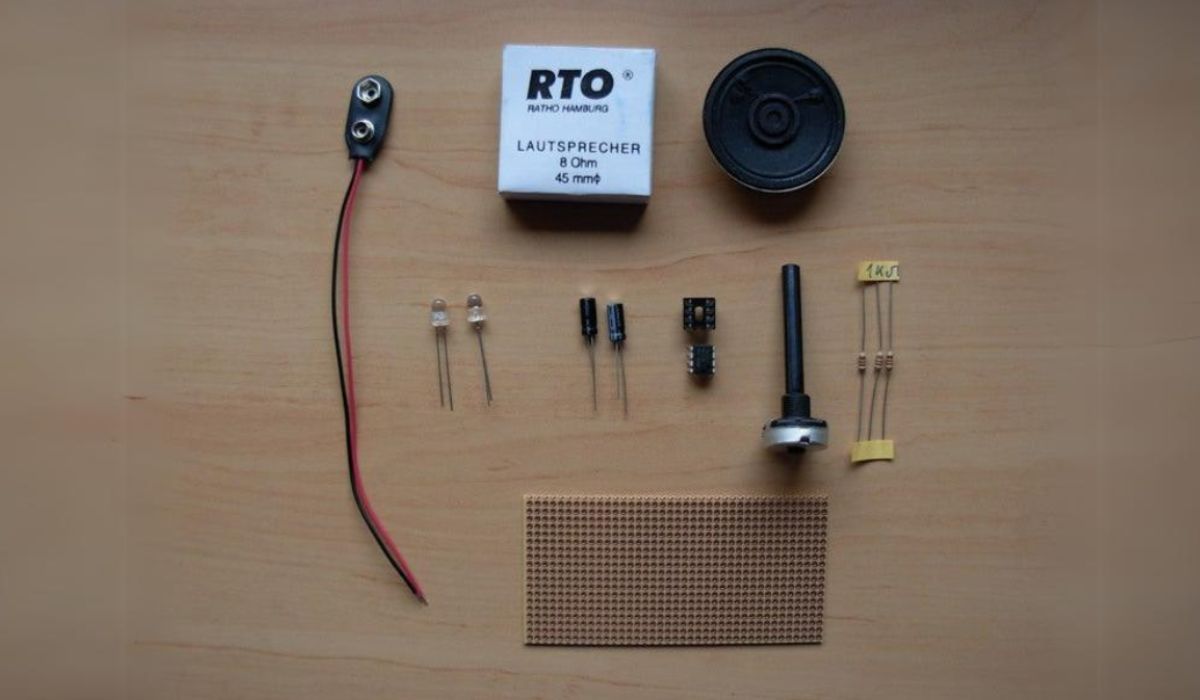
Before you begin building your radio, it’s essential to gather all the necessary materials and components. Here is a list of items you’ll need:
- A circuit board: This will serve as the foundation for your radio’s electronic components. Choose a board that is appropriate for the size and complexity of your project.
- Electronic components: To receive and transmit radio signals, you’ll need components such as resistors, capacitors, diodes, transistors, and an integrated circuit (IC).
- An antenna: This is crucial for receiving radio signals. Depending on your design, you can use a wire antenna or a specialized antenna designed for AM or FM reception.
- A housing: Decide on the type of enclosure you want for your radio. It can be a simple plastic box or a custom-made wooden case.
- Controls and display: Depending on the features you want for your radio, you’ll need switches, knobs, and a display to tune in to different stations and adjust settings.
- Power source: Decide if you want your radio to run on batteries or be powered by an external power supply. Make sure to choose a compatible power source.
- Soldering equipment: To connect the components to the circuit board, you’ll need a soldering iron, solder wire, and flux.
- Basic hand tools: These include wire cutters, pliers, screwdrivers, and a multimeter for testing and troubleshooting.
It’s important to note that the specific components and materials you’ll need may vary depending on the type of radio you want to build. Research different radio circuits and designs to determine the appropriate materials for your project.
Once you have gathered all the necessary materials, you’re ready to move on to the next step: preparing the circuit board.
Step 2: Prepare the Circuit Board
Now that you have all the materials in place, it’s time to prepare the circuit board for assembling the electronic components. Follow these steps to get your circuit board ready:
- Inspect the circuit board: Examine the board for any visible defects or damaged traces. Use a magnifying glass if needed to ensure there are no solder bridges or breaks in the copper traces.
- Clean the board: Use a gentle brush or a cotton swab dipped in isopropyl alcohol to clean the circuit board. This will remove any dust, debris, or fingerprints that may interfere with the soldering process.
- Apply solder mask: If your circuit board doesn’t already have a solder mask, you can apply one to protect the traces and prevent unintended solder connections. Make sure to follow the instructions provided with the solder mask material.
- Identify component placement: Refer to the circuit diagram or layout diagram of your radio circuit. Identify the locations where each component will be soldered on the board. Use a marker or label stickers to mark these spots.
- Prepare the solder pads: Use a soldering iron with a fine tip to apply a small amount of solder to each solder pad on the board. This will help improve the soldering connection between the components and the board.
By taking the time to properly prepare the circuit board, you’re setting the foundation for a secure and reliable connection between the electronic components. With the board ready, you can now move on to the next step: soldering the components.
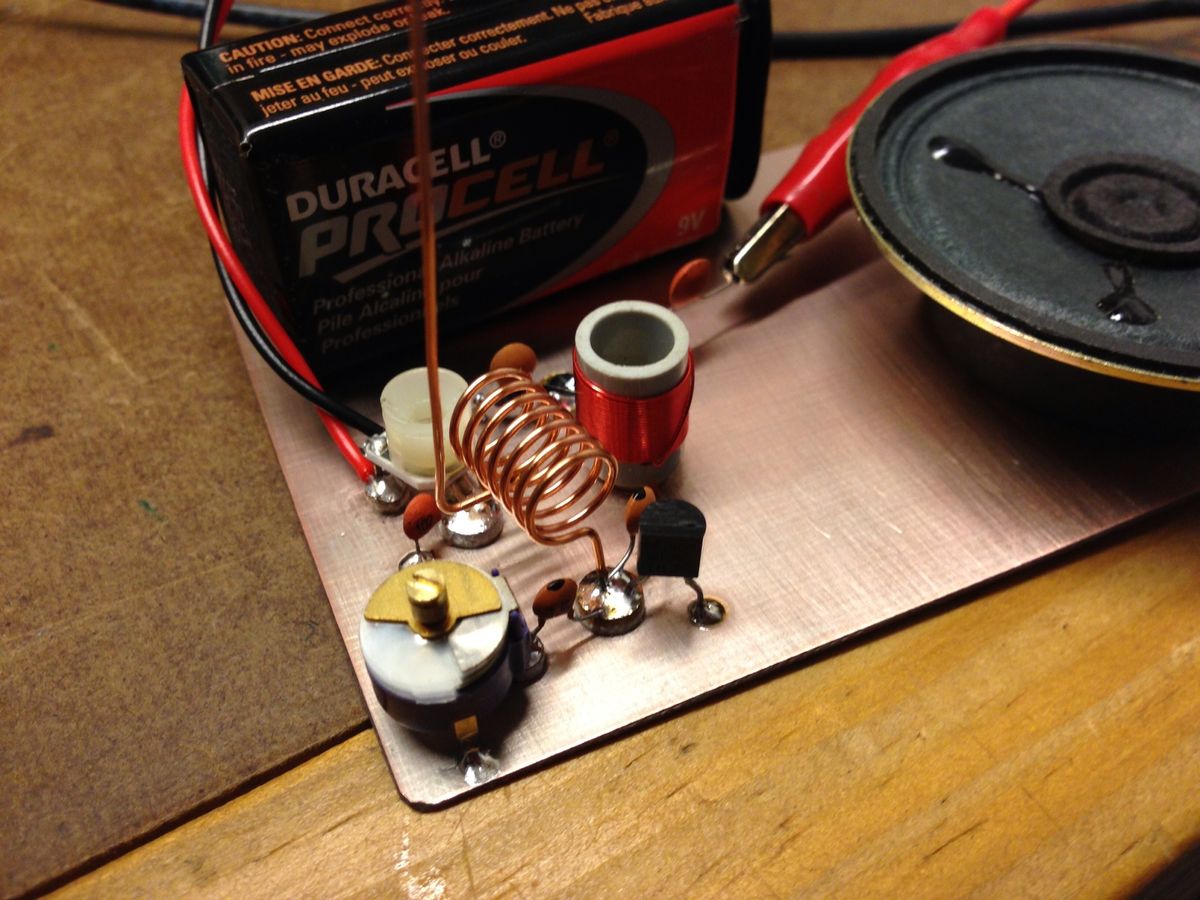
Step 3: Solder Components
With the circuit board prepared, it’s time to solder the electronic components in place. Follow these steps to ensure a successful soldering process:
- Prepare your soldering station: Set up your soldering iron and make sure it is heated to the appropriate temperature for the components you are working with. Additionally, have your solder wire and flux at hand.
- Start with low-profile components: Begin by soldering the smaller, low-profile components such as resistors and diodes. Place each component on its designated spot on the circuit board and hold it in place with a small piece of tape if necessary.
- Apply flux: Apply a small amount of flux to the solder pads and component leads. Flux helps in achieving a clean solder joint by preventing oxidation and improving solder flow.
- Solder the components: Touch the soldering iron tip to the joint of the component lead and the solder pad simultaneously. Allow the solder to flow onto the joint, ensuring a secure and reliable connection. Be careful not to apply excessive heat to prevent damage to the components.
- Trim excess leads: After soldering each component, use wire cutters to trim the excess component leads flush with the solder joint. This will keep the circuit board tidy and prevent short circuits.
- Repeat for all components: Continue soldering the remaining components, following the same process. Take your time to ensure each joint is properly soldered and visually inspect for any signs of cold solder joints or bridges.
Remember to maintain good soldering practices, such as avoiding excessive heat, not disturbing the components before the solder cools, and using proper ventilation to avoid inhalation of solder fumes. Take breaks as needed to prevent solder fatigue.
Once all the components are soldered in place, you’re ready to move on to the next step: connecting the antenna for optimal signal reception.
Step 4: Connect the Antenna
Now that the components are soldered onto the circuit board, it’s time to connect the antenna. The antenna is a crucial part of the radio as it picks up radio signals for reception. Follow these steps to connect the antenna:
- Select the appropriate antenna: Depending on the type of radio circuit you’re using, you may need to choose either a wire antenna or a specialized AM or FM antenna. Refer to the circuit diagram or instructions for guidance.
- Identify the antenna connection point: On the circuit board, there will be a designated spot for connecting the antenna. It may be labeled as “ANT” or “Antenna.” Locate this connection point.
- Prepare the antenna wire: If you’re using a wire antenna, strip off a small section of insulation from the end of the wire. This will expose the metal core for connection.
- Solder the antenna wire: Place the stripped end of the antenna wire onto the antenna connection point on the circuit board. Apply heat from the soldering iron to the joint and touch the solder wire to create a secure connection. Be careful not to overheat or damage the circuit board.
Once the antenna is connected, double-check that the solder joint is solid and there are no loose connections. A stable and properly connected antenna will ensure optimal reception for your radio.
With the antenna in place, you’re one step closer to completing your radio. The next step is to assemble the housing to protect the circuitry and provide a neat and professional appearance.
Step 5: Assemble the Housing
Assembling the housing for your radio not only adds aesthetic value but also protects the circuit board and components. Follow these steps to assemble the housing:
- Choose a suitable housing: Decide on the type of enclosure you want for your radio. It can be a plastic box, a wooden case, or any other material that suits your design preferences. Ensure that the housing is large enough to accommodate the circuit board and has adequate space for the controls and display.
- Prepare the housing: If necessary, drill holes in the housing for the controls, display, and other external components of your radio. Take accurate measurements and use appropriate tools for a clean and precise finish.
- Mount the circuit board: Place the circuit board inside the housing, aligning it with the pre-drilled holes. Use screws, standoffs, or adhesive materials to secure the board in place, ensuring it is firmly anchored and protected from movement or vibrations.
- Mount the controls and display: Install the switches, knobs, buttons, and display components according to your design. Ensure that they are properly aligned with the holes in the housing and securely fastened.
- Organize the wiring: Carefully route and organize the wiring inside the housing to ensure a clean and clutter-free appearance. Use cable ties, clips, or adhesive mounts to secure and manage the wires.
- Close the housing: Once all the components are securely mounted and the wiring is organized, close the housing. Ensure that the enclosure is tightly sealed to protect the circuitry from dust, moisture, and other potential hazards.
By assembling the housing with precision and care, you’re not only enhancing the overall look of your radio but also providing a stable and protected environment for the circuit board and components to function optimally.
With the housing assembled, you’re nearing the completion of your radio project. The next step is to install the controls and display to enable you to tune in to different stations and adjust settings.
Step 6: Install Controls and Display
Installing the controls and display is a crucial step in building your radio, as it allows you to interact with the device and tune in to your favorite stations. Follow these steps to install the controls and display:
- Identify the control and display components: Depending on your design, you may have switches, knobs, buttons, and an LCD or LED display for tuning and adjusting settings. Refer to your circuit diagram or instructions to determine the appropriate placement and connections.
- Mount the controls: Begin by mounting the switches, knobs, and buttons onto the pre-drilled holes in the housing. Ensure they are aligned properly and securely fastened. Use locking washers or nuts if necessary to prevent loosening over time.
- Connect the controls: Carefully connect the control components to the appropriate pins or terminals on the circuit board. Use wires or ribbon cables, making sure to match the connections according to the circuit diagram.
- Install the display: If your radio has an LCD or LED display, follow the manufacturer’s instructions to mount it onto the housing. Connect the display to the circuit board using appropriate cables, ensuring a secure connection.
- Test the controls and display: Power on your radio and test the functionality of the installed controls and display. Check if the controls respond correctly and if the display shows the relevant information accurately. Make any necessary adjustments or corrections.
Properly installing the controls and display ensures that your radio is user-friendly and allows you to conveniently operate and enjoy your custom-built device.
With the controls and display successfully installed, you’re almost ready to experience the joy of listening to your favorite stations. However, before that, you need to test and adjust your radio to ensure optimal performance, which brings us to the next step.
Step 7: Test and Adjust
Now that your radio is fully assembled, it’s time to test and make any necessary adjustments to ensure optimal performance. Follow these steps to test and adjust your radio:
- Power on your radio: Connect your radio to a power source, either batteries or an external power supply, depending on your design. Ensure everything is securely connected and there are no loose wires or connections.
- Tune in to a station: Use the controls on your radio to tune in to a known station. Start with a strong signal station to ensure you can test the reception and audio quality.
- Experiment with the controls: Adjust the volume, switch between AM and FM modes, and explore other features and functionalities of your radio. Observe if the controls respond accurately and if they affect the audio output.
- Check for interference: Move around the radio and listen for any interference or static noise. This can be an indication of poor grounding or interference from nearby electronic devices. Make adjustments as needed to minimize interference.
- Perform an audio quality check: Listen to the audio output of your radio and assess the overall quality. Pay attention to clarity, volume range, and any distortion or background noise. Make adjustments to the circuit or components if necessary to improve the audio quality.
- Seek expert guidance if needed: If you encounter any technical difficulties or if the radio is not performing as expected, don’t hesitate to seek guidance from experienced individuals or electronics forums. They can provide valuable insights and troubleshooting steps to help you rectify the issues.
Testing and adjusting your radio is an important step in ensuring its functionality and performance. By carefully assessing and fine-tuning the various aspects, you can achieve a radio that provides clear and enjoyable reception of your favorite stations.
With the testing and adjustment process successfully completed, you have now built your own radio! Take a moment to appreciate the knowledge and skills you’ve acquired throughout this journey.
Conclusion
Congratulations on successfully building your own radio! By following the steps outlined in this guide, you have gained valuable insights into the world of radio circuitry and electronics. Building a radio from scratch is not only an exciting and rewarding project, but it also provides a deeper understanding of how this essential device functions.
Throughout this process, you have learned about gathering the necessary materials, preparing the circuit board, soldering components, connecting the antenna, assembling the housing, installing controls and display, and testing and adjusting your radio. Each step has allowed you to develop your skills in electronics, soldering, circuitry, and problem-solving.
Building a radio also gives you the freedom to customize its design and features according to your preferences. Whether it’s choosing a unique housing, selecting different control components, or experimenting with advanced circuitry, the possibilities are endless.
Remember, building a radio is just the beginning. You can continue to expand your knowledge by exploring different radio circuit designs, experimenting with new components, and even delving into more advanced concepts such as digital signal processing. The world of radio technology is vast, and there is always more to learn and explore.
So, go ahead and enjoy your newly built radio as you tune in to your favorite stations and experience the joy of listening to music, news, and entertainment. Your custom-built radio is a testament to your skills and passion for electronics. Happy listening!