Home>Devices & Equipment>Radio>How To Remove Kenwood Radio
Radio
How To Remove Kenwood Radio
Published: November 10, 2023
Learn how to remove a Kenwood radio easily with our step-by-step guide. Whether you're upgrading or troubleshooting, our expert tips will help you navigate the process smoothly.
(Many of the links in this article redirect to a specific reviewed product. Your purchase of these products through affiliate links helps to generate commission for AudioLover.com, at no extra cost. Learn more)
Table of Contents
- Introduction
- Step 1: Gather Supplies
- Step 2: Disconnect the Power Source
- Step 3: Remove the Trim Panel
- Step 4: Unmount the Kenwood Radio
- Step 5: Disconnect the Wiring Harness
- Step 6: Remove the Antenna Plug
- Step 7: Remove the Mounting Bracket
- Step 8: Install the New Radio or Leave Empty Slot
- Step 9: Reconnect the Wiring Harness
- Step 10: Remount the Trim Panel
- Step 11: Reconnect the Power Source
- Conclusion
Introduction
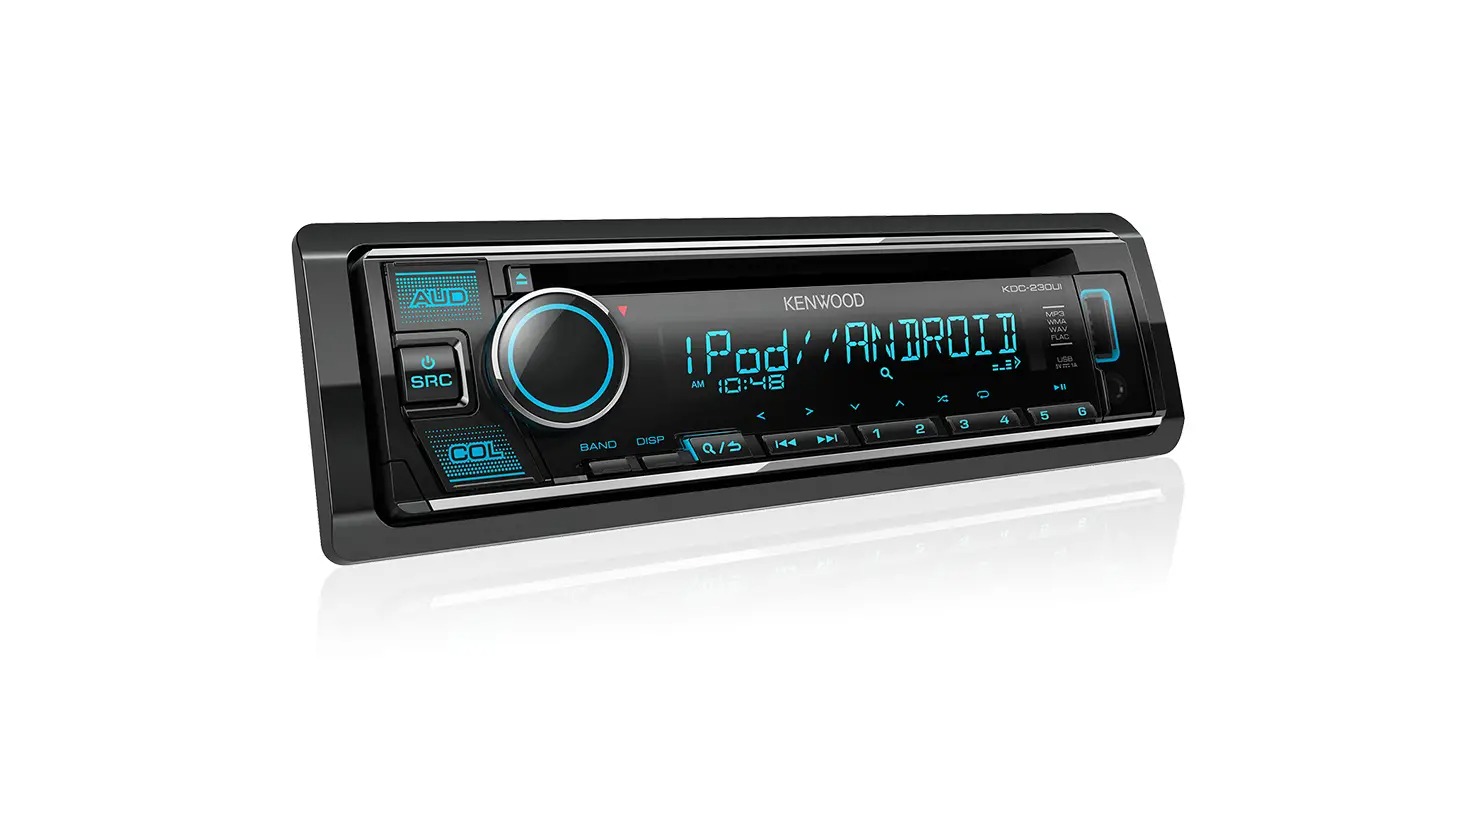
If you’re looking to remove a Kenwood radio from your vehicle, whether it’s to upgrade to a newer model or for repairs, this article will guide you through the step-by-step process. Kenwood is a well-known brand in the radio industry, known for their high-quality and reliable products. By following these instructions, you’ll be able to safely and efficiently remove your Kenwood radio without causing any damage to your vehicle.
Removing a Kenwood radio may seem like a daunting task, especially if you’re not familiar with car electronics. However, with a few basic tools and some patience, you’ll be able to complete the process successfully. It’s important to note that the exact steps may vary slightly depending on the make and model of your vehicle, as well as the specific Kenwood radio you’re dealing with. So be sure to consult the user manual or seek professional assistance if needed.
In this guide, we’ll walk you through each step of the removal process, from gathering the necessary supplies to reinstalling the trim panel. Whether you’re a seasoned DIY enthusiast or a beginner, these instructions will help you navigate the process smoothly.
Before we begin, it’s crucial to prioritize safety. Always disconnect the power source and take precautions to avoid damaging any components during the removal process. Remember to take your time and be gentle with the wires and connectors to prevent any accidental breakage or short circuits.
Now that we’ve covered the basics, let’s proceed to the first step: gathering the necessary supplies.
Step 1: Gather Supplies
Before you start removing your Kenwood radio, it’s essential to gather the necessary supplies. Having the right tools on hand will make the process smoother and ensure that you have everything you need to complete the removal successfully. Here are the supplies you’ll need:
- Trim removal tools: These tools are specifically designed to help you remove the trim panel without causing any damage. They come in various shapes and sizes to accommodate different types of trim panels.
- Socket wrench set: You’ll need a socket wrench to remove any bolts or screws that are holding the radio in place. Make sure you have a set that includes sockets of different sizes to fit the fasteners.
- Wire harness adapter: If you plan on installing a new radio after removing the Kenwood one, a wire harness adapter will make the installation process much easier. It allows you to connect the new radio to the existing wiring in your vehicle without cutting or splicing any wires.
- Antenna adapter: Similar to the wire harness adapter, an antenna adapter is necessary if you’re installing a new radio. It ensures that the antenna connection is compatible with the new radio.
- Electrical tape: This will come in handy for securing any loose wires or connections during the removal process.
- Plastic bag or container: It’s a good idea to have a plastic bag or container nearby to store any screws, bolts, or small parts that you remove. This will help prevent them from getting lost or misplaced.
Once you have gathered all the necessary supplies, you’ll be well-prepared to proceed with the removal process. Having these tools readily available will save you time and ensure that you have everything you need in one place.
Now that you have all the supplies, it’s time to move on to the next step: disconnecting the power source. This is an essential safety measure that must be done before removing the radio.
Step 2: Disconnect the Power Source
Before you begin removing the Kenwood radio from your vehicle, it’s crucial to disconnect the power source. This step is vital to ensure your safety and prevent any electrical mishaps during the removal process. Follow these instructions to disconnect the power source:
- Turn off your vehicle’s engine: Start by turning off your vehicle’s engine and removing the keys from the ignition. This will eliminate any risk of electrical shock while working on the radio.
- Locate the fuse panel: In most vehicles, the fuse panel is either located under the dashboard on the driver’s side or in the engine compartment. Consult your vehicle’s manual to find the specific location of the fuse panel.
- Identify the radio fuse: Look for the fuse that is labeled for the radio or the audio system. This fuse is responsible for providing power to the radio.
- Remove the radio fuse: Use a pair of needle-nose pliers or a fuse puller tool to carefully remove the radio fuse from its slot. This will disconnect the power supply to the radio.
After removing the radio fuse, it’s important to test the radio to ensure that the power is indeed disconnected. Turn on your vehicle and try to operate the radio. If it doesn’t turn on or function properly, then you have successfully disconnected the power.
Disconnecting the power source is an essential step to avoid any electrical accidents or damage to the radio or vehicle. It’s always better to be safe than sorry, so take the time to double-check that the power is disconnected before moving on to the next step.
Now that you have disconnected the power source, you are ready to move on to the next step: removing the trim panel. This will give you access to the Kenwood radio for removal.
Step 3: Remove the Trim Panel
With the power source safely disconnected, you can now proceed to remove the trim panel surrounding the Kenwood radio. The trim panel is the decorative piece that covers the radio and other controls in your vehicle’s dashboard. Removing it will provide you access to the radio and make it easier to remove. Follow these steps:
- Identify the clips or screws: Depending on your vehicle’s make and model, the trim panel may be held in place by either clips or screws. Take a close look at the edges of the trim panel to determine which method is being used.
- Using trim removal tools or a suitable tool, gently pry and remove the clips: If the trim panel is secured with clips, insert the trim removal tool between the panel and the dashboard. Apply gentle pressure to release the clips one by one, working your way around the panel. Be careful not to apply too much force to avoid damaging the clips or the panel itself. If the trim panel has screws, proceed to the next step.
- Remove the screws: If the trim panel is held in place with screws, locate and remove them using a suitable screwdriver or socket wrench. Keep the screws in a safe place, as you’ll need them later for reinstallation.
- Gently pull and remove the trim panel: With the clips or screws removed, carefully pull the trim panel away from the dashboard. Take your time and apply even pressure to avoid breaking any plastic tabs or connectors that may still be holding the panel in place. Set the trim panel aside in a safe place, ensuring it doesn’t get scratched or damaged.
Once the trim panel is removed, you’ll have a clear view of the Kenwood radio and the mounting brackets that hold it in place. You’re now ready to move on to the next step: unmounting the Kenwood radio itself.
Remember to take your time and be gentle when removing the trim panel. Rushing or using excessive force can lead to damage, so proceed with caution. Now that the trim panel is out of the way, let’s move on to unmounting the Kenwood radio in the next step.
Step 4: Unmount the Kenwood Radio
Now that you have removed the trim panel, it’s time to unmount the Kenwood radio from its position in the dashboard. The radio is typically secured in place with mounting brackets, screws, or a combination of both. Follow these steps to unmount the Kenwood radio:
- Locate the mounting brackets: Take a close look at the sides of the Kenwood radio and identify the mounting brackets. These brackets are usually metal and may be attached to the radio itself or the dashboard structure.
- If the radio is secured with screws, use a screwdriver or socket wrench to remove them. Keep track of the screws as you’ll need them later.
- If the radio is secured with mounting brackets, look for any release tabs or screws that are holding them in place. Some brackets may have a latch or lock mechanism that needs to be disengaged before the radio can be removed.
- Once you have identified the locking mechanism, carefully release it. Depending on the design, you may need to press down on a tab, lift a lever, or unscrew a securing screw.
- Gently pull the radio out of its mounting position. Be careful not to tug on any wires connected to the back of the radio.
As you remove the radio, it’s important to support it with one hand to prevent it from falling out or putting strain on the wiring harness at the back. Slowly ease the radio out of its position, guiding any connected wires through the opening.
Once the Kenwood radio is unmounted, set it aside in a safe location, taking care not to damage any of its components or connectors. Make sure the radio is secure and won’t accidentally fall or get bumped during the rest of the removal process.
Now that the Kenwood radio is unmounted, you can proceed to the next step: disconnecting the wiring harness.
Step 5: Disconnect the Wiring Harness
With the Kenwood radio unmounted from the dashboard, the next step is to disconnect the wiring harness. The wiring harness is a collection of wires that connect the radio to the electrical system of your vehicle. By disconnecting it properly, you can ensure a clean removal and avoid any damage to the wiring or the radio. Follow these steps:
- Identify the wiring harness connected to the back of the Kenwood radio. It should consist of a series of wires and connectors.
- Gently press the release tabs or buttons on the connectors to unlock them. These tabs or buttons may be located on the sides or top of the connector.
- Once the tabs or buttons are released, carefully pull the connectors apart to disconnect them. Avoid pulling on the wires themselves, as this can cause damage.
- If there are any smaller connectors or antenna plugs attached to the radio, disconnect them in the same manner.
During this step, it’s crucial to exercise caution and patience. Take care not to force the connectors apart or pull on the wires too hard. If a connector seems stuck, verify that you have fully released the locking mechanism before attempting to disconnect it again.
Once all the connectors and antenna plugs are disconnected, set them aside in a safe place. It’s a good practice to label or mark them to ensure proper reconnection later if needed.
With the wiring harness properly disconnected, you’re now ready to move on to the next step: removing the antenna plug.
Remember to be gentle and take your time during this step to avoid damaging the wiring harness or connectors. With the wiring harness disconnected, you can now proceed with confidence to the next step in the removal process.
Step 6: Remove the Antenna Plug
Now that the wiring harness is disconnected, the next step is to remove the antenna plug from the Kenwood radio. The antenna plug is responsible for connecting the radio to the vehicle’s antenna, allowing you to receive radio signals. Here’s how to remove the antenna plug:
- Locate the antenna plug connected to the back of the Kenwood radio. It is typically a round or rectangular plug with a single wire attached to it.
- Gently grasp the base of the antenna plug and twist it counterclockwise. This will loosen the plug from its socket.
- Once the plug is loose, continue twisting it until it can be fully removed from the radio.
It’s important to note that some antenna plugs may have a different design or attachment method. In such cases, consult the user manual specific to your radio or seek additional guidance to ensure proper removal.
After removing the antenna plug, set it aside in a safe place. Take care not to damage the plug or its connecting wire, as they will be reused if you decide to install a new radio or reattach the current one in the future.
With the antenna plug removed, you have successfully disconnected all the necessary components from the Kenwood radio. The next step in the process is to remove any mounting brackets that are still attached to the radio.
Take your time and be gentle when removing the antenna plug to avoid any damage. Now that the plug is removed, you’re ready to move on to the next step in the removal process.
Step 7: Remove the Mounting Bracket
Now that you have disconnected the wiring harness and removed the antenna plug, the next step is to remove any mounting brackets that are still attached to the Kenwood radio. These brackets secure the radio in place within the dashboard. Follow these steps to remove the mounting brackets:
- Inspect the mounting brackets attached to the Kenwood radio. They are typically metal brackets that may be screwed or clipped onto the radio.
- If there are screws holding the brackets in place, use a suitable screwdriver or socket wrench to remove them. Set the screws aside for later use if needed.
- If the brackets are clipped onto the radio, locate the release tabs or mechanisms. These may vary in design, but they are typically located on the sides or corners of the brackets.
- Press or maneuver the release tabs or mechanisms to disengage the brackets from the radio. You may need to use a moderate amount of force or wiggle the brackets slightly to free them.
- Once the brackets are released, gently slide them off the Kenwood radio.
Removing the mounting brackets will free the Kenwood radio completely from any physical attachments. Set the brackets aside in a safe place, as they may be reused if you are reinstalling the same radio or installing a new one.
With the mounting brackets removed, you now have an unobstructed Kenwood radio ready for replacement or further servicing. The next step will depend on whether you plan to install a new radio or leave the slot empty.
Remember to take your time and be delicate when removing the mounting brackets to avoid damaging the radio or surrounding components. With the brackets removed, you’re prepared to progress to the next step in the removal process.
Step 8: Install the New Radio or Leave Empty Slot
In this step, you have two options: you can either install a new radio or leave the slot empty. The choice will depend on your preferences and needs. Here’s what you need to consider for each option:
Option 1: Install a New Radio
If you plan to install a new radio, follow these steps:
- Select a compatible radio: Choose a new radio that is compatible with your vehicle’s make and model. Ensure it has the necessary features and specifications you desire.
- Prepare the new radio for installation: If the new radio requires any additional mounting brackets or installation accessories, make sure to attach them according to the manufacturer’s instructions.
- Connect the wiring harness: Take the wire harness adapter and connect it to the wiring harness of the vehicle. Then, connect the other end of the adapter to the corresponding connectors on the new radio. Make sure to match the wire colors and connectors properly.
- Attach the antenna plug: If applicable, connect the antenna plug to the new radio, twisting it clockwise until it is securely in place.
- Slide the new radio into the slot: Carefully insert the new radio into the empty slot in the dashboard, ensuring that it is properly aligned and seated. If necessary, reattach the mounting brackets using the screws you removed earlier.
- Reconnect the power source: Locate the fuse panel and reinstall the radio fuse. Test the new radio to ensure it powers on and functions correctly.
Now you have successfully installed a new radio in your vehicle, providing you with improved features and functionality.
Option 2: Leave the Slot Empty
If you choose not to install a new radio, you can leave the slot empty. Some reasons for this choice may include keeping the original look of the vehicle, planning for a future installation, or using alternative audio sources.
To leave the slot empty, follow these steps:
- If the mounting brackets were removed, keep them safely stored for potential future use.
- Carefully slide the Kenwood radio back into the dashboard slot, ensuring it is aligned and securely seated.
- Reinstall the trim panel: Align the trim panel with the dashboard and gently press it back into place, ensuring all clips or screws are properly engaged.
Leaving the slot empty allows for a seamless integration with the vehicle’s dashboard and maintains its original appearance.
Whether you choose to install a new radio or leave the slot empty, make sure to double-check all connections and test the functionality of the audio system.
With the new radio installed or the slot empty, you have successfully completed the removal process. Now you can enjoy your upgraded audio system or explore alternative audio options.
Step 9: Reconnect the Wiring Harness
After installing a new radio or leaving the slot empty, the next step is to reconnect the wiring harness. This step ensures that the electrical connections are properly established and that the audio system functions correctly. Follow these steps to reconnect the wiring harness:
- If you installed a new radio, locate the wire harness adapter that you connected to the wiring harness of the vehicle in Step 8. If you left the slot empty, you will be reconnecting the original wiring harness.
- Take the wire harness adapter and connect it to the corresponding connectors on the back of the Kenwood radio. If you left the slot empty, reconnect the original wiring harness to the appropriate connectors.
- Match the wire colors and connectors on the wire harness adapter with those on the Kenwood radio or the original wiring harness. Ensure they are securely connected and latched in place.
- Once the connections are made, give them a gentle tug to ensure they are securely attached and won’t come loose during use.
By reconnecting the wiring harness, you are restoring the electrical connections necessary for the audio system to function properly. This step is crucial for ensuring that the radio receives power and that the speakers and other audio components are activated.
After reconnecting the wiring harness, proceed to the next step: remounting the trim panel to complete the reinstallation process.
Take your time during this step to ensure that the wiring harness is properly connected. By doing so, you’ll avoid any audio issues or system malfunctions down the line.
Step 10: Remount the Trim Panel
With the wiring harness reconnected, the next step is to remount the trim panel. The trim panel is the decorative piece that covers the radio and provides a finished look to the dashboard. Follow these steps to remount the trim panel:
- Inspect the trim panel and ensure it is clean and free from any dirt or debris. Wipe it down if necessary.
- Align the trim panel with the openings in the dashboard and guide any clips or tabs into their corresponding slots. Press gently to secure the trim panel in place.
- If the trim panel was secured with screws, reinstall them using the appropriate screwdriver or socket wrench. Make sure the screws are securely tightened, but avoid overtightening to prevent damage.
- Double-check the alignment and fit of the trim panel. Ensure that it sits flush with the surrounding surfaces and that all edges and corners are properly aligned.
It’s important to take your time and be gentle when remounting the trim panel to avoid any damage. The trim panel should fit snugly and securely, without any gaps or looseness.
Once the trim panel is securely remounted, give it a gentle push or wiggle to confirm that it is properly locked in place. Ensure that it doesn’t rattle or move when lightly touched.
With the trim panel successfully remounted, you are now ready to proceed to the final step: reconnecting the power source and completing the radio removal process.
Take a moment to appreciate your work and the renewed appearance of your dashboard. The remounted trim panel gives the final touch to the radio removal process.
Step 11: Reconnect the Power Source
Now that you have remounted the trim panel, the final step is to reconnect the power source. This step will restore power to the radio and ensure that it functions properly. Follow these steps to reconnect the power source:
- Locate the fuse panel in your vehicle, which is usually located under the dashboard or in the engine compartment.
- Identify the fuse slot for the radio or audio system. Refer to your vehicle’s manual if you’re unsure which fuse to use.
- Take the radio fuse that you removed earlier and insert it back into the corresponding fuse slot. Push it in firmly until it is fully seated.
- Once the fuse is securely in place, check that all other fuses are also seated properly in their respective slots.
- Turn on your vehicle’s engine and test the Kenwood radio. Make sure it powers on and that all functions, such as volume control, source selection, and display, are working correctly.
If the radio does not power on or if you encounter any issues, double-check the fuse to ensure it is properly installed. Additionally, review the wiring harness connections to confirm they are securely connected.
With the power source reconnected and the radio functioning correctly, you have successfully completed the process of removing and reinstalling your Kenwood radio.
Take a moment to appreciate your efforts and enjoy the newly installed or empty slot in your vehicle’s dashboard. Whether you upgraded to a new radio or left the slot empty for future use, you can now fully enjoy your audio experience while driving.
Should you encounter any difficulties or further questions, consult the user manual or consider seeking professional assistance to ensure the radio is properly installed and functioning optimally.
Conclusion
Removing a Kenwood radio from your vehicle may seem like a daunting task, but by following the step-by-step process outlined in this guide, you can successfully complete the removal without any issues. Whether you’re upgrading to a newer radio model or performing repairs, these instructions provide a comprehensive overview of the removal process.
Throughout the process, prioritize safety by disconnecting the power source and handling the components with care to avoid any damage or electrical mishaps. Take your time, be gentle, and use the appropriate tools to ensure a smooth removal experience.
By gathering the necessary supplies, disconnecting the power source, removing the trim panel, unmounting the Kenwood radio, disconnecting the wiring harness, removing the antenna plug, and removing the mounting bracket, you prepare the radio for either the installation of a new radio or leaving the slot empty.
Reconnecting the wiring harness, remounting the trim panel, and reconnecting the power source complete the process, leaving you with a fully functional audio system or a clean dashboard slot.
Remember to consult the user manual or seek professional assistance if you encounter any difficulties or have questions specific to your vehicle and radio model.
With these instructions, you now have the knowledge and confidence to remove a Kenwood radio from your vehicle. Whether you’re a seasoned DIY enthusiast or a beginner, successfully completing this removal is within your reach. So take the plunge, and enjoy the satisfaction of accomplishing this task while enhancing your vehicle’s audio experience.