Home>Devices & Equipment>Radio>How To Program Motorola Radio

Radio
How To Program Motorola Radio
Published: November 24, 2023
Learn how to program Motorola radio with step-by-step instructions and expert tips. Enhance your radio communication skills and stay connected.
(Many of the links in this article redirect to a specific reviewed product. Your purchase of these products through affiliate links helps to generate commission for AudioLover.com, at no extra cost. Learn more)
Table of Contents
Introduction
Welcome to the world of Motorola radios! Whether you’re a radio enthusiast, an emergency responder, or a business owner looking to improve communication across your team, understanding how to program Motorola radios is essential. By programming your Motorola radio, you can customize and optimize its functionality, ensuring seamless and efficient communication.
In this article, we will explore the fundamentals of programming Motorola radios, covering everything from the basics to advanced settings. We will discuss the necessary software, the process of connecting your radio to a computer, and the steps for programming channels, frequencies, encryption, and other features. By the end of this article, you will have a comprehensive understanding of how to program your Motorola radio to suit your specific needs.
Motorola radios are widely used across various industries, including public safety agencies, transportation, hospitality, and construction. These radios offer reliable communication over long distances, robust features, and durable construction, making them a top choice for professionals in demanding environments.
While programming a Motorola radio may seem daunting at first, rest assured that with the right knowledge and guidance, it becomes a straightforward process. In the following sections, we will delve into the step-by-step instructions, providing you with the confidence to program your Motorola radio efficiently.
Before we dive into the programming details, it’s important to note that different models of Motorola radios may have slight variations in their programming methods and capabilities. Therefore, it’s essential to consult the user manual or the specific documentation for your Motorola radio model for precise instructions.
Now, let’s begin our exploration of how to program Motorola radios and unlock their full potential!
Understanding Motorola Radios
Before diving into the programming process, it’s important to have a basic understanding of Motorola radios and their key components. Motorola radios are portable communication devices used for transmitting and receiving voice and data signals over radio frequencies. They are designed to provide reliable, clear, and secure communication, making them ideal for various industries and professional settings.
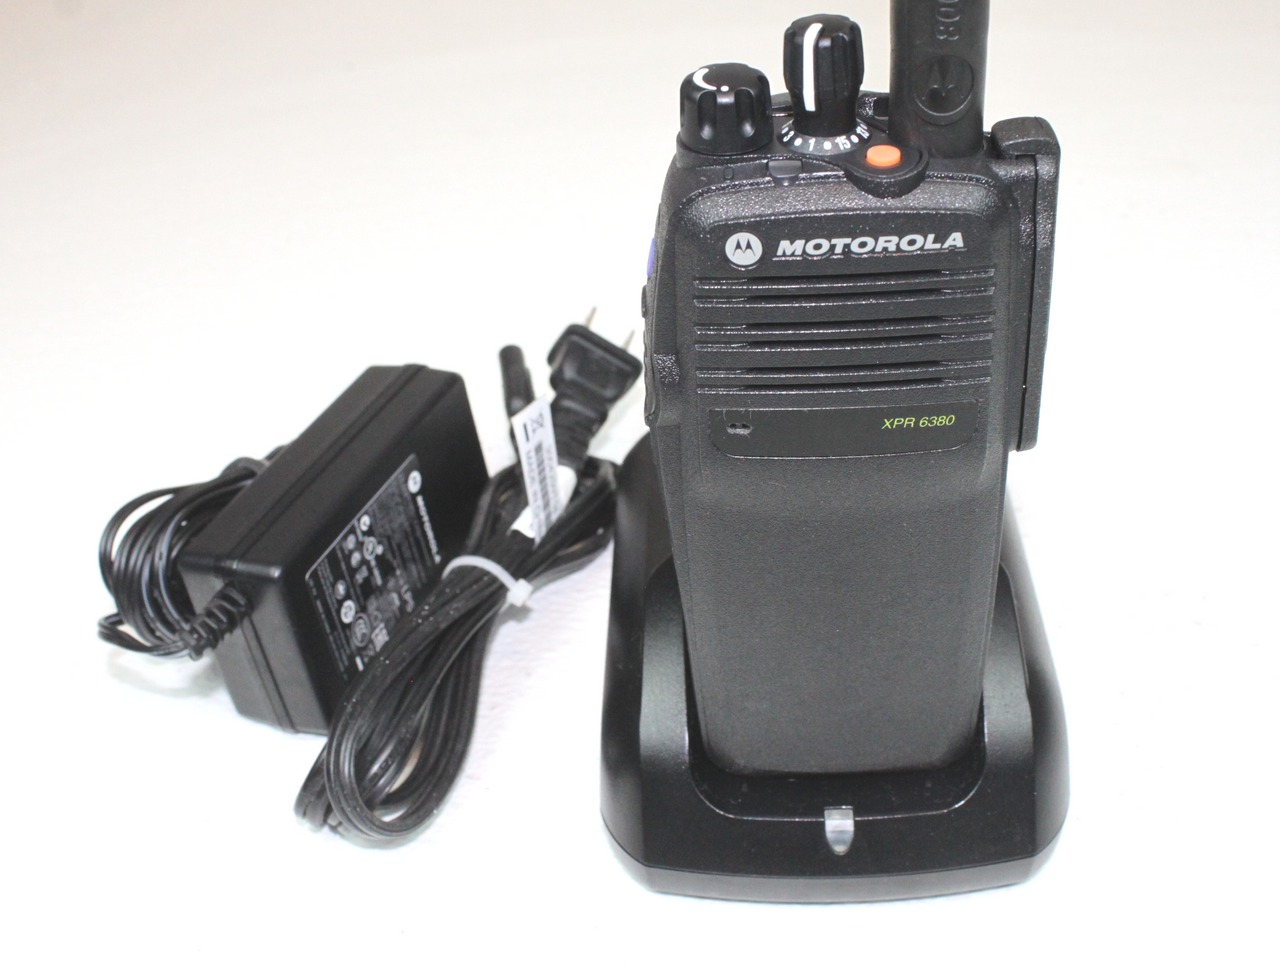
Motorola radios typically consist of the following key components:
- Radio Body: This is the physical housing of the radio, which contains the internal circuits, controls, and display.
- Antenna: The antenna is responsible for transmitting and receiving the radio signals. It plays a crucial role in determining the range and clarity of communication.
- Battery: Motorola radios are powered by rechargeable batteries, which provide the necessary power to keep the radio functioning throughout the day.
- Keypad and Controls: The keypad and control buttons allow users to select channels, adjust volume, activate features, and navigate through the radio’s menu options.
- Display: The display provides important information, such as channel number, signal strength, battery level, and various menu options.
- Speaker/Microphone: The speaker and microphone enable users to listen and speak during communication, ensuring clear and effective message transmission.
Motorola radios operate on specific frequencies and use channels to organize communication. Channels are pre-programmed frequencies that allow users to communicate within a designated frequency range. By selecting the appropriate channel, users can establish direct communication with other radios on the same frequency.
One of the key advantages of Motorola radios is their ability to support digital communication, which offers superior voice quality, extended range, and enhanced security compared to traditional analog radios. Motorola radios also offer various advanced features, such as encryption, individual and group calling, text messaging, GPS tracking, and emergency alert capabilities.
By understanding the basic components and functionality of Motorola radios, you are ready to explore the programming process to optimize your radio’s performance and customize it to your specific needs. In the next section, we will delve into the programming basics, including the necessary software and steps to connect your Motorola radio to a computer.
Programming Basics
Programming a Motorola radio involves configuring various settings, such as channels, frequencies, privacy codes, and special features, to customize the device’s functionality according to your specific requirements. It allows you to tailor your radio to your operational needs, ensuring efficient communication and improved workflow.
Here are the fundamental steps involved in programming a Motorola radio:
- Obtain the Programming Software: Motorola radios require specific programming software to interface with the device and make configuration changes. The software is usually provided by Motorola and is compatible with different operating systems, such as Windows. You can download the software from the official Motorola website or obtain it from a Motorola-authorized dealer.
- Connect the Radio to a Computer: To start the programming process, you need to connect your Motorola radio to a computer using a programming cable. The programming cable is generally equipped with a USB connector on one end and a radio-specific connector on the other. Connect the appropriate ends to the radio and the computer, respectively.
- Launch the Programming Software: Once the radio is connected to the computer, launch the programming software. Follow the software’s instructions for establishing communication with the radio.
- Backup the Radio’s Configuration: Before making any changes, it’s essential to backup the radio’s existing configuration. This ensures that you can revert to the original settings if needed. The programming software should have an option to save a backup file of the current configuration.
- Configure Channels and Frequencies: Channels and frequencies are the backbone of communication on a Motorola radio. Depending on the model, you can program a range of channels and assign specific frequencies to each channel. This allows you to organize communication and switch between different frequencies as needed.
- Set Privacy Codes: In scenarios where privacy is paramount, Motorola radios offer privacy codes, also known as sub-audible tones or Continuous Tone-Coded Squelch System (CTCSS) codes. These codes help prevent interference from other users by allowing only radios programmed with the same code to access a specific channel or frequency.
- Enable Special Features: Motorola radios come equipped with various features, such as emergency alerts, text messaging, scan functions, and GPS capabilities. Depending on your needs, you can enable and configure these features through the programming software.
- Validate and Write Changes: Once you have made all the necessary changes and configurations, validate the settings on the programming software. Ensure that the desired channels, frequencies, privacy codes, and features are correctly programmed. Finally, write the changes to the radio’s memory to apply the new configuration.
By following these programming basics, you can effectively customize and optimize your Motorola radio to fulfill your communication needs. In the next section, we will explore the specific programming software used for Motorola radios and the steps for connecting your radio to a computer.
Programming Software
To program your Motorola radio, you will need to utilize specific programming software provided by Motorola. This software allows you to interface with the radio and make the necessary programming changes to customize its functionality. The programming software is typically compatible with Windows operating systems and can be downloaded from the official Motorola website or obtained from a Motorola-authorized dealer.
Here are some key points to consider regarding the programming software:
- Motorola Software Compatibility: Different models of Motorola radios may require different programming software versions. It is essential to ensure that you have the correct software version for your specific radio model. Refer to the user manual or consult the Motorola website for information on which software is compatible with your radio model.
- System Requirements: Before installing the programming software, check the system requirements to ensure compatibility with your computer. This information is usually provided on the Motorola website or in the software’s documentation. Common requirements include specific operating systems (such as Windows XP, Windows 7, or Windows 10) and minimum hardware specifications.
- Installation Process: Once you have downloaded the programming software, run the installation file and follow the on-screen instructions. The installation process may include accepting the software’s terms and conditions, specifying the installation directory, and creating shortcuts for easy access.
- Software Features: Motorola programming software offers a range of features to configure and customize your radio. These features may include channel/frequency programming, encryption setup, individual/group calling configuration, scan functions, power settings, and various other advanced options. Familiarize yourself with the software’s user interface and features to make the most of its capabilities.
- Software Updates: Motorola regularly releases software updates to improve functionality, fix bugs, and introduce new features. It is advisable to stay updated with the latest software version to access all the enhancements and improvements. Check the Motorola website or subscribe to their newsletter for notifications regarding software updates.
- Programming Cable: To connect your Motorola radio to a computer for programming, you will need a programming cable. Typically, the programming cable has a USB connector on one end and a radio-specific connector on the other. Ensure that you have the correct programming cable that is compatible with your radio model.
By using the Motorola programming software, you can unlock the full potential of your radio and tailor it to your specific needs. The software provides an intuitive interface for making configuration changes, programming channels and frequencies, enabling features, and ensuring seamless communication.
In the next section, we will explore the process of connecting your Motorola radio to a computer using the programming cable, allowing you to establish communication between the radio and the programming software.
Connecting the Motorola Radio to a Computer
Connecting your Motorola radio to a computer is a crucial step in the programming process. It allows for seamless communication between the programming software and the radio, enabling you to make the necessary programming changes and optimize the radio’s functionality. To connect your Motorola radio to a computer, follow these steps:
- Ensure Compatibility: Verify that your computer meets the system requirements specified by the Motorola programming software. Check if the software is compatible with your operating system and ensure that you have the necessary USB drivers installed.
- Obtain a Programming Cable: Purchase or obtain a programming cable that is compatible with your specific Motorola radio model. The programming cable typically has a USB connector on one end and a radio-specific connector on the other.
- Power Off the Radio: Before connecting the radio to the computer, make sure to power it off. This prevents any potential issues during the connection process.
- Connect the Programming Cable: Plug one end of the programming cable into the USB port of your computer. On the other end, connect the radio-specific connector to the appropriate port on your Motorola radio. Make sure the connection is secure.
- Power On the Radio: After connecting the programming cable, power on your Motorola radio. Ensure that it is in a standby or programming mode for proper communication with the programming software.
- Launch the Programming Software: Open the Motorola programming software on your computer. Follow any prompts or instructions provided by the software to establish communication with the connected radio.
- Verify Connection: Once the software and radio are both running, verify that the connection is established successfully. The software should display the connected radio model and other relevant information.
Once the Motorola radio is successfully connected to your computer, you can begin the programming process using the programming software. The established connection allows for seamless data transfer between the software and the radio, enabling you to program channels, frequencies, privacy codes, and other custom settings to optimize your communication experience.
It’s important to note that the process of connecting the radio to a computer may slightly vary depending on your specific Motorola radio model and the programming software you are using. Refer to the user manual or the documentation provided with your radio and software for precise instructions tailored to your setup.
In the next section, we will discuss the steps involved in programming channels, frequencies, and privacy codes on your Motorola radio, enabling you to customize your communication setup.
Programming Channels and Frequencies
Programming channels and frequencies is a vital step in configuring your Motorola radio to operate on the desired frequency range and establish effective communication. This process allows you to organize your radio’s channels and assign specific frequencies to each channel, ensuring seamless connectivity and clear transmission. Here’s how to program channels and frequencies on your Motorola radio:
- Access the Programming Software: Launch the Motorola programming software on your computer, ensuring that your radio is connected via the programming cable.
- Select the Radio Model: Choose the appropriate radio model within the programming software. This ensures that you are working with the correct radio specifications and functionality.
- Navigate to Channel/Frequency Programming: Within the programming software, locate the menu or section dedicated to channel/frequency programming. This may be labeled as “Channel Configuration” or “Frequency Settings.”
- Create Channel Names: Assign meaningful names or labels to each channel to easily identify their purpose. For example, you might use names like “Team 1” or “Security” for different groups or departments.
- Assign Frequencies: Specify the frequency or frequencies for each channel. Depending on your radio model, you may need to input the frequency manually or choose from a predetermined list of frequencies within the software.
- Set Transmit and Receive Tones: Configure the transmit (TX) and receive (RX) tones for each channel. These tones ensure that the radio only transmits and receives signals from radios programmed with the same tones, reducing interference from other users.
- Add Channel Descriptions: Provide brief descriptions for each channel, explaining its purpose or usage. This helps users understand the intended use of each channel and facilitates efficient communication within your organization or team.
- Validate and Write Changes: Verify the programmed channel names, frequencies, tones, and descriptions. Once you are satisfied with the settings, validate them within the programming software. Finally, write the changes to the radio’s memory to apply the newly programmed channels and frequencies.
By programming channels and frequencies on your Motorola radio, you ensure that your radio operates within the desired frequency range and that each channel is assigned the correct frequency and settings for optimum communication. This allows for efficient organization, easy switching between channels, and seamless connectivity with other radios operating on the same frequencies.
It’s important to note that the specific steps and options for programming channels and frequencies may vary depending on your Motorola radio model and the programming software being used. Refer to your radio’s user manual and the software documentation for precise instructions tailored to your setup.
In the next section, we will discuss the setup of encryption on your Motorola radio, enhancing the privacy and security of your communication.
Setting Up Encryption
In situations where privacy and security are paramount, setting up encryption on your Motorola radio can provide an additional layer of protection for your communication. Encryption ensures that your transmissions are secure and can only be understood by authorized receivers with the corresponding encryption key. Follow these steps to set up encryption on your Motorola radio:
- Access the Programming Software: Launch the Motorola programming software on your computer, ensuring that your radio is connected via the programming cable.
- Navigate to Encryption Settings: Locate the menu or section within the programming software that pertains to encryption settings. This may be labeled as “Encryption Configuration” or “Security Settings.”
- Select Encryption Type: Choose the encryption algorithm or method that best suits your needs. Motorola radios typically support various encryption types, such as Advanced Encryption Standard (AES) or Digital Encryption Standard (DES).
- Set Encryption Keys: Input the encryption keys or codes into the programming software. Encryption keys are typically alphanumeric strings that serve as the passphrase for encoding and decoding the encrypted signal. Ensure that the keys are kept secure and shared only with authorized users.
- Assign Encryption to Channels: Specify which channels or groups should use encryption. Determine which conversations require additional security and enable encryption for those specific channels.
- Validate and Write Changes: Validate the encryption settings within the programming software, ensuring that the encryption type, keys, and channel assignments are correct. Finally, write the changes to the radio’s memory to apply the encryption settings.
- Share Encryption Keys: If you are operating in a team or organization, ensure that the relevant users are provided with the necessary encryption keys. Communicate the keys securely, either in person or through a secure messaging platform, to prevent unauthorized access to encrypted transmissions.
- Test Encryption: After setting up encryption, conduct tests to verify that the encrypted transmissions are functioning correctly. Test the encrypted channels by transmitting and receiving messages between radios programmed with the same encryption keys.
By setting up encryption on your Motorola radio, you can protect sensitive information, maintain confidentiality, and prevent unauthorized access to your communication. Encryption adds an extra level of security, especially in industries where privacy and data protection are critical.
It is important to note that encryption capabilities may vary depending on your specific Motorola radio model. Refer to the user manual or contact Motorola support for precise instructions and compatibility details. Additionally, ensure compliance with any legal considerations or regulations regarding the use of encryption in your region or industry.
In the next section, we will delve into programming additional features and options on your Motorola radio, allowing you to further customize and optimize your communication setup.
Programming Features and Options
Motorola radios offer a range of additional features and options that can be programmed to enhance your communication capabilities. These features enable you to customize your radio to suit your specific needs and optimize its functionality. Let’s explore some of the common features and options you can program on your Motorola radio:
- Emergency Alert: Many Motorola radios have an emergency alert feature that, when activated, sends a distress signal to alert other radios within range. You can program this feature to emit a specific tone, initiate a pre-recorded voice message, or activate an emergency status.
- Scan Functions: Scan functions allow your radio to automatically search for active channels or frequencies. You can program the scan list to include specific channels, frequency ranges, or priority channels that your radio should monitor for activity.
- Individual and Group Calling: Motorola radios often provide individual and group calling features. You can program specific IDs or aliases for individual radios or groups, facilitating direct communication with specific team members or departments.
- Text Messaging: Some advanced Motorola radios support text messaging capabilities. You can program predefined messages or manually enter text messages to be sent or received by compatible radios.
- Power Settings: Programming power settings allows you to adjust the transmit power of your radio. This can help conserve battery life in low-power situations or increase the range when higher power is required.
- GPS Tracking: If your Motorola radio has built-in GPS capabilities, you can program and configure the tracking features. This allows you to monitor the location of your radio or other radios within your network.
- Tone Signaling: Tone signaling features, such as call tones or alert tones, can be programmed to provide audible notifications for specific events or messages.
- Channel Voice Announcements: Some Motorola radios have the ability to announce the channel name or frequency when it is selected or changed. You can program the voice announcements to aid in identifying the active channel.
These are just a few examples of the many features and options available on Motorola radios. The programming software provided by Motorola allows you to customize and activate these features according to your specific requirements. Review the user manual and software documentation for your radio model to explore all the available programming options.
By programming these additional features and options, you can tailor your Motorola radio to suit your operational needs, streamline communication, and enhance productivity. In the next section, we will discuss the importance of testing and verifying the programmed settings to ensure they are functioning as intended.
Testing and Verifying the Programmed Settings
Once you have programmed the desired settings on your Motorola radio, it is crucial to test and verify those settings to ensure they are functioning correctly. Testing and verifying the programmed settings help you identify any potential issues or discrepancies, allowing for timely adjustments and troubleshooting. Here are some steps you can take to test and verify your programmed settings:
- Functionality Testing: Test each programmed feature and option to ensure they are working as intended. For example, make a test call using individual or group calling, activate the emergency alert feature to check if it functions properly, send and receive text messages, and monitor the scan function to ensure it captures the desired channels.
- Range Testing: Test the range of your radio to determine how far the signal can reach. Have someone with a radio programmed to the same frequency stand at increasing distances from you while you transmit and receive messages. This will help you understand the effective range of your radio in particular environments.
- Privacy Code Testing: If you have programmed privacy codes or sub-audible tones, test them in different scenarios to ensure that only radios with the correct code can communicate on the designated channel.
- Battery Performance Testing: Monitor the battery performance of your radio by tracking the battery level over time during regular use. This will help you gauge the battery life and identify any potential issues with battery drainage.
- Reception Testing: Test the reception quality of your radio in various environments, such as buildings, outdoor areas, or areas with obstructions. Observe the signal strength, clarity, and any potential interference or noise that may affect communication.
- Channel Switching and Function Navigation: Test the ease of switching between programmed channels and accessing different functions on your radio. Ensure that the channel selections and menu navigation are smooth and intuitive.
- GPS Tracking (if applicable): If your Motorola radio has GPS tracking capabilities, test the accuracy and functionality of the GPS feature. Monitor the location updates and verify that they correspond correctly to the actual positions of the radios.
- Communication Tests: Conduct communication tests with other radios on the same frequencies. Verify that messages are transmitting and receiving clearly, ensuring effective communication between radios.
By thoroughly testing and verifying the programmed settings, you can identify and resolve any issues or inconsistencies, ensuring that your Motorola radio performs optimally. Regular testing and maintenance of your radio will help you maintain reliable communication and minimize potential disruptions in critical situations.
If you encounter any issues during the testing process, consult the user manual or seek support from Motorola or a qualified technician. They can provide further guidance and troubleshooting steps specific to your radio model and programming setup.
In the next section, we will cover common troubleshooting techniques and address some of the common issues that may arise when programming a Motorola radio.
Troubleshooting and Common Issues
While programming a Motorola radio can be a straightforward process, you may encounter some common issues. Understanding how to troubleshoot these problems will help you overcome any obstacles and ensure smooth functionality. Here are some common issues and troubleshooting techniques for programming a Motorola radio:
- Connection Issues: If you are experiencing difficulties connecting your radio to the programming software, ensure that the programming cable is securely connected to both the radio and the computer. Verify that the correct drivers are installed, and try reconnecting the cable or using a different USB port.
- Incorrect Firmware/Software Version: Ensure that you have the latest firmware or software version for your specific Motorola radio model. Outdated firmware or software may cause compatibility issues or lack certain features. Check the Motorola website or contact customer support for the most up-to-date versions.
- Invalid Keyed-In Frequencies: Double-check the frequencies you have programmed into your radio to ensure they are accurate. Typos or incorrect inputs can prevent proper communication. Refer to the user manual or utilize frequency charts to verify the correct values.
- Audio Quality Issues: If you experience poor audio quality or distorted sound, check the microphone and speaker connections on your radio. Ensure that they are clean and properly attached. Adjust the volume settings, and verify that the audio settings in the programming software are correctly configured.
- Encryption Key Mismatch: If you are encountering issues with encryption, verify that the encryption keys programmed into your radio match those used by the intended recipients. Ensure the correct encryption algorithm is selected and the keys are entered accurately.
- Power and Battery Problems: If your radio is not powering on or experiencing battery life issues, check the battery connections for cleanliness and tightness. Charge the battery fully and verify that it is compatible with your radio model. Consider using high-quality batteries or utilizing the charger recommended by Motorola for optimal performance.
- Software Freezing or Crashing: If the programming software freezes or crashes during use, try closing and reopening the application. Ensure that your computer meets the software’s system requirements, and consider updating your operating system. If issues persist, uninstall and reinstall the software, or contact Motorola support for further assistance.
- Lack of Range or Signal Coverage: If you experience limited range or poor signal coverage, check if the antennas are properly connected and undamaged. Adjust the antenna orientation for better reception. Consider utilizing a higher-gain or longer antenna. Additionally, ensure that you are operating within the designated frequency power limits set by local regulations.
These are just a few common issues that you may encounter while programming a Motorola radio. It is important to consult your radio’s user manual, programming software documentation, or reach out to Motorola support for more detailed troubleshooting steps specific to your radio model.
Remember, patience and careful attention to detail are key when troubleshooting issues. Be systematic in addressing each problem, and always double-check your settings and connections before seeking further assistance.
Next, we will conclude our article with a summary of the key points discussed.
Conclusion
Programming a Motorola radio is an essential skill for optimizing communication and customizing the functionality of your device. By understanding the programming basics, connecting your radio to a computer, and utilizing the programming software, you can unlock the full potential of your Motorola radio and tailor it to your specific needs.
We covered the importance of understanding Motorola radios and their key components, as well as the necessary programming software to interface with your radio. By following the step-by-step instructions, you can program channels, frequencies, privacy codes, and additional features to enhance your communication setup.
Throughout the programming process, testing and verifying the programmed settings are crucial to ensure their proper functionality. Conduct range tests, check encryption settings, and verify the performance of various features to ensure smooth operation. Any issues that arise can often be solved through troubleshooting techniques tailored to common problems encountered.
By becoming familiar with the programming process and troubleshooting steps, you can program your Motorola radio with confidence. This empowers you to create a highly customized and efficient communication system that meets the specific requirements of your industry, organization, or personal use.
Remember to consult the user manual and the documentation provided with your specific Motorola radio model for precise instructions and additional features that may be available. Additionally, always keep up-to-date with software updates and guidelines provided by Motorola to ensure your radio operates at its best.
Now that you have a comprehensive understanding of how to program Motorola radios, it’s time to take the next step. Grab your programming cable, connect your radio to your computer, and start customizing your Motorola radio to unlock its full potential!

