Home>Events & Info>Playback>How To Make A Program Use A Specific Playback Device
Playback
How To Make A Program Use A Specific Playback Device
Modified: January 22, 2024
Learn how to make a program use a specific playback device and improve your audio experience. Find step-by-step instructions and tips for setting up playback devices.
(Many of the links in this article redirect to a specific reviewed product. Your purchase of these products through affiliate links helps to generate commission for AudioLover.com, at no extra cost. Learn more)
Table of Contents
Introduction
Welcome to this guide on how to make a program use a specific playback device. Have you ever encountered the frustration of launching a program or application, only to find that it defaults to a different audio output device than the one you want to use? Whether you have a dedicated set of speakers, headphones, or a sound system connected to your computer, it can be inconvenient when a program doesn’t automatically recognize and utilize your desired playback device.
But fear not! In this article, we will explore step-by-step instructions on how to ensure that a program uses a specific playback device, allowing you to enjoy your audio content exactly the way you want it. Whether you’re a music enthusiast, a gamer, or simply someone who wants to optimize their audio experience, this guide will empower you to take control over your program’s audio settings.
Before we dive into the steps, it’s essential to understand that the process might vary slightly depending on your operating system and the specific program you’re using. However, the general principles we will discuss should be applicable in most cases and across different platforms.
So, if you’re ready to take charge of your program’s audio configuration, let’s get started with Step 1: Checking available playback devices.
Step 1: Checking Available Playback Devices
The first step in making a program use a specific playback device is to identify the available devices on your computer. This will allow you to determine which device you want to use for a particular program.
To check the available playback devices, follow these steps:
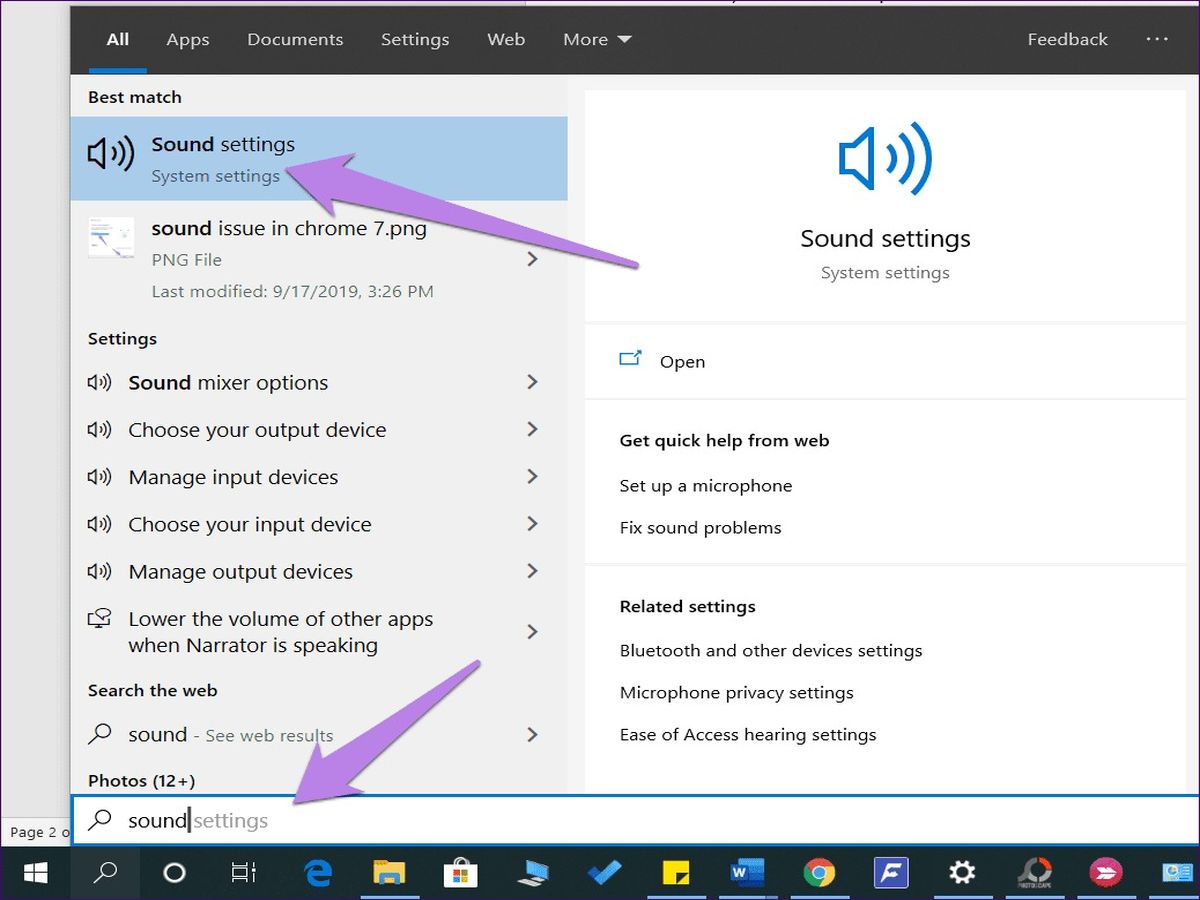
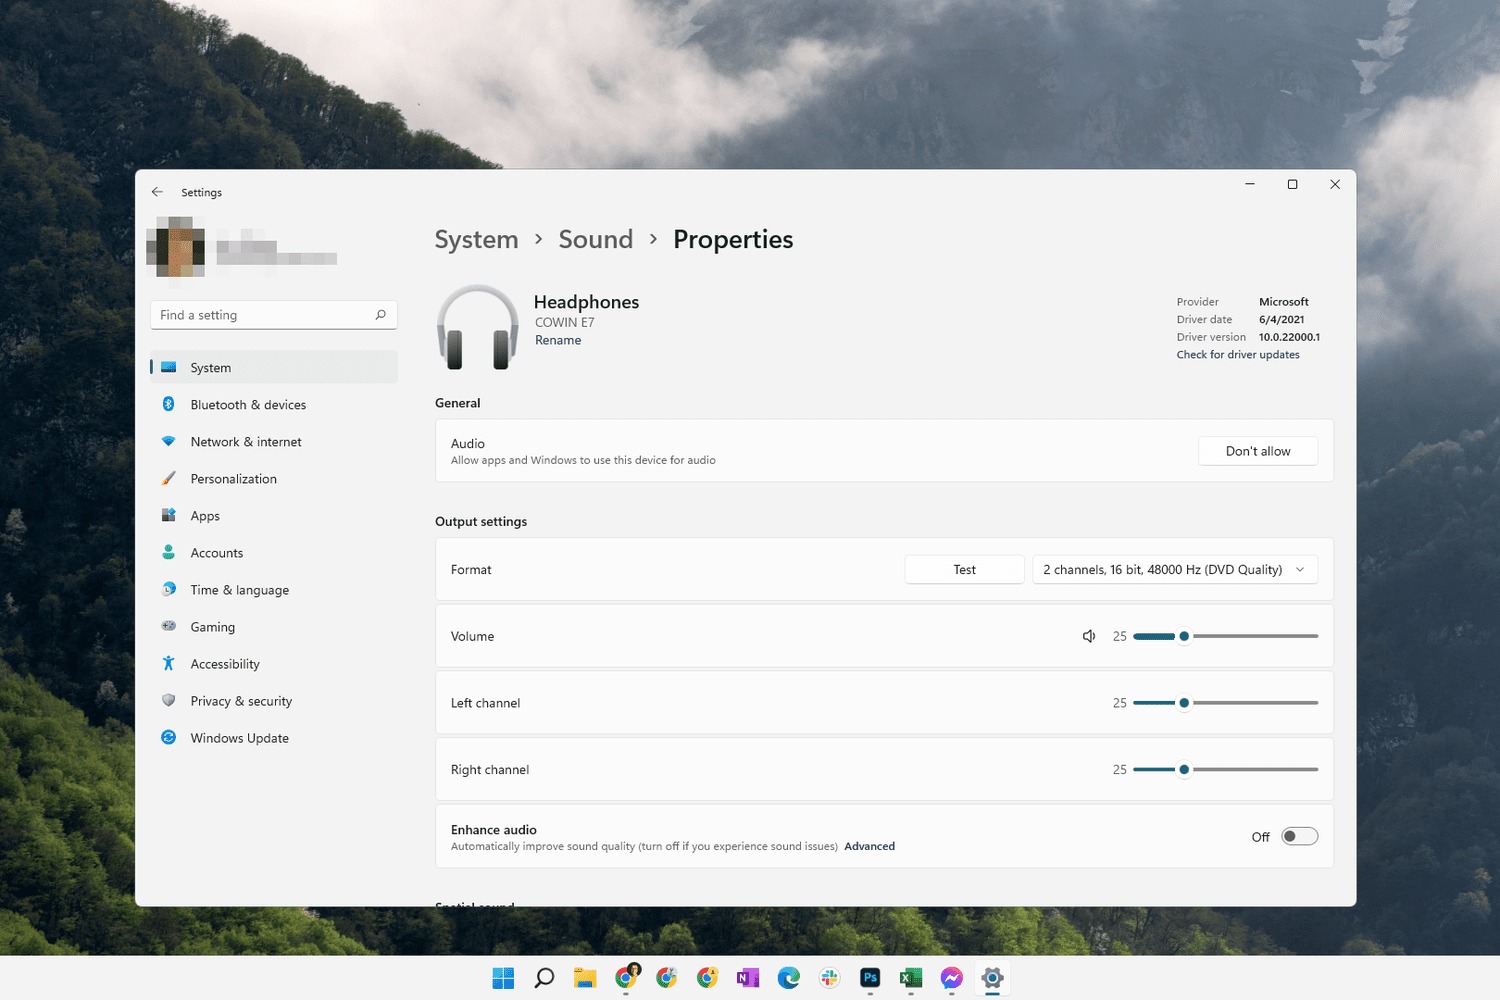
- Open the sound settings on your computer. The method for accessing sound settings may vary depending on your operating system, but you can typically find it in the Control Panel or System Preferences.
- In the sound settings, navigate to the playback tab or a similar option that lists the available audio devices.
- Take note of the devices listed. These may include options such as speakers, headphones, external sound systems, or any other audio output devices connected to your computer.
Once you have identified the available playback devices, you can proceed to the next step of selecting the desired device for your program.
It’s important to note that some programs may not recognize all available devices listed in your sound settings. In such cases, you may need to configure the program settings specifically to detect and utilize the desired device. We will discuss this further in the subsequent steps. For now, let’s focus on selecting the desired playback device.
Step 2: Selecting the Desired Playback Device
Now that you have identified the available playback devices on your computer, it’s time to select the specific device you want to use for a particular program. This step ensures that your chosen playback device will be the default audio output for that program.
To select the desired playback device, follow these steps:
- Access the sound settings on your computer, as mentioned in Step 1.
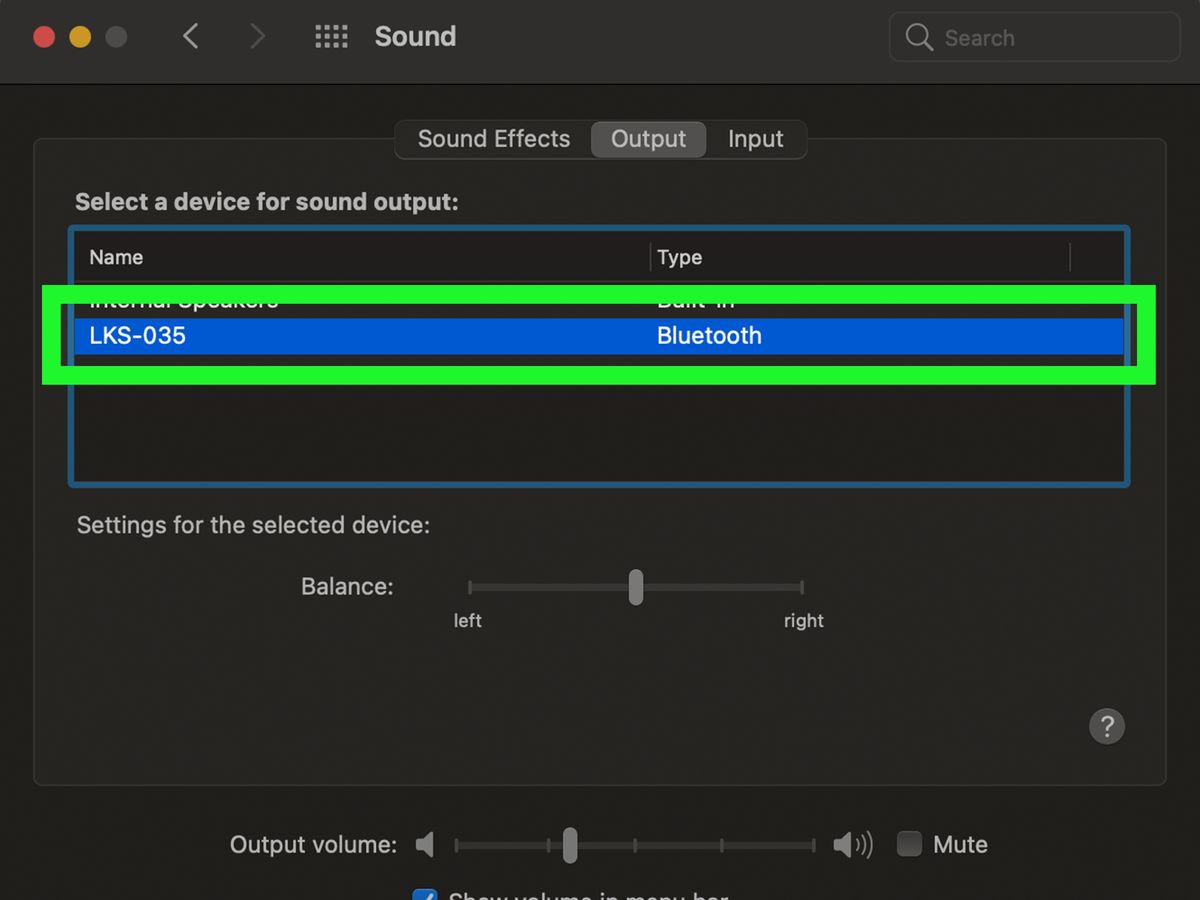
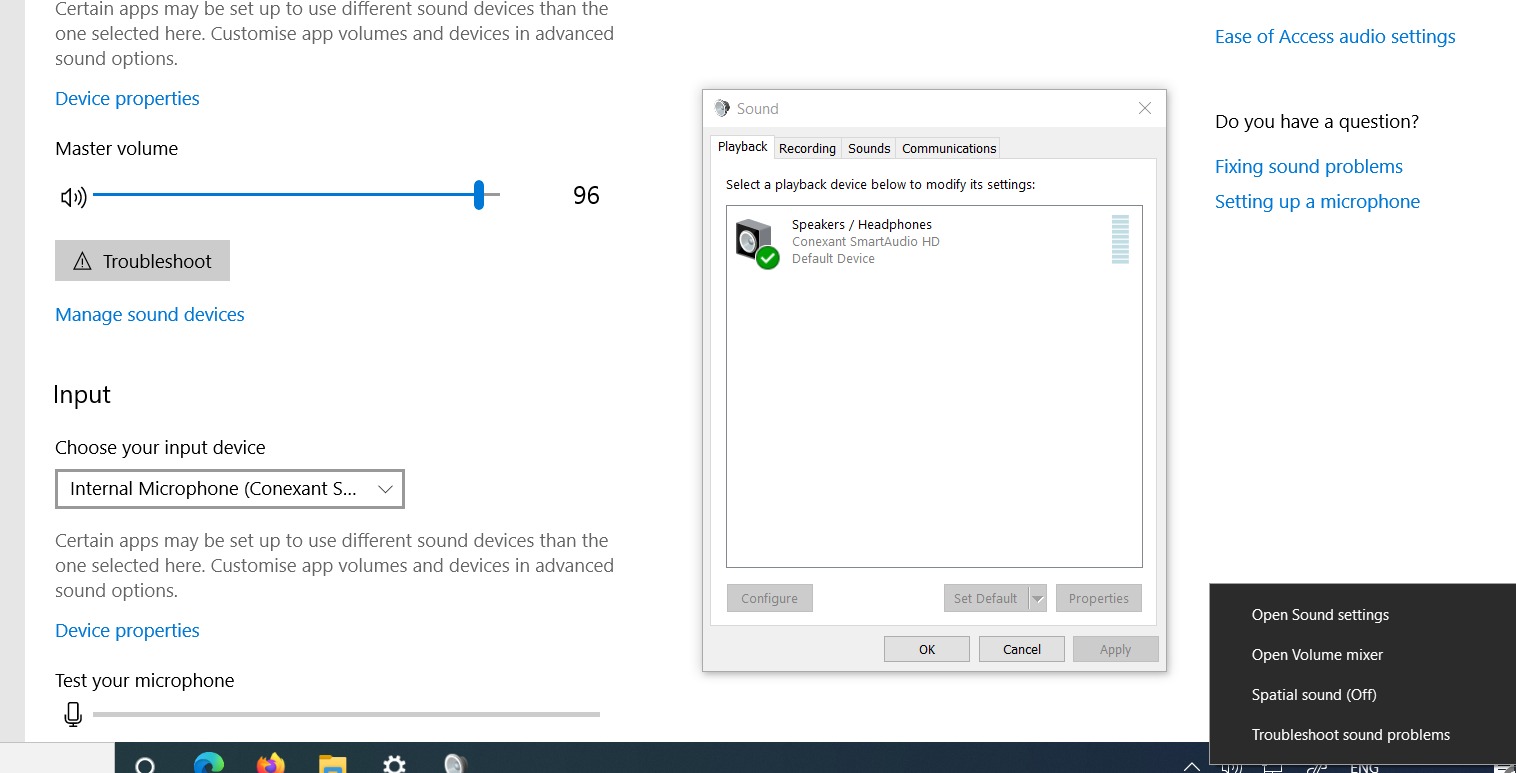
- Locate the playback tab or a similar option that lists the available audio devices.
- Identify the playback device you want to use for the program. This can be speakers, headphones, or any other preferred audio output device.
- Right-click on the desired playback device and select “Set as Default Device” or a similar option. This action will make the chosen device the default audio output for your computer.
By setting the desired playback device as the default, you are ensuring that any program or application without specific audio output device settings will automatically use the default device you have selected. However, keep in mind that certain programs may have their own audio settings that override the default device selection. We will address this in Step 3.
Once you have set the desired playback device as the default, you can proceed to the next step of configuring the program settings to ensure it recognizes and uses the specific playback device.
Step 3: Configuring Program Settings
Configuring the settings of the program you want to use with a specific playback device is crucial to ensure that it recognizes and utilizes the desired device. While most programs will automatically use the default audio device set in the system settings, some programs have their own audio settings that need to be adjusted.
Here are the steps to configure the program settings:
- Open the program you want to configure and navigate to its settings or preferences menu. This can usually be found under the “Options,” “Settings,” or “Preferences” menu.
- Look for the “Audio” or “Sound” settings within the program’s settings menu.
- Within the audio settings, locate the playback device or audio output options.
- Choose the desired playback device for the program. This can be a specific device from the list of available devices or an option to use the system default device.
- Save or apply the settings to ensure that the program recognizes and uses the specific playback device.
By configuring the program settings, you are instructing the program to use the selected playback device instead of relying solely on the system default device. This step is essential for programs that have their own independent audio settings, as it ensures your preferred device is used for that specific program.
It’s important to note that not all programs have customizable audio settings. In some cases, they may rely solely on the system default device. If this is the case, the program will automatically use the playback device you selected as the system default in the previous step.
Once you have configured the program settings, you can proceed to the next step of testing the program with the specific playback device.
Step 4: Testing the Program with the Specific Playback Device
After you have checked the available playback devices, selected your desired device, and configured the program settings, it’s time to test the program to ensure it is using the specific playback device you intended.
Here are the steps to test the program with the specific playback device:
- Close and reopen the program you have configured.
- Play audio or video content within the program.
- Listen for the audio output and verify that it is coming from the selected playback device.
- If the audio is coming from the desired device, congratulations! You have successfully made the program use a specific playback device.
- If the audio is still coming from a different device, double-check the program settings to ensure the correct playback device is selected.
- If needed, repeat the steps to reconfigure the program settings to use the desired playback device.
Testing the program is crucial to ensure that the changes you made in the previous steps have taken effect. By playing audio or video content within the program, you can verify that the program is using the correct playback device.
If you encounter any issues or the program still does not recognize the desired device, you may need to consult the program’s documentation or support resources for further troubleshooting steps specific to that program.
With the program now successfully using the specific playback device, you can enjoy your audio content with the optimal audio output you desire.
Conclusion
Congratulations! You have reached the end of this guide on how to make a program use a specific playback device. By following the steps outlined in this article, you have learned how to identify the available playback devices on your computer, select the desired device, configure program settings, and test the program with the specific playback device.
Having control over which audio output device a program uses can greatly enhance your audio experience. Whether you prefer to use dedicated speakers for music playback, headphones for gaming, or any other audio output device, being able to customize the playback device ensures that you enjoy your audio content exactly the way you want it.
Remember that the steps outlined in this guide may vary slightly depending on your operating system and the specific program you are using. It’s always a good idea to consult the documentation or support resources for the program you want to configure if you encounter any difficulties or encounter specific settings unique to that program.
Now that you know how to make a program use a specific playback device, you can take full control over your audio settings and enjoy an immersive audio experience tailored to your preferences.
Thank you for reading, and may you have many hours of enjoyable audio playback with your preferred devices!