Home>Devices & Equipment>Radio>How To Set A Station On Car Radio


Radio
How To Set A Station On Car Radio
Modified: January 22, 2024
Learn how to set a station on your car radio with our step-by-step guide. Find out how to tune in to your favorite channels and enjoy your drive.
(Many of the links in this article redirect to a specific reviewed product. Your purchase of these products through affiliate links helps to generate commission for AudioLover.com, at no extra cost. Learn more)
Table of Contents
Introduction
Setting a station on a car radio is a simple yet essential skill for any driver or passenger who wants to listen to their favorite music, talk shows, or news while on the road. As technology has evolved, car radios have become more advanced, offering a wide range of features and options for tuning in to your preferred stations. Whether you’re driving a classic car with a traditional analog radio or a modern vehicle with a touchscreen infotainment system, the process of setting a station remains relatively similar.
In this article, we will guide you through the steps to set a station on a car radio, regardless of the make or model of your vehicle. Whether you prefer listening to FM or AM stations, we will cover the basic procedures to help you tune in to your desired frequencies. We will also explore additional features that may be available on your car radio, such as manual tuning, storing presets, and fine-tuning the reception.
Before we dive into the steps, it’s crucial to have a basic understanding of the FM and AM bands. FM (Frequency Modulation) is the most common band used for commercial radio stations, offering a higher-quality audio experience. AM (Amplitude Modulation) is often used for talk radio and sports broadcasts, covering larger geographic areas but with slightly lower audio fidelity.
So, whether you’re embarking on a road trip, running errands, or simply enjoying a drive, let’s explore how to set a station on your car radio and tune in to the music and shows that keep you entertained on the go.
Step 1: Turn on the Car Radio
The first step in setting a station on your car radio is to turn it on. This may sound obvious, but knowing how to turn on the radio in your specific car model is essential as the location and method can vary.
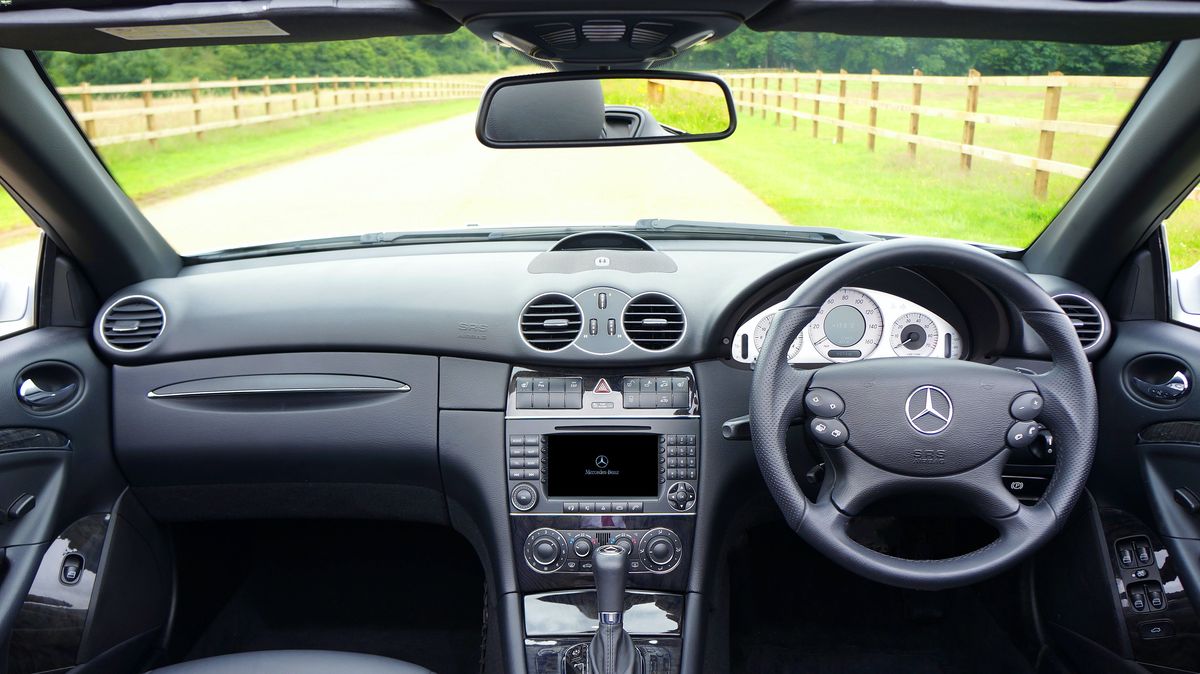
In most vehicles, you can find the power button or knob for the radio on the center console, dashboard, or integrated into the infotainment system. It is usually marked with a radio icon or simply labeled as “Power” or “On/Off.”
If your car has a keyless ignition system, you may need to press the start button once without pressing the brake pedal to activate the electronics, including the radio. In vehicles with traditional ignition keys, simply turn the key in the ignition to the “Accessory” or “On” position to power up the radio system.
Once the radio is turned on, you should see the display light up, indicating that it is ready for use. Depending on your car’s features, you may also see the current radio station or frequency displayed on the screen.
If your car radio has additional features like Bluetooth connectivity or Apple CarPlay/Android Auto integration, make sure these are also turned on if you wish to use them alongside the radio. Refer to your car’s user manual for specific instructions on activating these features.
Now that the car radio is switched on, you’re ready to move on to the next step and choose the FM/AM band.
Step 2: Choose the FM/AM Band
After turning on the car radio, the next step is to select the desired FM or AM band. This step is crucial as it determines whether you’ll be tuning in to FM (Frequency Modulation) or AM (Amplitude Modulation) stations.
In most car radios, you can switch between the FM and AM bands by pressing a designated button or using a menu option on the infotainment system. Look for buttons labeled “FM/AM” or “Band” on the faceplate of the radio or on the steering wheel controls.
If your car radio has a touchscreen display, there may be an icon or indicator that allows you to switch between FM and AM modes by tapping on the screen. Some modern radios even have voice recognition capabilities, allowing you to switch bands by voice command.
Once you have selected the FM or AM band, the radio will prepare to scan or tune in to stations in that specific frequency range. Keep in mind that FM bands typically range from 88.1 MHz to 107.9 MHz, while AM bands typically range from 540 kHz to 1,700 kHz. These ranges may vary slightly depending on your location and local regulations.
If you’re unsure which band to choose, consider the type of content you want to listen to. FM stations generally offer a wider range of music, talk shows, and news broadcasts, while AM stations often feature sports, talk radio, and news from a more local perspective.
Now that you have chosen the FM/AM band, you’re ready to move on to the next step and start scanning or manually tuning for a station.
Step 3: Seek or Manual Tuning
Once you have selected the FM or AM band on your car radio, it’s time to start searching for a station. There are two common methods for tuning in to stations: seek tuning and manual tuning.
1. Seek Tuning:
Seek tuning is a convenient method that allows the radio to automatically scan and lock onto the next available station with a strong signal. To initiate the seek tuning feature, look for a button labeled “Seek” or “Scan” on the radio or steering wheel controls.
When you press the seek button, the radio will start scanning through the frequencies in the chosen band, moving from one station to another. As it scans, the radio will often pause briefly when it detects a strong signal, indicating a potential station.
If you come across a station that you want to listen to, press the seek button again to stop the scanning process and lock onto that station. The radio will then fine-tune the reception and provide clear audio for you to enjoy.
2. Manual Tuning:
If you prefer more control over the tuning process, manual tuning allows you to manually adjust the frequency to find your desired station. Look for buttons or knobs labeled “Tune” or arrows pointing up and down for manual tuning.
Using the manual tuning controls, you can incrementally increase or decrease the frequency to move through the available stations. Pay attention to the frequency display to see the changes as you turn the knob or press the buttons.
Once you find a station of interest, stop tuning and allow the radio to fine-tune the reception for optimal audio quality. Adjust the tuning as needed if you encounter any interference or weak signals.
Whether you prefer seek tuning or manual tuning, both methods allow you to find stations that suit your preferences. Experiment with both techniques to determine which one works best for you and your car radio.
Now that you understand the seek and manual tuning options, you’re ready to move on to the next step: setting a station.
Step 4: Set a Station
Once you have found a station that you want to tune in to, it’s time to set it on your car radio. Setting a station allows you to easily access it in the future without having to manually search for it again.
To set a station on your car radio, follow these steps:
- Tune in to the desired station using the seek or manual tuning method explained in the previous step.
- Once you have the station playing on your car radio, locate the button or control labeled “Preset” or “Memory”. This button is usually found on the faceplate of the radio or may be integrated into the touchscreen display.
- Press and hold the preset button for a few seconds. The radio will typically beep or display a message to indicate that the station has been saved.
- Depending on your car radio, you may have multiple preset buttons labeled with numbers or icons. Choose an available preset button where you want to store the station.
- To access the saved station in the future, simply press the corresponding preset button. The radio will automatically tune in to the station you set, making it quick and convenient to listen to your favorite stations while on the road.
Note that the number of available presets can vary depending on your car radio model. Some radios offer a limited number of presets, while others provide more flexibility with multiple pages or folders of presets.
Setting multiple stations as presets allows you to have a variety of your favorite stations readily available, making it easy to switch between them with just a press of a button.
Now that you have successfully set a station on your car radio, you can move on to the next step: fine-tuning and adjusting the station to improve the audio quality.
Step 5: Store the Station as a Preset
Once you have found a station that you want to listen to regularly, it’s a good idea to store it as a preset on your car radio. Storing a station as a preset allows you to quickly access it with just a press of a button, saving you time and effort in the future.
To store a station as a preset, follow these steps:
- Tune in to the station that you want to store as a preset using the seek or manual tuning method explained in the earlier steps.
- Once you are tuned in to the desired station, locate the “Preset” or “Memory” button on your car radio. This button is typically found on the faceplate of the radio or may be integrated into the touchscreen display.
- Press and hold the preset button for a few seconds. The radio will usually beep or display a message to indicate that the station has been stored as a preset.
- Most car radios have multiple preset buttons labeled with numbers or icons. Choose an available preset button where you want to store the station. Some radios also offer the option to create different preset pages or folders, allowing you to organize your saved stations.
- Repeat the process to store other stations as presets if desired. Depending on your car radio, you may have a limited number of preset slots available, so choose the stations that you listen to frequently or enjoy the most.
- Once you have stored the station as a preset, you can easily access it in the future by pressing the corresponding preset button. The radio will automatically tune in to the station you saved, providing quick and convenient access to your favorite stations.
By storing stations as presets, you can create a personalized list of your preferred stations, making it effortless to switch between them without having to manually tune or search for each station every time you want to listen.
Now that you have successfully stored a station as a preset on your car radio, you can move on to the next step: fine-tuning and adjusting the station to optimize the audio quality.
Step 6: Fine-Tuning and Adjusting the Station
After setting a station as a preset on your car radio, you may find the need to fine-tune and adjust the station for optimal audio quality. Fine-tuning allows you to optimize the reception and clarity of the station you’re listening to. Here are some tips to help you fine-tune and adjust the station:
- Antenna Position: If your car has an external antenna, check its position. Sometimes, adjusting the position of the antenna can improve reception and reduce static or interference. Consult your car’s manual for guidance on adjusting the antenna.
- Scan for Alternate Frequencies: Some radio stations broadcast on multiple frequencies in various locations. If you experience poor reception or interference on your preset frequency, try scanning for alternate frequencies that may offer better reception of the same station.
- Equalizer Settings: Many car radios have built-in equalizer settings that allow you to adjust the sound characteristics. Experiment with these settings to enhance the audio quality of the station you’re listening to. Common equalizer presets include options like “Rock,” “Pop,” “Jazz,” and “Classical,” or you can customize the settings manually based on your preferences.
- Audio Filters and Noise Reduction: Some car radios offer additional features like audio filters or noise reduction settings. These can help reduce background noise, static, or interference and improve the overall sound quality of the station.
- Volume and Balance: Adjusting the volume and balance settings on your car radio can also contribute to a better listening experience. Find a comfortable volume level and adjust the balance between the speakers to ensure a balanced sound stage.
- Antenna Booster: If you’re still experiencing weak reception even after fine-tuning, consider investing in an external antenna booster. These devices can improve the antenna’s signal reception, especially in areas with weak radio signals or during long-distance driving.
Continuously monitor and make adjustments to the fine-tuning settings as needed to maintain optimal audio quality and reception. Keep in mind that the radio signals can vary depending on your location, driving conditions, and the surrounding environment. Adjustments may be necessary when traveling to different areas or encountering changes in reception quality.
By fine-tuning and adjusting the station, you can enjoy an enhanced listening experience, free of static, interference, or distortions.
Now that you have completed the steps for setting a station on your car radio and fine-tuning it, you’re ready to enjoy your favorite music, talk shows, or news while on the road!
Conclusion
Setting a station on your car radio is a straightforward process that allows you to enjoy your favorite music, talk shows, or news while on the go. By following the steps outlined in this guide, you can tune in to FM or AM stations and store them as presets for easy access.
Starting with turning on the car radio and selecting the desired FM or AM band, you can use the seek or manual tuning options to find stations that match your preferences. Once you have found a station to your liking, store it as a preset using the dedicated preset buttons on your car radio.
Don’t forget to fine-tune and adjust the station to optimize the audio quality. This can include adjusting the antenna position, scanning for alternate frequencies, utilizing equalizer settings, and making use of audio filters and noise reduction features. Continuously make adjustments as needed to ensure a clear and enjoyable listening experience.
By mastering the art of setting a station on your car radio, you can personalize your driving experience and stay entertained with your preferred radio stations while on the road. Whether it’s for a road trip, daily commute, or leisurely drive, having easy access to your favorite stations adds to the enjoyment of the journey.
Remember that the specifics of setting a station may vary depending on your car radio model, so it’s always beneficial to refer to the user manual for detailed instructions and features specific to your vehicle.
Now, turn on your car radio, set your favorite station, and enjoy the music and shows that make your driving experience even more enjoyable!


