Home>Devices & Equipment>Radio>Why Is My Radio Screen Not Working
Radio
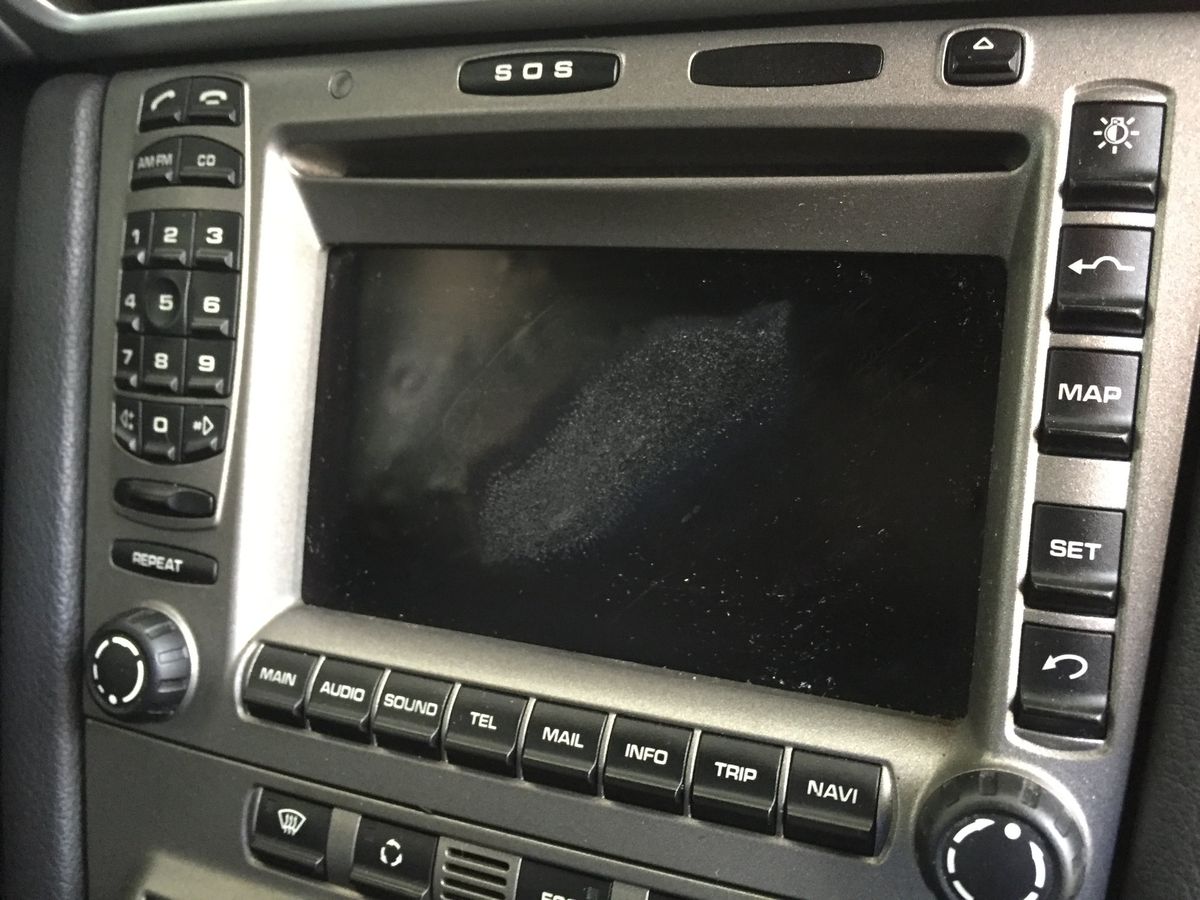
Why Is My Radio Screen Not Working
Published: November 11, 2023
Experiencing issues with your radio screen? Find out why it's not working and get it fixed.
(Many of the links in this article redirect to a specific reviewed product. Your purchase of these products through affiliate links helps to generate commission for AudioLover.com, at no extra cost. Learn more)
Table of Contents
Introduction
Radio screens have become an integral part of modern car and home entertainment systems. They provide a visual interface for users, allowing them to access various features, settings, and information. However, it can be frustrating when the radio screen stops working, leaving users in the dark.
There can be several reasons why a radio screen may malfunction, from technical issues to physical damage. In this article, we will explore the most common causes of radio screen problems and provide troubleshooting steps to help you get your entertainment system back up and running.
It is important to note that while the troubleshooting steps provided here can be helpful in resolving minor radio screen issues, more complex problems may require professional assistance. If you are unsure or uncomfortable performing any of the troubleshooting steps, it is always best to consult a trained technician who can accurately diagnose and fix the problem.
Now, let’s delve into the common causes of radio screen malfunction and the steps you can take to address them.
Common Causes of Radio Screen Malfunction
A radio screen not working can be a frustrating experience, but understanding the common causes can help you troubleshoot the issue effectively. Here are some of the most frequent culprits behind radio screen malfunctions:
- Faulty Wiring:
- Loose Connections:
- Blown Fuse:
- Software Glitch:
- Physical Damage:
A common cause of radio screen malfunction is faulty wiring. Over time, the wires connecting the radio system to the screen may become damaged or worn out, resulting in a loss of connection and functionality.
Loose connections can also lead to radio screen issues. If the cables connecting the screen to the radio unit are not securely attached, it can cause intermittent or no display on the screen.
In some cases, a blown fuse can be the culprit behind a non-functional radio screen. Fuses are designed to protect electrical components from excessive current, and when a fuse blows, it interrupts the electrical flow to the radio screen.
Another common cause of radio screen malfunction is a software glitch. Just like any electronic device, radio systems can experience software errors that can cause the screen to freeze, display distorted images, or not work at all.
Accidental physical damage can also render the radio screen non-functional. Impact from a bump or drop can crack the screen, damage internal components, or loosen connections, leading to a loss of display.
These are just a few of the common causes of radio screen malfunctions. Identifying the underlying issue is crucial in order to determine the appropriate troubleshooting steps. In the next section, we will delve into how to troubleshoot and resolve radio screen issues.
Faulty Wiring
Faulty wiring is one of the common causes of radio screen malfunctions. Over time, the wiring connecting the radio system to the screen can become damaged or worn out, leading to a loss of connection or functionality. Here’s how to troubleshoot and address faulty wiring issues:
Check for visible damage: Inspect the wiring for any visible signs of damage, such as frayed wires, cuts, or burns. If you notice any damage, it is likely causing the issue, and the wiring needs to be repaired or replaced.
Ensure proper connections: Make sure that all connections between the radio unit and the screen are secure. Loose connections can result in intermittent functionality or complete failure. Carefully disconnect and reconnect the wires, ensuring a tight and secure fit.
Inspect the wiring harness: The wiring harness is a bundle of wires that connects the radio unit to the screen. Check for any loose or disconnected wires within the harness. If you find any, reconnect them and secure them with electrical tape or connectors.
Test the wiring with a multimeter: If visual inspection doesn’t reveal any issues, use a multimeter to test the continuity of the wires. Set the multimeter to the continuity testing mode and touch the probes to the ends of each wire. If there is no continuity, it indicates a break in the wiring that needs to be repaired or replaced.
Replace damaged wiring: If you have identified damaged or faulty wiring during the inspection, it is necessary to replace the affected wires. Cut out the damaged portion, stripping the ends of the new wires, and connect them securely using electrical connectors or soldering.
Remember, if you are uncomfortable performing these troubleshooting steps or unable to pinpoint the issue, it’s best to seek professional help. A trained technician can accurately diagnose and address any faulty wiring problems in your radio system.
Loose Connections
Loose connections are a common cause of radio screen malfunctions. If the cables connecting the screen to the radio unit are not securely attached, it can result in intermittent or no display on the screen. Here’s how to troubleshoot and address loose connection issues:
Check for loose cables: Start by checking if any of the cables connecting the screen to the radio unit are loose. Gently push and pull on the cables to ensure they are firmly connected. If you find any loose cables, reconnect them securely.
Inspect the cable connectors: Examine the connectors on both ends of the cables for any damage, corrosion, or dirt. Clean the connectors with a soft cloth or compressed air and reconnect them firmly. If the connectors are damaged, they may need to be replaced.
Use cable management: Sometimes, loose connections can be caused by cables being pulled or yanked out of place. Use cable management solutions such as zip ties or cable clips to secure the cables and prevent them from being accidentally disconnected.
Check for bent or broken pins: Inspect the pins on the connectors to ensure they are straight and not bent or broken. If you notice any bent or broken pins, they may be causing poor connection. In such cases, the connectors or cables may need to be replaced.
Test with a different cable: If you suspect a specific cable to be causing the issue, try replacing it with a different cable. Use a known working cable to connect the screen to the radio unit and see if the problem is resolved. If it works with a different cable, the original cable needs to be replaced.
Consider wireless options: In some cases, using wireless connectivity options can eliminate the need for physical cables altogether. Look into wireless adapters or Bluetooth connectivity solutions that allow you to connect your radio system to the screen without the risk of loose connections.
If you have gone through these troubleshooting steps and the loose connection issue persists, it is advisable to seek professional assistance. A trained technician can help diagnose the problem accurately and resolve any loose connection issues in your radio system.
Blown Fuse
A blown fuse is a common cause of a non-functional radio screen. Fuses are designed to protect electrical components from excessive current, and when a fuse blows, it interrupts the electrical flow to the radio screen. Here’s how to troubleshoot and address a blown fuse:
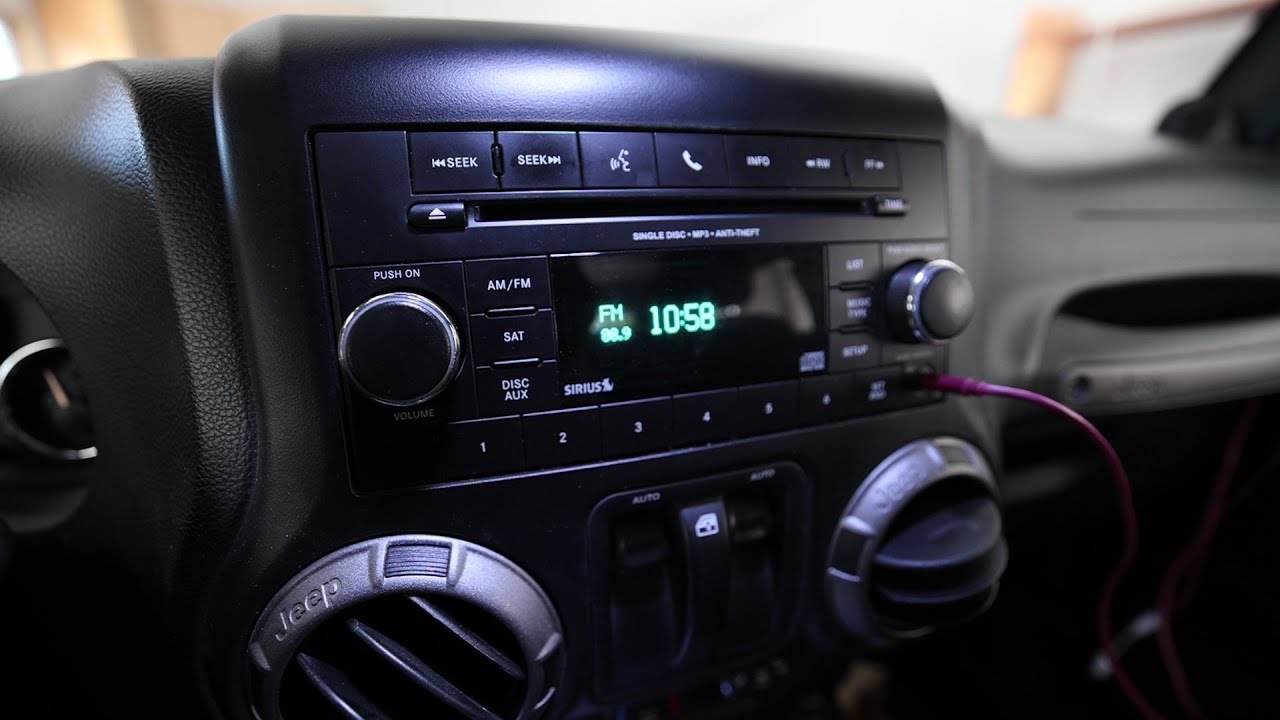
Locate the fuse box: Start by locating the fuse box in your vehicle or home where the radio system is installed. The fuse box is usually located in the engine compartment, under the dashboard, or in other accessible areas.
Identify the radio fuse: Refer to the manual or the fuse box cover to locate the fuse specifically assigned to the radio or infotainment system. The fuse should be labeled accordingly.
Inspect the radio fuse: Check the radio fuse visually to see if it is blown. If the metal strip inside the fuse is broken or melted, it indicates that the fuse has blown.
Replace the blown fuse: If you have identified a blown fuse, it needs to be replaced. Use the appropriate replacement fuse with the same rating as the old one. Carefully insert the new fuse into the fuse holder, ensuring it is securely in place.
Test the radio screen: Once you have replaced the blown fuse, turn on the radio system and test if the screen is working properly. If the screen powers on and functions as expected, the blown fuse was the likely cause of the issue.
Consider the underlying cause: While replacing the blown fuse will restore functionality, it is worth considering what caused the fuse to blow in the first place. A power surge, faulty wiring, or a short circuit may be the root cause, and it is advisable to have a professional inspect the system to prevent future fuse blowouts.
It is important to note that if the fuse blows again soon after replacement, there may be an underlying electrical issue that needs to be addressed. In such cases, it is recommended to seek professional assistance to diagnose and fix the problem.
Software Glitch
A software glitch is another common cause of radio screen malfunctions. Just like any electronic device, radio systems can experience software errors that can cause the screen to freeze, display distorted images, or not work at all. Here’s how to troubleshoot and address a software glitch:
Restart the radio system: A simple restart can often resolve software glitches. Turn off the radio system, wait for a few seconds, and then turn it back on. This will refresh the system’s software and may resolve any temporary software issues causing the screen malfunction.
Perform a factory reset: If the restart doesn’t resolve the issue, you can try performing a factory reset on the radio system. This will restore the system to its original settings and eliminate any software glitches. Please note that a factory reset will erase all custom settings and stored data, so make sure to back up any important information.
Update the software: Check if there are any available software updates for your radio system. Manufacturers often release updates to fix bugs and improve system performance. Visit the manufacturer’s website or consult the user manual for instructions on how to update the software. Follow the provided guidelines and ensure a stable power source during the update process.
Clear cache and data: Some radio systems have a cache and data storage for apps and settings. Clearing the cache and data can help resolve software glitches. Consult the user manual or go to the system settings to find the option to clear the cache and data. Note that clearing the data will reset your saved settings and preferences.
Seek technical support: If the software glitch persists after trying the troubleshooting steps mentioned above, it is advisable to seek technical support from the manufacturer or a qualified technician. They can assist in diagnosing the issue further and provide specific solutions for your radio system.
It is important to stay up to date with software updates and perform regular maintenance on your radio system to avoid software glitches. Maintaining a clean and organized system with minimal app clutter can help minimize the chances of encountering software-related issues.
Physical Damage
Accidental physical damage can also result in a non-functional radio screen. Impact from a bump or drop can crack the screen, damage internal components, or loosen connections, leading to a loss of display. Here’s how to troubleshoot and address physical damage-related issues:
Inspect the screen: Carefully examine the screen for any visible signs of physical damage, such as cracks, scratches, or shattered glass. If you notice any damage, it is likely the cause of the screen malfunction and may require professional repair or replacement.
Check for loose connections: Physical damage can also result in loose connections between the screen and the radio unit. Gently push and pull on the cables to ensure they are securely connected. If you suspect a loose connection, follow the troubleshooting steps outlined in the previous section to address the issue.
Assess internal components: In some cases, physical damage may affect the internal components of the radio system. If you have the necessary technical knowledge, you can open up the unit and inspect the internal components for any visible damage or dislodged parts. However, it is recommended to consult a professional technician to avoid further damage.
Consider repair or replacement: Depending on the extent of the physical damage, you may need to consider repair or replacement options. In the case of minor damage, professional repair services may be able to fix the issue and restore functionality. However, if the damage is severe or the cost of repair is prohibitive, it may be more practical to replace the radio system or screen.
Preventive measures: To minimize the risk of physical damage to your radio system, handle it with care and avoid exposing it to excessive heat, moisture, or extreme temperatures. Additionally, consider using protective cases or covers for portable radio systems to provide an extra layer of protection against accidental damage.
Physical damage to the radio screen often requires professional assistance for repair or replacement. Consulting a trained technician or reaching out to the manufacturer’s customer support can provide you with the best options to address physical damage-related issues in your radio system.
Troubleshooting the Radio Screen Not Working
When faced with a radio screen that is not working, it is important to follow a systematic approach to troubleshoot and resolve the issue. Here are some troubleshooting steps you can take to address a non-functional radio screen:
- Check the wiring: Start by inspecting the wiring connecting the radio system to the screen. Look for any visible damage, loose connections, or disconnected wires. If you find any issues, repair or replace the wiring as necessary.
- Tighten connections: Make sure all the connections between the screen and the radio unit are securely fastened. Tighten any loose connections to ensure a stable electrical connection.
- Replace the fuse: If the screen is not receiving power, a blown fuse may be the culprit. Locate the appropriate fuse for the radio system and replace it with a new fuse of the same rating.
- Reset the radio system: Try resetting the radio system to its default settings. This can be done through the system’s menu or by disconnecting the power source for a short period of time. Resetting the system may help resolve any software glitches causing the screen malfunction.
- Seek professional help: If the troubleshooting steps mentioned above do not resolve the issue, it is advisable to seek assistance from a professional technician. They have the knowledge and tools to diagnose and fix more complex problems with the radio system.
It is important to note that the troubleshooting steps provided here are general guidelines and may vary depending on the specific make and model of your radio system. Always refer to the manufacturer’s manual or consult with professional technicians for detailed instructions tailored to your specific system.
Remember, if you are uncomfortable performing any of the troubleshooting steps or if the issue persists, it is best to seek professional help. They can provide expert advice and solutions to get your radio screen working again.
Check the Wiring
When troubleshooting a non-functional radio screen, one of the first steps is to check the wiring. Faulty wiring can often be the cause of connectivity issues and display problems. Here’s how to go about checking the wiring:
Inspect for visible damage: Start by visually inspecting the wiring for any signs of damage such as frayed wires, cuts, or burns. These can occur over time due to wear and tear, or from external factors like rodents or accidents. If you notice any damage, it is likely causing the issue and the wiring needs to be repaired or replaced.
Ensure proper connections: Make sure that all connections between the radio unit and the screen are securely attached. Loose or improperly connected cables can result in intermittent functionality or a complete loss of display. Gently push and pull on the cables to ensure they are firmly secured.
Inspect the wiring harness: The wiring harness is a bundle of wires that connects the radio unit to the screen. Check for any loose or disconnected wires within the harness. If you find any, reconnect them and secure them with electrical tape or connectors.
Test the wiring with a multimeter: If a visual inspection doesn’t reveal any issues, you can use a multimeter to test the continuity of the wires. Set the multimeter to the continuity testing mode and touch the probes to the ends of each wire. If there is no continuity, it indicates a break in the wiring that needs to be repaired or replaced.
Replace damaged wiring: If you have identified damaged or faulty wiring during the inspection, it is necessary to replace the affected wires. Cut out the damaged portion, strip the ends of the new wires, and connect them securely using electrical connectors or soldering.
By carefully checking the wiring for any damage, ensuring proper connections, and replacing any faulty wiring, you can effectively address connectivity issues and restore functionality to your radio screen. If you are uncomfortable performing these troubleshooting steps or unable to identify the issue, it is recommended to seek professional help. A trained technician can accurately diagnose and address any wiring problems in your radio system.
Tighten Connections
Loose connections can often be the culprit behind a radio screen not working. When the cables connecting the screen to the radio unit are not securely attached, it can result in intermittent functionality or a complete loss of display. Here’s how to troubleshoot and address loose connection issues:
Check for loose cables: Start by visually inspecting the cables connecting the screen to the radio unit. Gently push and pull on the cables to ensure they are securely connected. If you find any cables that are loose, reconnect them properly.
Inspect the cable connectors: Examine the connectors on both ends of the cables for any damage, corrosion, or dirt. Clean the connectors with a soft cloth or compressed air if necessary. Ensure that the connectors are securely attached and making proper contact with the corresponding ports.
Use cable management: Sometimes, loose connections can be caused by cables being pulled or yanked out of place. Implement cable management solutions such as zip ties or cable clips to secure the cables and prevent them from being accidentally disconnected. This will help maintain the integrity of the connections.
Check for bent or broken pins: Inspect the pins on the connectors to ensure they are straight and not bent or broken. If you notice any bent or broken pins, they may be causing a poor connection. In such cases, the connectors or cables may need to be replaced to ensure a secure and reliable connection.
Test with a different cable: If you suspect a specific cable to be causing the issue, try replacing it with a known working cable. Use the new cable to connect the screen to the radio unit and observe if the problem is resolved. If the screen functions properly with the new cable, it indicates that the original cable was the issue and should be replaced.
Consider wireless options: In some cases, utilizing wireless connectivity options such as Bluetooth adapters can eliminate the need for physical cables. This can provide a more convenient, hassle-free, and reliable connection between the radio system and the screen.
By ensuring that all connections between the screen and the radio unit are securely fastened, you can eliminate loose connection issues and restore functionality to your radio screen. If you have gone through these troubleshooting steps and the problem persists, it is advisable to seek professional assistance. A trained technician can accurately diagnose and address any loose connection issues in your radio system.
Replace the Fuse
A blown fuse can cause a radio screen to stop working. Fuses are designed to protect electrical components from excessive current, and when a fuse blows, it interrupts the electrical flow to the radio screen. Here’s how to troubleshoot and address a blown fuse:
Locate the fuse box: Start by locating the fuse box in your vehicle or home where the radio system is installed. The fuse box is usually located in the engine compartment, under the dashboard, or in other accessible areas.
Identify the radio fuse: Refer to the manual or the fuse box cover to locate the fuse specifically assigned to the radio or infotainment system. The fuse should be labeled accordingly.
Inspect the radio fuse: Check the radio fuse visually to see if it is blown. If the metal strip inside the fuse is broken or melted, it indicates that the fuse has blown.
Replace the blown fuse: Once you have identified a blown fuse, it needs to be replaced. Use the appropriate replacement fuse with the same rating as the old one. This information can be found in the vehicle’s manual or on the fuse box cover.
Insert the new fuse: Carefully insert the new fuse into the fuse holder, ensuring it is securely in place. Make sure it is fully seated to establish proper electrical contact.
Test the radio screen: After replacing the blown fuse, turn on the radio system and test if the screen is working properly. If the screen powers on and functions as expected, the blown fuse was likely the cause of the issue.
Consider the underlying cause: While replacing the blown fuse will restore functionality, it is important to consider what caused the fuse to blow in the first place. A power surge, faulty wiring, or a short circuit may be the root cause. If the fuse blows again soon after replacement, it is recommended to seek professional assistance to diagnose and fix any underlying electrical issues.
Remember to consult the vehicle’s manual or seek professional help if you are unsure about the correct type or rating of the fuse to be used. It is essential to use the appropriate fuse to ensure the safety and proper functioning of the radio system.
Reset the Radio System
If your radio screen is not working properly, performing a reset on the radio system can often help resolve the issue. Resetting the system restores it to its default settings, eliminating any software glitches that may be causing the malfunction. Here’s how to reset the radio system:
Locate the reset button: Check the user manual or the manufacturer’s website to find the location of the reset button on your specific radio system. The reset button is usually a small, recessed button that may require a pin or a paperclip to reach.
Press and hold the reset button: Once you have located the reset button, press and hold it for a few seconds. This will initiate the reset process. You may need to use a pin or paperclip to press the button, as it is often recessed for safety reasons.
Power cycle the system: After releasing the reset button, turn off the radio system using the power button or by disconnecting the power source. Leave it powered off for a few minutes to ensure a complete reset.
Power on and test the radio screen: After the power cycle, turn on the radio system and test if the screen is functioning properly. Check for any improvement in display, responsiveness, or functionality. The reset process should have cleared any software glitches that were causing the screen malfunction.
Perform a factory reset: If a simple reset doesn’t resolve the issue, you may need to perform a factory reset. This will restore the system to its original settings and eliminate any software issues. However, please note that performing a factory reset will erase all custom settings, presets, and saved data. Make sure to back up any important information before proceeding.
If the radio screen is still not working after a reset or factory reset, there may be a more complex issue at play. In such cases, it is best to consult the user manual, contact the manufacturer’s customer support, or seek professional assistance to diagnose and resolve the problem.
Seek Professional Help
If you have tried troubleshooting steps and your radio screen is still not working, or if you are uncomfortable performing intricate repairs, it is recommended to seek professional help. A trained technician can accurately diagnose and address the issue, ensuring that your radio system is properly repaired. Here’s why professional assistance may be necessary:
Expertise and Experience: Professional technicians have specialized knowledge and experience in handling various radio systems. They are familiar with the intricacies of different models and can quickly identify the root cause of the problem.
Diagnostic Tools: Professionals have access to diagnostic tools that can help them pinpoint the issue accurately. These tools can provide detailed information about the health of the radio system and aid in the troubleshooting process.
Repairs and Replacements: Professional technicians have the necessary skills and training to perform repairs or replacements effectively. They can replace faulty components, fix wiring issues, or perform software updates with precision.
Quality Assurance: When seeking professional help, you can have peace of mind knowing that the repair work is done properly. Professionals typically offer warranties on their services, ensuring that if the issue persists or reoccurs within a specified period, they will take responsibility and fix it without additional costs.
Safety: Radio systems involve electrical components and, in some cases, intricate wiring. Professionals are well-versed in safety protocols and can carry out repairs without compromising your safety or causing further damage to the system.
Manufacturer Support: If your radio system is under warranty, seeking professional help ensures that the repair work is performed in line with the manufacturer’s guidelines. This helps protect the warranty and prevents potential issues with future claims.
By seeking professional help, you can save time and avoid potential complications associated with DIY repairs. Professional technicians can provide in-depth knowledge, efficient solutions, and peace of mind, all of which contribute to a successful resolution of your radio screen issue.
If your radio system is still under warranty, check with the manufacturer to see if the issue is covered. They may direct you to an authorized service center for repair or replacement.
Conclusion
A non-functional radio screen can be a frustrating experience, but it doesn’t have to be a permanent issue. By understanding the common causes of radio screen malfunctions and following the appropriate troubleshooting steps, you can often resolve the problem and get your entertainment system up and running again.
In this article, we have explored the common causes of radio screen malfunctions, including faulty wiring, loose connections, blown fuses, software glitches, and physical damage. We have provided troubleshooting steps for each of these issues, such as checking the wiring, tightening connections, replacing fuses, resetting the radio system, and seeking professional help when needed.
It is important to remember that while many radio screen issues can be resolved through DIY troubleshooting, some problems may require the expertise of a professional technician. If you are uncomfortable or unsure about performing any of the troubleshooting steps, it is always best to seek professional assistance to avoid further damage or complications.
Additionally, preventive measures such as handling the radio system with care, using cable management solutions, and regular maintenance can help minimize the risk of radio screen malfunctions.
In conclusion, the key to resolving a radio screen not working is to systematically troubleshoot the potential causes and apply the appropriate solutions. Whether it’s checking the wiring, tightening connections, replacing fuses, resetting the system, or seeking professional help, addressing the issue promptly and correctly can help restore functionality to your radio screen and enhance your overall entertainment experience.