Home>Devices & Equipment>Subwoofer>How To Reset Sonos Subwoofer
Subwoofer
How To Reset Sonos Subwoofer
Published: January 21, 2024
Learn how to reset your Sonos subwoofer and get it back to optimal performance. Follow our step-by-step guide to troubleshoot any issues with your subwoofer.
(Many of the links in this article redirect to a specific reviewed product. Your purchase of these products through affiliate links helps to generate commission for AudioLover.com, at no extra cost. Learn more)
Table of Contents
Introduction
Welcome to the world of deep, immersive bass with Sonos Subwoofer! As an essential component of any home audio setup, a subwoofer adds an extra dimension of richness and impact to your music, movies, and games. Whether you’re a music enthusiast, a movie lover, or a gaming aficionado, the Sonos Subwoofer is designed to enhance your audio experience and bring your entertainment to life.
In this comprehensive guide, we will delve into the world of Sonos Subwoofers, exploring their features, benefits, and most importantly, how to reset them. At some point, you may encounter issues with your Subwoofer that require a reset to restore it to its optimal functioning state. Whether it’s a connectivity problem, unresponsive controls, or audio performance troubles, a reset can often be the solution to get your Subwoofer back on track.
Before we dive into the process of resetting the Sonos Subwoofer, let’s take a closer look at what makes it such a remarkable addition to your audio setup.
Understanding Sonos Subwoofer
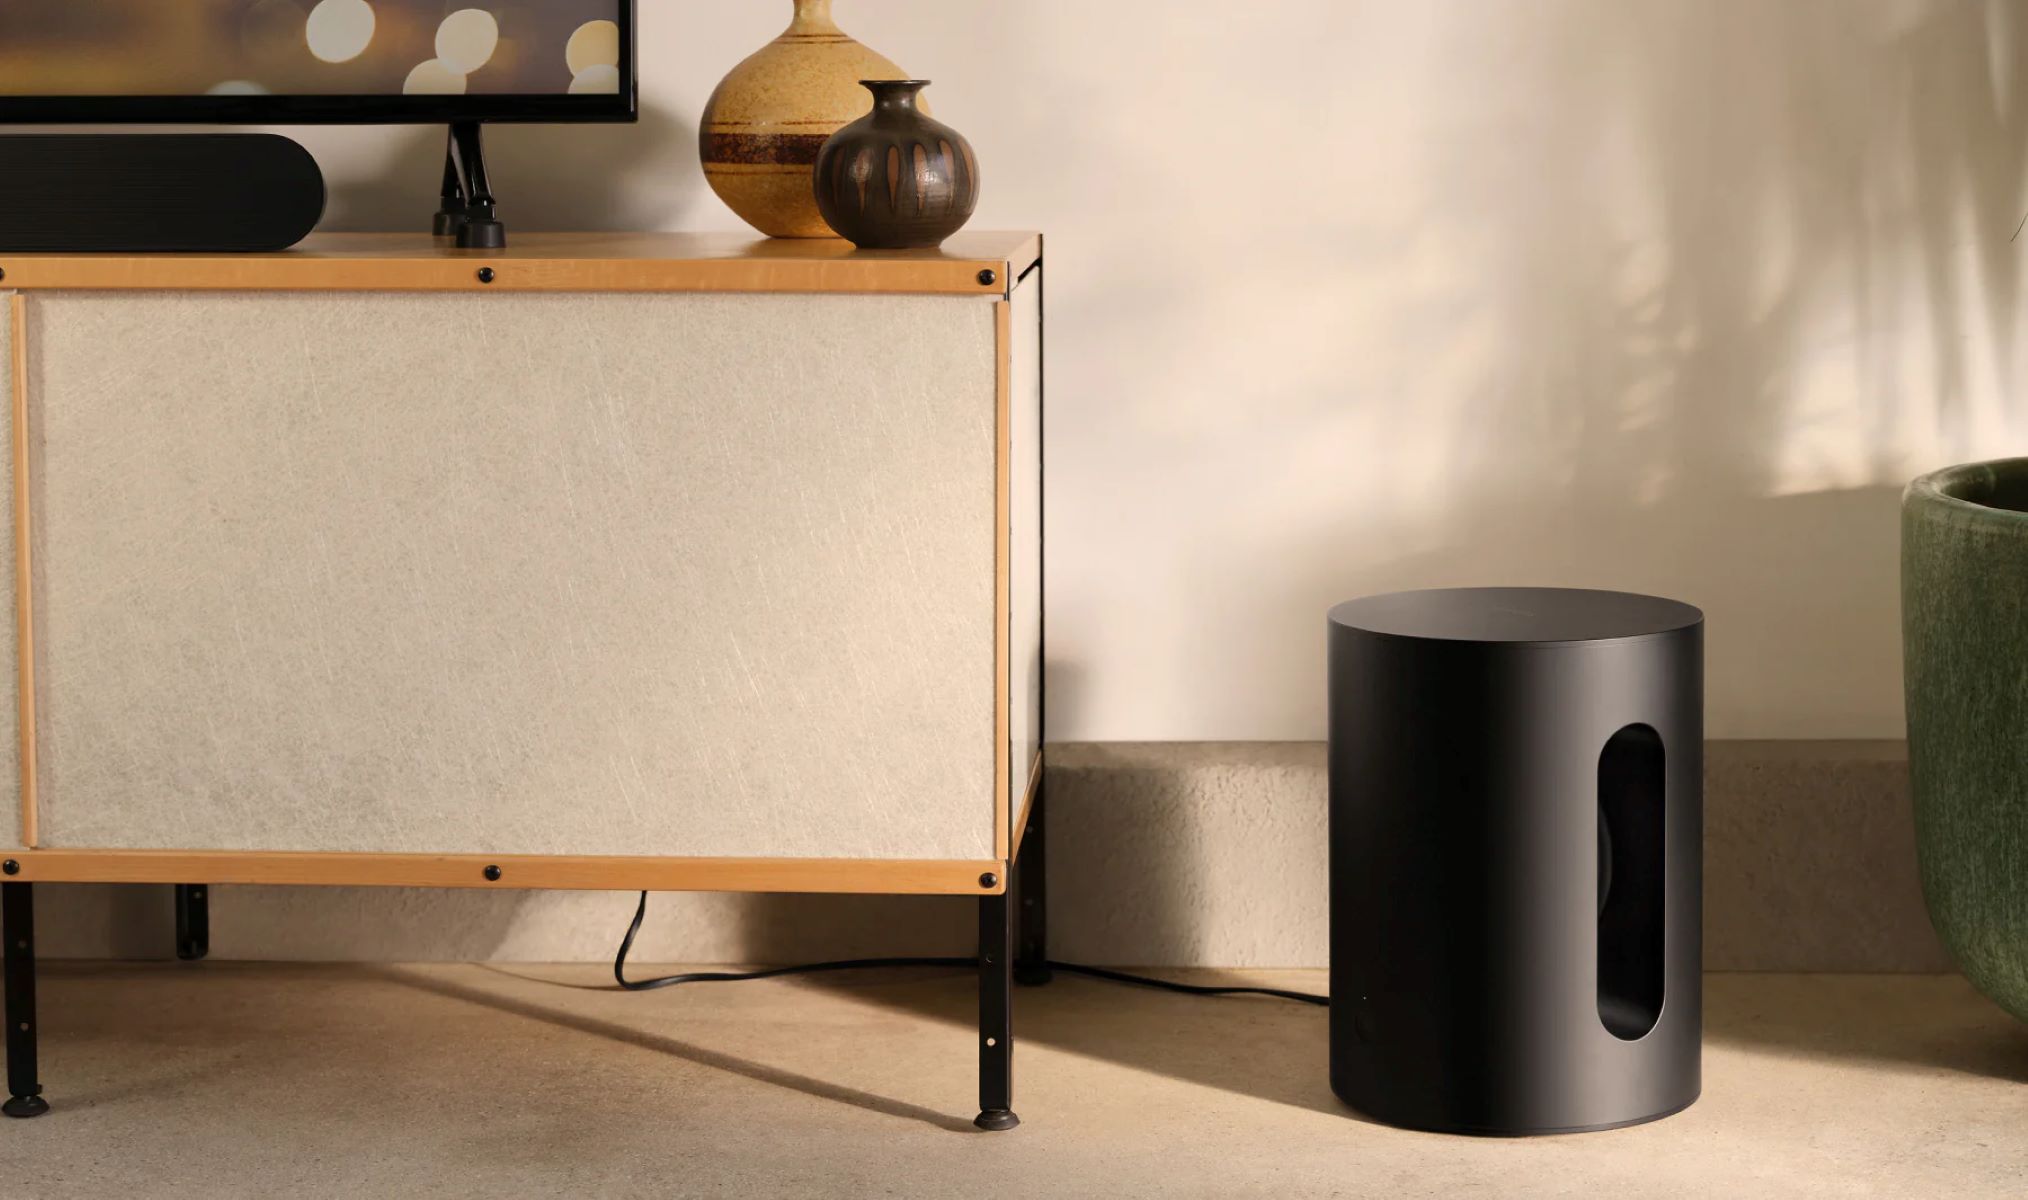
The Sonos Subwoofer is a powerful and sleek device that adds deep bass to your audio setup. It is specifically designed to complement your existing Sonos speakers, delivering an immersive and well-balanced sound experience. The Subwoofer features a unique design, with a premium finish and a compact size, making it easy to fit into any room.
One of the standout features of the Sonos Subwoofer is its wireless connectivity. It seamlessly integrates with other Sonos speakers in your setup, enabling you to create a multi-room audio system without the need for complicated wiring. This means you can place the Subwoofer anywhere in your room to achieve optimal bass performance, without the constraints of cables.
But what sets the Sonos Subwoofer apart from other subwoofers on the market is its ability to produce deep, rich low frequencies while maintaining clarity and precision. It boasts two force-canceling drivers that eliminate any distortion or vibration, ensuring that you get a clean and powerful bass response. Whether you’re listening to music, watching movies, or playing games, the Sonos Subwoofer enhances the overall audio experience by providing a solid foundation of bass.
Another impressive feature of the Sonos Subwoofer is its compatibility with various streaming services. You can connect it to your Wi-Fi network and stream music directly from popular platforms like Spotify, Apple Music, and Google Play Music. The Subwoofer also supports voice control, allowing you to adjust volume, skip tracks, and play/pause using voice commands through virtual assistants like Amazon Alexa or Google Assistant.
With its advanced digital signal processing capabilities, the Sonos Subwoofer can optimize the sound based on the room’s acoustics. It automatically adjusts the equalization and phase settings to ensure that the bass sounds balanced and precise, regardless of the room’s layout or furniture placement. This adaptability means that you’ll get consistent and high-quality bass reproduction no matter where you place the Subwoofer.
Now that you have a better understanding of the Sonos Subwoofer and its remarkable features, let’s explore the reasons why you might need to reset it.
Reasons to Reset Sonos Subwoofer
While the Sonos Subwoofer is a reliable and high-performing device, there may be situations where you need to reset it. Resetting the Subwoofer can help resolve various issues that may arise during its usage. Here are some common reasons why you might need to reset your Sonos Subwoofer:
- Connectivity Issues: Sometimes, the Subwoofer may encounter connectivity problems, such as difficulty connecting to your Wi-Fi network or syncing with other Sonos speakers. Resetting the Subwoofer can often resolve these issues and restore its ability to connect seamlessly.
- Unresponsive Controls: If you find that the controls on your Subwoofer, such as volume adjustment or play/pause buttons, are unresponsive or malfunctioning, a reset can help bring them back to normal functioning.
- Audio Performance Troubles: In certain cases, you may notice a decline in the audio performance of your Subwoofer, such as distorted bass or reduced volume. Resetting the Subwoofer can help recalibrate its settings and improve the overall audio quality.
- Software Update Issues: Occasionally, a software update on your Sonos system may not install correctly on the Subwoofer, leading to functionality issues. Resetting the Subwoofer can help resolve any conflicts and ensure a smooth software update process.
- Compatibility Problems: If you have recently added new Sonos speakers or other components to your audio system, you may encounter compatibility issues with the Subwoofer. Resetting the Subwoofer can help establish proper communication and synchronization between the devices.
- General Troubleshooting: In some cases, when you’ve tried various troubleshooting steps to resolve problems with your Subwoofer and nothing seems to work, a reset can serve as a last resort to restore its functionality.
It’s important to note that resetting your Sonos Subwoofer should be a last resort. Before proceeding with a reset, make sure to troubleshoot and explore other potential solutions. Resetting will erase any custom settings or configurations, so it’s recommended to document your preferences before performing a reset.
Now that you understand the reasons behind resetting your Sonos Subwoofer, let’s dive into the step-by-step process of how to reset it.
Resetting Sonos Subwoofer Step by Step
Resetting your Sonos Subwoofer is a straightforward process that can help resolve various issues you may encounter. Follow these step-by-step instructions to reset your Sonos Subwoofer:
- Prepare the Subwoofer: Ensure that the Subwoofer is connected to power and turned on. Make sure there are no loose cables or external devices connected to it.
- Locate the reset button: On the back of the Subwoofer, look for a small reset button. It is usually located towards the bottom and labeled “Reset.” You may need a small tool, such as a paperclip or a pin, to press the reset button.
- Press and hold the reset button: Use the small tool to press and hold the reset button for about 5 seconds. You will notice that the Subwoofer’s status light will begin to flash white, indicating that the reset process has initiated.
- Wait for the reset to complete: Keep holding the reset button until the status light on the Subwoofer stops flashing and turns solid white. This indicates that the reset process is complete.
- Release the reset button: Once the status light turns solid white, release the reset button. The Subwoofer will now restart and go through the initial setup process.
- Complete the setup process: Follow the instructions on the Sonos app or controller to complete the setup process for your Subwoofer. This may involve connecting it to your Wi-Fi network and configuring any desired settings or preferences.
After completing the reset process and the subsequent setup, your Sonos Subwoofer should be restored to its factory settings. Any previous issues or glitches should be resolved, and you can now enjoy optimal performance from your Subwoofer.
Remember to update your Sonos app and firmware to the latest versions to ensure compatibility and access to the latest features and enhancements. If you continue to experience issues with your Subwoofer after a reset, consult the Sonos support resources or reach out to their customer service for further assistance.
Now that you know how to reset your Sonos Subwoofer, let’s explore some troubleshooting tips to address common issues you might encounter.
Troubleshooting Tips
While resetting your Sonos Subwoofer can often resolve many issues, there may be times when you encounter minor troubles that don’t require a full reset. Here are some troubleshooting tips to help you address common problems with your Sonos Subwoofer:
- Check Power and Connections: Ensure that the Subwoofer is properly connected to power and that all cables are securely plugged in. Sometimes, a loose connection can cause issues with power or audio output.
- Restart Your Sonos System: Restart your entire Sonos system, including all speakers and the Subwoofer. Simply unplug the power cables, wait for a few seconds, and then plug them back in. This can help refresh the system and resolve minor glitches.
- Verify Wi-Fi Connectivity: Ensure that your Subwoofer is connected to a stable Wi-Fi network. Check the Wi-Fi settings and make sure there are no connectivity issues or interference from neighboring networks.
- Reposition the Subwoofer: Experiment with different placements for your Subwoofer. Sometimes, moving it to a different location in the room can improve the bass response and overall audio performance.
- Update Sonos Software: Check for any available software updates for your Sonos system. Updating to the latest version can help resolve compatibility issues and provide bug fixes and improvements.
- Reset Wi-Fi Credentials: If you’ve recently changed your Wi-Fi network or passwords, update the Wi-Fi credentials on your Subwoofer. This can ensure a proper connection to the new network.
- Check Sonos System Status: Visit the Sonos support webpage or check their social media channels for any reported system-wide issues or outages that may be affecting the performance of your Subwoofer.
- Reset Individual Speakers: If you’re experiencing issues with specific speakers in your Sonos system, you can try resetting them individually before resorting to a full system reset.
- Contact Sonos Support: If you’ve tried all the troubleshooting steps and your Subwoofer still isn’t functioning correctly, reach out to Sonos customer support for further assistance. They have a dedicated team of experts who can help identify and resolve any complex issues you may be facing.
By following these troubleshooting tips, you can often resolve minor issues and keep your Sonos Subwoofer performing at its best. Remember to document any changes you make to settings or configurations for future reference.
Now that you’re armed with troubleshooting knowledge, let’s wrap up this guide.
Conclusion
The Sonos Subwoofer is an exceptional addition to any audio setup, delivering deep and immersive bass that enhances your music, movies, and gaming experiences. However, like any electronic device, there may be times when you need to reset it to address issues or restore optimal performance.
In this guide, we’ve explored the world of Sonos Subwoofers, understanding their features and benefits. We’ve also discussed the common reasons for resetting a Subwoofer, such as connectivity issues, unresponsive controls, and audio performance troubles. Additionally, we provided a step-by-step guide on how to reset your Sonos Subwoofer and shared troubleshooting tips to help you address minor issues without a full reset.
Remember, before proceeding with a reset, it’s essential to troubleshoot and explore other potential solutions. Keep in mind that resetting will erase any custom settings or configurations, so it’s advisable to document your preferences beforehand.
If you continue to experience difficulties with your Sonos Subwoofer after attempting troubleshooting steps or a reset, don’t hesitate to reach out to Sonos support for further assistance. Their dedicated team of experts is there to help you resolve any complex issues and ensure your Subwoofer provides the best audio experience possible.
Now, armed with the knowledge of resetting and troubleshooting your Sonos Subwoofer, you can confidently navigate any issues that may arise and continue enjoying optimal bass performance in your audio setup.