Home>Devices & Equipment>Radio>How To Reset Pioneer Radio Bluetooth
Radio
How To Reset Pioneer Radio Bluetooth
Modified: March 8, 2024
Discover how to reset your Pioneer radio's Bluetooth connection and ensure a seamless listening experience. Enjoy uninterrupted music with this step-by-step guide.
(Many of the links in this article redirect to a specific reviewed product. Your purchase of these products through affiliate links helps to generate commission for AudioLover.com, at no extra cost. Learn more)
Table of Contents
Introduction
Welcome to our guide on how to reset a Pioneer Radio Bluetooth connection. Pioneer radios are popular for their excellent sound quality and convenient Bluetooth functionality, allowing you to connect your devices wirelessly for a seamless audio experience. However, there may be instances where you encounter issues with the Bluetooth connection, such as difficulties in pairing or unstable connections.
In such cases, resetting the Pioneer Radio’s Bluetooth settings can often resolve the problem and restore a stable connection. Resetting the Bluetooth settings will clear any saved devices and configurations, essentially starting fresh with the Bluetooth feature. It is a simple process that can be completed in a few easy steps, ensuring that you can once again enjoy the convenience of wirelessly connecting your devices to your Pioneer Radio.
In this comprehensive guide, we will walk you through the step-by-step process of resetting the Bluetooth connection on your Pioneer Radio. Whether you are experiencing troubles with pairing, a glitchy connection, or simply want to start anew, this guide will provide you with the necessary instructions to get your Pioneer Radio’s Bluetooth feature up and running smoothly.
Step 1: Turn off the Pioneer Radio
The first step in resetting the Bluetooth connection of your Pioneer Radio is to ensure that the device is turned off. This will allow for a complete power cycle, which can help clear any temporary glitches or conflicts that may be affecting the Bluetooth function.
To turn off your Pioneer Radio, locate the power button. On most models, the power button is labeled with a prominent “On/Off” symbol. Press and hold the power button until the radio turns off completely. You may need to hold the button for a few seconds to ensure that the device powers down completely.
Once the Pioneer Radio is turned off, it is recommended to wait for a brief period of time before proceeding to the next step. This will allow any residual power to dissipate, ensuring a fresh start when the device is powered back on.
In some cases, you may need to disconnect the power source of the Pioneer Radio to ensure a complete power cycle. If your Pioneer Radio is connected to a power outlet, you can unplug the device from the socket. If it is connected to the vehicle’s power supply, you can remove the appropriate fuse or disconnect the battery temporarily.
Step 2: Press and hold the “Reset” button
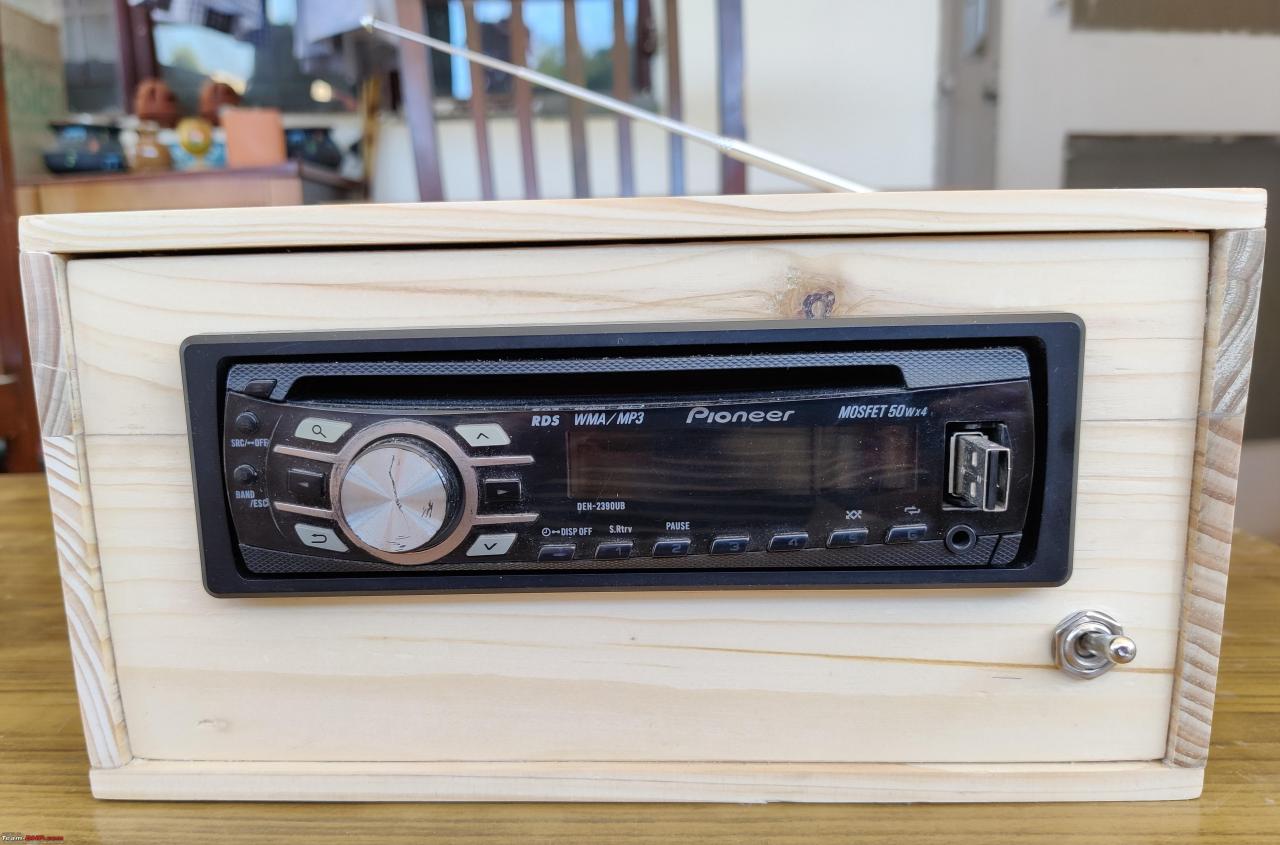
After ensuring that the Pioneer Radio is turned off, the next step is to locate and press the “Reset” button. The “Reset” button is a small, usually recessed button on the front or back panel of the radio. It is typically labeled as “Reset” or “RST.”
Using a small pointed object, such as a pen tip or a paperclip, gently press and hold the “Reset” button. It is important to hold the button down for a consistent duration, usually around 10 to 15 seconds. This will initiate the reset process.
While pressing the “Reset” button, you may feel a slight click or resistance as the button is engaged. This is normal and indicates that the button has been activated successfully. Continue to hold the button down until you are ready to proceed to the next step.
It is important to note that the location of the “Reset” button may vary depending on the model of your Pioneer Radio. It is recommended to consult the user manual or the Pioneer website for specific instructions on locating the “Reset” button for your particular model.
Pressing the “Reset” button will reset the Bluetooth settings of your Pioneer Radio to their default factory state. This will clear any saved devices, preferences, and configurations associated with the Bluetooth feature. Resetting the Bluetooth settings is necessary to start fresh and address any potential issues that may be impacting the Bluetooth connection.
Step 3: Release the “Reset” button
After holding down the “Reset” button for the appropriate duration, it’s time to release it. Releasing the “Reset” button will finalize the reset process and allow your Pioneer Radio to restart with the default Bluetooth settings.
Gently release the “Reset” button and make sure it returns to its original position. You may feel a slight click or release as you let go of the button. This indicates that the button has been successfully released.
Once the “Reset” button has been released, it’s important to wait for a few moments to allow the Pioneer Radio to complete the reset process. During this time, the device will reconfigure its Bluetooth settings and prepare for the next step of the resetting process.
While waiting for the Pioneer Radio to restart, it’s a good idea to ensure that any devices previously connected to the Bluetooth feature are out of range. This will prevent any unwanted reconnect attempts that could potentially cause issues during the resetting process.
It’s important to remember that releasing the “Reset” button is a crucial step in resetting the Bluetooth settings of your Pioneer Radio. This step allows the device to apply the default factory settings and clear any previous configurations or connections. The next step will involve reconnecting your Pioneer Radio to Bluetooth, ensuring a fresh and stable connection for your audio needs.
Step 4: Reconnect the Pioneer Radio to Bluetooth
After the Pioneer Radio has completed the reset process, it’s time to reconnect it to Bluetooth. This step will allow you to pair your devices with the radio and establish a new and stable Bluetooth connection.
To begin the reconnection process, turn on your Pioneer Radio by pressing the power button. The device will start up with the default factory settings, including the Bluetooth feature.
Next, go to the Bluetooth settings on your device that you want to connect to the Pioneer Radio. This could be your smartphone, tablet, or any other Bluetooth-enabled device.
In the Bluetooth settings on your device, locate the list of available devices and search for your Pioneer Radio. It is usually displayed as “Pioneer Radio” or a similar name. If you can’t find it, make sure the Bluetooth on your device is turned on and in discoverable mode.
Select your Pioneer Radio from the list of available devices on your device. This will initiate the pairing process between your device and the Pioneer Radio. Follow any prompts or instructions on your device’s screen to complete the pairing process.
Once the devices are successfully paired, your Pioneer Radio and your device are now connected via Bluetooth. You should be able to stream music, make calls, or use any other Bluetooth features supported by your Pioneer Radio.
It’s worth noting that the exact procedure for reconnecting to Bluetooth may vary depending on the model of your Pioneer Radio and the device you are pairing. Refer to the user manual or the Pioneer website for specific instructions tailored to your equipment.
With your Pioneer Radio successfully reconnected to Bluetooth, you can now enjoy the convenience of wirelessly playing your favorite music or making hands-free calls while on the go.
Step 5: Test the Bluetooth connection
After reconnecting your Pioneer Radio to Bluetooth, it’s important to test the connection to ensure that it is functioning properly. This step will allow you to verify the stability and reliability of the Bluetooth connection, ensuring that you can enjoy uninterrupted audio playback and seamless device interaction.
Begin by playing music or audio on your paired device, such as your smartphone or tablet. Choose a song or audio file that you would like to listen to through your Pioneer Radio’s speakers.
Make sure that the audio output of your device is set to the Pioneer Radio. This can usually be done by accessing the audio settings on your device and selecting the connected Pioneer Radio as the output device. The specific steps may vary depending on your device and operating system.
Once the audio is playing on your device, check if the sound is being transmitted through the Pioneer Radio’s speakers. Adjust the volume on both your device and the Pioneer Radio to ensure an optimal listening experience.
During the playback, pay close attention to any audio interruptions, distortions, or dropouts. If you notice any issues, such as inconsistent sound quality or frequent disconnections, it may indicate a problem with the Bluetooth connection.
If you encounter any issues with the Bluetooth connection during the testing phase, double-check that both devices are within a reasonable range of each other and that there are no obstructions or interference sources causing signal degradation.
If problems persist, you may need to repeat the reset process outlined in the previous steps or consult the user manual for troubleshooting options specific to your Pioneer Radio model.
On the other hand, if the Bluetooth connection is stable and the audio quality is clear and consistent, congratulations! You have successfully reset the Bluetooth connection on your Pioneer Radio and can now enjoy seamless wireless audio playback.
By testing the Bluetooth connection, you can ensure that your Pioneer Radio is functioning as intended and that you can fully enjoy the benefits of wireless connectivity while driving or in any other environment.
Conclusion
Resetting the Bluetooth connection on your Pioneer Radio can be a simple yet effective solution to resolve issues with pairing, connection stability, or other Bluetooth-related problems. This guide has provided you with step-by-step instructions to help you reset your Pioneer Radio’s Bluetooth settings and establish a fresh and reliable connection.
By following the outlined steps, including turning off the radio, pressing and holding the “Reset” button, releasing the button, and reconnecting to Bluetooth, you can reset your Pioneer Radio and start anew with the Bluetooth feature. Remember to test the connection after the reset process to ensure its stability and performance.
If you experience ongoing issues with the Bluetooth connection after resetting, it is advisable to check for any firmware updates for your Pioneer Radio and ensure that your paired devices are compatible and up to date. Additionally, consulting the user manual or the Pioneer website for troubleshooting tips specific to your model can provide further guidance and assistance.
Resetting the Bluetooth on your Pioneer Radio can enhance your overall audio experience, allowing you to wirelessly connect your devices and enjoy streaming music, hands-free calling, and other Bluetooth features with ease and convenience.
We hope that this guide has been helpful in assisting you with resetting the Bluetooth connection on your Pioneer Radio. With a fresh Bluetooth connection, you can now enjoy seamless audio connectivity and make the most of your Pioneer Radio’s features. Happy listening!