Home>Events & Info>Acapella>How To Record Acapella
Acapella
How To Record Acapella
Modified: January 22, 2024
Learn how to record acapella songs with professional quality. Discover the best techniques and tips for capturing clean vocals and harmonies in your recordings.
(Many of the links in this article redirect to a specific reviewed product. Your purchase of these products through affiliate links helps to generate commission for AudioLover.com, at no extra cost. Learn more)
Table of Contents
Introduction
Acapella, the mesmerizing art of singing without instrumental accompaniment, has captivated audiences for centuries. From choral groups to solo vocalists, the purity and emotional depth of acapella performances have the power to transcend language and culture. Whether you’re a seasoned musician or an aspiring singer, recording your acapella performance is a fantastic way to showcase your talent and share it with the world.
But how do you ensure that your acapella recordings are of the highest quality? In this article, we will delve into the art of recording acapella, from choosing the right equipment to editing and mixing the final product. By following these steps, you’ll be able to capture the essence of your acapella performance and create a professional-grade recording that truly showcases your vocal prowess.
Note: Acapella recordings can be done in various settings, including professional studios, home studios, or even in a room with minimal equipment. The techniques and equipment discussed in this article can be customized to fit your recording environment and budget.
So, without further ado, let’s dive into the world of acapella recording!
Equipment Needed
When it comes to recording acapella, having the right equipment is crucial for capturing the nuances and clarity of your vocals. Here are some essential tools you’ll need:
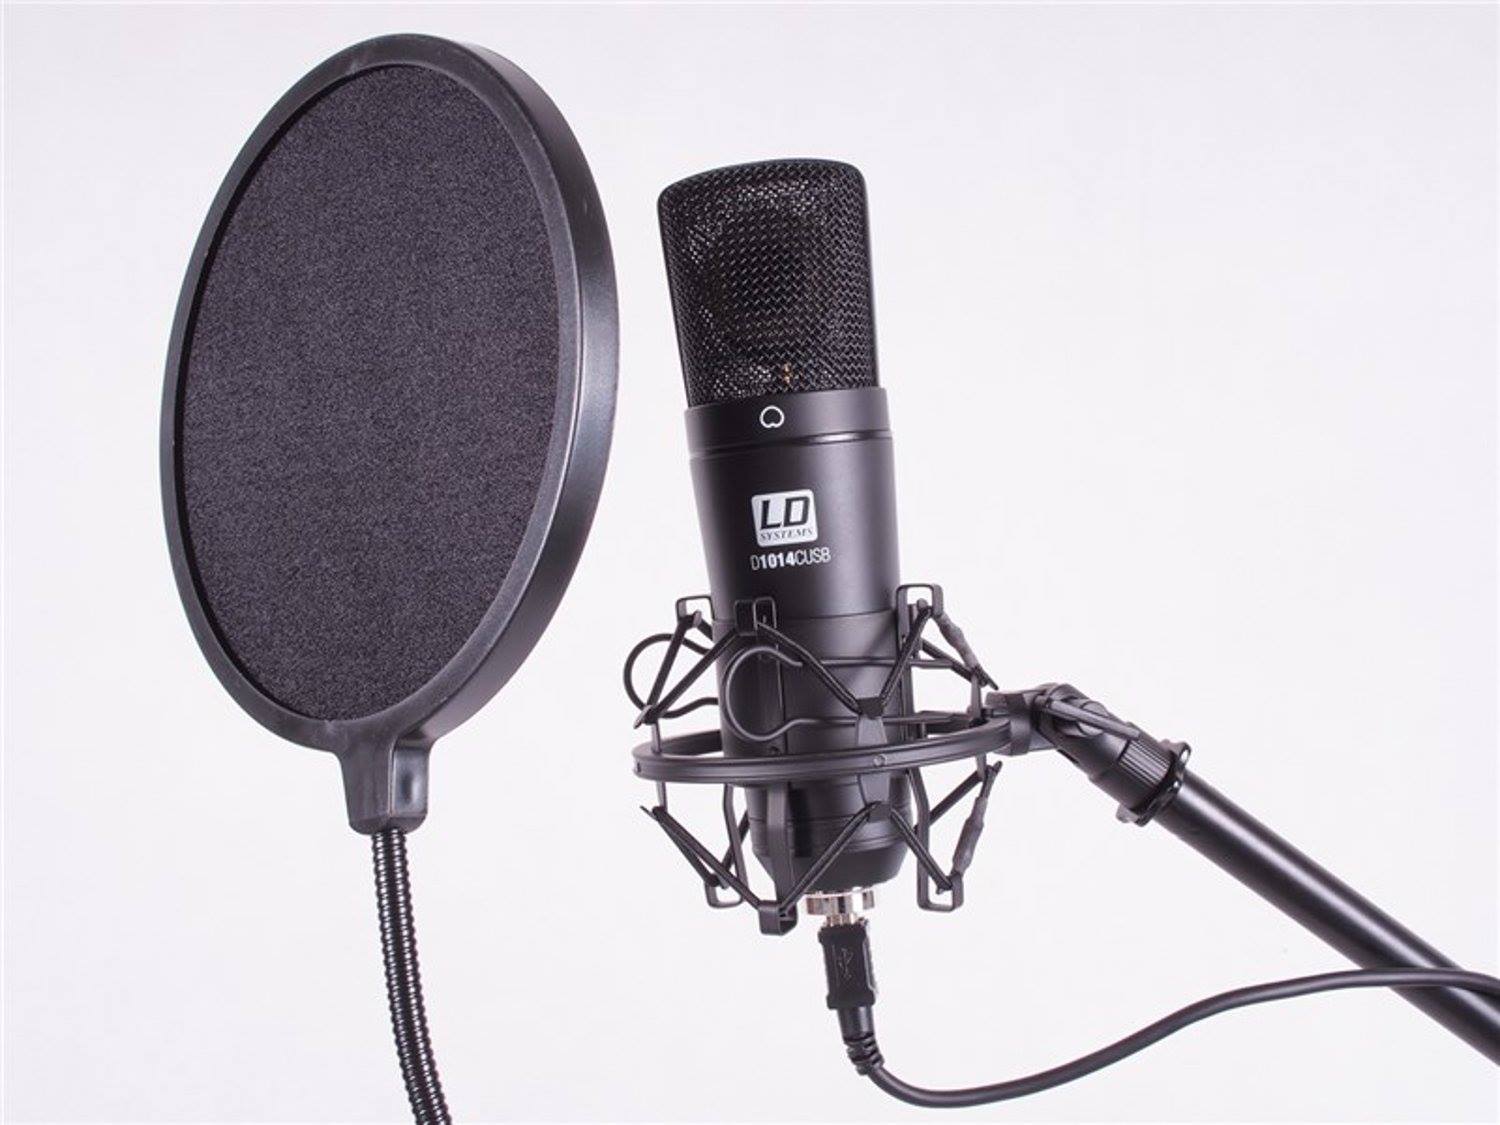
- Microphone: Invest in a high-quality vocal microphone that suits your voice and recording environment. Some popular options include the Shure SM58 and the Audio-Technica AT2020.
- Pop Filter: A pop filter helps reduce plosive sounds (such as “p” and “b” sounds) that can cause distortion in your recording. It’s a small investment that makes a big difference in the overall sound quality.
- Headphones: A good pair of closed-back headphones allows you to monitor your recording in real-time and catch any subtle imperfections or background noise.
- Audio Interface: To connect your microphone to your computer, you’ll need an audio interface. Focusrite Scarlett and PreSonus AudioBox are popular choices for beginners.
- Pop-up Vocal Booth: If you’re recording in a less-than-ideal acoustic environment, a pop-up vocal booth can help minimize echoes and background noise, creating a more controlled recording space.
- Computer and Recording Software: You’ll need a computer or laptop with recording software such as Audacity (free) or Adobe Audition (paid) to capture and edit your acapella recording.
Remember, the quality of your equipment will significantly impact the final sound of your recording. While it’s important to invest in good gear, keep in mind that the most critical factor is your voice and performance.
Tip: Before making any purchases, consider reaching out to fellow musicians or recording professionals for recommendations and guidance based on your specific needs and budget.
Choosing the Right Location
Choosing the right location for your acapella recording is key to achieving optimal sound quality. Here are some factors to consider when selecting your recording space:
- Acoustics: Look for a room or space with good acoustic properties. Avoid rooms with excessive echo or reverberation, as they can negatively impact the clarity of your vocals. If possible, choose a room with carpeting, curtains, or other sound-absorbing materials to minimize reflections.
- Noise Level: Select a location that is as quiet as possible. Background noise, such as traffic, air-conditioning units, or appliances, can be distracting and can affect the overall quality of your recording. Consider recording at times when noise levels are typically low.
- Size and Shape: The size and shape of the room can affect the sound quality of your recording. Larger rooms tend to have more natural reverb, while smaller rooms may result in a more intimate sound. Experiment with different spaces to find the one that suits the style of your acapella performance.
- Ventilation: Proper ventilation is essential to prevent discomfort or interference due to excessive heat or stuffiness during recording sessions. Ensure that the space has adequate airflow to maintain a comfortable and focused environment.
- Privacy: Choose a location where you can have uninterrupted recording sessions. Inform others in your household or building about your recording plans to minimize the chances of unexpected interruptions or unwanted background noise.
Tip: If you don’t have access to a suitable recording space, consider using makeshift soundproofing techniques such as hanging heavy blankets or using bookshelves to absorb sound reflections.
By selecting the right location, you’ll create an environment that enhances the natural beauty of your acapella performance and ensures a more professional-sounding recording.
Setting Up the Recording Space
Once you’ve selected the ideal location for your acapella recording, it’s time to set up the space to maximize sound quality and minimize unwanted noise. Follow these steps to prepare your recording space:
- Clean and Declutter: Before starting the recording process, tidy up the area to eliminate any objects or clutter that could potentially generate unwanted noise or reflections. Remove any unnecessary items and ensure a clean and organized space.
- Furniture Placement: Arrange the furniture in the room strategically. Place soft furniture such as sofas, chairs, or pillows against the walls to help absorb sound reflections and minimize echoes.
- Experiment with Room Treatment: Depending on the available resources, you may want to try using acoustic panels, foam, or diffusers to further improve the room’s acoustics. These can help control reflections and create a more controlled recording environment.
- Positioning Yourself: Stand or sit in the optimal position within the room to capture the best sound. Consider the positioning of the microphone and the distance from it to ensure a balanced and clear recording. Experiment with distance and angle to find the sweet spot that captures the true essence of your voice.
- Eliminate External Noise: Take steps to minimize external noise sources. Close windows and doors to block out street noise, turn off fans or air conditioning units, and silence any electronic devices that may produce unwanted background noise during the recording session.
Tip: If you’re recording in a particularly noisy environment, consider using headphones and a click track to keep your timing consistent. This will allow you to record your acapella parts individually and layer them together later for a cleaner final product.
By setting up your recording space thoughtfully, you’ll create an environment that promotes optimal sound quality and increases the chances of capturing a stellar acapella performance.
Microphone Selection and Placement
Choosing the right microphone and proper placement are crucial aspects of recording acapella that can significantly impact the clarity and quality of your vocals. Here’s what you need to know:
Microphone Selection:
There are various types of microphones available, but for recording acapella, a condenser microphone is recommended. Condenser microphones are known for their sensitivity and ability to capture the intricate details of vocals. Popular choices include the Shure SM58, Audio-Technica AT2020, and Rode NT1.
Microphone Placement:
Proper microphone placement is essential to capture the full range and nuances of your voice. Here’s a step-by-step guide:
- Position: Set up your microphone on a sturdy stand at a height that allows you to sing comfortably. Experiment with different heights to find the level that works best for your voice.
- Distance: Position the microphone at a proper distance from your mouth. It’s generally recommended to keep the microphone around 6-8 inches away, but this may vary depending on your voice and microphone sensitivity.
- Angle: Angle the microphone slightly downwards towards your mouth to ensure that it captures the direct sound rather than picking up excess room reflections.
- Pop Filter: Attach a pop filter to the microphone stand to reduce plosive sounds and control any bursts of air that may cause distortion.
- Monitor Volume: Be mindful of the monitor volume to prevent bleed into the microphone. Keep the volume at a level where you can hear yourself clearly without causing feedback or interference.
Tip: If you have access to multiple microphones, consider experimenting with different mics and placements to find the one that best suits your voice and captures the desired sound.
Remember to take some time to test and adjust the microphone placement before starting your recording session. By selecting the right microphone and placing it accurately, you’ll ensure a clear and pristine acapella recording.
Adjusting Levels and Settings
Once you have your microphone set up, it’s important to properly adjust the levels and settings to ensure optimal recording quality. Here are some steps to follow:
- Gain Control: Start by setting the microphone gain level. This controls the sensitivity of the microphone. Set the gain low initially, and gradually increase it until your voice is captured clearly without any distortion or clipping.
- Monitoring: Use headphones to monitor your recording in real-time. This will help you identify any issues with volume, clarity, or unwanted noise. Adjust the headphone mix to a comfortable level that allows you to hear your voice clearly against any backing tracks or reference material.
- Room Reverb: If your recording space has some natural reverb, you may need to adjust the settings on your audio interface or recording software to minimize any unwanted room reflections. Experiment with the input and output settings to find the optimal balance.
- Equalization (EQ): Depending on your voice and personal preference, you may want to apply some EQ to enhance the overall tonal balance. Use a parametric EQ to adjust frequencies that sound too harsh or lacking in clarity. This can help bring out the best in your vocals.
- Compression: Apply light compression to even out the dynamic range of your vocals. This helps ensure that softer parts are audible while preventing any harsh peaks or volume inconsistencies. Experiment with the compression settings to achieve a natural and balanced sound.
Tip: It’s important to strike a balance when applying EQ and compression. Use subtle adjustments and trust your ears to achieve the best results without compromising the natural character of your voice.
Take the time to familiarize yourself with the settings and options available in your recording software. Remember to make incremental changes and constantly monitor your recording to ensure you’re capturing the best possible sound.
By adjusting the levels and settings appropriately, you’ll be able to achieve a well-balanced and professional-sounding acapella recording.
Performing the Acapella
Now that you’ve set up your recording space and adjusted your microphone and settings, it’s time to focus on delivering an exceptional acapella performance. Here are some tips to help you make the most of your recording:
- Warm Up: Prior to recording, warm up your vocal cords by doing vocal exercises and stretches. This will help you achieve better pitch accuracy, control, and overall vocal performance.
- Focus on Technique: Pay attention to your breath control, diction, and overall vocal technique. Ensure that you’re articulating words clearly, incorporating proper dynamics, and utilizing your vocal range effectively to bring emotion and expression to your performance.
- Embrace Emotion: Acapella performances often rely heavily on the emotional connection with the audience. Tap into the meaning of the lyrics and convey the intended emotion through your voice. This will help create a more captivating and authentic performance.
- Take Breaks: If you’re planning to record multiple takes or multiple sections of the acapella, remember to take breaks in between to rest your voice. Hydrate appropriately and give yourself time to recharge to maintain vocal clarity and prevent strain.
- Experiment with Harmonies and Layers: If you have the ability and inclination, consider adding harmonies or additional vocal layers to your acapella recording. This can add depth and richness to the overall sound and create a more captivating listening experience.
Tip: Record multiple takes of each section to give yourself options during the mixing and editing process. This will allow you to choose the best parts and create a more polished final recording.
Remember that acapella recordings showcase the beauty and power of the human voice. Pour your passion and personality into your performance and let your unique voice shine through.
By focusing on technique, emoting effectively, and taking care of your voice, you’ll be able to deliver a standout acapella performance that resonates with your listeners.
Recording Techniques and Tips
Recording acapella requires attention to detail and utilizing effective techniques to capture the best possible performance. Here are some recording techniques and tips to help you achieve a professional-sounding acapella recording:
- Take Advantage of Punch-Ins: If you make a mistake or feel unsatisfied with a specific section of your acapella performance, don’t be afraid to use punch-ins. Record the problematic section separately and then seamlessly edit it into the main recording during post-production.
- Layering Techniques: Experiment with layering your voice to add depth and texture to your acapella recording. You can create multiple vocal tracks for harmonies, counter melodies, or background textures. Ensure that each layer is balanced and blends well with the main vocal track.
- Headphone Mix: Pay attention to the mix in your headphones. Make sure you can clearly hear your vocals along with any accompanying tracks or reference recordings. Adjust the volume levels to find a balance that allows you to deliver a consistent and confident performance.
- Recording in Sections: If your acapella piece is particularly challenging or long, consider recording it in sections rather than attempting to capture the entire performance in one take. This can help reduce fatigue and improve the overall quality of each section.
- Use a Metronome or Click Track: To maintain consistent timing and rhythm throughout your acapella recording, consider using a metronome or click track. This will help ensure that all the different vocal parts align correctly and make the editing process easier.
- Experiment with Spatial Effects: Depending on the style and desired effect, you can experiment with adding spatial effects such as reverb or delay to certain sections of your acapella recording. This can create a sense of depth and space and enhance the overall sonic experience.
Tip: It’s essential to find a balance between perfection and natural expression. While it’s crucial to strive for a polished performance, don’t be afraid to embrace the human elements of your acapella recording, such as slight variations in timing or vocal inflections that add character to your performance.
Ultimately, the key to a successful acapella recording is experimentation and finding techniques that work best for your voice and style. Keep refining your recording process and incorporating new techniques as you continue to grow as a vocalist and recording artist.
Editing and Mixing the Acapella
Once you have completed your acapella recording, the next step is to edit and mix the tracks to create a polished and cohesive final product. Here are some essential editing and mixing techniques for acapella recordings:
- Organize and Label: Before starting the editing process, ensure that you have organized and labeled your vocal tracks properly. This makes it easier to navigate and work with them during the editing and mixing phase.
- Trimming and Cleaning: Listen attentively to each recorded track and trim out any unwanted noise, breathing sounds, or mistakes. Use fade-ins and fade-outs as necessary to create smooth transitions between sections.
- Aligning Tracks: If you have recorded multiple vocal tracks for harmonies or layers, make sure to align them properly so that they sync up with the main vocal track. This ensures a cohesive and tight sound.
- Volume Leveling: Adjust the volume levels of each track to create a balanced mix. Pay attention to the dynamics and make subtle adjustments to achieve a consistent volume throughout the acapella recording.
- Panning: Experiment with panning to create a sense of space and separation between the vocal tracks. This can help enhance the stereo image and make your acapella recording feel more immersive.
- Applying EQ and Compression: Use EQ and compression to refine the overall sound of your acapella recording. Tweak the EQ settings to enhance certain frequencies or address any tonal imbalances. Apply gentle compression to control the dynamic range and ensure a more polished and cohesive sound.
- Automation: Utilize automation to make precise adjustments to volume, EQ, or other effects at specific points in the acapella recording. This allows you to create dynamic moments and highlight certain parts of the performance.
- Reverb and Effects: Consider adding some subtle reverb or other effects to enhance the overall sound and create a sense of depth. Be mindful of how much reverb you apply, as it should complement the acapella recording without overpowering the vocals.
Tip: When editing and mixing, it’s important to reference your acapella recording on different devices and audio systems to ensure that it translates well across various playback platforms.
Remember, the goal of editing and mixing is to enhance the natural beauty of your acapella performance while maintaining a balanced and professional sound. Take your time to fine-tune each element and seek feedback from trusted listeners or mix engineers if possible.
By applying careful editing and mixing techniques, you’ll be able to transform your acapella recording into a polished masterpiece that captures the true essence of your vocal talent.
Finalizing the Recording
After editing and mixing your acapella recording, it’s time to finalize the project and prepare it for distribution or sharing. Here are some important steps to consider when finalizing your recording:
- Mastering: If you have the necessary skills and tools, you can perform a basic mastering process to ensure optimal sound quality and consistency across different playback systems. This involves making overall adjustments to the EQ, compression, and volume levels of your acapella recording.
- Exporting: Export your acapella recording in a high-quality audio format, such as WAV or FLAC, to preserve the fidelity of your performance. Ensure that the exported file name and tags are properly filled out to provide useful metadata for future reference.
- Backup: Make multiple backups of your finalized acapella recording, storing them in different locations or on different storage devices. This ensures the safety and security of your hard work and allows for easy access in case of any future needs or modifications.
- Artwork and Metadata: If you’re planning to release or share your acapella recording digitally, create compelling artwork and add relevant metadata such as track title, album name, and artist information. This helps in promoting and organizing your acapella recording effectively.
- Distribution: Determine the platforms or channels through which you’d like to share or distribute your acapella recording. This can include online music platforms, social media, or personal websites. Utilize appropriate channels to reach your target audience and engage with them effectively.
- Solicit Feedback: Share your finalized acapella recording with trusted friends, fellow musicians, or mentors to gather feedback and constructive criticism. This can help you refine your skills and improve future recordings.
Tip: Consider creating a visually engaging video to accompany your acapella recording and upload it to platforms like YouTube or Vimeo. This can enhance the overall listening experience and attract a wider audience.
Finalizing your acapella recording is an exciting step in the creative process. Take pride in your work and ensure that your final product represents your artistic vision and passion.
By following these finalization steps and effectively sharing your acapella recording, you’ll have the opportunity to connect with listeners, showcase your talent, and make a lasting impression in the world of acapella music.
Conclusion
Recording and sharing an acapella performance is an incredible way to present your vocal abilities and share your passion for music with the world. By following the steps outlined in this article, you can ensure that your acapella recording is of the highest quality and truly showcases your talent.
From selecting the right equipment and choosing the ideal location to setting up your recording space and performing with authenticity, each aspect of the recording process contributes to capturing a captivating and professional acapella recording.
Remember to pay attention to the details during the editing and mixing phase, ensuring that every track blends harmoniously and creates a balanced sound. By adding subtle effects and applying proper mastering techniques, you can enhance the final product and leave a lasting impression on your listeners.
Don’t be afraid to experiment, explore different recording techniques, and continuously strive to improve your skills as a vocalist and recording artist. Each recording is an opportunity for growth and artistic expression.
Finally, take pride in your acapella recording and share it with the world. Whether it’s through online platforms, social media, or personal channels, let your music touch the hearts of those who listen and inspire others to embrace the beauty of acapella music.
Now, armed with knowledge and passion, it’s time to dive into the world of acapella recording and unleash your vocal talents. So, set up your equipment, find the perfect location, and let your voice soar through the purity and brilliance of acapella music.