Home>Instruments>Brass Instruments>How To Get Brass Instruments On Garageband


Brass Instruments
How To Get Brass Instruments On Garageband
Modified: February 20, 2024
Learn how to add realistic brass instruments to your GarageBand tracks with this step-by-step guide. Enhance your music production with our expert tips and tricks for using brass instruments in GarageBand.
(Many of the links in this article redirect to a specific reviewed product. Your purchase of these products through affiliate links helps to generate commission for AudioLover.com, at no extra cost. Learn more)
Table of Contents
- Introduction
- Garageband and Brass Instruments
- Method 1: Using Garageband’s Built-in Brass Sounds
- Method 2: Importing and Using External Brass Instrument Plugins
- Step 1: Research and Download Brass Instrument Plugins
- Step 2: Installing the Brass Instrument Plugins
- Step 3: Importing the Brass Instrument Plugins into Garageband
- Step 4: Using the Imported Brass Instruments in Garageband
- Tips and Tricks for Using Brass Instruments in Garageband
- Conclusion
Introduction
Welcome to the world of music creation in Garageband! Whether you’re a seasoned musician or just starting out, Garageband offers a wide range of features to help you effortlessly create music on your electronic devices. And if you’re a fan of brass instruments and want to incorporate their rich sound into your compositions, you’re in luck!
In this article, we’ll explore how you can get brass instruments on Garageband. We’ll take a look at both the built-in brass sounds available within Garageband and how to import and use external brass instrument plugins. So, let’s dive in and discover how you can bring the warmth and depth of brass instruments to your Garageband projects.
Gone are the days when you needed physical instruments and expensive recording equipment to create music. With Garageband, you have access to a virtual studio at your fingertips. Whether you’re a trumpet enthusiast, a saxophone aficionado, or a lover of the French horn, Garageband has you covered.
By leveraging the power of technology, Garageband provides a wide range of instruments, including brass, that you can use to compose, arrange, and produce your music. With just a few clicks, you can add the distinctive timbre of brass instruments to your tracks and elevate your compositions to new heights.
In the next sections, we’ll explore two methods to get brass instruments on Garageband. The first method focuses on utilizing the built-in brass sounds, while the second method involves incorporating external brass instrument plugins to expand your options even further. Let’s get started!
Garageband and Brass Instruments
Garageband is a powerful digital audio workstation (DAW) developed by Apple. It comes pre-installed on all Mac computers and is also available as a free download for iOS devices. The software allows musicians and music enthusiasts to create, edit, and produce music easily.
When it comes to brass instruments, Garageband offers a wide variety of options. Whether you’re looking for the bold and bright sound of a trumpet, the smooth and sultry tones of a saxophone, or the majestic resonance of a French horn, Garageband has it all.
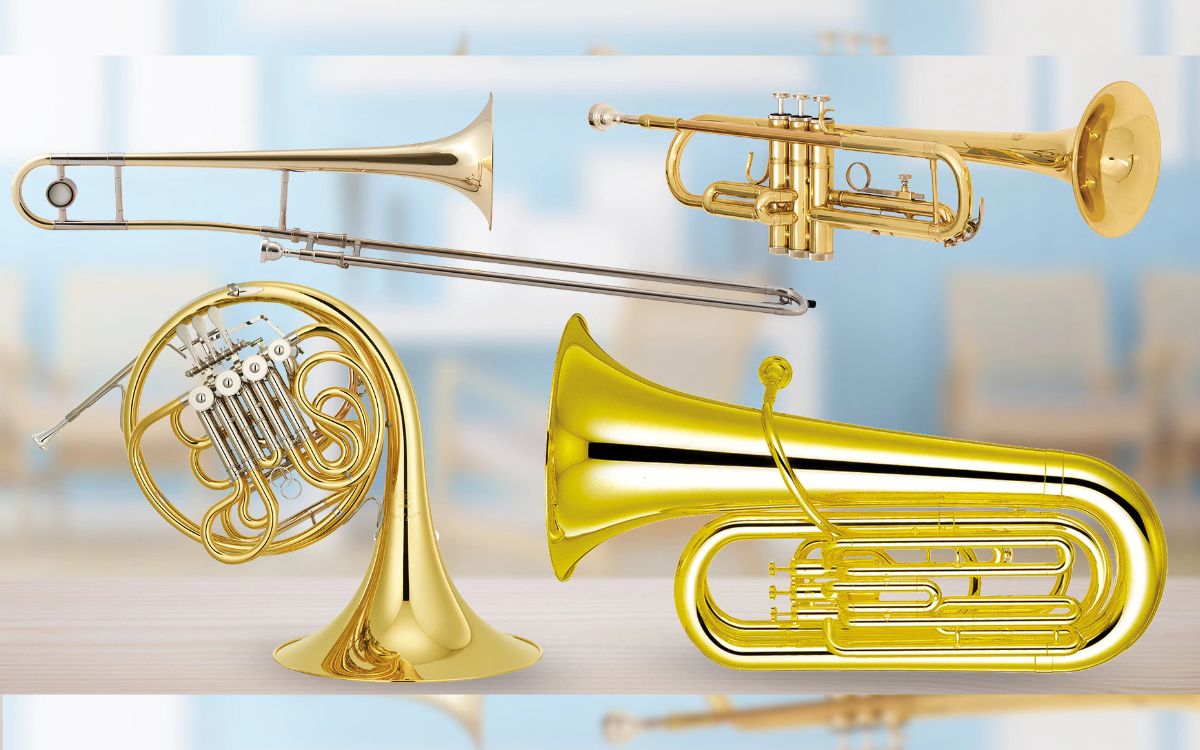
Garageband features a collection of built-in brass sounds that can be accessed from the software’s library. These sounds have been meticulously sampled from real brass instruments to provide an authentic and realistic playing experience. The instruments include trumpet, trombone, French horn, tuba, and more.
With Garageband’s built-in brass sounds, you can play and record melodies, create harmonies, and layer multiple brass tracks to achieve a rich and full arrangement. The software also provides various effects and processing tools, allowing you to fine-tune the sound of your brass instruments to fit perfectly into your mix.
While the built-in brass sounds in Garageband offer a great starting point, some musicians may want to explore additional options to further expand their brass instrument palette. This is where external brass instrument plugins come into play.
External brass instrument plugins are third-party software that can be integrated into Garageband. These plugins offer a wider range of brass instrument sounds, with more customization options and greater control over the sound parameters. They can be used alongside or in place of the built-in brass sounds in Garageband, giving you even more flexibility in your music creation process.
In the next sections, we’ll walk you through the steps to access and utilize both the built-in brass sounds and external brass instrument plugins in Garageband. So, whether you prefer to work with the pre-loaded options or venture into the world of plugins, you’ll find everything you need to elevate your compositions with the enchanting sound of brass instruments.
Method 1: Using Garageband’s Built-in Brass Sounds
Garageband provides a wide range of built-in brass sounds that are readily available for you to use in your compositions. These sounds have been carefully crafted and sampled from real brass instruments to ensure authenticity and realism. Here’s how you can access and use these built-in brass sounds in Garageband:
- Open Garageband on your Mac or iOS device. Create a new project or open an existing one to start working.
- From the Garageband toolbar, click on the “Library” button located on the top-right corner of the interface. This will open the Library panel where you can find various instruments and sounds.
- In the Library panel, click on the “Brass” category to see all the available brass instrument options.
- Browse through the list of brass instruments, which can include trumpet, trombone, French horn, tuba, and more. Click on the specific instrument you want to use.
- Once you’ve selected a brass instrument, a virtual keyboard or a smart instrument interface will appear on the main Garageband window. You can either play the instrument using your computer’s keyboard, a connected MIDI controller, or directly with your iOS device’s touch screen.
- Experiment with different playing techniques and explore the various keyboard zones to access different articulations and variations of the selected brass instrument sound.
- Record your performance by clicking on the red “Record” button in Garageband. You can record multiple tracks with different brass instruments, allowing you to create harmonies and layer them for a fuller sound.
- Once you’ve recorded your brass parts, you can edit them further using Garageband’s editing tools. You can adjust the volume, add effects, apply EQ, or even quantize your performances to achieve a tighter and more polished sound.
Using Garageband’s built-in brass sounds, you can easily incorporate the warm and expressive tones of brass instruments into your compositions. Whether you’re composing a jazz piece, an orchestral composition, or adding a touch of brass to a pop track, Garageband’s built-in brass sounds will offer you the versatility and realism you need.
However, if you’re looking for additional brass instrument options or more advanced customization features, you may want to explore the use of external brass instrument plugins. In the next section, we’ll guide you through the process of researching, downloading, and using these plugins in Garageband to further enhance your brass instrument collection.
Method 2: Importing and Using External Brass Instrument Plugins
If you’re looking to expand your options beyond Garageband’s built-in brass sounds, you can incorporate external brass instrument plugins into your music production workflow. These plugins offer a wider range of brass instrument sounds and more customization options. Follow these steps to import and use external brass instrument plugins in Garageband:
- Research and Download Brass Instrument Plugins:
- Start by researching reputable brass instrument plugins that are compatible with Garageband. There are many options available, both free and paid, so take some time to find the ones that suit your needs and budget.
- Visit the plugin developer’s website or digital marketplace and download the brass instrument plugin files to your computer. Make sure to choose the plugin format that is compatible with Garageband, such as Audio Units (AU) or Virtual Studio Technology (VST).
- Installing the Brass Instrument Plugins:
- Once you have the plugin files downloaded, locate the installation files or executable on your computer. Double-click on the file and follow the instructions provided by the plugin developer to install the plugins on your system.
- Some plugins may require additional steps, such as authorizing the software or entering license information. Make sure to carefully follow the plugin’s installation instructions to ensure a successful installation.
- Importing the Brass Instrument Plugins into Garageband:
- Launch Garageband and open a new or existing project.
- Click on the “Plugins” icon in the Garageband toolbar, located on the top-right corner of the interface. This will open the Plugin Library panel.
- In the Plugin Library panel, click on the “+” button to add a new plugin. Navigate to the location where you installed the brass instrument plugins and select the plugin files you want to import.
- Garageband will scan and validate the plugins, and they will now appear in the Plugin Library panel.
- Using the Imported Brass Instruments in Garageband:
- Select the track or instrument where you want to use the external brass instrument plugin.
- Click on the “Plugins” icon in the track controls section to open the Plugin interface for that track.
- Locate the imported brass instrument plugin in the Plugin Library panel and drag it onto the Plugin interface for the selected track.
- Adjust the plugin’s parameters and settings to customize the sound of the brass instrument. This can include controlling the attack, release, vibrato, and other sound characteristics specific to the chosen plugin.
- Play or record your brass parts using the external brass instrument plugin, and experiment with different settings to achieve your desired sound.
By following these steps, you can integrate external brass instrument plugins into your Garageband projects. These plugins offer a wealth of options to enhance and expand your brass instrument collection, allowing you to create unique and dynamic compositions in any genre.
Remember to explore different plugins and experiment with their features to find the ones that resonate with your musical style. Whether you’re looking for realistic brass sounds, vintage tones, or experimental effects, the world of external brass instrument plugins in combination with Garageband can unlock a whole new level of creativity.
Now that you know how to import and use external brass instrument plugins in Garageband, let’s move on to some tips and tricks that will help you make the most out of your brass instrument recordings and compositions.
Step 1: Research and Download Brass Instrument Plugins
Before you can start using external brass instrument plugins in Garageband, it’s important to conduct thorough research to find the right plugins for your needs. Here’s how you can research and download brass instrument plugins for your music production:
- Define Your Requirements:
- Start by identifying the specific brass instrument sounds you require for your compositions.
- Consider the genres of music you typically create and the specific characteristics you want in your brass instruments, such as articulations, tones, and effects.
- Having a clear understanding of your requirements will help narrow down your search and find the plugins that best align with your musical vision.
- Read Reviews and User Feedback:
- Visit online music production forums, websites, and communities to read reviews and gain insights from other musicians who have used brass instrument plugins.
- Pay attention to the feedback on the sound quality, user interface, stability, and support provided by the plugin developers.
- This information will give you an idea of the overall performance and reliability of the plugins you’re considering.
- Explore Demo Versions:
- Many plugin developers offer demo or trial versions of their brass instrument plugins.
- Take advantage of these demos to test the sound quality, user interface, and compatibility with Garageband before making a purchasing decision.
- Experiment with different playing styles, explore the plugin’s features, and assess how well it fits within your musical workflow.
- Consider Your Budget:
- Brass instrument plugins can vary in price, from free options to premium plugins with advanced features.
- Decide on a budget that suits your financial constraints and objectives for your music production.
- Keep in mind that while free plugins can be a good starting point, paid plugins often offer more extensive features, better sound quality, and dedicated support.
- Download and Install:
- Once you have finalized your selection, visit the plugin developer’s website or go to a reputable digital marketplace to download the chosen brass instrument plugins.
- Make sure to download the correct plugin format, such as Audio Units (AU) or Virtual Studio Technology (VST), compatible with Garageband.
- Follow the installation instructions provided by the plugin developer to install the plugins on your computer.
By thoroughly researching and downloading brass instrument plugins, you can expand your options and enhance your music production capabilities in Garageband. Remember to take your time, experiment with different plugins, and choose the ones that best align with your creative vision and musical style.
Now that you have acquired the brass instrument plugins, let’s move on to the next step: installing them on your system.
Step 2: Installing the Brass Instrument Plugins
Once you have downloaded the brass instrument plugins for Garageband, the next step is to install them on your system. Follow these guidelines to ensure a smooth installation process:
- Locate the Plugin Installation Files:
- After downloading the brass instrument plugins, navigate to the location where the installation files are saved on your computer.
- The installation files might be in a compressed format, such as a ZIP or RAR file. If this is the case, extract the contents to a folder on your computer before proceeding to the next step.
- Make a note of the destination folder where you have extracted the plugin files, as you will need it during the installation process.
- Open the Installation Wizard:
- Double-click on the plugin’s installation file or executable to launch the installation wizard provided by the plugin developer.
- In some cases, you might need to right-click on the file and select “Run as administrator” to initiate the installation process.
- Follow the Installation Instructions:
- The installation wizard will guide you through the process of installing the brass instrument plugins on your system.
- Read and understand the instructions provided by the plugin developer, as they may vary depending on the specific plugin and software version.
- During the installation, you might be asked to choose the destination folder where the plugin should be installed. Select the appropriate folder, or use the default location if it matches the destination folder you noted earlier.
- Some plugins may require you to agree to license agreements or terms of usage before proceeding with the installation.
- Complete the Installation Process:
- Once you have followed all the installation steps and made the necessary selections, click on the “Install” or “Finish” button to complete the installation process.
- Depending on the size and complexity of the plugin, the installation might take a few moments to complete. Be patient and avoid interrupting the process.
- After the installation is finished, you will receive a confirmation message indicating that the brass instrument plugin has been successfully installed on your system.
By following these steps, you can install the brass instrument plugins onto your computer, making them accessible within Garageband. It’s important to carefully read and follow the installation instructions provided by the plugin developer to ensure a successful installation.
Now that your brass instrument plugins are installed, you can proceed to the next step: importing them into Garageband. We will cover this process in detail in the upcoming section.
Step 3: Importing the Brass Instrument Plugins into Garageband
With your brass instrument plugins installed on your computer, the next step is to import them into Garageband. By following the steps below, you’ll be able to access and utilize your newly acquired brass instrument plugins within your Garageband projects:
- Launch Garageband on your Mac or iOS device and open a new or existing project.
- Click on the “Plugins” icon located in the control bar at the top of the Garageband interface. This will open the Plugin Library panel.
- In the Plugin Library panel, click on the “+” button located in the bottom-left corner. This action will add a new plugin to the list.
- Navigate to the folder where you installed the brass instrument plugins on your computer.
- Select the desired brass instrument plugin file and click “Open” or “Choose.”
- Garageband will scan the plugin and validate its compatibility. This process might take a few moments.
- After the plugin is successfully validated, it will appear in the Plugin Library panel alongside the built-in plugins.
Congratulations! You have now imported the brass instrument plugins into Garageband. These plugins will be available for you to use in your projects, expanding your options and allowing you to create unique and customized brass instrument sounds.
Keep in mind that each brass instrument plugin may have its own specific settings and interface. You can access and customize these settings by clicking on the plugin’s icon in the plugin library and adjusting the parameters in the plugin window.
Now that the brass instrument plugins are imported, you can start incorporating them into your tracks and exploring their unique sonic possibilities. In the next step, we will guide you through the process of using the imported brass instruments in Garageband.
Step 4: Using the Imported Brass Instruments in Garageband
Now that you have successfully imported the brass instrument plugins into Garageband, it’s time to start using them in your compositions. Follow these steps to incorporate the imported brass instruments into your tracks:
- Select the track or instrument where you want to use the imported brass instrument plugin.
- Click on the “Plugins” icon in the track controls section of Garageband. This will open the Plugin interface for that track.
- In the Plugin Library panel, locate the imported brass instrument plugin and drag it onto the Plugin interface for the selected track.
- Once the plugin is inserted, its interface will appear, allowing you to refine and customize the sound of the brass instrument.
- Explore the different parameters and settings available in the plugin interface. These may include controls for attack, release, vibrato, dynamics, and more.
- Adjust the parameters to achieve your desired sound for the brass instrument. Use your creativity to sculpt the tone and character of the instrument according to your musical vision.
- Experiment with different playing techniques and articulations to bring life to your brass instrument performances. This can include using modulation, key switches, or expression controls provided by the plugin.
- Record your performance by clicking on the red “Record” button in Garageband. You can record multiple tracks with different brass instruments, enabling you to create harmonies and layer them for a fuller sound.
- After recording, you can further edit and refine your brass instrument parts, using Garageband’s editing tools. Adjust the volume, apply effects, and fine-tune the timing to create a polished and professional-sounding track.
By following these steps, you can integrate the imported brass instruments into your Garageband tracks and shape their sound to fit seamlessly within your compositions. Take your time to explore the different controls and features offered by each plugin, as they can significantly enhance the realism and versatility of your brass instrument performances.
Remember to experiment, be creative, and trust your ears. By utilizing the imported brass instrument plugins effectively, you can achieve stunning brass sounds and add a layer of depth and expression to your music.
Now that you have learned how to use the imported brass instrument plugins in Garageband, let’s move on to the next section where we’ll share some tips and tricks to help you make the most out of your brass instruments in Garageband.
Tips and Tricks for Using Brass Instruments in Garageband
Now that you have learned how to incorporate brass instruments into your Garageband compositions, let’s explore some tips and tricks to help you maximize the potential of these instruments and elevate your music:
- Experiment with Articulations: Brass instruments have a wide range of articulations, such as staccato, legato, sforzando, and more. Use these articulations to bring your brass performances to life and add expressive nuances to your compositions.
- Embrace Dynamics: Brass instruments are known for their dynamic range. Use automation or velocity control to simulate the natural dynamics of a brass performance. This will add depth and realism to your compositions.
- Layer Multiple Brass Tracks: To create a fuller and richer sound, consider layering multiple brass instrument tracks. Experiment with different combinations of brass instruments and arrange them in harmonies or counter-melodies for a more complex texture.
- Blend with Other Instruments: Brass instruments can be powerful and dominant in a mix. Consider blending them with other instruments, such as strings or woodwinds, to create a balanced and cohesive sound. Experiment with different EQ and panning techniques to find the perfect blend.
- Use Effects Sparingly: While Garageband offers a variety of effects for brass instruments, use them sparingly and with intention. Effects like reverb, delay, and compression can enhance the sound, but be mindful not to overuse them and risk drowning out the natural characteristics of the brass instruments.
- Utilize MIDI Controllers: If you have a MIDI controller, such as a keyboard or wind controller, use it to enhance the realism of your brass instrument performances. MIDI controllers allow for expressive playing techniques like vibrato, pitch bending, and modulation, adding a human touch to your music.
- Explore Brass-specific Plugins: In addition to the general brass instrument plugins, consider exploring plugins specifically designed for brass instruments. These plugins often offer specialized features and controls that can further enhance the authenticity and realism of your brass performances.
- Get Inspiration from Real Brass Recordings: Listen to recordings of real brass performances to understand the nuances and characteristics unique to each instrument. Use these recordings as inspiration to refine your playing techniques and create authentic sounding brass tracks.
- Practice and Experiment: Like any instrument, mastering brass instruments in Garageband requires practice. Take the time to experiment with different playing styles, articulations, and techniques to develop your own unique sound and expression.
With these tips and tricks, you’re well-equipped to create compelling brass instrument compositions in Garageband. Remember to let your creativity guide you, and don’t hesitate to try new ideas. With time and practice, you’ll be able to craft stunning brass soundscapes that captivate your listeners.
Now, armed with the knowledge and techniques shared in this article, you can confidently dive into your Garageband projects and harness the power of brass instruments to take your music to new heights!
Conclusion
In conclusion, Garageband offers a fantastic platform for incorporating brass instruments into your music compositions. Whether you choose to utilize the built-in brass sounds or explore the world of external brass instrument plugins, Garageband provides a user-friendly and versatile environment for creating rich and expressive brass performances.
By following the steps outlined in this article, you can easily access and use brass instruments in Garageband. The built-in brass sounds offer a solid foundation, while external brass instrument plugins open up a wide range of possibilities for customization and sonic exploration.
Throughout the process, remember to research and download reputable brass instrument plugins that align with your musical requirements. Take your time to install these plugins correctly and import them into Garageband. Once imported, you can use them to augment your tracks with authentic, customizable brass instrument sounds.
Along the way, we’ve shared tips and tricks to help you make the most of your brass instruments in Garageband. Experiment with articulations, dynamics, and layering to add depth and realism to your compositions. Blend brass instruments with other instruments to create cohesive mixes, and utilize MIDI controllers to bring expressive performances to life.
Lastly, remember to practice and explore different playing styles to develop your own unique sound. Continuously seek inspiration from real brass recordings and refine your techniques to create compelling brass tracks in Garageband.
With these tools, knowledge, and techniques at your disposal, you’re well-prepared to embark on a musical journey filled with captivating brass instrument compositions. So, fire up Garageband, unleash your creativity, and let the enchanting sound of brass instruments breathe life into your music.

