Home>Instruments>Synthesizer>How To Build Your Own Synthesizer With Vocoder

Synthesizer
How To Build Your Own Synthesizer With Vocoder
Published: December 11, 2023
Learn how to build your own synthesizer with a vocoder and create unique electronic music. Discover the secrets of sound manipulation and unleash your creativity.
(Many of the links in this article redirect to a specific reviewed product. Your purchase of these products through affiliate links helps to generate commission for AudioLover.com, at no extra cost. Learn more)
Table of Contents
- Introduction
- Understanding the Basic Components of a Synthesizer
- Selecting the Right Components for Your DIY Synthesizer
- Building the Oscillator Section
- Creating the Filter Section
- Incorporating Envelope Generators
- Adding Effects and Modulation Options
- Designing the Vocoder Section
- Connecting and Testing Your DIY Synthesizer
- Conclusion
Introduction
Welcome to the exciting world of synthesizers and vocoders! If you’ve ever dreamed of creating your own unique sounds and exploring the endless possibilities of electronic music, then building your own synthesizer with a vocoder is the perfect project for you. In this comprehensive guide, we’ll take you through the process of building your very own synthesizer from scratch, covering the essential components and providing step-by-step instructions.
A synthesizer is an instrument that generates and manipulates sound through various electronic components. It allows musicians and sound enthusiasts to create a wide range of sounds, from classic analog tones to futuristic digital textures. A vocoder, on the other hand, is a special type of synthesis that combines the human voice with electronic signals, resulting in distinctive robotic sounds and vocal effects.
By building your own synthesizer with a vocoder, you’ll have complete control over the sound generation and modulation process. You can experiment with different oscillator types, filters, envelope generators, effects, and modulation options to craft your own unique sonic palette.
Not only is building your own synthesizer a fulfilling and rewarding experience, but it also offers a deeper understanding of how electronic music is created. You’ll gain hands-on knowledge of the various components and circuitry involved in a synthesizer, making it easier for you to troubleshoot and modify your instrument in the future.
Whether you’re a seasoned musician or a beginner with a passion for sound exploration, this guide will take you through the essential steps to build your own synthesizer with a vocoder. So, let’s dive in and embark on this exciting journey of creating sonic masterpieces!
Understanding the Basic Components of a Synthesizer
Before diving into the process of building your own synthesizer, it’s crucial to have a good understanding of the basic components that make up this versatile instrument. Here are the key components you need to know:
1. Oscillators: These generate the raw sound waves of different waveforms such as sine, triangle, square, and sawtooth. Oscillators determine the fundamental pitch of your synthesizer’s sound.
2. Filters: Filters shape the character of the sound by attenuating or emphasizing specific frequency ranges. The most common filter types are low-pass, high-pass, band-pass, and notch filters.
3. Envelope Generators: Envelope generators control the dynamic aspects of sound, including attack, decay, sustain, and release (ADSR). They shape the volume, brightness, and duration of the sound.
4. Amplifiers: Amplifiers control the overall volume of the sound and can also introduce distortion or overdrive effects to create grittier tones.
5. Modulators: Modulators introduce modulation effects by altering various parameters such as pitch, amplitude, or filter cutoff frequency. Common modulators include LFOs (Low-Frequency Oscillators) and modulation envelopes.
6. Effects: Effects such as reverb, delay, chorus, and distortion add depth and character to your sound. They can be built into the synthesizer or added externally.
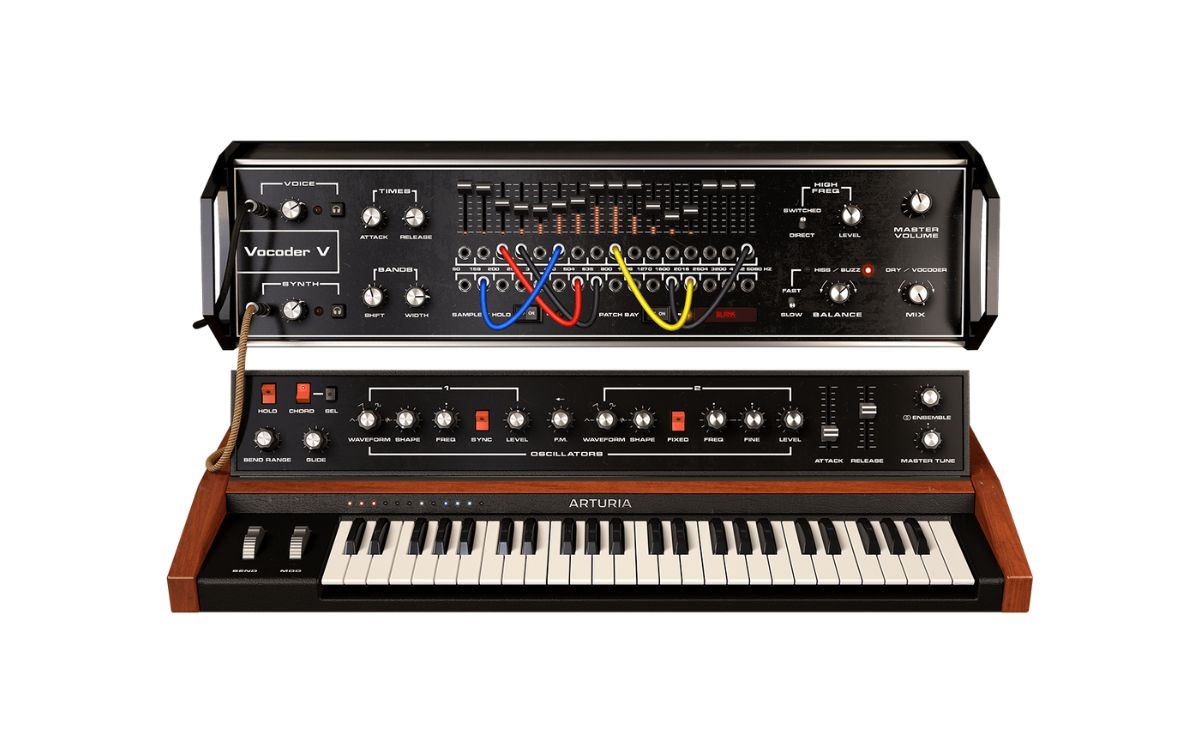
7. Vocoder: A vocoder combines the human voice with the synthesized sound by analyzing the vocal input and modulating the synthesizer’s sound.
Understanding these components will help you in selecting the right components for your DIY synthesizer. Each component plays a crucial role in shaping the sound and giving your synthesizer its unique characteristics.
Now that you have a basic understanding of the main components of a synthesizer, let’s move on to the next section, where we’ll guide you through the process of selecting the right components for your DIY synthesizer.
Selecting the Right Components for Your DIY Synthesizer
Choosing the right components for your DIY synthesizer is a crucial step in building an instrument that meets your specific needs and preferences. Here are some key considerations to keep in mind:
1. Budget: Determine your budget for the project. This will help you prioritize your component choices and ensure that you stay within your financial limits.
2. Sound Goals: What type of sounds do you want to create? Consider the genres and styles of music you want to explore. This will influence the selection of components such as oscillators, filters, and effects to achieve the desired sonic characteristics.
3. Circuit Design: Decide whether you want to follow a pre-existing circuit design or create your own. If you’re a beginner, it’s recommended to start with a well-documented circuit design. However, if you have experience in electronics, you can customize the circuit to suit your preferences.
4. Analog or Digital: Determine whether you want an analog or digital synthesizer. Analog synthesizers offer warm and organic sounds, while digital synthesizers provide a wider range of sonic possibilities and precise control.
5. Modular or Fixed Architecture: Decide if you want a modular synthesizer where you can add or remove modules, or a fixed architecture synthesizer with integrated components. Modular setups offer more flexibility but can be more complex to assemble.
6. Component Quality: Invest in good quality components to ensure reliability and longevity. Check for reputable manufacturers and read reviews to get an idea of component quality and performance.
7. Expandability: Consider the potential for expanding your synthesizer in the future. Look for components that allow for easy integration of additional modules or features.
8. Power Supply: Determine the power requirements of your chosen components and ensure that your power supply can handle the load. Consider if you need a battery-powered or mains-powered synthesizer.
By considering these factors, you can select the right components that align with your goals and budget. Keep in mind that experimentation and customization are part of the DIY experience, so don’t be afraid to explore different options and make adjustments along the way.
In the next section, we’ll dive into the process of building the oscillator section of your DIY synthesizer. Get ready for some hands-on electronics!
Building the Oscillator Section
The oscillator section is the heart of your synthesizer, responsible for generating the fundamental sound waves that form the basis of your sound. Building this section requires careful selection and assembly of components. Here’s a step-by-step guide to help you build the oscillator section of your DIY synthesizer:
1. Select the Oscillator Type: Choose the type of oscillator you want to use, such as a voltage-controlled oscillator (VCO) or a digital oscillator. VCOs are commonly used in analog synthesizers and offer versatile waveform options, while digital oscillators provide a wide range of synthesized waveforms.
2. Gather the Components: Depending on your chosen oscillator type, gather the necessary components, including resistors, capacitors, transistors, integrated circuits (ICs), and a waveform selection mechanism.
3. Circuit Design: If you’re following a pre-existing circuit design, carefully study the schematic diagram to understand the connections and component values. If you’re designing your own circuit, experiment by combining different component values to achieve your desired sounds.
4. Solder the Components: Begin by soldering the resistors and capacitors onto the PCB (Printed Circuit Board) according to the circuit layout. Ensure that each component is securely attached and that there are no solder bridges or loose connections.
5. Integrate the ICs: If your chosen oscillator requires integrated circuits, carefully insert them into their sockets, aligning the correct pins with the corresponding holes. Take precautions to prevent damage from static electricity.
6. Waveform Selection: If your oscillator offers multiple waveform options, incorporate a waveform selection mechanism. This can be achieved using a rotary switch or a multiplexer to toggle between different waveforms.
7. Test Your Oscillator: Once the components are soldered and the waveform selection mechanism is in place, connect your synthesizer to a power supply. Verify that the oscillator is functioning correctly by monitoring the output signal with an oscilloscope or audio interface. Adjust the component values if necessary to achieve the desired waveform and pitch stability.
Building the oscillator section requires a good understanding of circuit design and soldering techniques. Take your time to ensure accurate placement and connections of components, and always double-check your work.
Once your oscillator section is up and running smoothly, you can move on to building the other sections, such as filters, envelope generators, and effects, to further shape and modulate your sound.
In the next section, we’ll explore the process of creating the filter section of your DIY synthesizer. Get ready to add some sonic character!
Creating the Filter Section
The filter section of a synthesizer is responsible for shaping the tonal characteristics of the sound by selectively attenuating or emphasizing specific frequency ranges. Building this section involves selecting the right components and integrating them into your DIY synthesizer. Here’s a step-by-step guide to help you create the filter section:
1. Choose the Filter Type: Select the type of filter you want to incorporate in your synthesizer. Common filter types include low-pass, high-pass, band-pass, and notch filters. Each type offers different frequency response characteristics and affects the tonal color of the sound.
2. Gather the Components: Collect the necessary components for your chosen filter type, including resistors, capacitors, operational amplifiers (op-amps), and potentiometers for filter cutoff frequency control.
3. Circuit Design: Study the schematic diagram of the selected filter circuit to understand the connections and component values. If you’re designing your own circuit, consider the desired frequency response and experiment with different component values to achieve the desired effect.
4. Solder the Components: Begin soldering the resistors, capacitors, and op-amps onto the PCB according to the circuit layout. Ensure that each component is securely attached and that there are no solder bridges or loose connections.
5. Potentiometer Integration: Integrate potentiometers for controlling the filter cutoff frequency. These variable resistors allow you to adjust the frequency response of the filter in real-time. Connect the potentiometers to the appropriate terminals on the PCB.
6. Power Supply Connection: Ensure that the filter section is properly connected to the power supply of your synthesizer. Follow the circuit diagram to connect the necessary power and ground connections.
7. Test Your Filter: Connect your DIY synthesizer to a power source and audio output. Verify the functionality of the filter section by adjusting the potentiometers and observing the changes in the frequency response. Listen to the output sound and ensure that the filter is attenuating or emphasizing the desired frequency ranges.
Creating the filter section adds a crucial element to your synthesizer’s sound-shaping capabilities. Filters allow you to sculpt the sound and create sonic variations that suit your musical style and experimentation. Take your time with the assembly and testing process to ensure accurate functionality.
Once your filter section is successfully integrated, you can move on to incorporating other sections such as envelope generators, effects, and modulation options to enhance your DIY synthesizer’s sonic possibilities.
In the next section, we’ll dive into the world of envelope generators and explore how to incorporate them into your synthesizer. Get ready to shape your sound’s dynamics!
Incorporating Envelope Generators
Envelope generators play a vital role in shaping the dynamics of your synthesizer’s sound. They control parameters such as attack, decay, sustain, and release (ADSR), allowing you to create complex and evolving sonic textures. Here’s a step-by-step guide on how to incorporate envelope generators into your DIY synthesizer:
1. Understand Envelope Generator Basics: Familiarize yourself with the different stages of an envelope generator, namely the attack, decay, sustain, and release stages. Each stage determines how the sound evolves over time.
2. Select the Envelope Generator Type: Choose the type of envelope generator you want to incorporate into your synthesizer. There are various options available, including ADSR envelope generators, which are commonly used in synthesizers, as well as more complex multi-stage envelope generators for added flexibility.
3. Gather the Components: Collect the necessary components for your chosen envelope generator, such as resistors, capacitors, op-amps, and potentiometers for controlling the envelope parameters.
4. Circuit Design: Study the schematic diagram of the envelope generator circuit to understand the connections and component values. Ensure that you follow the circuit layout accurately to achieve the desired envelope characteristics.
5. Solder the Components: Begin soldering the resistors, capacitors, and op-amps onto the PCB according to the circuit layout. Double-check that each component is securely attached and that there are no solder bridges or loose connections.
6. Potentiometer Integration: Incorporate potentiometers to control the envelope parameters, such as attack time, decay time, sustain level, and release time. Connect these potentiometers to their respective terminals on the PCB.
7. Power Supply Connection: Connect the envelope generator section to the power supply of your DIY synthesizer, ensuring proper power and ground connections.
8. Test the Envelope Generator: Connect your synthesizer to a power source and audio output. Adjust the potentiometers to vary the envelope parameters and observe the changes in the sound’s dynamics. Verify that the envelope generator is functioning as expected and that it responds accurately to parameter adjustments.
Incorporating envelope generators into your DIY synthesizer adds a new level of expressiveness and control to your sound. The ability to shape the attack, decay, sustain, and release of each note opens up a world of creative possibilities.
Once you have successfully integrated the envelope generators, you can proceed to add additional features such as effects and modulation options to further enhance your synthesizer’s sonic capabilities.
In the next section, we’ll explore the world of effects and discuss how to incorporate them into your DIY synthesizer. Get ready to make your sound truly unique!
Adding Effects and Modulation Options
Effects and modulation options are crucial in adding depth, texture, and movement to the sounds produced by your DIY synthesizer. They allow you to create immersive and unique sonic experiences. Here’s a step-by-step guide on how to incorporate effects and modulation options into your synthesizer:
1. Choose the Effects: Decide which effects you want to incorporate into your synthesizer. Popular options include reverb, delay, chorus, flanger, and distortion. Each effect adds its own distinctive flavor to the sound.
2. Research Effects Modules: Explore commercially available effects modules or DIY circuit designs that provide the desired effects. Read reviews, check the specifications, and consider the compatibility with your synthesizer’s other components.
3. Gather the Components: Collect the necessary components for each selected effects module. This may include resistors, capacitors, integrated circuits, potentiometers, and connectors.
4. Circuit Design and Assembly: If you’re building the effects modules from DIY circuit designs, carefully follow the provided schematic diagrams and assembly instructions. Ensure that each component is properly soldered and connected according to the layout.
5. Integration with Synthesizer: Determine the appropriate connection points on your synthesizer’s main PCB to integrate the effects modules. Connect the audio input and output, power supply, and control signals according to the specifications of each effects module.
6. Test the Effects: Power up your DIY synthesizer and test each effects module individually. Adjust the relevant parameters, such as feedback, delay time, or mix level, to achieve your desired sound. Listen attentively to each effect’s behavior and make any necessary adjustments or troubleshooting.
7. Modulation Options: Modulation adds movement and complexity to your synthesizer’s sound. Consider incorporating modulation sources like Low-Frequency Oscillators (LFOs) or envelopes. Connect the modulation sources to parameters such as filter cutoff, oscillator pitch, or effect parameters to introduce dynamic changes.
Adding effects and modulation options to your DIY synthesizer opens up a world of sonic exploration and creativity. You can create lush ambient textures, rhythmic patterns, or distorted and gritty sounds, depending on your preferences.
Remember to experiment and fine-tune the effects and modulation parameters to achieve your desired soundscapes. Each effect and modulation option interacts with your synthesizer’s other components in unique ways, so don’t hesitate to explore different combinations and settings.
In the next section, we’ll delve into the exciting world of vocoders and guide you through the process of designing and incorporating a vocoder section into your DIY synthesizer. Get ready to create robotic and otherworldly vocal effects!
Designing the Vocoder Section
The vocoder section is a distinct and fascinating element of a synthesizer, responsible for blending the human voice with synthesized sounds, resulting in robotic and unique vocal effects. Designing and incorporating a vocoder section into your DIY synthesizer requires careful planning and consideration. Here’s a step-by-step guide to help you in the process:
1. Understand Vocoder Basics: Familiarize yourself with the principles of how a vocoder works. A vocoder typically analyzes the spectral content of a carrier signal (synthesized sound) using a series of bandpass filters and applies that spectral information to a modulator signal (human voice), resulting in the characteristic robotic sound.
2. Research Vocoder Algorithms: Explore different vocoder algorithms available, both analog and digital, to find the one that suits your desired sound. Consider factors such as the number of filter bands, analysis and synthesis techniques, and the complexity of the circuit design.
3. Gather the Components: Collect the necessary components for building the vocoder section, including filters (potentially in the form of operational transconductance amplifiers or digital signal processors), voltage-controlled amplifiers (VCAs), envelope followers, and mixers.
4. Circuit Design: Study the schematics of vocoder circuits that align with your chosen algorithm. Understand the signal flow, the connections between different modules, and the necessary component values. Modify or customize the circuit as needed to fit your synthesizer.
5. Solder the Components: Start soldering the required components onto the PCB, following the vocoder circuit’s layout. Pay close attention to properly connecting filters, VCAs, envelope followers, and any additional modules. Be meticulous to avoid any potential signal interference or poor electrical connections.
6. Power Supply Connection: Ensure that the vocoder section is correctly connected to the power supply of your DIY synthesizer. Observe the power requirements and ensure proper grounding is maintained.
7. Testing and Calibration: Connect your DIY synthesizer to a power source, microphone input, and audio output. Test the vocoder section by speaking or singing into the microphone while adjusting the filter bank and envelope follower settings. Listen for the characteristic vocoder effect and ensure that the different filter bands and envelope followers are functioning correctly.
Designing and building a vocoder section requires a good understanding of audio processing, filtering, and modulation techniques. Take your time to fine-tune the filter and envelope follower settings to achieve the desired vocal effects.
Once your vocoder section is successfully integrated, you can start exploring the creative possibilities of blending the voice and synthesized sounds. Combine the vocoder with other sections such as oscillators, filters, and effects to create truly unique and captivating sonic textures.
In the next section, we’ll discuss the process of connecting and testing your DIY synthesizer. Get ready to bring your creation to life!
Connecting and Testing Your DIY Synthesizer
After successfully building and integrating all the sections of your DIY synthesizer, it’s time to connect and test your creation. Proper wiring and testing ensure that the components are functioning correctly and that you can unleash the full potential of your synthesizer. Here’s a step-by-step guide to connect and test your DIY synthesizer:
1. Power Supply: Connect your DIY synthesizer to a stable and appropriate power supply. Double-check the voltage requirements of each component and ensure that the power supply can handle the load. Make sure that the power connections are secure and well-insulated to avoid any accidental short circuits.
2. Audio Output: Connect the audio output of your synthesizer to a suitable amplifier, mixer, or audio interface. Use shielded audio cables to minimize noise interference and ensure a clean signal transmission. Start with low volume settings to avoid any sudden loud sounds.
3. Control Voltage (CV) Connections: If you have incorporated modular synthesizer elements or external control signals, make the necessary CV connections to control different parameters of your synthesizer. This includes connecting CV outputs to pitch, filter cutoff, and modulation inputs.
4. Control Interface: If you have integrated knobs, sliders, or buttons for parameter control, ensure that they are wired correctly and make the necessary connections to your synthesizer’s control circuitry. Test each control element to verify that it responds accurately to parameter changes.
5. Test Each Section: Go through each section of your synthesizer, starting from the oscillator section, filters, envelope generators, effects, and finally, the vocoder. Verify that each section is functioning correctly by adjusting the relevant parameters and listening to the output sound. Make any necessary adjustments or troubleshooting as needed.
6. Playability and Expressiveness: Test the playability and expressiveness of your DIY synthesizer by interacting with the control interface in real-time. Experiment with different combinations of settings, modulation options, and effects to explore the full range of sounds that your synthesizer can produce. Embrace the opportunity for experimentation and discovery.
7. Fine-tuning and Calibration: Fine-tune your synthesizer by adjusting component values or control parameters to achieve the desired sound and response. Calibrate elements such as pitch tracking, filter cutoff, and modulation depths to maintain accurate and consistent control across the entire range of your synthesizer.
By carefully connecting and thoroughly testing your DIY synthesizer, you can ensure that all components work together seamlessly to create the unique sounds you envision. Don’t hesitate to refine and tweak your synthesizer’s settings until you are satisfied with the results.
Congratulations on building your DIY synthesizer! Now, it’s time to explore and unleash the full creative potential of your sonic masterpiece.
In the final section, we’ll provide a concluding remark, summarizing the journey and highlighting the benefits of building your own synthesizer with a vocoder.
Conclusion
Building your own synthesizer with a vocoder is a rewarding and exciting journey into the world of electronic music. Throughout this comprehensive guide, we’ve covered the essential components and steps to help you bring your DIY synthesizer project to life.
By understanding the basic components of a synthesizer, selecting the right components, and building sections such as the oscillator, filter, envelope generators, effects, and vocoder, you have gained valuable knowledge in electronic circuitry and sound design. Each section adds its own unique flavor to your synthesizer, allowing you to create a wide range of sounds and textures.
The process of connecting and testing your DIY synthesizer ensures that all the components work together harmoniously, and it gives you the opportunity to fine-tune and calibrate the instrument to suit your preferences.
By building your own synthesizer, you have gained a deeper understanding of how synthesizers work and the ability to customize your instrument to create your own signature sounds. This DIY approach also allows for future modifications and upgrades, ensuring that your synthesizer can evolve with your creative journey.
Remember, experimentation is key to unlocking the full potential of your DIY synthesizer. Explore different settings, modulation options, and effects to create unique and captivating music. Embrace the joy of discovering new sounds and let your imagination run wild.
Building your own synthesizer is not just a technical endeavor—it’s a creative expression. It allows you to bring your musical ideas to life and opens up a world of sonic possibilities. So, dive into the world of synthesizers, explore the endless possibilities, and create music that truly reflects your artistic vision.
Now that you have completed this comprehensive guide, it’s time to embark on your own synthesizer-building journey. Enjoy the process, embrace the challenges, and let your DIY synthesizer be a testament to your creativity and passion for sound.
Happy synthesizing!


