Home>Production & Technology>Acoustic>How To Record An Acoustic Guitar
Acoustic
How To Record An Acoustic Guitar
Published: March 12, 2024
Learn how to record an acoustic guitar with professional tips and techniques. Capture the rich, natural sound of your acoustic instrument.
(Many of the links in this article redirect to a specific reviewed product. Your purchase of these products through affiliate links helps to generate commission for AudioLover.com, at no extra cost. Learn more)
Table of Contents
Introduction
Recording an acoustic guitar is a delicate art that requires a blend of technical expertise and creative intuition. Whether you're a seasoned musician or a budding songwriter, capturing the rich, resonant tones of an acoustic guitar can elevate your music to new heights. In this comprehensive guide, we will delve into the intricacies of recording an acoustic guitar, covering everything from selecting the right equipment to mastering post-recording processing techniques.
The acoustic guitar, with its warm timbre and versatile sound, has been a staple in music across genres for decades. From folk ballads to soulful blues and contemporary pop hits, the acoustic guitar's timeless appeal lies in its ability to evoke emotion and add depth to musical compositions. As such, the process of recording an acoustic guitar is not merely a technical endeavor; it is an artistic pursuit aimed at capturing the instrument's soulful resonance and translating it into a captivating audio recording.
In the following sections, we will explore the essential steps and techniques for recording an acoustic guitar with precision and finesse. Whether you're aiming to create a pristine, studio-quality recording or seeking to capture the raw, organic essence of a live performance, this guide will equip you with the knowledge and skills to achieve your desired sound.
As we embark on this journey, it's important to approach the art of recording an acoustic guitar with a sense of curiosity and experimentation. Each recording session presents an opportunity to explore different tonal nuances, experiment with mic placements, and uncover unique sonic textures. By embracing the creative process and honing your recording techniques, you can unlock the full potential of the acoustic guitar as a captivating and expressive instrument in your musical endeavors.
With a blend of technical know-how, creative passion, and a keen ear for detail, you can embark on a rewarding journey of capturing the timeless allure of the acoustic guitar through the art of recording. Let's dive into the intricacies of this process, uncovering the nuances that will empower you to create captivating and evocative acoustic guitar recordings.
Choosing the Right Equipment
Selecting the appropriate equipment is a crucial first step in the process of recording an acoustic guitar. The right gear can make a significant difference in capturing the instrument's natural resonance and tonal characteristics. Here's a detailed look at the essential equipment needed to achieve high-quality acoustic guitar recordings:
1. Acoustic Guitar:
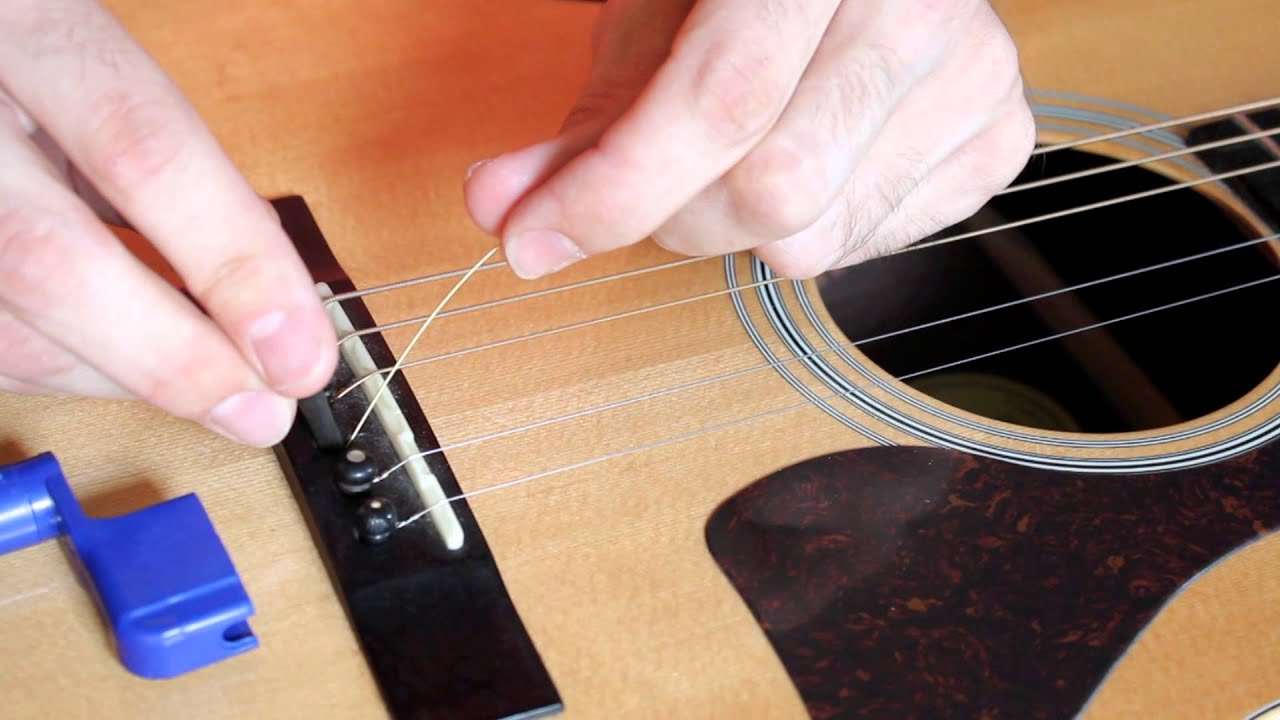
The foundation of any acoustic guitar recording is, of course, the instrument itself. Ensure that the guitar is well-maintained, with fresh strings and proper intonation. Different guitars produce varying tonal qualities, so it's beneficial to experiment with multiple guitars to find the ideal sound for your recording.
2. Microphones:
Choosing the right microphone is paramount in capturing the nuances of an acoustic guitar. Condenser microphones are commonly preferred for their sensitivity and ability to capture detailed acoustic performances. A large-diaphragm condenser mic, positioned strategically, can capture the full spectrum of the guitar's sound. Additionally, a small-diaphragm condenser mic can be used to capture the guitar's intricate high-frequency details.
3. Audio Interface:
An audio interface serves as the bridge between your microphones and recording software. Look for an interface with high-quality preamps to ensure clean and transparent signal capture. Select an interface with sufficient input channels to accommodate multiple microphones if you plan to use stereo or multi-mic recording techniques.
4. Studio Monitors or Headphones:
Accurate monitoring is essential for assessing the quality of your recordings. Invest in studio monitors or high-fidelity headphones to critically evaluate the captured sound. This step is crucial for identifying any imperfections or tonal inconsistencies that may require adjustments during the recording process.
5. Recording Software:
Choose a reliable digital audio workstation (DAW) that aligns with your recording preferences and workflow. Popular DAWs offer a range of features for editing, mixing, and processing audio tracks, providing the flexibility to refine your acoustic guitar recordings with precision.
6. Accessories:
Essential accessories include microphone stands, pop filters, and shock mounts to stabilize and protect your microphones during recording sessions. Additionally, investing in high-quality cables and a power conditioner can help maintain signal integrity and minimize unwanted noise in your recordings.
By carefully selecting and assembling the right equipment, you can lay a solid foundation for capturing the nuanced beauty of an acoustic guitar. Each component plays a vital role in shaping the final sonic character of the recording, making it essential to prioritize quality and compatibility when building your recording setup.
Setting Up Your Recording Space
Creating an optimal recording environment is essential for capturing the true essence of an acoustic guitar. The acoustic properties of the recording space significantly impact the overall sound quality and ambience of the recorded performance. Here's a detailed exploration of the key considerations for setting up your recording space to achieve exceptional acoustic guitar recordings:
-
Room Selection:
When selecting a room for recording, prioritize spaces with minimal ambient noise and reverberation. Ideally, choose a room with acoustically favorable characteristics, such as balanced sound diffusion and absorption. If possible, opt for a room with dimensions that minimize standing waves and resonances, contributing to a more balanced and natural acoustic environment. -
Acoustic Treatment:
Implementing acoustic treatment can enhance the sonic clarity of your recordings. Consider using acoustic panels, bass traps, and diffusers to address issues related to reflections, flutter echoes, and low-frequency buildup. Strategic placement of acoustic treatment materials can help create a more controlled and sonically balanced recording space, allowing the acoustic guitar's nuances to shine through without unwanted sonic artifacts. -
Isolation and Soundproofing:
To minimize external disturbances and ensure a focused recording environment, consider soundproofing the recording space to attenuate external noise. Additionally, if recording in a shared or multi-purpose space, isolation shields and portable vocal booths can help contain the acoustic guitar's sound while reducing bleed from other sources, resulting in cleaner recordings with improved sonic isolation. -
Instrument Positioning:
When positioning the acoustic guitar within the recording space, aim to achieve a balanced acoustic response. Experiment with different room orientations and instrument placements to find the optimal position that complements the guitar's tonal characteristics. Additionally, consider the proximity of reflective surfaces and furniture to minimize unwanted sonic reflections and resonances. -
Monitoring Environment:
Establish a monitoring setup that allows for accurate assessment of the recorded sound. Position studio monitors or headphones in a manner that facilitates critical listening and evaluation of the acoustic guitar's tonal balance, dynamics, and spatial characteristics. A well-calibrated monitoring environment is crucial for making informed decisions during the recording process.
By meticulously addressing the nuances of your recording space, you can create an environment that fosters the faithful capture of the acoustic guitar's rich timbre and expressive dynamics. Each aspect of the recording space, from acoustic treatment to instrument positioning, plays a pivotal role in shaping the sonic landscape of your recordings, ultimately contributing to the creation of captivating and immersive acoustic guitar performances.
Mic Placement Techniques
Mic placement is a critical aspect of capturing the nuanced tonal characteristics and spatial dynamics of an acoustic guitar. The positioning of microphones relative to the instrument significantly influences the recorded sound, allowing for the capture of rich harmonics, resonant body tones, and detailed transients. Here's an in-depth exploration of mic placement techniques that can elevate the quality and fidelity of acoustic guitar recordings:
-
Close-Miking:
Placing a microphone in close proximity to the acoustic guitar's soundhole or fretboard yields a focused and intimate sound. This technique accentuates the instrument's body resonance and percussive qualities, making it ideal for capturing the warmth and depth of fingerstyle playing or subtle nuances in a solo performance. Experiment with slight variations in mic positioning to find the sweet spot that best complements the guitar's tonal characteristics. -
Spaced Pair (Stereo) Miking:
Utilizing a spaced pair configuration with two microphones positioned at a distance from the acoustic guitar creates a spacious and immersive stereo image. By carefully adjusting the distance and angle between the microphones, you can capture the instrument's natural ambience and stereo width, enhancing the sense of depth and realism in the recording. This technique is particularly effective for capturing the full-bodied resonance of the acoustic guitar in a room or studio environment. -
X-Y Coincident Pair Miking:
Employing an X-Y coincident pair setup involves placing two cardioid or bi-directional microphones in close proximity, with their capsules intersecting at a specific angle. This technique facilitates precise stereo imaging and phase coherence, resulting in a well-defined and cohesive stereo representation of the acoustic guitar's sound. The X-Y configuration minimizes phase issues and provides a balanced stereo image with excellent mono compatibility, making it suitable for capturing detailed acoustic performances with clarity and spatial accuracy. -
Mid-Side (M-S) Miking:
The mid-side miking technique combines a cardioid microphone (mid) with a bi-directional or figure-8 microphone (side) to capture a versatile stereo image. By adjusting the level and polarity of the side microphone relative to the mid microphone, you can control the width and spatial characteristics of the recorded sound. This technique offers flexibility in post-recording processing, allowing for precise adjustment of the stereo width and ambience while maintaining mono compatibility and a coherent center image. -
Room Miking (Ambient Miking):
Positioning a microphone at a distance from the acoustic guitar to capture the ambient sound of the room or performance space adds depth and natural reverberation to the recording. This technique enhances the sense of space and envelopment, contributing to a more immersive and organic sonic experience. Experiment with microphone placement and room orientation to capture the desired balance of direct instrument sound and ambient spaciousness.
By leveraging these mic placement techniques, you can tailor the recording approach to suit the specific sonic characteristics and artistic vision of each acoustic guitar performance. Each technique offers unique sonic possibilities, allowing for creative exploration and precise control over the spatial and tonal aspects of the recorded sound. With a discerning ear and thoughtful experimentation, you can harness the power of mic placement to capture captivating and authentic acoustic guitar recordings.
Recording Tips and Tricks
Recording an acoustic guitar is a nuanced process that demands attention to detail and a keen understanding of the instrument's sonic intricacies. To elevate the quality of your recordings and capture the true essence of the acoustic guitar, consider implementing the following tips and tricks:
-
Optimize Playing Technique: Encourage the guitarist to focus on consistent playing dynamics and precise fingerpicking or strumming. A well-executed performance enhances the clarity and expressiveness of the recorded sound, allowing for a more compelling and polished end result.
-
Experiment with Mic Combinations: Explore the sonic possibilities of using multiple microphones in combination. Pairing a close-mic with a room mic, or blending different microphone types, can add depth and dimension to the recorded sound, enriching the overall sonic texture of the acoustic guitar.
-
Monitor Signal Levels: Pay close attention to signal levels during recording to avoid clipping and distortion. Aim for a healthy signal-to-noise ratio, ensuring that the recorded audio maintains clarity and fidelity without introducing unwanted artifacts or digital distortion.
-
Capture Room Resonance: Embrace the natural resonance of the recording space by strategically positioning microphones to capture the room's ambience. This can impart a sense of depth and spaciousness to the acoustic guitar recordings, enhancing the overall sonic character with a touch of natural reverberation.
-
Utilize High-Quality Preamps: Invest in high-quality microphone preamps to maintain the integrity of the recorded signal. Clean and transparent preamplification preserves the nuances of the acoustic guitar's sound, contributing to a pristine and uncolored recording.
-
Employ Dynamic Microphone Techniques: Experiment with dynamic microphones to capture the percussive elements and transient details of the acoustic guitar. Dynamic mics can add punch and presence to the recorded sound, particularly when capturing rhythmic strumming patterns or percussive playing styles.
-
Embrace Post-Recording Processing: Leverage the capabilities of your recording software to refine the recorded tracks. Techniques such as EQ adjustments, compression, and subtle reverb application can enhance the tonal balance and sonic cohesion of the acoustic guitar recordings, elevating them to a professional standard.
-
Focus on Performance Dynamics: Encourage the guitarist to infuse the performance with dynamic expression, exploring variations in volume and intensity. Dynamic playing adds emotional depth and nuance to the recordings, creating a compelling and engaging sonic narrative.
By incorporating these recording tips and tricks into your workflow, you can elevate the quality and artistry of your acoustic guitar recordings. Each technique offers a pathway to unlocking the full sonic potential of the instrument, allowing for the creation of captivating and evocative audio recordings that resonate with depth and authenticity.
Post-Recording Processing
Post-recording processing plays a pivotal role in refining and enhancing the quality of acoustic guitar recordings, allowing for meticulous adjustments and sonic sculpting to elevate the captured performances to a professional standard. With a focus on precision and artistry, the post-recording phase offers a canvas for fine-tuning the tonal balance, dynamics, and spatial characteristics of the recorded tracks. Here's a detailed exploration of essential post-recording processing techniques tailored specifically for acoustic guitar recordings:
1. Equalization (EQ) Refinement:
Utilize parametric EQ to sculpt the tonal characteristics of the acoustic guitar tracks. Address frequency imbalances and resonant peaks, enhancing the clarity of the instrument's fundamental tones while delicately shaping the high-frequency sparkle and low-end warmth. Carefully attenuate any problematic frequencies and accentuate the instrument's natural timbre to achieve a balanced and cohesive sonic profile.
2. Dynamic Range Control:
Apply subtle compression to control the dynamic range of the acoustic guitar recordings, ensuring consistent levels and enhancing the perceived sustain and articulation. Employ gentle compression settings to tame transient peaks and add subtle glue to the overall sound, preserving the natural dynamics of the performance while achieving a polished and controlled sonic output.
3. Spatial Enhancement:
Introduce tasteful reverb and ambience to impart a sense of space and depth to the acoustic guitar recordings. Experiment with convolution reverbs or algorithmic reverb processors to create a natural and immersive sonic environment, tailoring the reverberation characteristics to complement the mood and aesthetic of the music. Additionally, consider utilizing stereo imaging tools to widen the perceived stereo field and enhance spatial dimensionality.
4. Harmonic Enrichment:
Explore the use of harmonic exciters or saturation plugins to add subtle warmth and harmonic richness to the acoustic guitar tracks. By introducing controlled harmonic distortion or saturation, you can infuse the recordings with a touch of analog warmth and musicality, enhancing the instrument's presence and adding depth to the overall sonic texture.
5. Final Polishing:
Engage in meticulous listening and critical assessment of the processed tracks, making nuanced adjustments to ensure sonic coherence and tonal finesse. Fine-tune the overall mix balance, addressing any remaining tonal inconsistencies or transient imbalances. Pay attention to detail, refining the sonic character of the acoustic guitar recordings to achieve a captivating and immersive sonic narrative.
By embracing the art of post-recording processing, you can transform raw acoustic guitar recordings into polished and evocative sonic masterpieces. Each processing technique offers an opportunity to refine the sonic intricacies of the instrument, allowing for the creation of captivating and emotionally resonant acoustic guitar recordings that captivate listeners with their depth and authenticity.
Conclusion
In conclusion, the art of recording an acoustic guitar is a multifaceted journey that intertwines technical precision with artistic expression. Throughout this comprehensive guide, we have delved into the intricacies of capturing the rich tonal nuances and expressive dynamics of the acoustic guitar, from selecting the right equipment to refining the post-recording processing. As we reflect on the essential steps and techniques outlined, it becomes evident that recording an acoustic guitar is not merely a technical endeavor; it is a creative pursuit aimed at preserving the instrument's soulful resonance and translating it into captivating audio recordings.
The acoustic guitar, with its timeless allure and versatile sonic palette, holds a revered position in the realm of music, spanning genres and generations with its emotive presence. As such, the process of recording an acoustic guitar demands a meticulous approach, guided by a deep appreciation for the instrument's sonic intricacies and a commitment to capturing its authentic essence. Each recording session presents an opportunity to explore the instrument's tonal nuances, experiment with mic placements, and uncover unique sonic textures, fostering a sense of curiosity and creative exploration.
From the careful selection of equipment to the strategic placement of microphones, every aspect of the recording process contributes to the faithful representation of the acoustic guitar's resonant beauty. The recording space, meticulously tailored to minimize sonic artifacts and enhance the instrument's natural ambience, serves as a canvas for capturing captivating performances with depth and clarity. Furthermore, the post-recording processing phase offers a realm of sonic sculpting, allowing for the refinement of tonal balance, dynamic control, and spatial enhancement to elevate the recorded performances to a professional standard.
As aspiring musicians, seasoned producers, and audio enthusiasts embark on their own journeys of recording acoustic guitars, it is essential to embrace the fusion of technical know-how and creative passion. By honing recording techniques, leveraging mic placement strategies, and embracing the art of post-recording processing, individuals can unlock the full sonic potential of the acoustic guitar, creating evocative and immersive audio recordings that resonate with depth and authenticity.
Ultimately, the art of recording an acoustic guitar transcends the realm of technical proficiency, evolving into a profound exploration of sonic artistry and emotional storytelling. With a blend of technical expertise, creative intuition, and a deep reverence for the instrument's timeless allure, individuals can embark on a rewarding journey of capturing the soulful resonance of the acoustic guitar, preserving its emotive essence in captivating and enduring audio recordings.