Home>Production & Technology>Acoustic>How To Replace Strings On An Acoustic Guitar

Acoustic
How To Replace Strings On An Acoustic Guitar
Published: March 11, 2024
Learn how to replace strings on an acoustic guitar with our step-by-step guide. Keep your acoustic guitar sounding its best with our expert tips.
(Many of the links in this article redirect to a specific reviewed product. Your purchase of these products through affiliate links helps to generate commission for AudioLover.com, at no extra cost. Learn more)
Table of Contents
Introduction
When it comes to playing the acoustic guitar, the quality and condition of the strings can significantly impact the sound and playability of the instrument. Whether you're a seasoned guitarist or just starting out, knowing how to replace the strings on your acoustic guitar is an essential skill that can enhance your playing experience.
Over time, the strings on an acoustic guitar can become worn, corroded, or lose their tone, affecting the overall sound quality. Additionally, frequent playing can cause the strings to accumulate dirt and oils from your fingers, further diminishing their performance. By replacing the strings regularly, you can ensure that your guitar produces a clear, vibrant tone and remains in optimal playing condition.
In this comprehensive guide, we will walk you through the process of replacing the strings on your acoustic guitar, from selecting the right strings to tuning the instrument for optimal sound. Whether you're a DIY enthusiast or simply looking to maintain your guitar at home, this step-by-step tutorial will equip you with the knowledge and confidence to keep your acoustic guitar sounding its best.
Without further ado, let's dive into the world of acoustic guitar maintenance and learn how to breathe new life into your instrument by replacing its strings.
Choosing the Right Strings
Selecting the right strings for your acoustic guitar is a crucial step in the string replacement process. With a wide variety of options available, choosing the best strings can significantly impact the tone, playability, and overall performance of your instrument. Here's a detailed guide to help you make an informed decision when selecting new strings for your acoustic guitar.
Consider String Material
The material of the strings plays a pivotal role in determining the tone and feel of your guitar. Phosphor bronze and 80/20 bronze are the two most common types of acoustic guitar strings. Phosphor bronze strings are known for their warm, balanced tone and are favored by many acoustic guitarists. On the other hand, 80/20 bronze strings offer a bright, crisp sound with enhanced clarity. Consider your playing style and the sound you wish to achieve when choosing between these materials.
Gauge and Tension
String gauge refers to the thickness of the strings, which directly affects the tension and playability of the guitar. Lighter gauge strings are easier to fret and bend, making them ideal for beginners and players who prefer a more effortless playing experience. Conversely, heavier gauge strings offer a fuller, more resonant tone and are preferred by those seeking increased volume and projection. It's essential to strike a balance between gauge and tension to find strings that complement your playing style and the characteristics of your guitar.
Coated vs. Uncoated Strings
Coated strings are designed to resist corrosion and prolong their lifespan, making them a popular choice for players seeking longevity and consistent tone. While coated strings may come at a higher price point, their durability and retained brightness over time make them a worthwhile investment. On the other hand, uncoated strings offer a more traditional feel and tone, providing a raw, natural sound that some players prefer.
Brand and Personal Preference
With numerous reputable string manufacturers in the market, each offering a unique blend of materials and technologies, it's essential to consider your personal preferences and playing style when choosing a brand. Experimenting with different brands can help you discover the perfect match for your acoustic guitar, allowing you to tailor the sound and feel to your liking.
By carefully considering the string material, gauge, coating, and brand, you can make an informed decision when selecting new strings for your acoustic guitar. Taking the time to explore these factors will ultimately lead to an enhanced playing experience and a personalized tone that resonates with your musical style.
Removing the Old Strings
Before installing new strings on your acoustic guitar, it's essential to remove the old ones carefully. This process not only prepares the instrument for fresh strings but also allows for thorough cleaning and inspection of the guitar's components. Here's a detailed guide on how to remove the old strings from your acoustic guitar:
-
Loosen the Strings: Begin by turning the tuning pegs to loosen the tension of each string. This can be done by turning the pegs in a counterclockwise direction. Loosening the strings reduces the risk of them snapping abruptly, ensuring a safe removal process.
-
Unwind the Strings: Once the strings are sufficiently loosened, unwind them from the tuning pegs. Start at the headstock and carefully unwind each string, taking note of how they are wound around the pegs. Keep the removed strings organized to prevent tangling and make the disposal process more manageable.
-
Remove the Bridge Pins: For guitars with bridge pins securing the strings, use a bridge pin puller or a suitable tool to gently pry the bridge pins out of the bridge. Take care not to apply excessive force, as this can damage the bridge or the pins themselves. Once the pins are removed, the old strings can be lifted out from the bridge.
-
Dispose of the Old Strings: Properly dispose of the old strings to avoid any potential hazards. Many music stores offer recycling programs for used guitar strings, contributing to environmental sustainability. Alternatively, you can store the old strings in a designated container until you can safely dispose of them.
-
Clean the Guitar: With the old strings removed, take the opportunity to clean the fretboard, bridge, and other areas where dirt and debris may have accumulated. A soft, lint-free cloth can be used to wipe down these areas, ensuring that the guitar is free from any buildup that could affect the performance of the new strings.
By following these steps, you can safely and effectively remove the old strings from your acoustic guitar, setting the stage for the installation of fresh, vibrant strings. This process not only facilitates the maintenance of your instrument but also allows for a thorough inspection of the guitar's components, ensuring that it remains in optimal playing condition.
Installing the New Strings
Installing new strings on your acoustic guitar is a transformative process that rejuvenates the instrument's tone and playability. Here's a comprehensive guide to help you seamlessly install the new strings and breathe new life into your guitar.
Stringing the Guitar
-
Inserting the Strings: Begin by inserting the end of the string into the corresponding bridge pin hole, ensuring that the ball end is securely seated against the bridge plate. For guitars with a tailpiece, thread the string through the tailpiece and over the bridge saddle.
-
Securing the Bridge Pins: If your guitar features bridge pins, carefully align the holes in the bridge with the corresponding holes in the bridge plate. Gently press the bridge pins into place, ensuring a snug fit without applying excessive force.
-
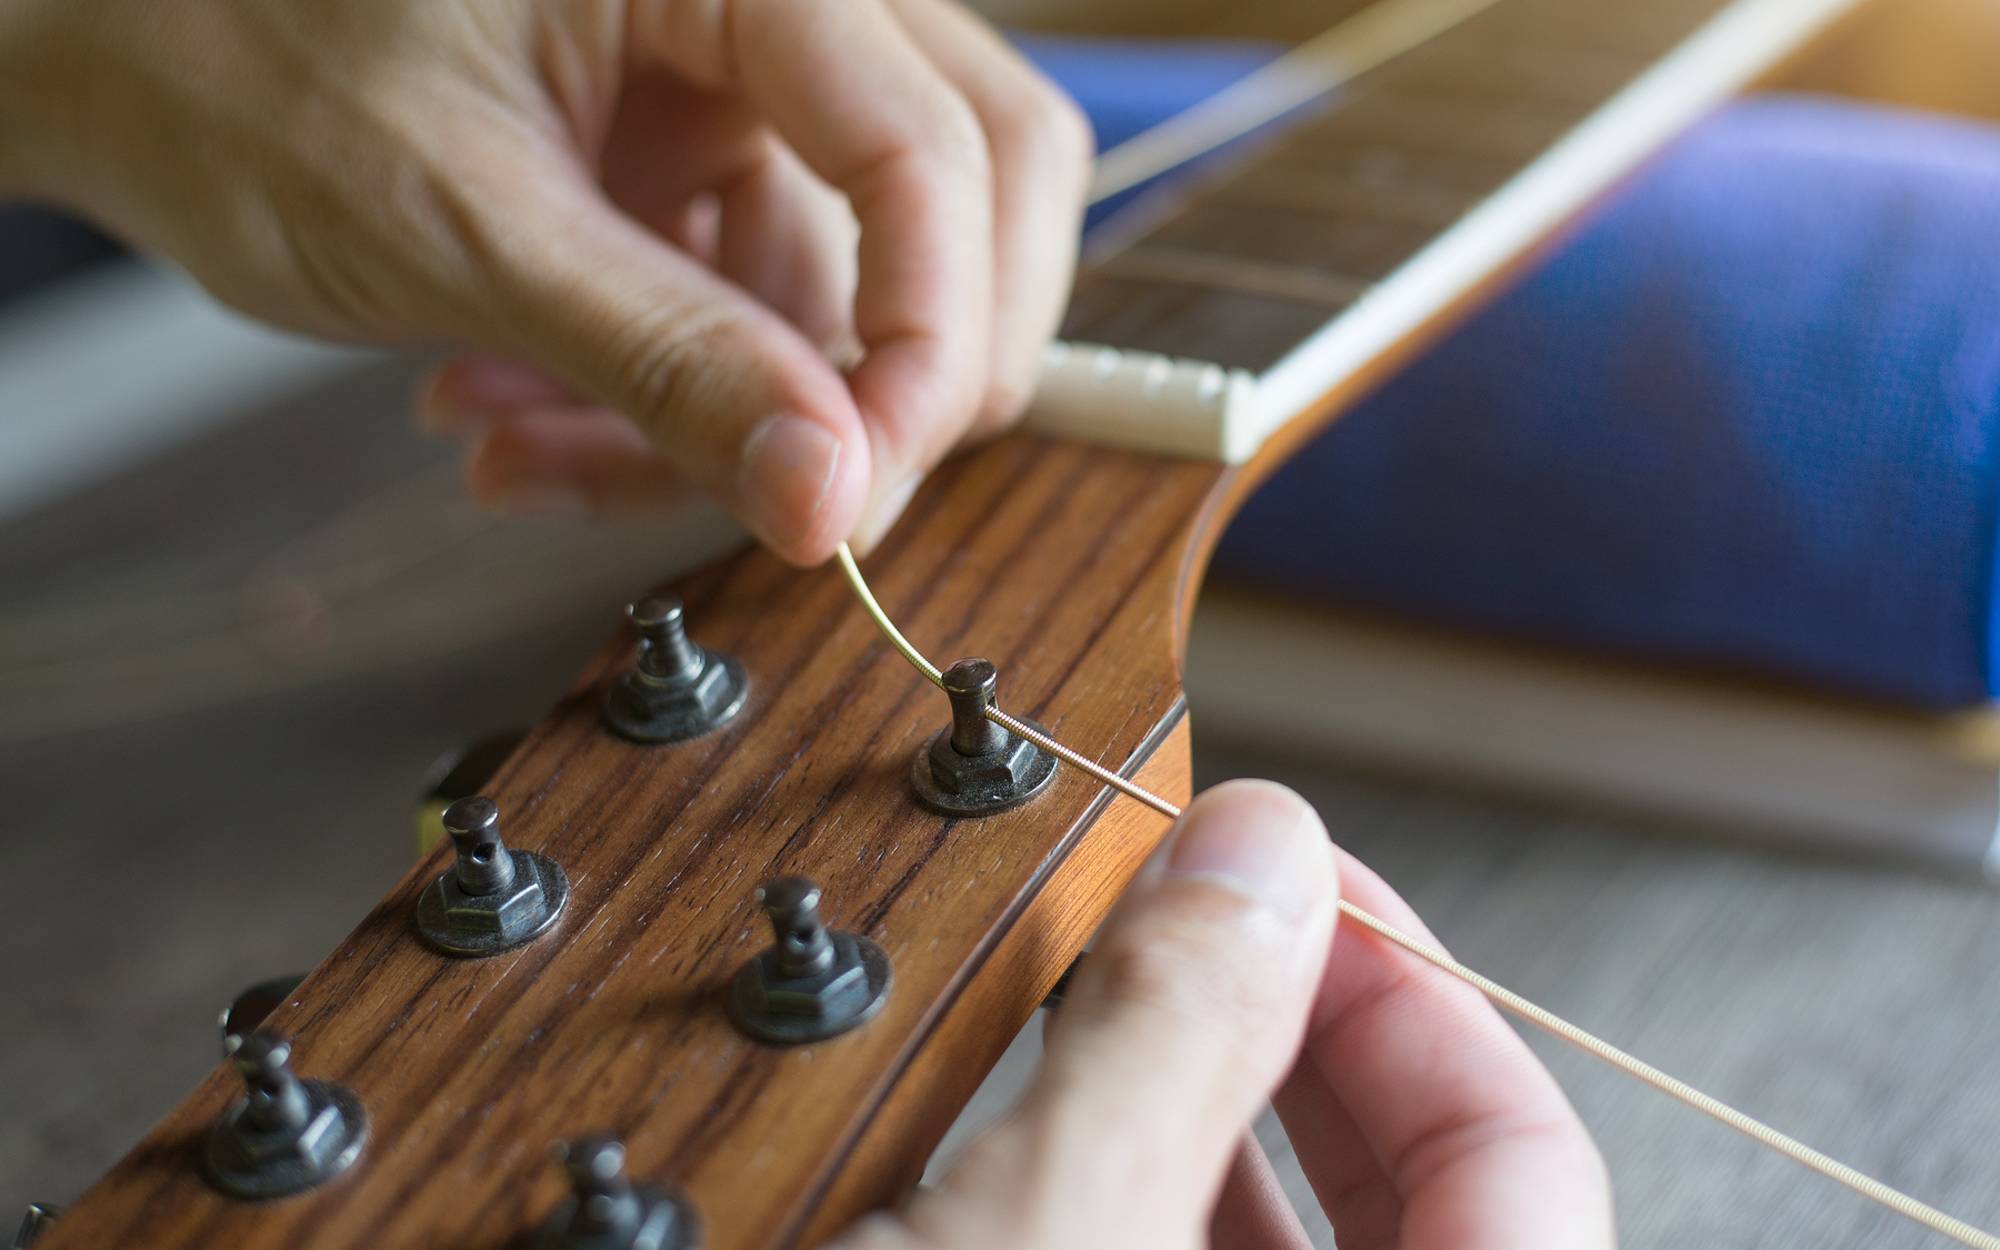
Winding the Strings: Moving to the headstock, guide the opposite end of the string through the appropriate tuning peg hole. Leave a sufficient length of slack to allow for winding. Begin winding the string onto the tuning peg in a clockwise direction, ensuring that each turn is neat and overlaps the previous one.
Ensuring Proper Tension
-
Stretching the Strings: After securing the strings at the bridge and headstock, gently pull each string away from the fretboard to remove any slack. This helps to seat the strings properly and minimizes the need for frequent retuning after installation.
-
Tuning the Guitar: Using a reliable tuner, begin tuning the strings to their respective pitches. It's essential to tune the strings gradually, starting with the low E string and progressing to the high E string. Repeat the tuning process until each string reaches its correct pitch.
Trimming Excess String Length
-
Cutting the Excess: Once the strings are tuned and properly seated, use a suitable wire cutter to trim the excess string length near the tuning pegs. Exercise caution to avoid leaving sharp protrusions that could cause injury or damage to the guitar.
-
Securing the Strings: With the excess string length trimmed, ensure that the remaining portion is neatly wound around the tuning pegs. This prevents the strings from slipping and maintains tuning stability during play.
By following these steps, you can successfully install new strings on your acoustic guitar, unlocking a renewed sonic potential and ensuring optimal playability. With the new strings in place, your guitar is poised to deliver a rich, vibrant tone and a responsive playing experience, inspiring you to explore new musical horizons.
Tuning the Guitar
Tuning the guitar is a critical step in the string replacement process, as it ensures that the instrument produces accurate pitches and resonates harmoniously. Proper tuning not only enhances the overall sound quality but also contributes to a satisfying playing experience. Here's a detailed guide on how to effectively tune your acoustic guitar after installing new strings.
Gradual Tuning Process
After installing the new strings and ensuring they are properly seated at the bridge and headstock, it's time to initiate the tuning process. Using a reliable tuner, begin by tuning the low E string to its designated pitch. Gradually pluck the string and observe the tuner's display, adjusting the tuning peg until the string reaches the correct pitch. It's essential to tune the string gradually, avoiding sudden, drastic adjustments that can lead to over-tensioning and potential string breakage.
Progressing Through the Strings
Once the low E string is tuned, proceed to tune the A, D, G, B, and high E strings in sequence. By following a systematic approach, you can ensure that each string is tuned accurately and harmonizes with the others. As you progress through the tuning process, periodically revisit the previously tuned strings to verify their pitches, as tuning one string can affect the tension and pitch of the others.
Fine-Tuning and Harmonization
As the strings approach their correct pitches, pay close attention to the tuner's display and the auditory feedback from the guitar. Fine-tune each string to achieve precise pitch accuracy, ensuring that the guitar produces a cohesive and harmonious sound across all strings. This meticulous approach to tuning contributes to the overall tonal balance and playability of the instrument, setting the stage for an enjoyable and rewarding playing experience.
Retuning and Stability
After initially tuning all six strings, it's common for the strings to undergo minor pitch adjustments as they settle into their new positions. Gently stretch each string by pulling it away from the fretboard, allowing any residual slack to be removed. Retune the strings as needed, gradually stabilizing their pitches and ensuring that the guitar maintains consistent tuning throughout the playing session.
Final Checks
Once the guitar is tuned to perfection, perform a final check of each string's pitch and overall tonal balance. Strumming across all strings and playing various chords can help confirm that the guitar is in optimal playing condition, with the strings resonating harmoniously and producing a vibrant, well-balanced tone.
By meticulously tuning your acoustic guitar after installing new strings, you can unlock its full sonic potential and enjoy a responsive, harmonious playing experience. This attention to detail ensures that your guitar is ready to deliver inspiring performances and accompany you on your musical journey.
Maintaining Your New Strings
Maintaining your new strings is essential for preserving their tone, playability, and longevity. By incorporating simple yet effective practices into your guitar care routine, you can ensure that your new strings remain in optimal condition, allowing you to enjoy consistent performance and a vibrant sound. Here's a comprehensive guide to maintaining your new strings and maximizing their lifespan.
Wiping Down the Strings
After each playing session, take a moment to wipe down the strings with a clean, lint-free cloth. This simple yet crucial step helps remove sweat, oils, and debris that accumulate during playing, preventing premature corrosion and preserving the strings' brightness. By keeping the strings clean, you can extend their lifespan and maintain a crisp, articulate tone.
String Lubrication
Periodically applying a small amount of high-quality string lubricant can help reduce friction between the strings and the nut, bridge, and tuning pegs. This minimizes wear and tear on the strings, enhancing their durability and playability. When applying the lubricant, ensure that it is evenly distributed along the contact points, promoting smooth string movement and reducing the risk of breakage.
Proper Storage
When not in use, storing your guitar in a suitable environment can significantly impact the condition of the strings. Exposure to extreme temperatures, humidity, or direct sunlight can accelerate string degradation. Therefore, storing the guitar in a protective case or a controlled environment can help maintain the integrity of the strings, ensuring that they retain their tonal characteristics and playability over time.
Regular Tuning and Inspection
Frequent tuning and periodic string inspection are essential for identifying any signs of wear, fatigue, or potential issues. By staying vigilant and addressing any tuning inconsistencies or abnormalities promptly, you can prevent excessive stress on the strings and mitigate the risk of unexpected breakage. Additionally, inspecting the strings for signs of corrosion, fraying, or uneven wear allows you to take proactive measures to maintain their performance and integrity.
String Replacement Schedule
While maintaining your new strings is crucial, it's important to recognize that strings have a finite lifespan. Factors such as playing frequency, playing style, and environmental conditions can influence the rate of string degradation. Establishing a regular string replacement schedule based on these factors can help ensure that your guitar consistently delivers optimal tone and playability. By replacing the strings before they become excessively worn or dull, you can experience the full sonic potential of your instrument.
By incorporating these maintenance practices into your guitar care routine, you can prolong the lifespan of your new strings and enjoy a consistently vibrant, responsive playing experience. With proper care and attention, your acoustic guitar will continue to inspire and accompany you on your musical journey, allowing you to explore new melodies and express your creativity with confidence.

