Home>Production & Technology>Acoustic>How To Hang Up Acoustic Panels
Acoustic
How To Hang Up Acoustic Panels
Published: March 11, 2024
Learn how to properly hang up acoustic panels to improve sound quality in your space. Our step-by-step guide will help you achieve the best acoustic results.
(Many of the links in this article redirect to a specific reviewed product. Your purchase of these products through affiliate links helps to generate commission for AudioLover.com, at no extra cost. Learn more)
Table of Contents
Introduction
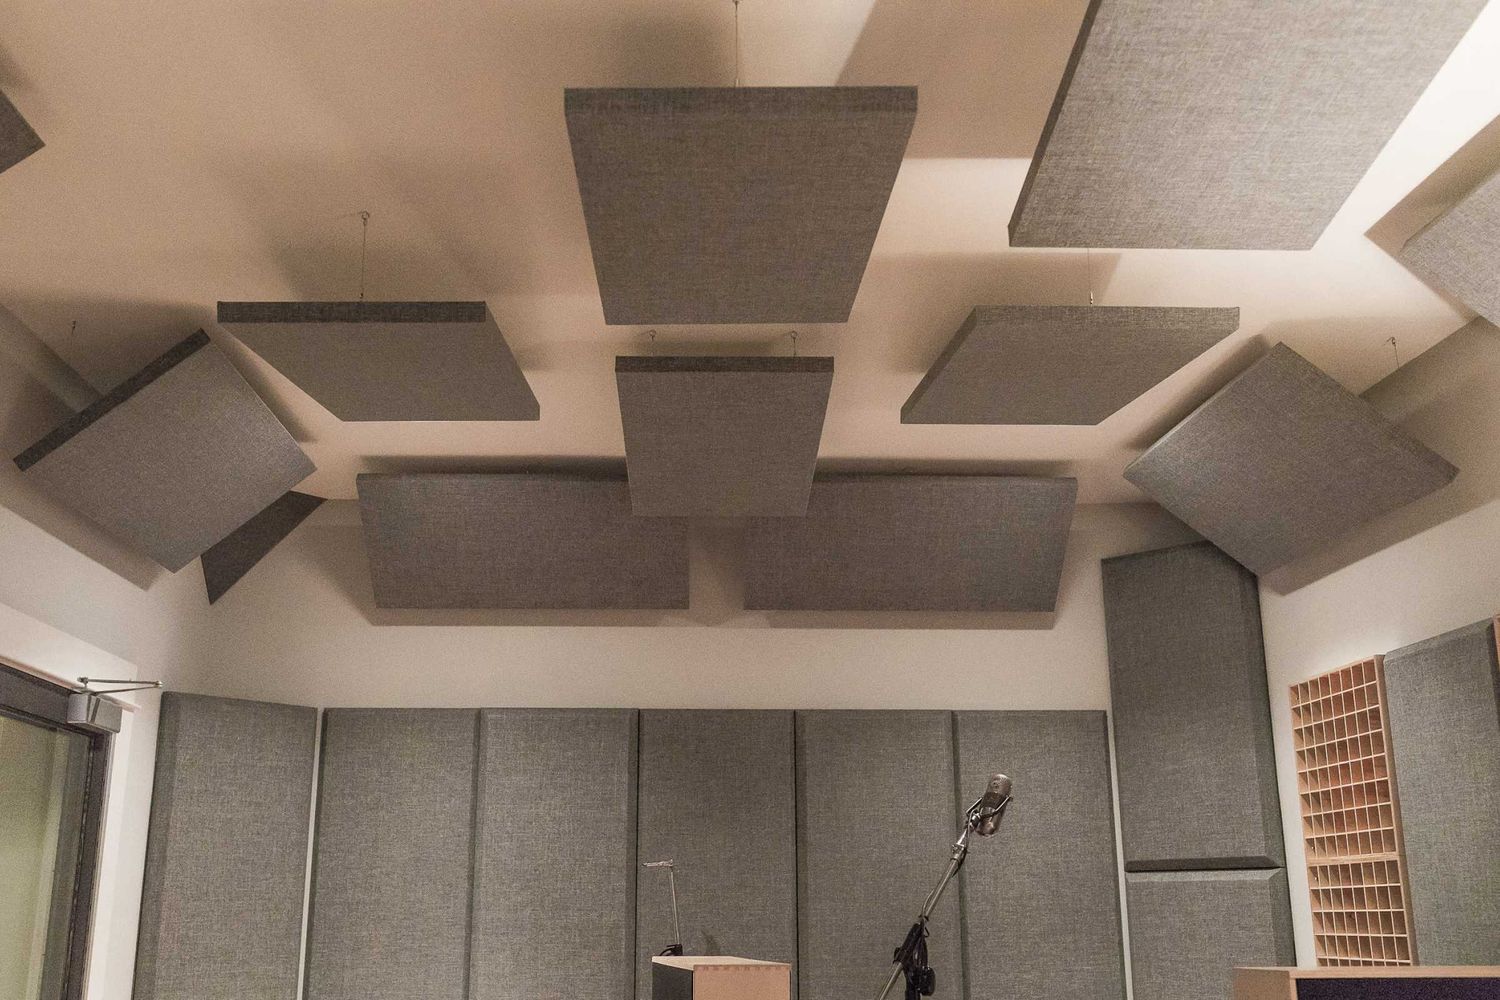
When it comes to creating the perfect acoustic environment, the placement of acoustic panels plays a crucial role. Whether you're setting up a home recording studio, a home theater, or a music practice space, strategically hanging acoustic panels can significantly enhance the sound quality of the room. These panels are designed to absorb sound waves, reduce echoes, and minimize unwanted noise, ultimately improving the overall acoustics of the space.
Properly hanging acoustic panels not only enhances the auditory experience but also adds a touch of aesthetic appeal to the room. The process may seem daunting at first, but with the right guidance and tools, it can be a rewarding and straightforward endeavor. In this comprehensive guide, we will walk you through the step-by-step process of hanging acoustic panels, ensuring that you achieve optimal sound performance and visual harmony in your space.
By following these instructions, you'll be able to transform any room into an acoustically optimized environment, where sound is clear, balanced, and free from unwanted reverberations. So, let's dive into the details and learn how to hang up acoustic panels like a pro.
Step 1: Determine the Placement
Before diving into the physical installation of acoustic panels, it's crucial to determine the optimal placement for these sound-enhancing fixtures. The strategic positioning of acoustic panels can significantly impact their effectiveness in absorbing sound waves and minimizing unwanted noise. Here's a detailed guide on how to determine the ideal placement for your acoustic panels:
-
Assess the Acoustic Needs: Begin by evaluating the acoustic characteristics of the room. Identify areas where sound reflections are prominent and where echoes tend to linger. These are the key areas where acoustic panels can make a substantial difference in improving the overall sound quality.
-
Identify Reflection Points: Stand in various locations within the room and clap your hands or produce a sharp sound. Observe where the sound reflects the most. These reflection points are typically found on bare walls, especially those directly opposite the sound source. These are prime locations for installing acoustic panels to minimize sound reflections.
-
Consider Room Dimensions: Take into account the size and shape of the room. In larger spaces, sound waves have more room to travel and bounce off surfaces, leading to increased reverberation. Focus on placing acoustic panels in areas where sound reflections are likely to be most pronounced, such as along the longer walls or in the corners of the room.
-
Strategic Panel Placement: For optimal results, aim to cover approximately 20-30% of the wall space with acoustic panels. This can be achieved by strategically placing panels at reflection points, first reflection points (the point where sound directly reflects off a surface before reaching the listener), and areas with noticeable echo.
-
Consider Aesthetic Balance: While the primary goal is to improve acoustics, it's also important to consider the visual impact of the panels. Strive to achieve a balance between acoustic functionality and aesthetic appeal. This may involve experimenting with different panel arrangements to find the most visually pleasing and acoustically effective placement.
By carefully assessing the acoustic needs, identifying reflection points, considering room dimensions, and achieving a balance between functionality and aesthetics, you can effectively determine the optimal placement for your acoustic panels. This thoughtful approach sets the stage for the successful installation and utilization of these sound-enhancing fixtures.
Step 2: Gather the Necessary Tools
Before embarking on the installation of acoustic panels, it's essential to gather the appropriate tools and materials to ensure a smooth and efficient process. Having the right tools at your disposal will not only streamline the installation but also contribute to the overall quality and stability of the panel placement. Here's a comprehensive list of the necessary tools and materials you'll need for hanging acoustic panels:
-
Acoustic Panels: The primary component of this project is, of course, the acoustic panels themselves. These panels come in various sizes, shapes, and materials, such as fiberglass, foam, or fabric-wrapped panels. Ensure that you have an adequate number of panels to cover the predetermined reflection points and areas with noticeable echo.
-
Mounting Hardware: Depending on the type of acoustic panels and the surface they will be mounted on, you'll need appropriate mounting hardware. This may include heavy-duty picture-hanging hooks, drywall anchors, or mounting brackets designed specifically for acoustic panels. Be sure to select hardware that can support the weight of the panels and provide a secure attachment to the wall.
-
Measuring Tape: Accurate measurements are crucial for achieving symmetrical and balanced panel placement. A reliable measuring tape will enable you to determine the precise spacing between panels and ensure uniformity in their arrangement.
-
Level: To guarantee that the panels are installed straight and aligned with the horizon, a level is indispensable. This tool will help you avoid crooked or uneven panel placement, contributing to a polished and professional finish.
-
Pencil or Marker: Marking the positions for mounting hardware and panel placement on the wall requires a pencil or marker. These markings serve as guides during the installation process, ensuring that the panels are positioned accurately.
-
Power Drill and Drill Bits: If you're mounting panels on surfaces such as drywall or wood, a power drill and appropriate drill bits are essential for creating pilot holes and securing the mounting hardware in place.
-
Screwdriver or Screw Gun: Depending on the type of mounting hardware, a screwdriver or screw gun will be necessary for attaching the hardware securely to the wall, providing a stable foundation for the panels.
-
Step Stool or Ladder: For installations that require reaching higher wall areas, a step stool or ladder will facilitate safe and convenient access to those areas, ensuring that panels can be mounted at the desired heights.
By ensuring that you have all the necessary tools and materials on hand, you'll be well-prepared to proceed with the installation of acoustic panels. This proactive approach minimizes interruptions during the installation process and contributes to the overall success of the project.
Step 3: Install Mounting Hardware
Once you have determined the optimal placement for your acoustic panels and gathered the necessary tools, the next crucial step is to install the mounting hardware. Proper installation of the mounting hardware is essential for ensuring the stability, security, and longevity of the acoustic panels on the chosen surfaces. Here's a detailed guide on how to install the mounting hardware for your acoustic panels:
-
Select the Mounting Locations: Using the measurements and markings from the previous step, identify the precise locations where the mounting hardware will be installed. Ensure that the locations align with the predetermined placement of the acoustic panels, maintaining uniform spacing and symmetry.
-
Prepare the Mounting Surfaces: If you're mounting the panels on drywall, it's advisable to use drywall anchors to provide a secure attachment. For wooden surfaces, locate the wall studs and mark the positions for the mounting hardware accordingly. Preparing the mounting surfaces ensures that the hardware will be anchored to stable and reliable points.
-
Install the Mounting Hardware: Depending on the type of hardware selected, follow the manufacturer's instructions for installation. This may involve drilling pilot holes for the anchors or brackets and using a screwdriver or screw gun to secure them in place. Use a level to ensure that the hardware is installed straight and aligned with the predetermined positions.
-
Test the Stability: Once the mounting hardware is in place, perform a gentle tug or shake to verify the stability of the attachments. This step is crucial for identifying any potential issues with the hardware before hanging the acoustic panels. Address any instability or loose attachments to prevent future complications.
-
Double-Check the Positions: Before proceeding to hang the acoustic panels, double-check the positions of the installed mounting hardware. Ensure that they align with the markings and measurements, and make any necessary adjustments to guarantee precise alignment.
By meticulously following these steps, you can effectively install the mounting hardware for your acoustic panels, laying a solid foundation for the subsequent hanging process. The attention to detail and precision in this phase contributes to the overall stability and visual appeal of the installed panels, ensuring that they fulfill their acoustic-enhancing purpose with reliability and finesse.
Step 4: Hang the Acoustic Panels
With the mounting hardware securely in place, it's time to proceed with the pivotal step of hanging the acoustic panels. This phase requires precision, attention to detail, and a methodical approach to ensure that the panels are positioned accurately and securely. Here's a comprehensive guide on how to hang the acoustic panels with finesse and effectiveness:
-
Align the Panels: Begin by aligning the first acoustic panel with the installed mounting hardware. Carefully lift the panel and position it against the wall, ensuring that it aligns with the designated mounting points. Take into account any predetermined spacing between panels to maintain uniformity in their arrangement.
-
Secure the Panels: Once the panel is aligned with the mounting hardware, gently press it against the wall to engage the hardware securely. Depending on the type of mounting system, this may involve hanging the panel on hooks, slots, or brackets. Ensure that the panel is stable and level before proceeding to the next one.
-
Maintain Symmetry: If you're hanging multiple panels, maintain symmetry and uniform spacing between each panel. Use a measuring tape to verify the consistent distance between panels, creating a visually balanced and harmonious arrangement. This attention to detail contributes to the overall aesthetic appeal of the installed panels.
-
Check for Stability: After hanging each panel, perform a gentle shake or push to verify its stability and secure attachment. This step is crucial for identifying any potential issues with the panel's mounting and addressing them promptly. Ensuring the stability of each panel is essential for their long-term performance and visual integrity.
-
Repeat the Process: Continue the process of aligning, securing, and verifying the stability of each panel until all designated panels are hung. Maintain a methodical approach and double-check the alignment and stability of each panel as you progress through the installation.
-
Admire the Results: Once all the acoustic panels are securely hung, take a step back and admire the transformation they bring to the room. Notice the visual and acoustic impact they have, and appreciate the enhanced ambiance and sound quality they contribute to the space.
By following these detailed steps, you can effectively hang the acoustic panels with precision and finesse, ensuring that they fulfill their acoustic-enhancing purpose while adding a touch of visual elegance to the room. This phase marks the culmination of the installation process, resulting in a space that is acoustically optimized and visually appealing.
Step 5: Adjust and Secure the Panels
After hanging the acoustic panels, the final step involves adjusting and securing the panels to ensure optimal performance and long-term stability. This phase is critical for fine-tuning the panel placement and addressing any potential issues that may affect their functionality. Here's a detailed guide on how to adjust and secure the panels with precision and care:
-
Fine-Tune the Alignment: Take a moment to assess the alignment of each panel. Ensure that they are level and aligned with each other, creating a visually cohesive and balanced arrangement. Use a level to make any necessary adjustments, guaranteeing that the panels are perfectly positioned.
-
Evaluate Sound Absorption: Once the panels are in place, assess their impact on sound absorption. Clap your hands or produce sound within the room and observe how the panels affect the reverberation and echo. Fine-tune the positioning of any panels that may require slight adjustments to optimize their sound-absorbing capabilities.
-
Inspect for Gaps or Misalignment: Carefully inspect the perimeter of each panel for any gaps or misalignment with the mounting hardware. Address any discrepancies by gently adjusting the panels to ensure a snug and uniform fit against the wall. This meticulous attention to detail contributes to the overall effectiveness of the panels in absorbing sound waves.
-
Secure the Panels: Once the panels are adjusted to perfection, take the necessary steps to secure them in place. Double-check the stability of the mounting hardware and ensure that the panels are firmly attached to the wall. This may involve tightening screws, adjusting brackets, or reinforcing the attachment points to guarantee long-term stability.
-
Consider Aesthetic Harmony: While focusing on functionality, take a moment to evaluate the visual harmony of the installed panels. Ensure that they contribute to the overall aesthetic appeal of the room, complementing the existing decor and architectural elements. Make any final adjustments to achieve a visually pleasing and balanced arrangement.
-
Test for Stability: Perform a final test to verify the stability of each panel. Apply gentle pressure and ensure that the panels remain securely attached without any wobbling or movement. This step is crucial for confirming that the panels are ready to fulfill their acoustic-enhancing role with reliability and durability.
By meticulously adjusting and securing the panels, you can ensure that they not only enhance the acoustics of the room but also contribute to its visual appeal. This phase marks the completion of the installation process, leaving you with a space that is optimized for superior sound quality and aesthetic elegance.
Conclusion
In conclusion, the process of hanging acoustic panels is a transformative endeavor that goes beyond mere installation. It involves a thoughtful and strategic approach to optimizing the acoustics of a space while enhancing its visual appeal. By following the step-by-step guide outlined in this comprehensive tutorial, you have gained the knowledge and insight needed to embark on this rewarding journey with confidence and precision.
The meticulous process of determining the optimal placement for acoustic panels sets the stage for a purposeful installation. By assessing the acoustic needs, identifying reflection points, and considering room dimensions, you have gained a deeper understanding of how strategic panel placement can significantly impact the sound quality of a room. This thoughtful approach ensures that the panels are positioned where they can make the most substantial difference in absorbing sound waves and minimizing unwanted noise.
Furthermore, the emphasis on gathering the necessary tools and materials underscores the importance of preparedness and attention to detail. By ensuring that you have the essential tools, such as measuring tape, level, and mounting hardware, at your disposal, you are well-equipped to execute the installation with efficiency and precision. This proactive approach minimizes interruptions and contributes to the overall quality and stability of the panel placement.
The installation of mounting hardware and the subsequent hanging of acoustic panels require a methodical and meticulous approach. By carefully aligning, securing, and adjusting the panels, you have not only enhanced the sound quality of the room but also added a touch of visual elegance. The symmetrical arrangement and precise alignment of the panels contribute to a visually cohesive and balanced aesthetic, elevating the overall ambiance of the space.
As you stand back and admire the transformation brought about by the installed acoustic panels, you can take pride in knowing that you have successfully optimized the acoustics of the room while creating a visually appealing environment. The careful attention to detail, from the initial placement assessment to the final adjustments, ensures that the panels fulfill their acoustic-enhancing purpose with reliability and finesse.
In essence, the process of hanging acoustic panels is a harmonious blend of art and science, where the pursuit of superior sound quality converges with the creation of a visually captivating space. By embracing this process, you have not only enhanced the acoustics of the room but also added a touch of sophistication and elegance to its ambiance. This transformative journey culminates in a space that resonates with clarity, balance, and aesthetic harmony, enriching the auditory and visual experiences of all who inhabit it.