Home>Production & Technology>Audiophile>How To Make An Audiophile Speaker Cable
Audiophile
How To Make An Audiophile Speaker Cable
Modified: January 22, 2024
Learn how to create the perfect audiophile speaker cable for optimal sound quality. Enhance your audio experience with our step-by-step guide.
(Many of the links in this article redirect to a specific reviewed product. Your purchase of these products through affiliate links helps to generate commission for AudioLover.com, at no extra cost. Learn more)
Table of Contents
Introduction
When it comes to achieving the best sound quality in your audio system, every detail matters. Audiophiles are constantly seeking ways to improve the listening experience, and one often overlooked factor is the speaker cables. While they may seem like a simple component, the right speaker cables can make a noticeable difference in the clarity, dynamics, and overall performance of your audio setup.
In this article, we will explore the world of audiophile speaker cables and guide you in making informed decisions when selecting, preparing, and assembling your own cables. Whether you’re a seasoned audiophile or new to the world of high-end audio, this article will provide valuable insights on how to make an audiophile speaker cable that will elevate your music listening experience.
Before we dive into the specifics of creating an audiophile speaker cable, let’s briefly discuss what makes these cables different from regular ones. Audiophile speaker cables are designed to minimize signal loss, interference, and distortion, ensuring that the audio signal from your amplifier reaches your speakers in the most accurate and unaltered manner possible.
Regular speaker cables often use lower-quality materials and construction, which can lead to degradation of the audio signal. Audiophile speaker cables, on the other hand, prioritize high-quality materials, such as oxygen-free copper or silver conductors, and employ superior construction techniques to minimize signal degradation.
While it’s true that some people believe expensive speaker cables provide significant sonic improvements, it’s important to note that you don’t necessarily have to break the bank to achieve great results. With some knowledge and careful selection, you can create an audiophile speaker cable that rivals high-end commercial options without the hefty price tag.
In the following sections, we will cover the key factors to consider when choosing the right wire and connectors, as well as the steps involved in preparing and assembling your own audiophile speaker cable. So, let’s embark on this journey to optimize your audio system and elevate your listening pleasure to new heights!
Understanding Audiophile Speaker Cables
Before we delve into the process of making your own audiophile speaker cables, it’s essential to have a solid understanding of what sets these cables apart from regular ones. By grasping the key principles behind their design and construction, you will be better equipped to make informed decisions and achieve optimal audio performance in your system.
One of the primary goals of audiophile speaker cables is to minimize resistance and signal loss. Resistance, measured in ohms, can affect the flow of electrical current through the cable. Lower resistance allows for a more efficient transfer of signal from the amplifier to the speakers, resulting in improved detail and dynamics.
In addition to resistance, capacitance and inductance are two other important factors to consider. Capacitance refers to the ability of a cable to store electrical energy. Excessive capacitance can cause high-frequency loss and a dulling of the sound. Inductance, on the other hand, is the cable’s ability to resist changes in electrical current. High inductance can lead to signal distortion and a loss of clarity.
When it comes to the conductors, audiophile speaker cables typically use high-quality materials such as oxygen-free copper (OFC) or silver. These materials offer superior conductivity and minimize signal degradation. OFC is preferred for its excellent electrical conductivity and affordability, while silver provides even better conductivity but comes at a higher cost.
Furthermore, the gauge of the wire is an essential consideration. The gauge refers to the thickness of the wire, with lower gauge numbers indicating a thicker wire. Thicker wires have lower resistance, allowing for better signal transmission. However, it’s important to choose a gauge that matches the power requirements of your speakers and amplifier. Using excessively thick wire may not yield any significant benefits and can be unnecessarily expensive.
Lastly, the shielding of the cable plays a crucial role in reducing interference. Electromagnetic interference (EMI) and radio frequency interference (RFI) can degrade the audio signal, resulting in audible noise or distortion. Audiophile speaker cables often incorporate shielding, such as a braided or foil shield, to protect against these interferences.
By understanding the principles behind audiophile speaker cables, you can make well-informed decisions when selecting the wire and connectors for your cable. In the next section, we will delve into the process of choosing the right wire for your audiophile speaker cable.
Choosing the Right Wire
When it comes to making an audiophile speaker cable, one of the most crucial decisions you’ll have to make is selecting the right wire. The wire you choose will directly impact the performance, sound quality, and durability of your cable.
First and foremost, it’s important to choose a wire that is specifically designed for audio applications. Regular electrical wire may not have the necessary characteristics to deliver optimal audio performance. Look for wire that is labeled as “speaker wire” or “audio cable.”
The material of the wire is a critical factor to consider. Copper is the most common and widely used material for speaker cables. It offers excellent electrical conductivity and is more affordable compared to other options. Oxygen-free copper (OFC) is highly recommended as it has been refined to remove impurities, resulting in even better conductivity. Silver is another option, known for its superior conductivity, but it is significantly more expensive than copper.
Next, consider the gauge of the wire. The gauge refers to the thickness of the wire and is represented by a numerical value. The lower the gauge number, the thicker the wire. Thicker wires have lower resistance and allow for better signal transfer, particularly over longer distances. However, it’s important to choose a gauge that matches the power requirements of your speakers and amplifier. Using excessively thick wire can be unnecessary and costly.
Another crucial aspect to consider is the construction of the wire. Look for a wire that is multi-stranded rather than solid-core. Multi-stranded wire offers better flexibility, making it easier to work with and route through tight spaces. It also provides better conductivity and reduces the skin effect, where high-frequency signals tend to travel more towards the surface of the wire.
Consider the insulation or jacketing material of the wire as well. The insulation should be durable, flexible, and resistant to wear and tear. Additionally, it should have good dielectric properties to prevent signal loss or interference. PVC (Polyvinyl Chloride) is a common insulation material that provides these characteristics.
Lastly, keep in mind the length of wire you’ll need for your setup. Measure the distance between your amplifier and speakers to determine the appropriate length. Ensure that you have enough slack for proper cable management without excessive coiling or stretching.
In summary, when choosing the right wire for your audiophile speaker cable, look for high-quality materials such as oxygen-free copper or silver. Consider the gauge, construction, insulation, and the length required for your specific setup. Taking these factors into account will help you create a speaker cable that optimizes audio performance and enhances your listening experience.
Selecting Connectors
When it comes to making your own audiophile speaker cables, selecting the right connectors is crucial. The connectors play a significant role in ensuring a secure and reliable connection between your cables and your amplifier and speakers. They also have an impact on the overall performance and durability of your audio system.
There are various types of connectors available, each with its own advantages and considerations. Let’s explore some of the common connectors used in audiophile speaker cables:
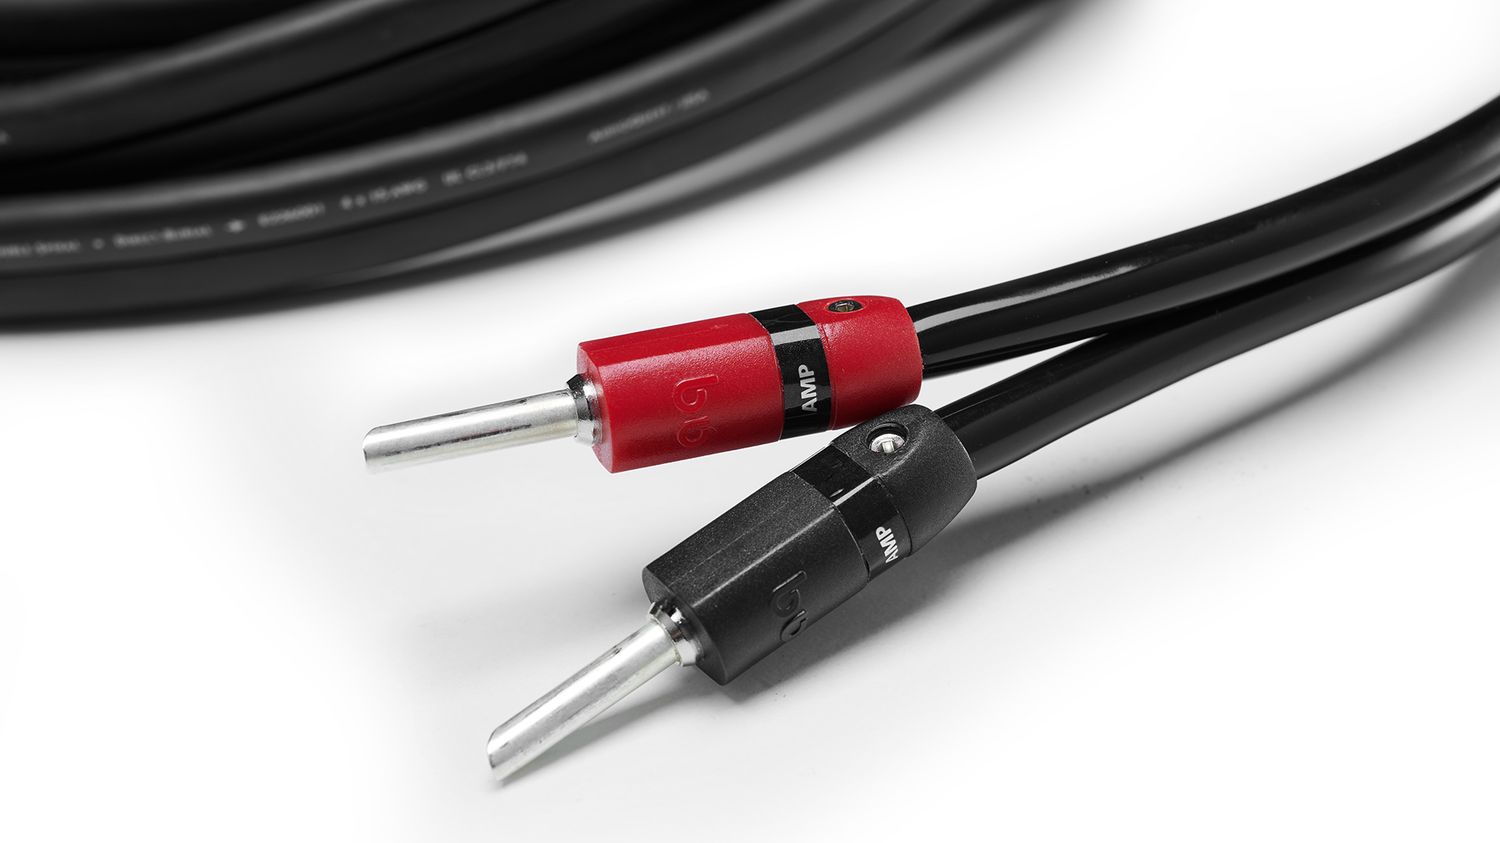
Banana Plugs: Banana plugs are one of the most popular and widely used connectors for speaker cables. They provide a secure and tight connection, making them easy to install and remove. Banana plugs also help to minimize signal loss and improve conductivity. They are compatible with most binding posts and offer a clean and professional look.
Spade Connectors: Spade connectors feature a flat, U-shaped metal terminal that can be crimped or soldered to the wire. They offer excellent surface contact and are ideal for speakers and amplifiers with binding posts that accept spade connectors. Spade connectors provide a reliable and low-resistance connection, ensuring optimal signal transfer.
Pins: Pins, also known as pin connectors or hook connectors, are cylindrical metal connectors that can be inserted into the binding posts of speakers and amplifiers. They are easy to install and offer a secure connection. However, pins may not provide as snug of a fit as other connector types, which can result in a slightly higher resistance and potential signal loss.
Speakon Connectors: Speakon connectors are commonly found in professional audio settings. They feature a twist-lock mechanism, ensuring a secure and reliable connection. Speakon connectors are capable of handling high-power signals and are well-suited for larger speaker systems and live sound applications.
When selecting connectors for your audiophile speaker cables, there are a few key factors to consider. First and foremost is compatibility. Ensure that the connectors you choose are compatible with the terminals on your amplifier and speakers. It’s also important to select connectors made from high-quality materials, such as gold-plated brass or copper, to ensure optimal conductivity and durability.
Another factor to consider is the ease of installation. Choose connectors that are easy to terminate and secure to the wire. Some connectors require crimping, soldering, or screwing, so consider your comfort level with these installation methods.
Lastly, consider the aesthetic appeal. While not directly related to performance, the appearance of the connectors can contribute to an overall clean and professional-looking audio system. Choose connectors that provide a tidy and visually pleasing look.
By selecting the right connectors, you can ensure a reliable and high-performance connection for your audiophile speaker cables. Take into account compatibility, quality of materials, ease of installation, and aesthetics to make the best choice for your audio system.
Preparing the Wire
Once you have chosen the right wire for your audiophile speaker cables, the next step is to properly prepare the wire before assembling the cable. Proper preparation ensures a clean and secure connection, minimizing signal loss and interference. Here are some essential steps to follow when preparing the wire:
1. Measure and cut: Start by measuring the required length of wire for your specific setup. Use a wire cutter or sharp scissors to cut the wire to the desired length. Make sure to leave a little extra length for any adjustments or cable management.
2. Strip the insulation: Using wire strippers, carefully strip off about half an inch of insulation from the ends of each wire. Take care not to cut into the conductors while stripping the insulation. Ensure that the exposed conductors are clean and free from any frayed strands or debris.
3. Twist the strands: For multi-stranded wire, twist the individual strands together to create a solid and compact conductor. This step helps to ensure a secure connection and prevents any loose strands from causing signal degradation.
4. Tin the conductors (optional): Tinning involves applying a thin layer of solder to the exposed conductors. This step can help improve conductivity and reduce the chances of corrosion or oxidation over time. If you choose to tin the conductors, use a soldering iron and high-quality solder to apply a smooth and even coating.
5. Apply heat shrink tubing (optional): Heat shrink tubing can provide additional protection and insulation for the exposed conductors. Slide a piece of heat shrink tubing over each wire, ensuring that it covers the exposed conductor. Use a heat gun or a lighter to heat the tubing, causing it to shrink and create a tight seal around the wire.
6. Label the wires (optional): To keep track of polarity or make future modifications easier, consider labeling or color-coding the wires. You can use adhesive labels, color markers, or different color heat shrink tubing to distinguish between positive and negative wires.
Properly preparing the wire ensures a clean and reliable connection, benefiting the overall performance of your audiophile speaker cables. Take your time and follow these steps meticulously to achieve the best results. Once the wire is prepared, you’re ready to move on to assembling your audiophile speaker cables.
Assembling the Cable
Now that you have prepared the wire, it’s time to assemble your audiophile speaker cable. This process involves connecting the wire to the chosen connectors to create a secure and reliable audio cable.
Follow these steps to assemble your audiophile speaker cable:
1. Select the connectors: Choose the appropriate connectors for your wire and audio system. Consider the compatibility, quality, and ease of installation of the connectors.
2. Terminate the connectors: Depending on the type of connectors you have chosen, you may need to crimp, solder, or screw them onto the prepared wire. Follow the manufacturer’s instructions to ensure a proper and secure connection.
3. Connect the wire to the connectors: Slide the stripped and prepared wire into the connector, ensuring it is inserted fully and making proper contact with the metal terminal. For banana plugs or spade connectors, tighten any screws or locking mechanisms to secure the wire in place.
4. Test the connections: Once the wire is connected to the connectors, perform a continuity test to ensure there are no loose connections or short circuits. Use a multimeter to check for a continuous connection between the conductors and the connectors.
5. Repeat for the other end: Repeat the above steps to assemble the connector on the other end of the wire. Ensure consistency in the termination process for both ends to maintain a balanced and reliable connection.
6. Organize and manage the cable: After assembling both ends of the speaker cable, take the time to organize and manage the cable. Use cable ties, wire loom, or other cable management solutions to keep the cable neat and prevent tangling or accidental damage.
By carefully following these steps, you will have assembled your own high-quality audiophile speaker cable. Remember to take your time and double-check each connection to ensure a proper and secure assembly. Good cable management will not only keep your audio system tidy but also help minimize the chances of signal degradation or interference.
With your cable assembled, it’s time to put it to the test and fine-tune your audio system for optimal sound quality. Let’s explore the testing and fine-tuning process in the next section.
Testing and Fine-tuning
After assembling your audiophile speaker cable, it’s essential to test and fine-tune your audio system to ensure optimal performance and sound quality. This process ensures that your cables are functioning correctly and allows you to make any necessary adjustments for the best listening experience. Here are the steps to follow:
1. Initial testing: Connect your newly assembled speaker cables to your amplifier and speakers. Play a variety of songs that cover different genres and listen carefully for any distortion, noise, or imbalance in the sound. Make note of any issues you hear during this initial testing phase.
2. Check connections: Verify that all the connections are secure and tight. Loose connections can result in poor signal transfer and affect the overall sound quality. If you notice any loose connections, re-terminate the affected end of the cable and ensure a proper connection.
3. Balance and phase check: Use a balance and phase test track or software to ensure that both speakers are balanced and in phase. Adjust the balance control on your amplifier or receiver to make sure the sound is evenly distributed between the left and right speakers. Verify that the phase of both speakers is consistent to avoid any cancellation or distortion in the audio signal.
4. Fine-tuning: Use an equalizer or tone controls to fine-tune the sound to your personal preference. Adjust the frequency response, bass, treble, and other audio parameters to achieve the desired tonal balance. Experiment with different settings and listen for any improvements in clarity, detail, and overall sound accuracy.
5. A/B comparison: If possible, conduct an A/B comparison between your new audiophile speaker cables and any previously used cables. Alternate between the two cables while listening to the same music or audio tracks. Pay attention to any differences in sound quality, dynamics, and overall musicality. This comparison will help you assess the improvements brought about by your new cables.
6. Repeat if necessary: If you encounter any issues during the testing and fine-tuning process, revisit the previous steps. Check for any potential sources of interference, such as nearby electronics or improperly grounded equipment. Make necessary adjustments or seek professional assistance if needed.
Testing and fine-tuning your audio system after assembling your speaker cables is a critical step towards achieving the best sound quality. By carefully listening, checking connections, balancing the sound, and making necessary adjustments, you can optimize your system’s performance and fully enjoy the benefits of your newly crafted audiophile speaker cables.
With the testing and fine-tuning process complete, you’re now ready to sit back, relax, and immerse yourself in the breathtaking sound quality that your audiophile speaker cables have brought to your audio system.
Conclusion
Congratulations! You have now completed the journey of creating your own audiophile speaker cables. Through understanding the principles of audiophile speaker cables, choosing the right wire and connectors, preparing the wire, assembling the cable, and testing and fine-tuning your audio system, you have taken significant steps toward optimizing your sound quality and enhancing your listening experience.
By carefully selecting high-quality materials, such as oxygen-free copper or silver wire, and choosing connectors that provide secure and reliable connections, you have ensured minimal signal loss and interference. The proper preparation and assembly of the cables have further enhanced the performance and durability of your audio system.
Remember that the process of making audiophile speaker cables is not just about the technical aspects, but also about the joy and satisfaction of creating something with your own hands. Building your own cables allows you to customize them to your liking, while also saving money compared to high-end commercial options.
With your newly assembled speaker cables, take the time to appreciate the subtle nuances, improved clarity, and enhanced dynamics that they bring to your favorite music and movies. Fine-tune your audio system to achieve the best sound balance, and continue to explore and enjoy the world of high-quality audio reproduction.
Keep in mind that audio preferences can vary from person to person, and there is no one-size-fits-all solution. Experiment with different wire gauges, connectors, and even cable lengths to further refine your setup. Trust your ears and make adjustments based on your personal listening preferences.
Lastly, don’t forget to share your knowledge and experience with other audio enthusiasts. Engage in discussions, participate in forums, and contribute to the audiophile community. Sharing your insights can not only help others on their journey to better sound quality, but also foster a sense of community and appreciation for the art of audio reproduction.
Enjoy your immersive and high-fidelity listening experience with your customized audiophile speaker cables. Embrace the beauty of music as it was meant to be heard and let your passion for audio continue to grow.