Home>Production & Technology>Audiophile>Delta Audiophile 192 How To Connect Tp Tor Speakers
Audiophile
Delta Audiophile 192 How To Connect Tp Tor Speakers
Modified: February 18, 2024
Learn how to connect your Delta Audiophile 192 to tor speakers and enhance your audio experience. Discover the step-by-step guide for audiophiles.
(Many of the links in this article redirect to a specific reviewed product. Your purchase of these products through affiliate links helps to generate commission for AudioLover.com, at no extra cost. Learn more)
Table of Contents
Introduction
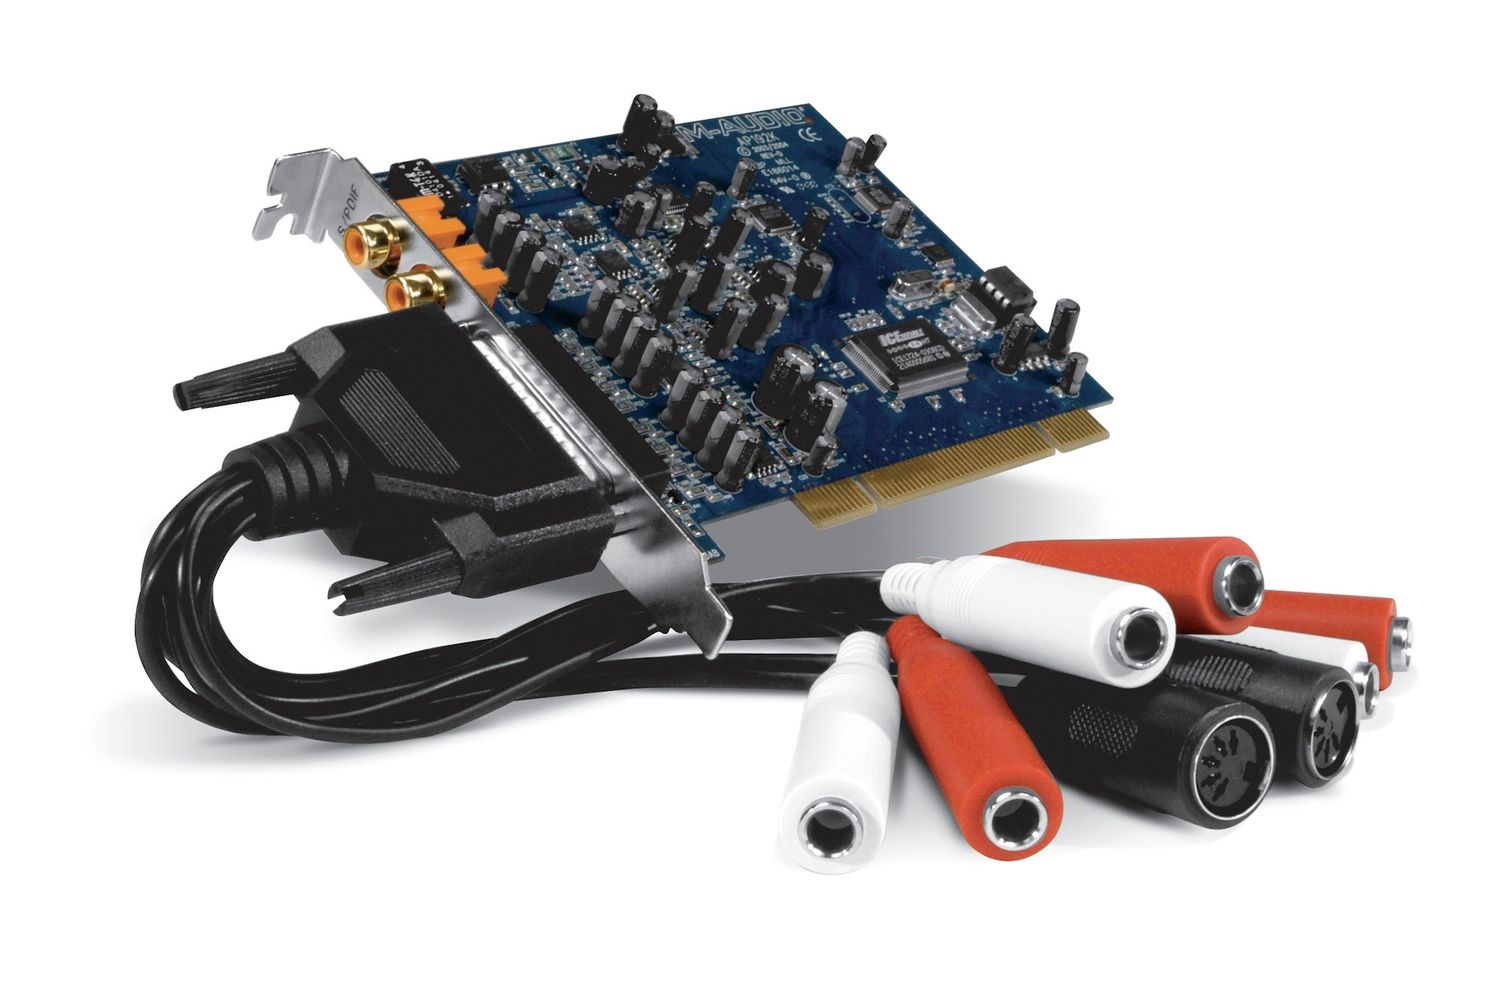
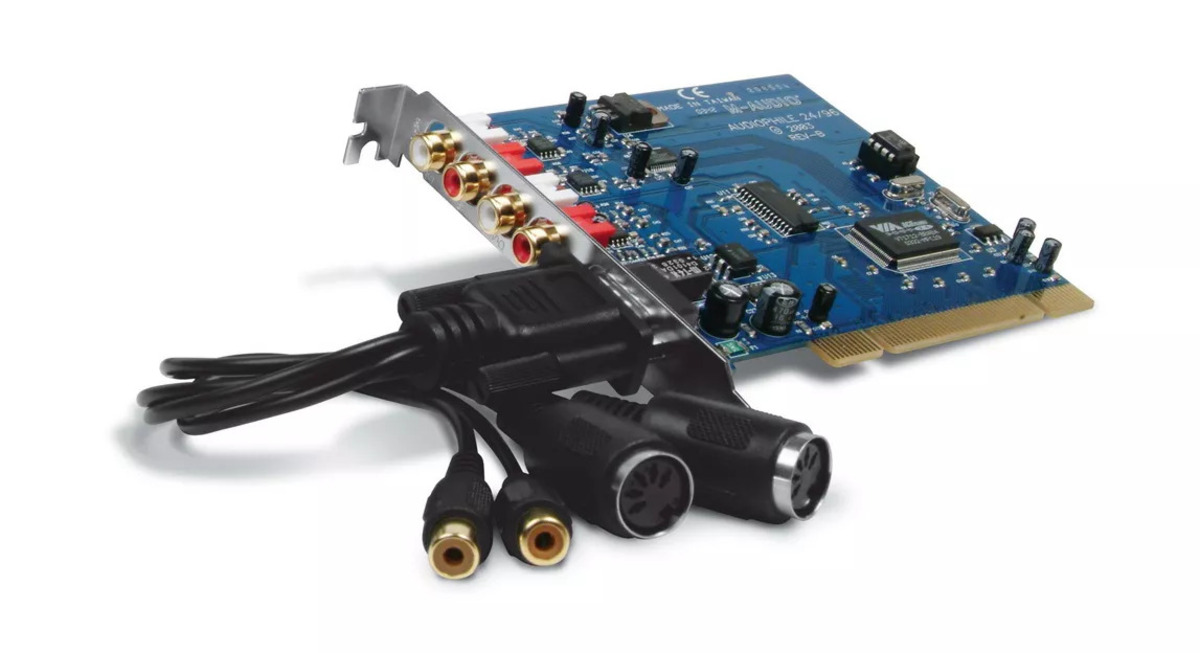
So you’ve got your new Delta Audiophile 192 sound card and a pair of top-tier speakers ready to deliver pristine audio quality. Now it’s time to connect those speakers to your sound card to embark on an immersive audiophile experience.
The Delta Audiophile 192 sound card is well-known among audiophiles for its exceptional sound clarity, superb dynamic range, and low latency. When paired with high-quality speakers, it can truly elevate your audio listening experience to new heights.
In this article, we will guide you through the process of connecting your speakers to the Delta Audiophile 192 sound card. Whether you’re a seasoned audiophile or a beginner looking to delve into the world of high-fidelity audio, this step-by-step guide will ensure that you make the right connections and optimize the settings for optimal audio performance.
Before we dive into the details, it’s important to note that the steps outlined here are specifically for connecting passive speakers to the Delta Audiophile 192 sound card. If you’re using active speakers or a different sound card model, the process may vary.
Now, let’s get started and configure your audio setup to enjoy crystal-clear sound reproduction that will make you feel like you’re sitting in the front row of your favorite concert!
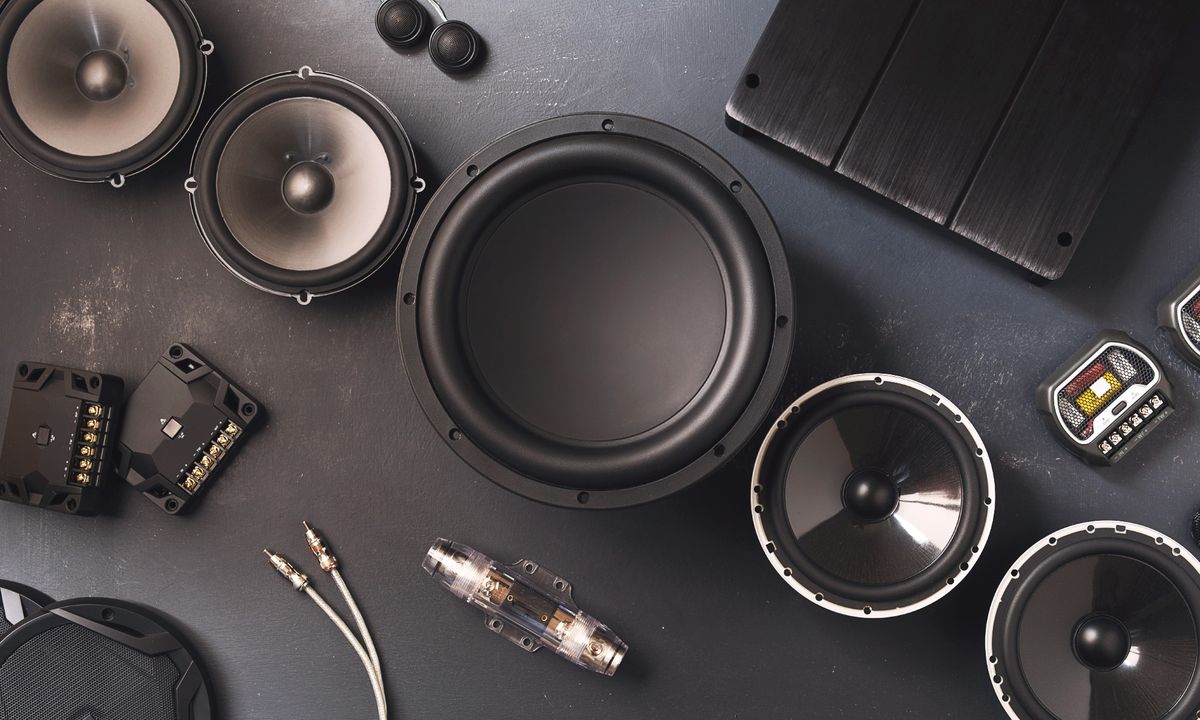
Step 1: Check the Speaker Connections
Before connecting your speakers to the Delta Audiophile 192 sound card, it’s crucial to ensure that your speakers are in good working condition and have the necessary connections.
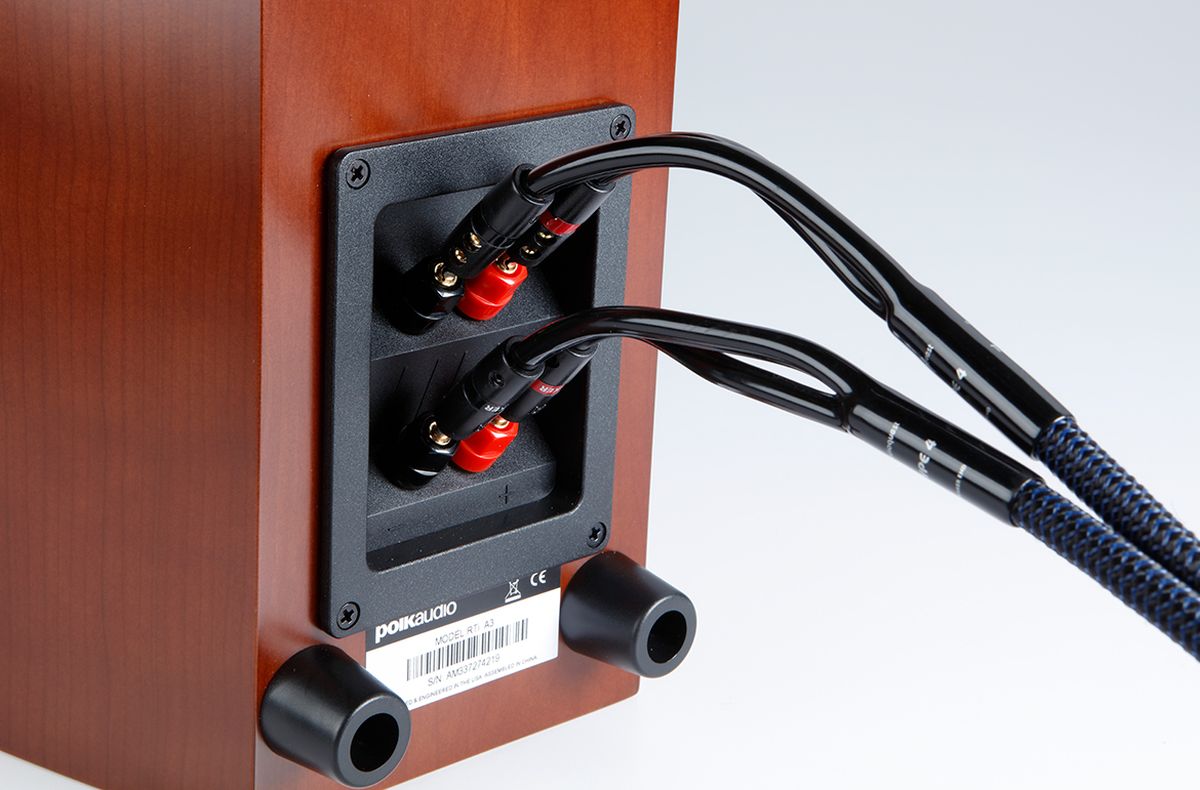
Begin by inspecting the back of each speaker. Look for the speaker terminals, which are usually labeled as “positive” (+) and “negative” (-). These terminals are where you will connect the speaker wires.
Make sure that the speaker wires are securely connected to the terminals on each speaker. Ensure that there are no loose connections or frayed wires, as this can affect the audio quality and potentially damage your equipment.
If your speakers have banana plug terminals, ensure that the banana plugs are securely inserted into the terminals. If your speakers have binding posts, make sure that the wires are tightly threaded into the posts and that they are properly tightened.
If you’re using bare wire connections, double-check that the wires are stripped of insulation and that they are inserted into the appropriate terminals, with the positive wire connected to the positive terminal and the negative wire connected to the negative terminal.
It’s also important to note the impedance rating of your speakers. The impedance, measured in ohms, indicates how much electrical resistance your speakers present to the amplifier. Ensure that the impedance of your speakers matches or is within the acceptable range specified by the Delta Audiophile 192 sound card.
Once you have confirmed that your speakers are in good working condition and the speaker connections are secure, you are ready to move on to the next step of connecting them to the Delta Audiophile 192 sound card.
Step 2: Connect the Speakers to the Amplifier
Now that you have verified the speaker connections, it’s time to connect your speakers to the Delta Audiophile 192 sound card’s amplifier output.
Start by locating the speaker output connectors on the back of the sound card. These connectors are usually color-coded, with red indicating the right channel and white or black representing the left channel.
Take the speaker wire from the right speaker and connect it to the corresponding red speaker output connector on the sound card. Ensure a secure connection by firmly inserting the wire into the connector. Repeat this process for the left speaker, connecting it to the appropriate white or black connector.
If you are using banana plugs, simply insert the banana plugs into the corresponding speaker output connectors. For bare wire connections, strip a small portion of insulation from the end of each wire, twist the exposed copper strands, and insert them into the appropriate connectors on the sound card.
Once both speakers are connected to the sound card, gently tug on the wires to ensure they are firmly in place. A loose connection can result in distorted sound or loss of audio signal.
Additionally, be mindful of the positioning of the speakers. Ideally, they should be placed in an optimal listening position, such as forming an equilateral triangle with the listening position. This ensures the best stereo imaging and soundstage.
Now that the speakers are connected to the Delta Audiophile 192 sound card, we can move on to the next step of adjusting the amplifier settings.
Step 3: Adjust the Amplifier Settings
Once your speakers are successfully connected to the Delta Audiophile 192 sound card, it’s time to optimize the amplifier settings to enhance your audio playback experience.
Start by turning on your amplifier and accessing the control panel or software interface of the Delta Audiophile 192 sound card. Here, you will find various settings and options to customize your audio output.
Begin by adjusting the volume control. Gradually increase the volume to your desired level, ensuring that it does not exceed the limits of your speakers. It’s best to start with a low volume and gradually increase it while playing some music or audio to avoid any sudden and potentially damaging bursts of sound.
Next, take a look at the equalizer settings. The equalizer allows you to fine-tune the audio frequencies to your liking. Experiment with boosting or reducing certain frequencies to achieve the desired tonal balance and audio accuracy. Keep in mind that your personal preferences and the characteristics of your speakers will influence the optimal settings.
Additionally, explore any built-in sound enhancement features that the Delta Audiophile 192 sound card offers. These may include options such as virtual surround sound, bass enhancement, or room correction. Adjust these settings according to your preferences and the acoustic environment in which your speakers are placed.
Furthermore, consider enabling any additional audio enhancement technologies or codecs that are supported by the sound card. These technologies can help improve audio quality, reduce distortion, and enhance the overall listening experience.
Remember to save your desired settings as presets, as they can come in handy for different types of media or listening scenarios. This way, you can easily switch between presets to suit your preferences and the audio content you are enjoying.
Take the time to experiment and fine-tune the amplifier settings until you achieve the desired audio quality and clarity. Every listening environment and personal preference is unique, so what sounds great to one person may not be ideal for another.
With the amplifier settings adjusted to your liking, it’s time to move on to the final step of testing the speaker connection.
Step 4: Test the Speaker Connection
Now that you have connected your speakers, adjusted the amplifier settings, and fine-tuned the audio output, it’s crucial to test the speaker connection to ensure everything is working as intended.
Start by playing a variety of audio content through your Delta Audiophile 192 sound card. This can include music, movies, podcasts, or any other media that will allow you to evaluate the sound quality and performance of your speakers.
Pay close attention to the following aspects while testing the speaker connection:
- Audio Balance: Ensure that the sound is evenly distributed between the left and right channels. Adjust the balance control if necessary to achieve a balanced audio output.
- Channel Separation: Listen for a clear separation of sound between the left and right speakers. This will give you an immersive stereo experience that accurately reproduces the audio track.
- Frequency Response: Test the ability of your speakers to reproduce different frequencies. Pay attention to the low, mid, and high-frequency ranges to ensure that there is no distortion or loss of detail.
- Bass Performance: Evaluate the bass response of your speakers. Ensure that low-frequency sounds are reproduced accurately and without any muddiness or excessive booming.
- Dynamic Range: Listen for the difference between soft and loud passages in the audio. A good speaker connection should allow for clear and impactful sound reproduction across the entire dynamic range.
Make any necessary adjustments to the amplifier settings during the testing process to optimize the audio playback according to your preferences and the characteristics of your speakers.
If you notice any issues with the speaker connection, such as distorted sound, uneven balance, or any other abnormalities, go back and double-check the speaker connections, amplifier settings, and audio sources. Sometimes, a simple readjustment or troubleshooting step can resolve the issue.
Once you are satisfied with the sound quality and performance of your speakers, you can sit back, relax, and enjoy the immersive audio experience that your Delta Audiophile 192 sound card and high-quality speakers offer.
Congratulations! You have successfully connected and tested your speakers with the Delta Audiophile 192 sound card, setting the stage for an exceptional audiophile journey.
Conclusion
In conclusion, connecting your speakers to the Delta Audiophile 192 sound card is a crucial step in achieving the ultimate audio experience. By following the steps outlined in this guide, you can ensure a seamless and optimized connection that will deliver exceptional sound quality.
Remember to check the speaker connections to ensure they are secure and in good working condition. Pay attention to the impedance rating of your speakers to ensure compatibility with the Delta Audiophile 192 sound card.
Next, connect your speakers to the amplifier output of the sound card, making sure to match the appropriate channels and maintain a secure connection. Consider the placement of your speakers for optimal stereo imaging and soundstage.
Adjust the amplifier settings to fine-tune the audio output according to your preferences. Experiment with volume levels, equalizer settings, and sound enhancement features to achieve a personalized and immersive listening experience.
Finally, test the speaker connection by playing various audio content and evaluating different aspects such as audio balance, channel separation, frequency response, bass performance, and dynamic range. Make any necessary adjustments to optimize the sound quality and performance of your speakers.
By following these steps, you are well on your way to enjoying remarkable audio fidelity and experiencing music, movies, and other media in a whole new way.
So go ahead, connect your speakers to the Delta Audiophile 192 sound card, and indulge in the exquisite world of audiophilia. Sit back, relax, and let the captivating sound envelop you, bringing your favorite audio content to life like never before.