Home>Production & Technology>MIDI>How To Link Drums To MIDI Pad

MIDI
How To Link Drums To MIDI Pad
Modified: March 9, 2024
Learn how to easily link your drums to a MIDI pad and unlock a world of creative possibilities. Discover the power of MIDI integration today.
(Many of the links in this article redirect to a specific reviewed product. Your purchase of these products through affiliate links helps to generate commission for AudioLover.com, at no extra cost. Learn more)
Table of Contents
Introduction
Linking drums to a MIDI pad opens up a world of creative possibilities for music producers and enthusiasts alike. By connecting a MIDI pad to your computer and configuring it with music production software, you can seamlessly integrate the expressive qualities of drumming into your digital compositions. Whether you're a seasoned musician or an aspiring beatmaker, harnessing the power of MIDI pads can elevate your music production experience to new heights.
In this comprehensive guide, we will explore the step-by-step process of linking drums to a MIDI pad, empowering you to unleash your rhythmic creativity. From gathering the necessary equipment to configuring the MIDI pad within your preferred music production software, each stage of the process will be carefully outlined to ensure a smooth and efficient setup.
By the end of this guide, you will have the knowledge and confidence to seamlessly integrate your drumming skills with the versatile capabilities of MIDI technology. Let's embark on this exciting journey to bridge the physicality of drumming with the boundless potential of digital music production.
Step 1: Gather the necessary equipment
Before delving into the process of linking drums to a MIDI pad, it is essential to gather the requisite equipment to ensure a seamless setup. The following items are crucial for this endeavor:
-
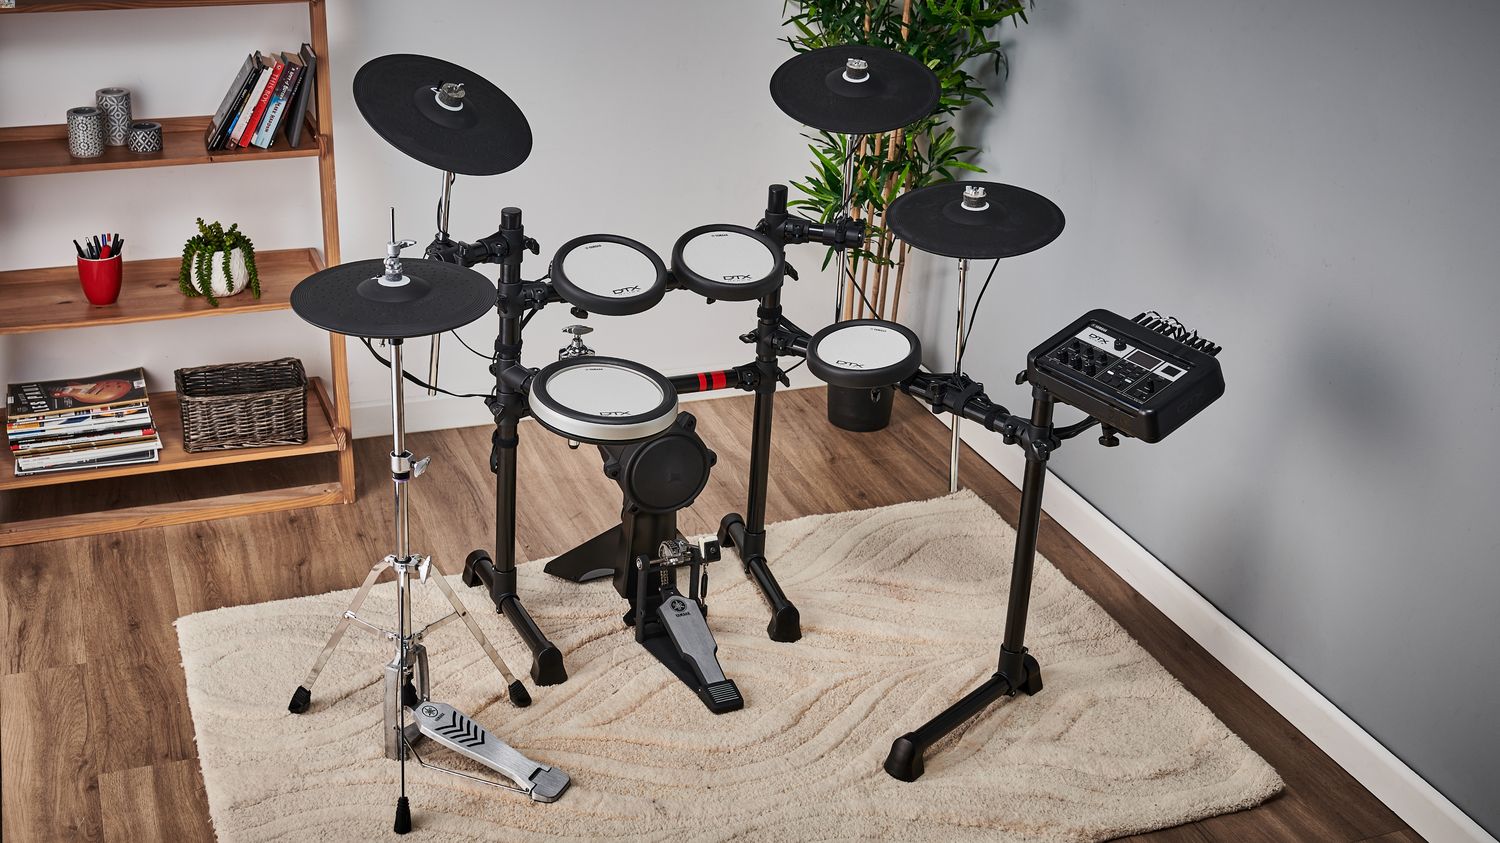
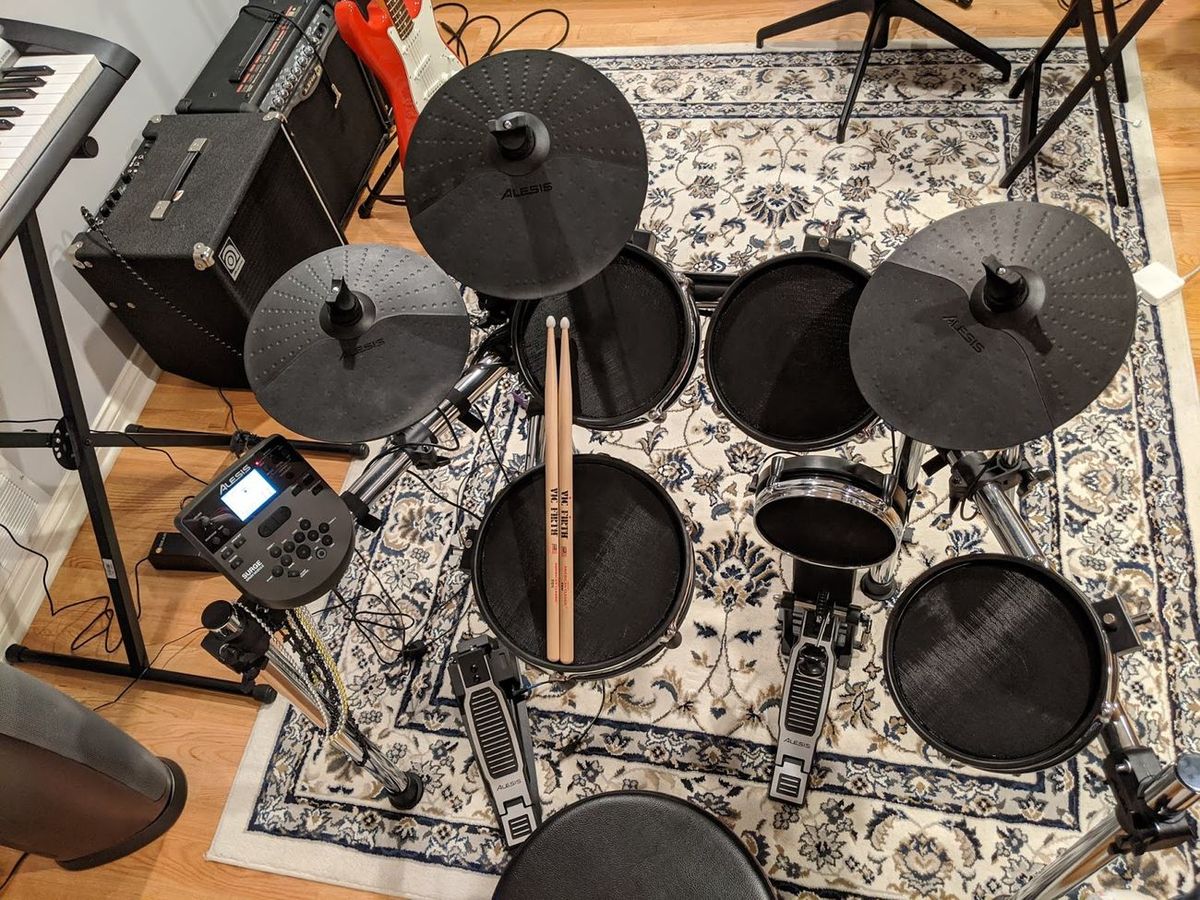
MIDI Pad Controller: Select a MIDI pad controller that aligns with your specific needs and preferences. Whether you opt for a compact, portable pad or a larger, feature-rich model, ensure that it offers responsive pads and intuitive controls for a satisfying user experience.
-
Computer: A reliable computer is indispensable for interfacing with the MIDI pad and running music production software. Whether you prefer a desktop or a laptop, ensure that it meets the system requirements of your chosen digital audio workstation (DAW) to facilitate smooth operation.
-
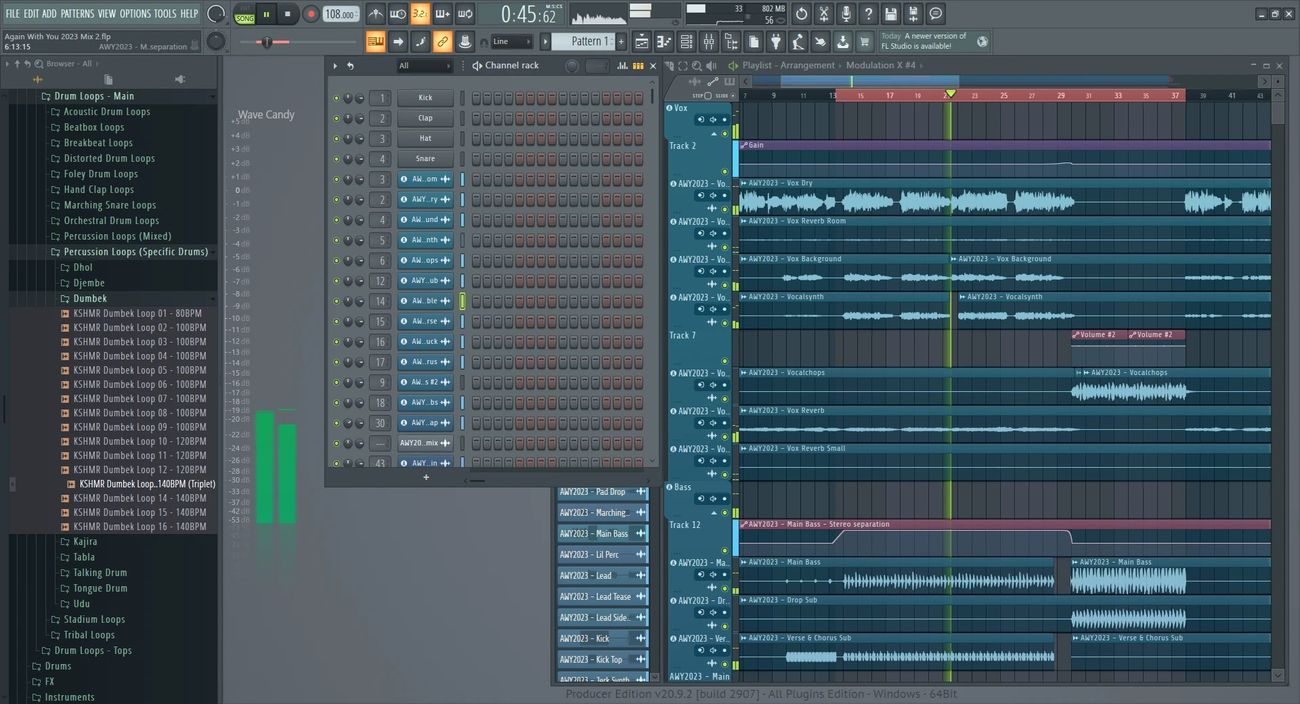
Music Production Software: Choose a reputable music production software that supports MIDI pad integration. Popular DAWs such as Ableton Live, FL Studio, and Logic Pro offer comprehensive MIDI functionality, allowing seamless connection and customization of MIDI pads.
-
MIDI Cables or USB Connectivity: Depending on the MIDI pad's connectivity options, procure the necessary MIDI cables or ensure that the pad features USB connectivity for direct interfacing with your computer.
-
Drum Sounds or Samples: To fully leverage the MIDI pad's potential, curate a collection of high-quality drum sounds or samples. These can be sourced from sample packs, virtual instruments, or recorded live drum performances, enriching your sonic palette for expressive drumming.
-
Optional: Audio Interface: If you intend to incorporate live drumming or external audio sources into your setup, an audio interface may be beneficial for capturing pristine audio signals and routing them to your music production software.
By assembling these essential components, you are poised to embark on a fulfilling journey of linking drums to a MIDI pad. With the groundwork laid through the acquisition of the necessary equipment, the subsequent steps will seamlessly progress towards configuring and harnessing the full potential of your MIDI pad for dynamic drumming experiences.
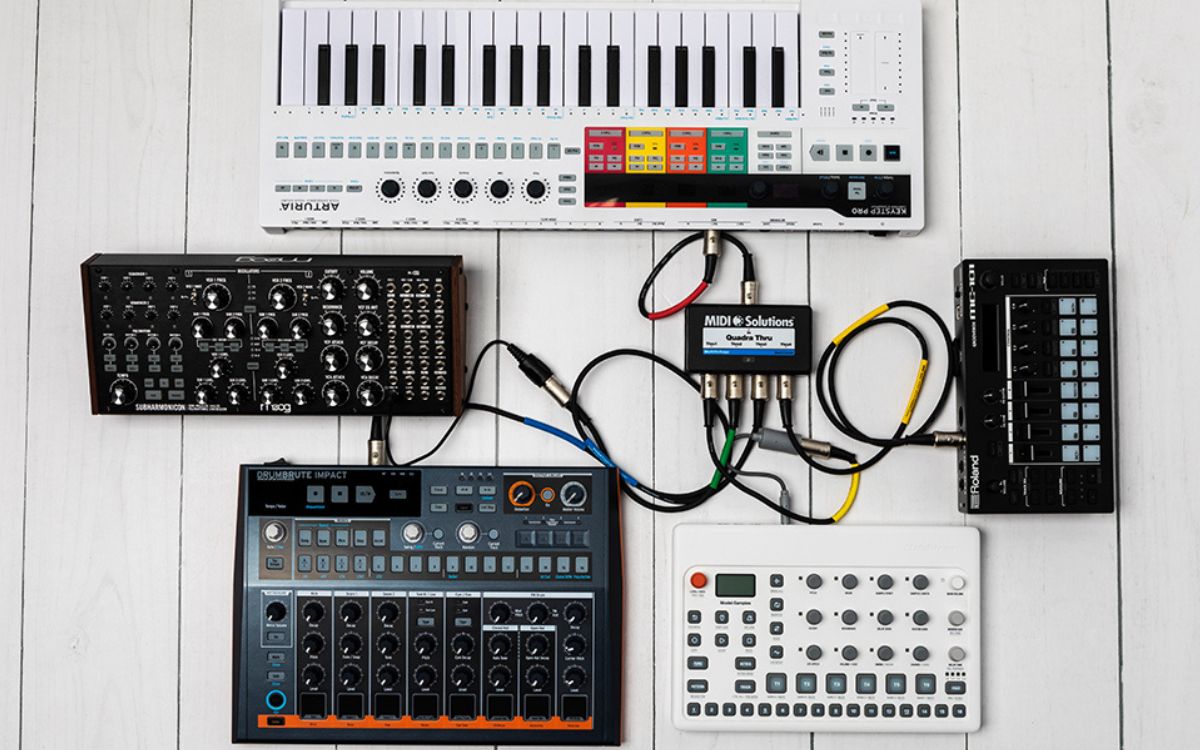
Step 2: Connect the MIDI pad to the computer
Connecting your MIDI pad to the computer is a pivotal step in establishing a seamless interface for digital drumming. The process involves physical connectivity and software configuration to ensure that the MIDI pad communicates effectively with your music production setup.
Physical Connection
-
MIDI Cables: If your MIDI pad features traditional MIDI ports, connect one end of a MIDI cable to the MIDI Out port on the pad and the other end to the MIDI In port of an audio interface or MIDI interface connected to your computer. This enables MIDI data transmission between the pad and the computer.
-
USB Connectivity: Many modern MIDI pads are equipped with USB connectivity, simplifying the connection process. Simply plug one end of a USB cable into the MIDI pad and the other end into an available USB port on your computer. This establishes a direct digital connection, enabling both MIDI data transfer and power supply for the pad.
Software Configuration
-
Driver Installation: If your MIDI pad requires specific drivers for USB connectivity, ensure that you install the necessary drivers provided by the manufacturer. This facilitates proper communication between the MIDI pad and your computer's operating system.
-
DAW Setup: Launch your preferred music production software and access the MIDI settings or preferences. Locate the section dedicated to MIDI devices or controllers and ensure that the MIDI pad is recognized. Depending on the DAW, you may need to enable the MIDI pad as a controller and assign it a unique identifier for seamless integration.
-
MIDI Mapping: To optimize the MIDI pad's functionality, you can engage in MIDI mapping within your DAW. This involves assigning specific drum sounds or samples to individual pads on the MIDI pad, allowing for intuitive triggering and performance. By mapping the MIDI pad to correspond with your desired drum setup, you can tailor the experience to align with your creative vision.
Testing the Connection
Once the physical connection and software configuration are complete, it's essential to test the MIDI pad's connection to the computer. Tap the pads on the MIDI pad to verify that MIDI data is being transmitted to the music production software. You should see visual feedback within the DAW, indicating MIDI input from the pad.
By successfully connecting the MIDI pad to your computer, you have laid the foundation for immersive drumming experiences within the digital realm. This pivotal step sets the stage for configuring the MIDI pad within your music production software and unleashing its expressive potential for rhythmic creativity.
Step 3: Set up the MIDI pad in your music production software
Configuring the MIDI pad within your music production software is a transformative process that empowers you to harness the full potential of your digital drumming setup. By seamlessly integrating the MIDI pad with your preferred digital audio workstation (DAW), you can unlock a world of expressive possibilities and streamline your creative workflow.
Accessing MIDI Settings
Upon launching your music production software, navigate to the MIDI settings or preferences section to initiate the setup process. Within this interface, you can typically designate the MIDI pad as a recognized controller, enabling bidirectional communication between the pad and the software. This pivotal step establishes a direct link, allowing your DAW to interpret the MIDI data transmitted by the pad and respond accordingly.
MIDI Input Configuration
In the MIDI settings, you have the opportunity to configure various aspects of MIDI input from the pad. This includes specifying the MIDI input channel through which the pad communicates with the software. Additionally, you can define the MIDI pad's behavior in terms of note assignment, velocity sensitivity, and pad response. By tailoring these settings to align with your playing style and creative preferences, you can ensure a seamless and personalized interaction with the MIDI pad.
Drum Pad Assignment
One of the defining features of MIDI pad integration is the ability to assign specific drum sounds or samples to individual pads on the MIDI pad. This process, known as drum pad assignment or MIDI mapping, allows you to customize the pad's layout to mirror your ideal drum setup. Within the MIDI settings of your DAW, you can designate each pad to trigger a distinct drum sound, offering unparalleled flexibility in shaping your rhythmic palette.
Velocity Mapping and Sensitivity
Velocity sensitivity plays a pivotal role in replicating the nuanced dynamics of acoustic drumming within the digital realm. Most MIDI pads feature velocity-sensitive pads, meaning that the force with which you strike a pad influences the intensity of the triggered sound. Within the MIDI settings of your DAW, you can fine-tune velocity mapping and sensitivity to ensure that your drumming gestures translate authentically into expressive and dynamic performances.
Calibration and Optimization
As you delve into the MIDI settings of your music production software, consider calibrating and optimizing the MIDI pad to align with your specific requirements. This may involve adjusting parameters such as pad sensitivity, aftertouch response, and MIDI note assignments to achieve an optimal playing experience. By tailoring the MIDI pad's behavior to suit your individual preferences, you can cultivate a seamless and intuitive drumming interface within your DAW.
Embracing Creative Freedom
Ultimately, the process of setting up the MIDI pad in your music production software is a gateway to creative freedom and sonic exploration. By customizing the MIDI pad's behavior, mapping drum sounds, and refining velocity sensitivity, you are poised to unleash your rhythmic vision and infuse your compositions with the expressive essence of live drumming. This pivotal integration transcends technical configuration, paving the way for immersive and dynamic drumming experiences within the digital domain.
Step 4: Assign drum sounds to the MIDI pad
Assigning drum sounds to the MIDI pad is a transformative process that empowers you to curate a personalized sonic arsenal, tailored to your creative vision and musical preferences. By mapping specific drum sounds or samples to individual pads on the MIDI pad, you can sculpt a dynamic and responsive drumming interface that mirrors the nuances of acoustic percussion within the digital realm.
Drum Sound Selection
The journey of assigning drum sounds begins with the selection of high-quality samples that encapsulate the sonic characteristics you aim to integrate into your compositions. Whether you prefer the punchy attack of a kick drum, the shimmering sizzle of a hi-hat, or the resonant thump of a snare, curate a diverse array of drum sounds that collectively form a versatile rhythmic palette. Sample packs, virtual instruments, and recorded live drum performances are invaluable sources for procuring an extensive range of drum sounds to fuel your creative endeavors.
MIDI Mapping and Pad Assignment
Within the MIDI settings of your music production software, embark on the process of MIDI mapping to assign drum sounds to the individual pads of the MIDI pad. This intuitive mapping allows you to designate specific drum samples to each pad, creating a tactile and responsive layout that aligns with your preferred drumming setup. Whether you opt for a traditional drum kit configuration or an experimental array of percussive elements, the MIDI mapping process empowers you to customize the pad's layout to mirror your unique rhythmic vision.
Dynamic Layering and Articulation
One of the compelling advantages of MIDI pad integration is the ability to incorporate dynamic layering and articulation into your drum performances. By assigning multiple variations of a drum sound to a single pad, you can emulate the expressive nuances inherent in live drumming. For example, you can assign different velocity layers to a snare drum, allowing for seamless transitions between subtle ghost notes and resounding accents. This nuanced approach to pad assignment imbues your performances with a lifelike quality, enriching your compositions with organic rhythmic textures.
Velocity Sensitivity and Expression
As you assign drum sounds to the MIDI pad, consider leveraging the velocity sensitivity of the pads to infuse your performances with expressive dynamics. By aligning the velocity response of the assigned drum sounds with the pad's sensitivity, you can authentically replicate the nuanced articulation of acoustic drumming. This harmonious interplay between pad assignment and velocity sensitivity fosters a responsive and expressive drumming experience, enabling you to convey a wide spectrum of emotions through your rhythmic performances.
Sonic Exploration and Experimentation
The process of assigning drum sounds to the MIDI pad transcends technical configuration, inviting you to embark on a journey of sonic exploration and experimentation. Embrace the freedom to mix and match diverse drum samples, layer complementary percussive elements, and sculpt intricate rhythmic textures that resonate with your artistic sensibilities. Through this creative exploration, you can unearth unique sonic combinations and rhythmic motifs that elevate your compositions to new heights of expressive potential.
By meticulously assigning drum sounds to the MIDI pad, you forge a direct connection between your creative impulses and the tactile interface of digital drumming. This pivotal step empowers you to infuse your compositions with the organic essence of live percussion, transcending the boundaries of traditional drum programming and unleashing a world of rhythmic possibilities within your music production endeavors.
Step 5: Test and adjust the settings
After meticulously connecting and configuring the MIDI pad within your music production software, the crucial step of testing and adjusting the settings awaits. This pivotal phase serves as the litmus test for the seamless integration of the MIDI pad into your digital drumming setup, ensuring that the configured parameters align with your creative vision and playing style.
Performance Validation
Initiate the testing phase by engaging in a series of performance validations, tapping into the pads of the MIDI pad to trigger the assigned drum sounds. As you unleash rhythmic patterns and dynamic accents, observe the responsiveness and accuracy of the pad's triggering mechanism. Verify that the velocity sensitivity translates your nuanced playing gestures into expressive dynamics, mirroring the subtleties of acoustic drumming within the digital domain.
Fine-Tuning Velocity Curves
Delve into the MIDI settings of your music production software to fine-tune the velocity curves associated with the MIDI pad. Adjusting the velocity curves enables you to tailor the pad's response to your playing dynamics, ensuring that soft taps yield delicate articulations while forceful strikes deliver impactful accents. By refining the velocity curves, you can achieve a harmonious balance between sensitivity and control, empowering you to convey a wide spectrum of emotions through your drumming performances.
Sensitivity Calibration
Embrace the process of sensitivity calibration to optimize the responsiveness of the MIDI pad to your playing nuances. This calibration may involve adjusting the pad's sensitivity to accommodate subtle variations in touch and pressure, fostering a natural and intuitive playing experience. By calibrating the pad's sensitivity, you can cultivate a heightened level of tactile connection, allowing your rhythmic expressions to flow effortlessly through the responsive interface of the MIDI pad.
Pad Cross-Talk Mitigation
In the pursuit of pristine drumming experiences, address any potential pad cross-talk issues that may arise during testing. Pad cross-talk occurs when the triggering of one pad inadvertently activates neighboring pads, leading to unintended sound triggering. Mitigate this phenomenon by configuring pad sensitivity thresholds and isolation settings within the MIDI pad or your music production software, ensuring that each pad responds independently without interference from adjacent triggers.
Iterative Refinement
Approach the testing and adjustment process as an iterative refinement of your MIDI pad setup. Continuously evaluate the responsiveness, dynamics, and articulations facilitated by the pad, making incremental adjustments to the settings as needed. By embracing a cyclical approach to refinement, you can progressively sculpt an optimized drumming interface that resonates with your expressive nuances and elevates your creative potential.
As you embark on the journey of testing and adjusting the MIDI pad settings, remain attentive to the interplay between technical configuration and artistic expression. This harmonious fusion empowers you to transcend the realm of traditional drum programming, immersing yourself in a dynamic and responsive drumming environment that amplifies your rhythmic creativity within the digital landscape.
Conclusion
In conclusion, the process of linking drums to a MIDI pad encapsulates a transformative journey that converges the tactile artistry of drumming with the boundless capabilities of digital music production. By embarking on this comprehensive endeavor, you have not only established a seamless interface between physical drumming gestures and digital expression but also cultivated a dynamic platform for immersive rhythmic exploration.
Throughout the meticulous steps of gathering the necessary equipment, connecting the MIDI pad to the computer, setting up the MIDI pad within your music production software, assigning drum sounds to the MIDI pad, and testing and adjusting the settings, you have navigated a multifaceted terrain of technical configuration and creative empowerment. Each stage of the process has served as a gateway to unlocking the expressive potential of MIDI pads, fostering an environment where your rhythmic visions can manifest with unparalleled authenticity and dynamism.
As you venture into the realm of MIDI pad integration, you have embraced the art of sonic curation, sculpting a personalized array of drum sounds that resonate with your musical sensibilities. Through meticulous MIDI mapping and pad assignment, you have tailored the MIDI pad's layout to mirror your ideal drumming setup, infusing it with dynamic layering, velocity sensitivity, and expressive articulation. This conscientious approach has endowed your digital drumming interface with a lifelike quality, bridging the gap between traditional percussion and contemporary music production.
The iterative process of testing and adjusting the settings has honed your MIDI pad setup to a refined state, where responsiveness, dynamics, and subtleties harmonize to amplify your rhythmic expressions. By fine-tuning velocity curves, calibrating sensitivity, and mitigating pad cross-talk, you have cultivated an environment where your creative impulses flow effortlessly through the tactile interface of the MIDI pad, transcending technical barriers to manifest authentic musicality.
Ultimately, the journey of linking drums to a MIDI pad extends beyond the realm of technical proficiency, encapsulating a profound fusion of artistry and innovation. As you embark on this transformative odyssey, may your rhythmic explorations flourish, and your compositions resonate with the organic essence of live percussion, perpetuating a harmonious synergy between the physicality of drumming and the limitless horizons of digital creativity. Embrace the rhythmic canvas that the MIDI pad unveils, and let your musical journey reverberate with the expressive pulse of digital drumming.
In this culmination of technical prowess and artistic ingenuity, you have paved the way for a rhythmic odyssey that transcends boundaries, amplifying the heartbeat of your compositions with the vibrant spirit of live drumming.