Home>Production & Technology>Music Video>How To Do A Music Video
Music Video
How To Do A Music Video
Modified: January 22, 2024
Learn how to create stunning music videos with our step-by-step guide. Discover the secrets behind captivating visuals and compelling storytelling to take your music videos to the next level.
(Many of the links in this article redirect to a specific reviewed product. Your purchase of these products through affiliate links helps to generate commission for AudioLover.com, at no extra cost. Learn more)
Table of Contents
- Introduction
- Step 1: Planning the Concept
- Step 2: Writing the Script
- Step 3: Choosing the Location
- Step 4: Assembling the Team
- Step 5: Preparing the Equipment
- Step 6: Choreographing the Shots
- Step 7: Shooting the Video
- Step 8: Editing the Footage
- Step 9: Adding Special Effects and Visual Enhancements
- Step 10: Adding Sound and Post-Production Audio
- Step 11: Exporting and Finalizing the Video
- Conclusion
Introduction
Music videos have become an integral part of the music industry, serving as a powerful tool for artists to express their creativity and connect with their audience on a visual level. A well-executed music video can significantly enhance the impact of a song and elevate the artist’s brand.
In this article, we will guide you through the process of creating a music video, from conceptualizing the idea to the final editing touches. Whether you’re an aspiring artist looking to promote your music or a filmmaker interested in exploring the world of music videos, this step-by-step guide will provide you with the knowledge and insights to bring your vision to life.
It’s important to note that creating a music video requires careful planning and coordination. From scriptwriting to location scouting, and from assembling a team to editing the final footage, each step plays a crucial role in capturing the essence of the song and delivering a visually captivating experience.
Throughout this article, we will focus on the key aspects of music video production, offering practical tips and expert advice to help you navigate the process with ease. So, let’s dive in and discover how to create a music video that resonates with your audience and leaves a lasting impression.
Step 1: Planning the Concept
The first step in creating a music video is to develop a strong concept that aligns with the theme and message of your song. This is the foundation upon which your video will be built, so it’s essential to take the time to brainstorm and refine your ideas.
Start by listening to the song repeatedly and taking note of its lyrics, mood, and overall vibe. What story or emotion does the song evoke? Consider the themes, symbolism, and imagery that could visually represent the essence of the song.
Next, think about the target audience for the music video. Who are you trying to reach? What kind of visuals and narratives would resonate with them? Understanding your audience will help you tailor your concept to appeal to their interests and preferences.
Once you have a general idea, it’s time to dive deeper into the concept development. Consider the following questions:
- What is the main storyline or plot of the music video?
- What locations, props, or costumes are needed to bring the concept to life?
- Are there any specific visual effects or special shots you want to incorporate?
- Do you want to feature any additional performers or actors in the video?
- What is the overall aesthetic or style you want to achieve?
Write down your answers and start sketching or creating mood boards to visualize your concept. This will help you communicate your ideas to the rest of the team and ensure everyone is on the same page.
Remember, the concept should be unique and distinct, setting your music video apart from others. It should also align with your brand as an artist and complement the song’s message. Take the time to experiment and explore different possibilities until you find the concept that feels right.
Once you have a solid concept in place, you can move on to the next step: writing the script.
Step 2: Writing the Script
Writing a script for your music video is crucial in ensuring that your vision is effectively translated into a visual narrative. While music videos may not follow the traditional structure of scripts for films or TV shows, having a clear plan and outline will greatly aid in the production process.
Before diving into the scriptwriting process, it’s important to consider the overall structure and flow of your video. Think about how the visuals will align with the lyrics and melodies of the song. Will there be specific moments or beats that you want to highlight?
Start by breaking down the song into sections (verse, chorus, bridge, etc.) and assign visual concepts or actions to each part. This will serve as a guide for the pacing and progression of your music video.
When writing the script, keep in mind the following elements:
- Scenes: Think about the different scenes or settings you want to incorporate. Consider indoor and outdoor locations, props, and any additional performers or actors.
- Actions: Define specific actions or movements that will occur within each scene. This could range from choreographed dance routines to simple gestures that enhance the storytelling.
- Camera Shots: Describe the desired camera angles and movements that will capture the desired visuals. Be as detailed as possible to ensure the cinematographer understands your vision.
- Transitions: Determine how you want to transition between scenes or shots. This could be through cuts, fades, or other creative techniques.
- Timing: Pay attention to the timing and synchronization of the visuals with the music, ensuring that key moments are highlighted at the right moments.
Remember to stay flexible during the scriptwriting process. Ideas may evolve or change as you explore different options, so be open to revisions and improvements along the way.
Once you have a final draft of the script, share it with the rest of your team, including the director, cinematographer, and editor. Their input and expertise can help refine the script and ensure that it aligns with the technical aspects of production.
By having a well-crafted script, you’ll be able to effectively communicate your vision and guide the production process, resulting in a cohesive and visually engaging music video.
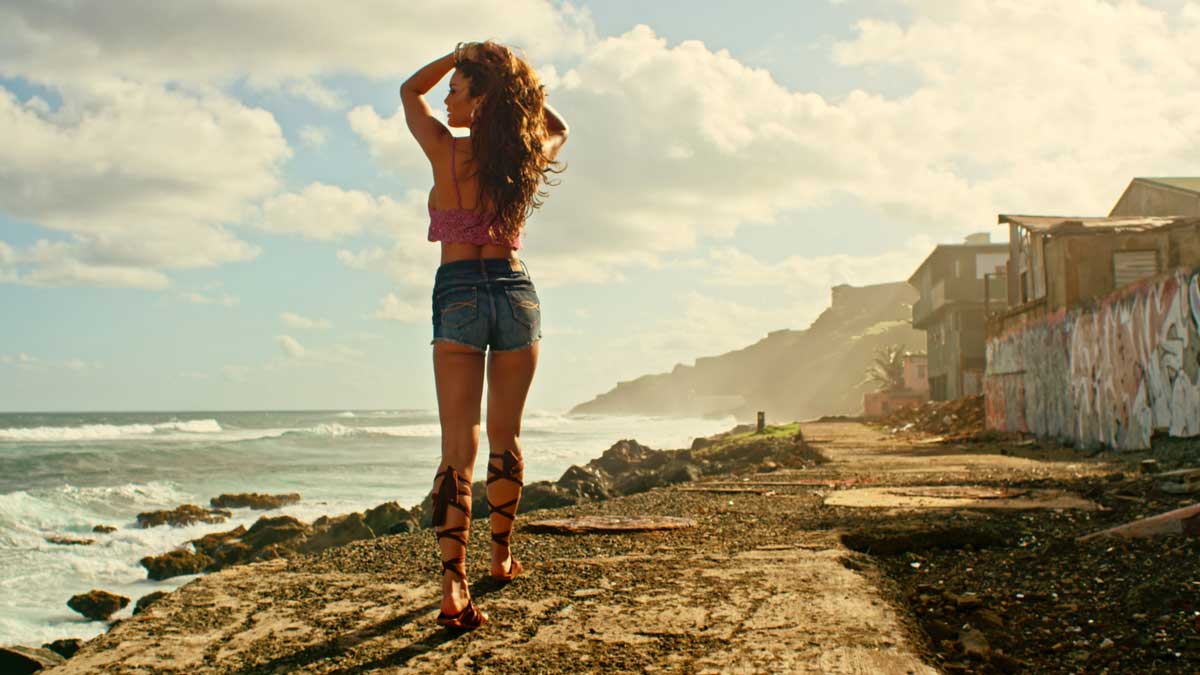
Step 3: Choosing the Location
The location where you shoot your music video plays a crucial role in setting the overall tone and atmosphere. It can enhance the storytelling, create visual interest, and showcase the artist’s unique style. When choosing a location, it’s important to consider various factors that align with your concept and budget.
Start by revisiting your concept and script. Identify the specific types of locations mentioned or implied in the script. Consider whether you want an indoor or outdoor setting, a natural or urban environment, or a specific backdrop that complements the song’s theme.
Next, consider the practical aspects of the locations you have in mind:
- Availability: Are the locations you have in mind accessible and available for filming? Make sure to secure any necessary permissions or permits.
- Logistics: Think about the logistics of shooting in each location. Is there ample space for equipment and crew? Are there any limitations or restrictions that may affect your production?
- Aesthetics: Evaluate the visual appeal of each location. Does it align with the desired look and feel of your music video? Consider the lighting, architecture, and overall ambiance.
- Budget: Determine whether the chosen locations fit within your budget. Some locations may require rental fees, insurance, or additional costs for set dressing.
- Accessibility: Consider the ease of transportation and accessibility for the entire crew, equipment, and talent. Ensure that the location can accommodate everyone involved in the production.
Additionally, keep in mind the weather and time constraints. If you’re shooting outdoors, consider the weather conditions during the planned shoot date, and have a backup plan in case of any unexpected changes.
Once you have a shortlist of potential locations, visit each one in person if possible. Assess how they look in person and whether they align with your vision. Take photos and notes to keep track of the details that stood out.
Finally, discuss the options with your team, including the director and cinematographer. Collaborate to determine which location(s) will best bring your concept to life. Consider their input and expertise in terms of lighting, camera angles, and composition.
Choosing the right location can elevate the production value of your music video and enhance the overall storytelling. By carefully considering the logistical and aesthetic aspects, you’ll be able to create a visually captivating video that resonates with your audience.
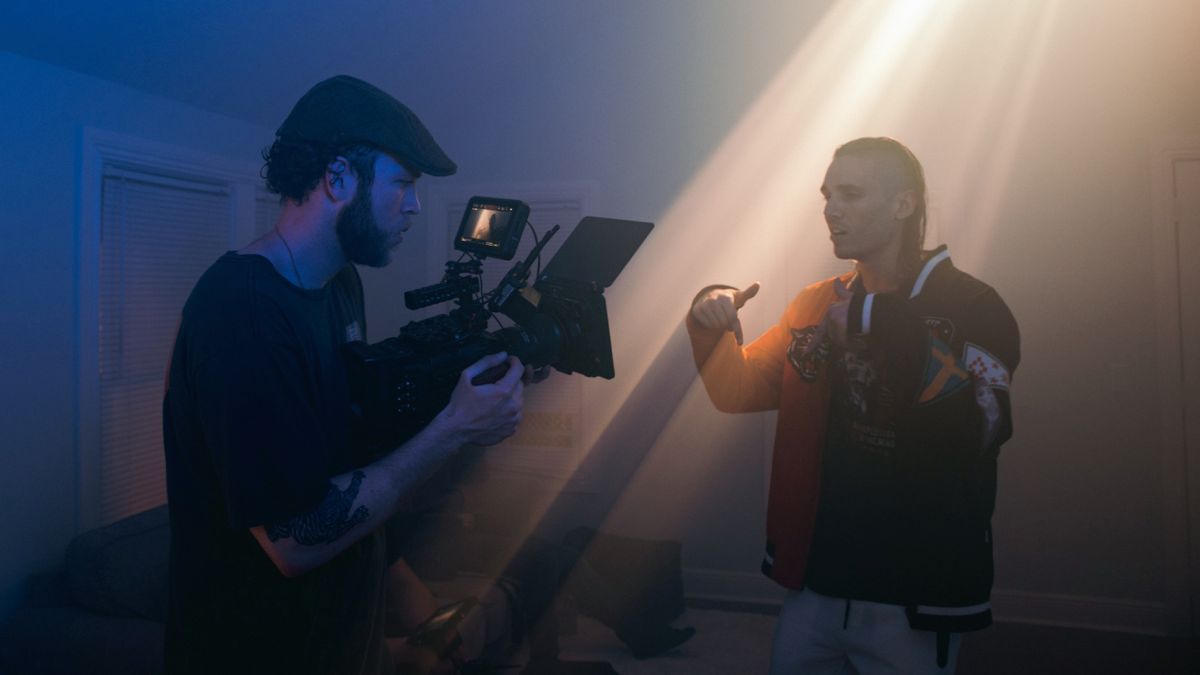
Step 4: Assembling the Team
Creating a music video is a collaborative endeavor that requires a skilled and dedicated team to bring your vision to life. Assembling the right team is key to ensuring a smooth production process and achieving the desired results. Here are some essential roles to consider:
- Director: The director is responsible for overseeing the creative aspects of the music video, including interpreting the concept and guiding the overall visual direction. Look for a director who has experience in music videos and shares a similar artistic vision.
- Cinematographer: The cinematographer, also known as the director of photography (DP), is in charge of capturing the visuals of the music video. They are skilled in lighting, camera techniques, and composition, and play a crucial role in translating the director’s vision into stunning imagery.
- Producer: The producer acts as the project manager, overseeing the logistics, budget, and overall organization of the production. They are responsible for coordinating the team, securing the necessary permits, and ensuring that the project stays on track.
- Art Director/Set Designer: The art director or set designer is responsible for the visual look and feel of the music video. They work closely with the director to create sets, props, and overall aesthetics that align with the concept. Their expertise in production design enhances the visual impact of the video.
- Choreographer (if applicable): If your music video involves dance sequences or choreography, consider bringing in a professional choreographer who can create captivating and synchronized movements that complement the music and storytelling.
- Makeup Artist/Wardrobe Stylist: To ensure that the artist and any additional performers look their best, consider enlisting a makeup artist and wardrobe stylist. They will design and execute the hair, makeup, and wardrobe choices that align with the concept and enhance the visual aesthetics.
- Editor: Once the video is shot, an editor will assemble and refine the footage, ensuring seamless transitions, rhythm, and storytelling. Look for an editor who understands music videos and can bring out the best in the captured shots.
- Production Assistants: Production assistants provide support to the entire team, helping with setup, equipment handling, and any other tasks necessary for a smooth production. They play a crucial role in keeping the production running efficiently.
When assembling your team, it’s important to consider their experience, skills, and compatibility with your concept and artistic vision. Look for professionals who have a portfolio of relevant work and a track record of successful collaborations.
Communicate your vision clearly to each team member and foster an environment of collaboration and open communication. Regular meetings and rehearsals will help align everyone’s expectations and ensure a cohesive approach.
Remember, a strong and talented team is essential for the success of your music video. By assembling the right individuals who bring their expertise and passion to the project, you’ll be on your way to creating a visually stunning and captivating music video.
Step 5: Preparing the Equipment
Having the right equipment is crucial for capturing high-quality footage and achieving the desired visual aesthetic for your music video. Before the shoot, it’s important to properly prepare and organize the necessary equipment to ensure a seamless production process. Here are some key steps to consider:
1. Camera and Lenses: Select a camera that suits your budget and desired image quality. Whether you choose a professional cinema camera or a high-quality DSLR, make sure it has the necessary features for capturing video. Consider the type of lenses you need based on your desired focal length, depth of field, and aesthetic preferences.
2. Lighting: Lighting is a critical element that greatly affects the mood and overall look of your music video. Depending on the concept, consider the type of lighting equipment you’ll need, such as softboxes, LED panels, or spotlights. Ensure that you have the necessary grip equipment, like light stands and sandbags, to set up the lighting effectively.
3. Grip and Stabilization: Depending on the desired movement and stability of your shots, consider including grip and stabilization equipment. This can include tripods, sliders, gimbals, or even a steady cam rig to achieve smooth camera movements.
4. Audio Equipment: Clear and high-quality audio is just as important as the visuals in a music video. Invest in a good microphone, boom pole, and audio recorder to capture clean sound during the shoot. Consider any additional audio equipment, such as lavalier microphones or an audio mixer, based on the specific requirements of your production.
5. Accessories: Don’t forget about the smaller accessories that can make a big difference. Make sure you have sufficient memory cards, batteries, and chargers for your camera and audio equipment. Additionally, stock up on essential items like lens filters, lens cleaning kits, and extra cables to avoid any last-minute surprises.
6. Test and Familiarize: Before the shoot, take the time to test all the equipment and familiarize yourself with its settings and functionalities. This will help ensure that everything is in working order and that you’re confident in using the gear during the shoot. This is also a good opportunity to see how different camera settings and lighting setups affect the overall look and feel of your shots.
7. Pack and Organize: Prepare a comprehensive equipment checklist and pack everything you need for the shoot. Consider using equipment cases or bags with compartments to keep everything organized and easily accessible on set. Labeling each piece of equipment will help streamline the setup and breakdown process.
8. Backup Plan: It’s always important to have a backup plan in case of any equipment malfunctions or unexpected issues. Consider having a backup camera, extra batteries, and additional equipment on standby, as well as a contingency plan for any lighting or audio challenges that may arise.
By properly preparing and organizing your equipment, you’ll be well-prepared to capture high-quality footage and bring your creative vision to life in your music video production.
Step 6: Choreographing the Shots
Choreographing the shots in your music video is a crucial step in ensuring that the visuals align with the music and effectively convey the desired emotions and storytelling. This step involves carefully planning and executing the camera movements, angles, and transitions to create a visually engaging and dynamic video.
Here are some key considerations when choreographing the shots:
- Shot List: Start by creating a shot list that outlines the specific shots and camera angles you want to capture. This can include wide shots, close-ups, overhead shots, tracking shots, and more. Ensure that your shot list aligns with the concept and script of your music video.
- Pacing and Timing: Consider the pacing and timing of each shot. Pay attention to the lyrics, melodies, and beats of the song and plan your shots accordingly. Syncing certain camera movements or transitions with specific moments in the music can add impact and enhance the overall visual experience.
- Camera Movements: Decide on the desired camera movements that will add visual interest to your shots. This can include static shots, panning, tilting, dolly movements, or even aerial shots if feasible. Experiment with different movements to find the ones that best convey the mood and style of your video.
- Transitions: Explore creative transitions between shots to add a dynamic element to your music video. This can include using cuts, fades, dissolves, or more elaborate techniques such as whip pans or match cuts. Transitions can help create a seamless flow between scenes and enhance the overall visual storytelling.
- Storyboarding: Consider storyboarding your shot sequences to visualize the progression of your music video. This involves sketching out each shot or scene to better understand the framing, composition, and overall continuity. Storyboarding can also help you communicate your vision to the rest of the team.
- Collaboration: Work closely with your director, cinematographer, and any additional team members involved in the shot planning process. Seek their input and expertise to maximize the visual impact of your video. Encourage creativity and open communication to ensure a collaborative approach.
- Rehearsals: Conduct rehearsals with the performers and any talent involved in the video. This allows everyone to understand their movements and actions within each shot. It also provides an opportunity to make any necessary adjustments to ensure a smooth execution on the shooting day.
Remember, the goal is to create visually captivating shots that enhance the storytelling and evoke the desired emotions. Experiment with different techniques and angles to add visual interest and create a unique visual experience for your audience.
By choreographing the shots effectively, you’ll be able to capture engaging visuals that complement the music and create a memorable music video that resonates with your viewers.
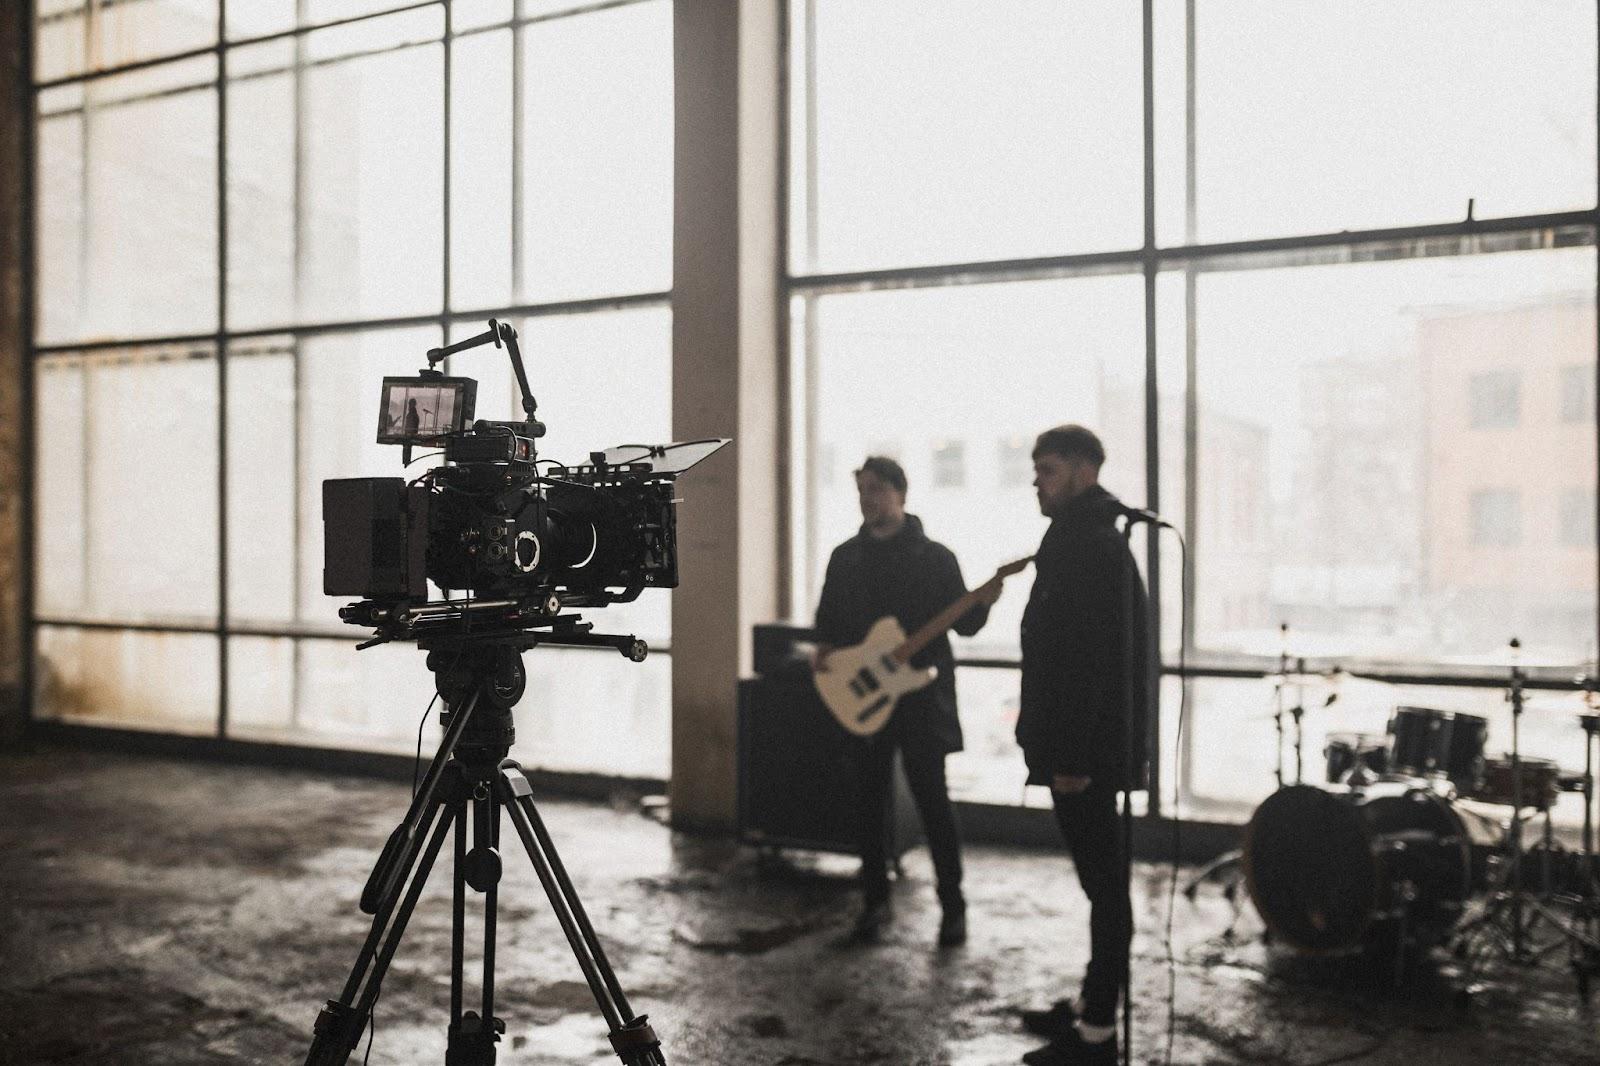
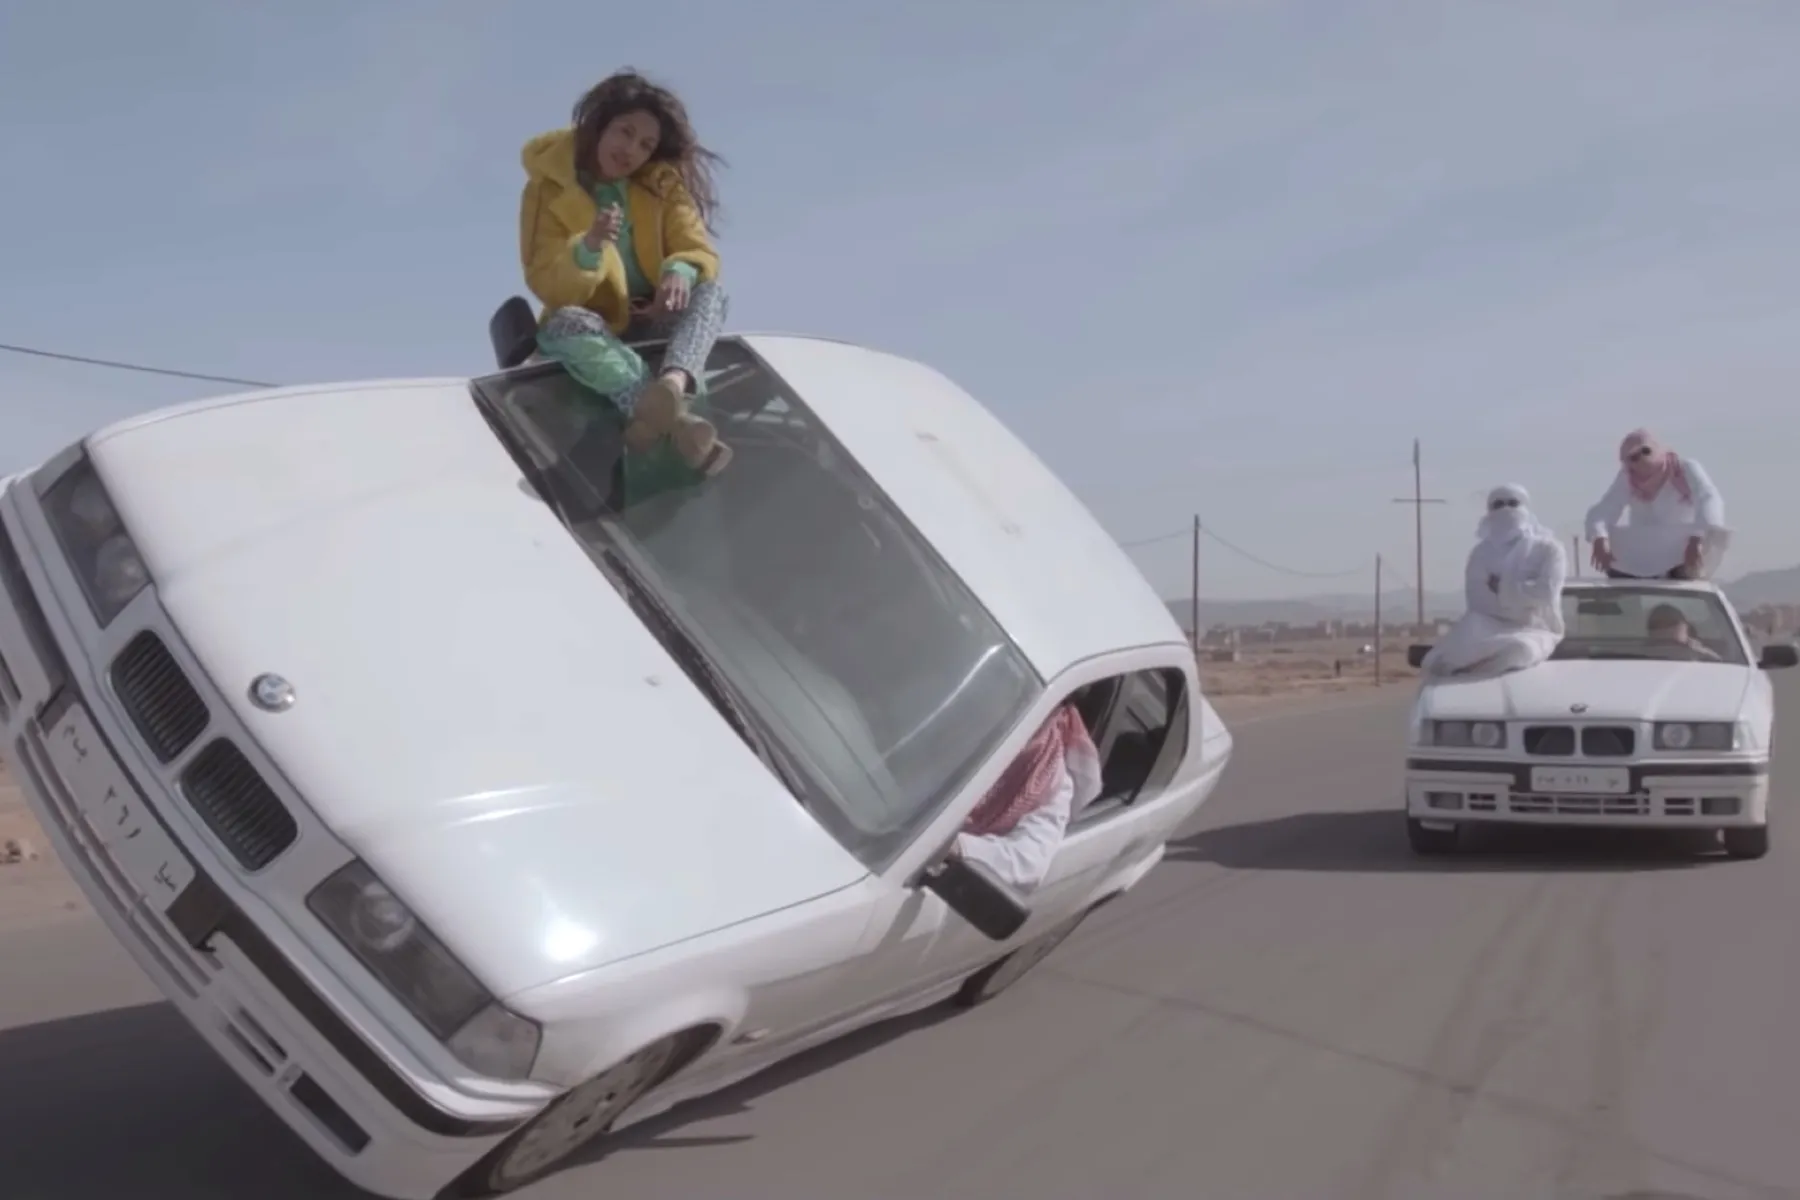
Step 7: Shooting the Video
Shooting the video is the pivotal moment in bringing your music video to life. This is where all the planning and preparation culminate into actual footage. To ensure a successful shoot, it’s important to be organized, efficient, and adaptable to any unexpected challenges that may arise.
Here are some key tips for shooting your music video:
- Set Etiquette: Establish a positive and collaborative atmosphere on set. Clearly communicate the expectations and roles of each team member to ensure a smooth working environment.
- Call Sheets: Provide call sheets to all team members prior to the shoot. This document outlines the schedule, location, and specific requirements for each day of shooting. It helps everyone stay organized and on track.
- Camera Setup: Set up your camera and other equipment according to your shot list and storyboard. Ensure that your camera settings, such as resolution, frame rate, and white balance, are optimized for the desired visual aesthetics.
- Communication: Foster clear and open communication between the director, cinematographer, and the rest of the team. Have regular check-ins to ensure everyone is aligned with the vision and goals of the music video.
- Lighting and Sound: Pay close attention to lighting and sound during the shoot. Continuously monitor and adjust lighting setups to achieve the desired ambiance and mood. Ensure that the audio recording is clear and free from any unwanted noise.
- Take Breaks: Shooting can be tiring for both the crew and the talent. Schedule breaks to rest and recharge. This will help maintain energy and focus throughout the day.
- Review Footage: Periodically review the footage to ensure that you are capturing the desired shots. This allows you to make any necessary adjustments or re-shoots if needed, minimizing potential issues during the editing process.
- Be Flexible: Adaptability is crucial during the shoot. Things may not always go as planned, and unforeseen obstacles may arise. Stay calm, think on your feet, and be open to creative solutions that may enhance the final product.
- Capture B-roll and Behind-the-Scenes Footage: Alongside the main shots, capture additional B-roll footage and behind-the-scenes moments. This can add depth and variety to your video and provide valuable content for promotional purposes.
Remember to have fun and enjoy the process. It’s an opportunity to bring your creative vision to life and collaborate with a talented team. By following these tips and remaining focused on your concept and goals, you’ll capture the footage you need to create a visually stunning music video.
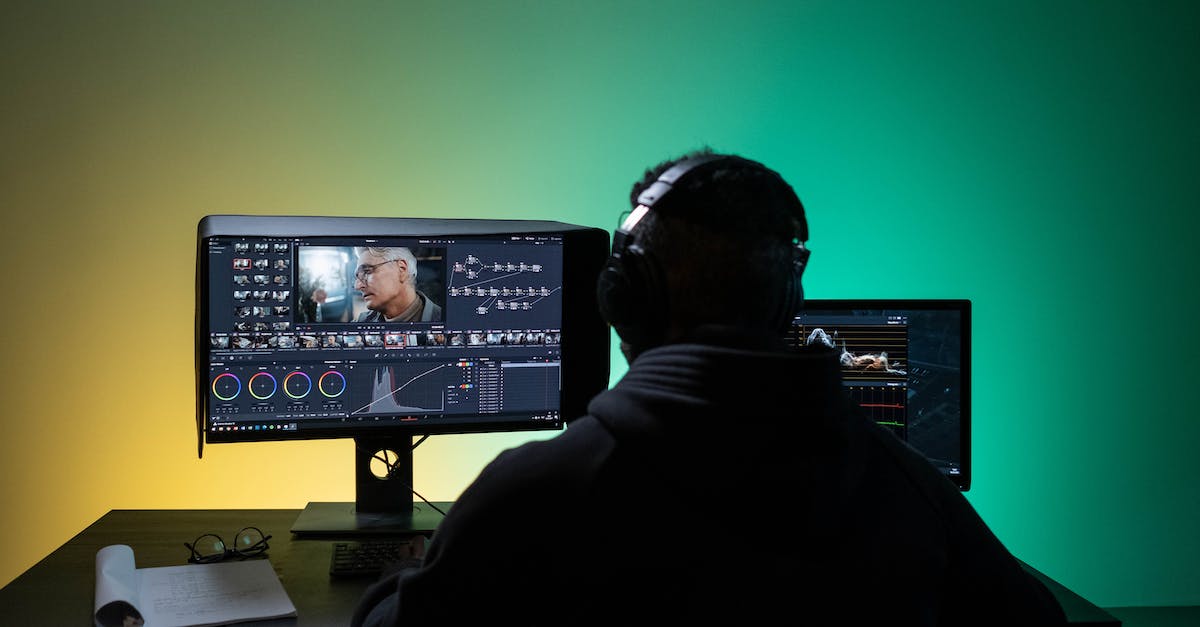
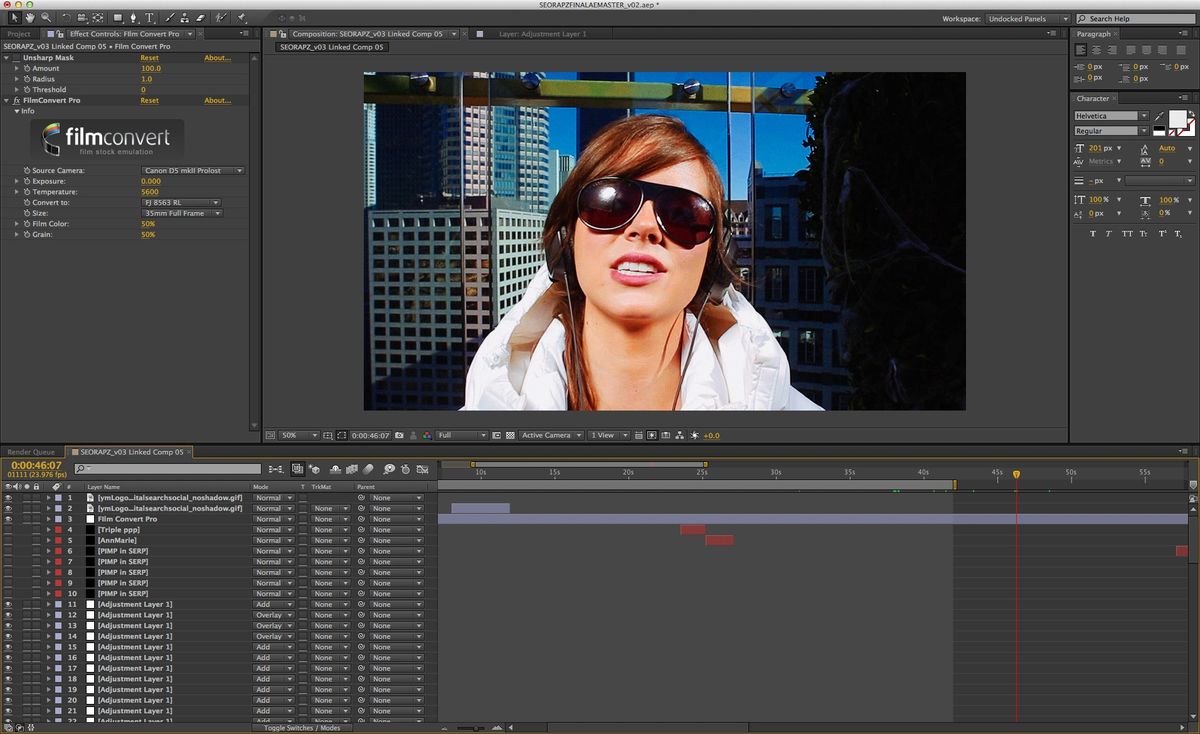
Step 8: Editing the Footage
Editing is where the magic truly happens, as you bring together all the footage captured during the shoot and transform it into a cohesive and visually captivating music video. The editing process allows you to shape and refine the story, pacing, and overall aesthetic of your video.
Here are some important steps to consider when editing your music video:
- Import and Organize Footage: Begin by importing all the footage into your editing software and organizing it in a logical manner. Create folders or bins to keep your footage sorted and easily accessible.
- Review and Select Shots: Watch through all the footage and make note of the shots you want to include in your music video. Identify the best performances, visual moments, and shots that align with your concept and story. Create a rough assembly of the selected shots.
- Storyboard and Shot List: Refer back to your storyboard and shot list as a guide for the overall structure and sequencing of shots. This will help you maintain consistency and continuity throughout the video.
- Refine the Storyline: Pay attention to the flow and narrative arc of your video. Trim and rearrange shots as needed to create a compelling story that aligns with the lyrics, emotions, and themes of the song.
- Color Correction and Grading: Enhance the visual appeal of your footage by applying color correction and grading techniques. This helps create a consistent and polished look, enhancing the overall mood and atmosphere of your music video.
- Transitions and Effects: Experiment with different transitions and effects to add visual interest and enhance the overall storytelling. This can include cuts, fades, dissolves, and other creative transitions that seamlessly connect your shots.
- Timing and Synchronization: Fine-tune the synchronization between the visuals and the music. Align key visual moments, movements, or transitions with specific beats, lyrics, or musical cues to create a visually engaging experience.
- Audiio Enhancements: Polish the audio track by adjusting levels, adding sound effects, and mixing the music with any additional audio elements. Ensure that the audio is well-balanced and enhances the overall impact of the video.
- Titles and Graphics: If needed, incorporate titles, subtitles, and graphics that support the storytelling or convey important information. Use fonts, colors, and styles that align with the overall visual aesthetic of the music video.
- Test and Preview: Regularly review and preview your edited video to evaluate its overall impact. Make any necessary adjustments to pacing, timing, or visual elements to ensure a satisfying viewing experience.
Remember, the editing process requires creativity and attention to detail. Take the time to experiment, iterate, and refine your video until you’re fully satisfied with the final product.
Finally, once you’re happy with the edited video, export it in the desired format and prepare it for distribution across various platforms.
Step 9: Adding Special Effects and Visual Enhancements
Adding special effects and visual enhancements can take your music video to the next level, elevating the overall visual experience and capturing the attention of your audience. This step allows you to incorporate creative elements that enhance the storytelling, create unique visual aesthetics, and capture the essence of your song.
Here are some key considerations when adding special effects and visual enhancements to your music video:
- Visual Effects: Assess your concept and storyboard to identify areas that can benefit from visual effects. This can include adding CGI elements, compositing multiple shots, creating environmental effects, or enhancing specific visuals to amplify the impact of the story or mood.
- Green Screen: If your concept requires dynamic backgrounds or fantastical settings, consider shooting some scenes using a green screen. This will allow you to replace the green background with any background or visuals of your choice during the post-production process.
- Color Manipulation: Experiment with color grading techniques to enhance the visual aesthetics and overall mood of your video. Adjusting hues, tones, and saturation levels can create a unique look and feel that aligns with your concept and desired atmosphere.
- Animation and Motion Graphics: Incorporate animations or motion graphics to add visual interest and enhance specific elements of your video. This can include animated text, graphics, or illustrations that dynamically interact with the music or storytelling.
- Visual Filters: Apply visual filters or presets to create a distinct and cohesive look throughout your music video. Filters can add texture, stylization, or a vintage feel to your footage, enhancing the overall visual impact and conveying a specific mood or theme.
- Creative Transitions: Further enhance your transitions by incorporating unique and eye-catching transition effects. These can include wipes, morphing, flip transitions, or any other creative techniques that seamlessly connect shots and add visual engagement.
- Split-Screen: Utilize split-screen techniques to showcase different perspectives or storytelling elements simultaneously. This can visually emphasize contrasts, complement lyrics, or convey multiple narratives within a single frame.
- Visual Storytelling: Consider creative ways to visually convey the message or story. This can include symbolic imagery, metaphorical visuals, or creative compositions that evoke specific emotions or add depth to the narrative.
- Experiment and Step Outside the Box: Don’t be afraid to experiment with different effects and enhancements to create a visually striking and unique music video. Push boundaries, think outside the box, and let your creativity shine in order to leave a lasting impression on your audience.
Remember, special effects and visual enhancements should enhance the overall storytelling and align with the concept and mood of your music video. Be mindful not to overuse or distract from the essence of the song. Every effect and enhancement should have a purpose and contribute to the visual aesthetic in a meaningful way.
Through the strategic use of special effects and visual enhancements, you can create a visually captivating music video that complements the song and captivates your audience.
Step 10: Adding Sound and Post-Production Audio
The audio component of your music video is just as crucial as the visuals. Adding sound and conducting post-production audio work will enhance the overall quality, immerse your audience in the experience, and ensure that the audio elements align seamlessly with the visual storytelling. Here’s what you need to consider:
- Sound Editing: Begin by importing and organizing the audio files into your editing software. Trim the audio clips to match the desired timing of the shots, aligning them with the visuals and music cues.
- Adjusting Levels: Balance the audio levels of different tracks, including the music, vocals, and any additional audio elements such as sound effects. Ensure a smooth and consistent audio mix throughout the music video.
- Clean Up and Enhancements: Remove any unwanted background noise or audio imperfections through noise reduction or sound restoration techniques. Enhance the quality of the audio by applying equalization, compression, and other audio processing tools.
- Syncing Audio with Footage: Ensure that the audio syncs perfectly with the visual elements. This involves careful alignment of lip-syncing, musical cues, and specific audio events with the corresponding shots.
- Ambience and Foley: Consider adding ambience or foley effects to enhance the immersive quality of certain scenes. This includes capturing and adding sounds like footsteps, rustling leaves, or ambient noise to create a realistic and engaging sonic environment.
- Sound Design: Use sound effects strategically to enhance the visual storytelling. This includes adding impact sounds, transitions, or atmospheric elements that amplify the emotions and dynamics of the video.
- Mixing and Mastering: Ensure that the final audio mix is well-balanced and cohesive. Pay attention to the dynamics, levels, and tonal quality, making sure that no specific audio element overpowers the others. Master the audio, considering the appropriate loudness levels for the intended release platform.
- Copyright Considerations: If you are using copyrighted music or sound effects, make sure you have obtained the necessary permissions or licenses to ensure legal compliance.
- Preview and Feedback: Regularly preview your music video with the audio components to assess its impact and make any necessary adjustments. Seek feedback from trusted individuals to ensure the audio is effectively enhancing the visuals and aligning with your creative vision.
Remember, the audio elements of your music video are essential in creating a captivating and immersive experience for your audience. Paying attention to the details of sound editing, design, and post-production audio work will elevate your music video and ensure a memorable viewing experience.
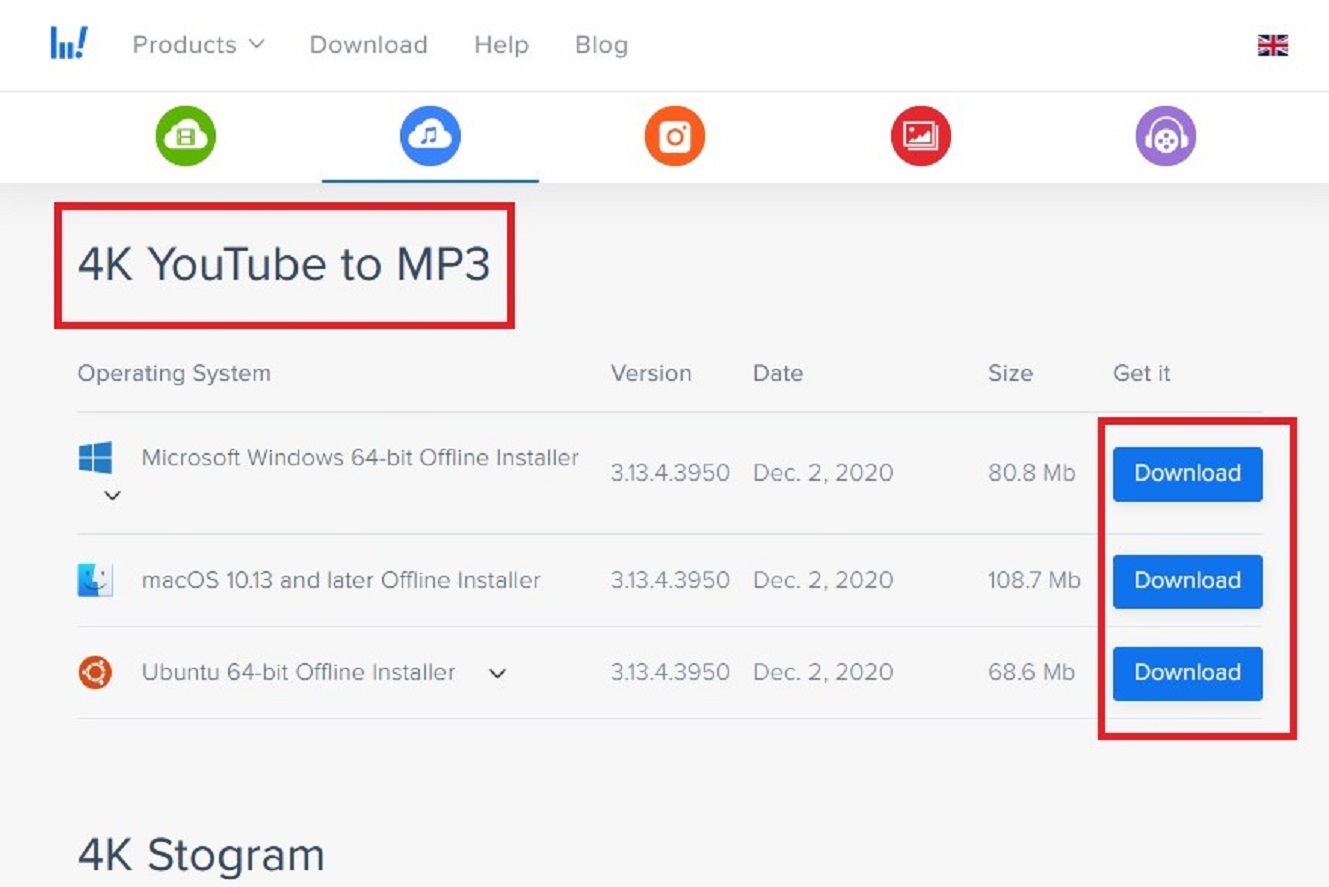
Step 11: Exporting and Finalizing the Video
Congratulations! You’ve reached the final step of creating your music video. This step involves exporting your edited video and finalizing it for distribution across various platforms. Here’s what you need to consider:
- Quality Check: Before exporting, thoroughly review the final version of your music video to ensure all elements are in place, including visuals, audio, transitions, effects, and titles. Pay attention to any potential errors or inconsistencies.
- Resolution and Format: Determine the appropriate resolution and format for the intended platform or distribution channels. Consider the aspect ratio, frame rate, and overall quality requirements. Common video formats include MP4, MOV, and AVI.
- Compression: Compress the video file, if necessary, to reduce its size without compromising the quality. Optimize the video for online streaming or physical media distribution.
- Consider Subtitles or Closed Captions: If your video contains dialogue or lyrics, consider adding subtitles or closed captions for accessibility and to reach a wider audience.
- Metadata: Include relevant metadata such as the title, artist name, genre, and any other pertinent information when exporting the finalized video. This will help with organization, SEO optimization, and discoverability.
- Duplicate Backup: Make duplicate copies of the exported video file and store them in multiple locations, ensuring that you have a backup in case of any unforeseen issues or data loss.
- Distribution Channels: Determine the platforms or channels where you want to share your music video, such as YouTube, Vimeo, social media platforms, your website, or music streaming services. Upload the video to these platforms, following their specific guidelines and requirements.
- Promotion and Marketing: Develop a strategic plan to promote and market your music video. Utilize social media, email marketing, and collaborations with influencers or other artists to maximize its reach and engagement.
- Monitor Performance: Regularly monitor the performance and engagement of your music video on the different distribution platforms. Track views, comments, likes, and shares to gauge its impact and make any necessary adjustments to your marketing strategy.
Remember, the finalization and distribution of your music video mark the beginning of its journey. It’s an opportunity to share your vision, connect with your audience, and promote your music. Stay engaged with your audience, adapt your strategy as needed, and continue to create compelling visual content.
Now that you’ve completed this step-by-step guide, you have the knowledge and tools to create a captivating music video. Embrace your creativity, experiment with different techniques, and most importantly, enjoy the process of bringing your music to life through the power of visuals.
Conclusion
Congratulations on completing your music video! You have followed a comprehensive step-by-step guide that has taken you from planning the concept to exporting the final product. Creating a music video requires careful planning, coordination, and creativity, but the end result is worth the effort.
Throughout the process, you have learned about the importance of conceptualizing a strong idea, writing a script, choosing the right location, assembling a talented team, preparing the equipment, choreographing shots, shooting the video, editing the footage, adding special effects and visual enhancements, and finalizing the video for distribution. Each step plays a crucial role in bringing your vision to life and creating a visually captivating music video.
Remember, a successful music video goes beyond just stunning visuals. It should align with the song’s message, evoke emotions, and resonate with your audience. Through effective storytelling, creativity, and collaboration, you can create a video that enhances the impact of your music and strengthens your brand as an artist.
Once your music video is finalized, make sure to choose the right platforms for distribution and invest effort in promoting and sharing it with your audience. Utilize social media, collaborations, and other marketing strategies to maximize its reach and engagement.
Lastly, remember that creating a music video is an ongoing journey of learning and growth. Seek feedback, analyze the response, and continuously improve your skills and creative approach. Push boundaries, experiment with different techniques, and stay true to your artistic vision.
With dedication, passion, and a strong understanding of the music video creation process, you can captivate your audience, establish your presence in the music industry, and make a lasting impact with your visual storytelling.