Home>Production & Technology>Music Video>How To Shoot A Music Video

Music Video
How To Shoot A Music Video
Published: November 20, 2023
Discover the ultimate guide on how to shoot a music video and unleash your creativity in the world of music visuals. Learn top techniques and tips to create stunning music videos.
(Many of the links in this article redirect to a specific reviewed product. Your purchase of these products through affiliate links helps to generate commission for AudioLover.com, at no extra cost. Learn more)
Table of Contents
- Introduction
- Choosing the Right Concept
- Pre-Production Planning
- Location Scouting
- Assembling the Crew
- Casting and Rehearsals
- Shooting Equipment and Setup
- Camera Techniques and Angles
- Lighting and Color Grading
- Directing the Performers
- Capturing the Performance
- Shooting B-Roll
- Utilizing Special Effects
- Post-Production Editing
- Adding Visual Effects
- Sound Design and Mixing
- Finalizing the Music Video
- Conclusion
Introduction
Welcome to the world of music videos, where artistry and storytelling combine to create captivating visual experiences. Music videos have become an essential component of the music industry, allowing artists to connect with their audience on a deeper level. A well-executed music video can enhance the impact and reach of a song, making it memorable and relatable.
In this article, we will explore the process of shooting a music video, from concept development to final production. We will provide valuable insights and tips to help you create a visually stunning and engaging music video that captures the essence of your song.
Shooting a music video is a labor of love that requires meticulous planning, creativity, and collaboration. It is a multi-faceted process that involves choosing the right concept, pre-production planning, assembling a talented crew, and executing the vision with precision and artistry.
Whether you are an aspiring musician looking to create your first music video or an experienced artist seeking guidance for your next project, this article will serve as a comprehensive resource to help you navigate the world of music video production.
So, put on your director’s hat, grab your camera, and let’s dive into the fascinating journey of shooting a music video!
Choosing the Right Concept
When it comes to shooting a music video, one of the first and most crucial steps is choosing the right concept. The concept sets the tone and narrative for the video, so it’s important to select something that aligns with the song’s message and resonates with your audience.
Start by deeply analyzing the lyrics and mood of the song. What story does it tell? What emotions does it evoke? Understanding the essence of the song will help you brainstorm visual concepts that complement the music.
Consider your target audience and the image you want to portray. Are you aiming for a light-hearted and fun video, or a more introspective and profound visual experience? Take into account your personal style as an artist and the genre of the music.
Brainstorming with a creative team can be incredibly valuable during this process. Collaborate with directors, producers, and cinematographers who understand your vision and can contribute fresh ideas. Exchange thoughts and explore different approaches to find the concept that best reflects your artistic vision.
It’s also important to consider the practicality and feasibility of the concept. Budget, time constraints, and available resources may influence your decision. You want to create a concept that is both visually compelling and achievable within your limitations.
Research existing music videos to gather inspiration but ensure that your concept is unique and stands out. Find ways to add your own creative twist and bring freshness to the table.
Remember, the concept should enhance the song rather than overshadow it. It should create a visual experience that resonates with your audience and leaves a lasting impression. Don’t be afraid to be bold and take risks with your concept, but always stay true to the message of the song.
Once you have chosen the right concept, you can move on to the next step of pre-production planning, where you will bring your vision to life through storyboarding, shot lists, and more. But for now, allow your creativity to flow and explore the endless possibilities that await you in crafting the perfect concept for your music video.
Pre-Production Planning
Pre-production planning is a critical phase of shooting a music video that lays the foundation for a successful and efficient production. This stage involves detailed preparation and organization to ensure that everything runs smoothly during the shoot.
Start by creating a production timeline that outlines all the essential tasks and deadlines. This includes script development, storyboard creation, location scouting, casting, and securing permits if necessary. Assign responsibilities to team members and establish clear communication channels.
Script development involves further refining the concept and translating it into a cohesive narrative. Collaborate with a scriptwriter or director to create a script that aligns with the chosen concept and complements the song. The script should include the shots, dialogue (if any), and any specific instructions for the crew and talent.
Storyboarding is a visual representation of the script, allowing you to plan the sequence of shots and visualize the overall look of the music video. It helps in determining the camera angles, composition, and movements. Incorporate key moments of the song into the storyboard to ensure proper synchronization between the visuals and the music.
Location scouting plays a crucial role in determining the visual aesthetic of the music video. Consider the concept and look for locations that enhance its narrative. Scout both indoor and outdoor locations that suit the mood and style of the video. Obtain any permits or permissions required for shooting in certain locations.
Casting is another important aspect of pre-production. Determine the type of talent you need for your music video, whether it’s actors, dancers, or your band members. Conduct auditions or reach out to talent agencies to find suitable individuals who can bring your vision to life.
During pre-production, you should also consider the equipment you will need for the shoot. Determine the camera, lenses, and other technical gear required to achieve the desired look. Ensure that you have all the necessary equipment and that it is in proper working condition.
Finally, create a detailed shot list that outlines each shot, camera movement, and any specific requirements. This will help guide the cinematographer and ensure that all the essential shots are captured during the shoot.
Pre-production planning is crucial for a smooth and successful music video shoot. Taking the time to meticulously plan and organize will save you time and effort during production. It will also provide a clear roadmap for bringing your concept to life and creating a visually captivating music video.
Location Scouting
Location scouting is a crucial step in the pre-production phase of shooting a music video. The right locations can enhance the visual appeal and narrative of your video, creating a captivating backdrop for your performance or story.
When scouting for locations, consider the concept and mood of the music video. Look for settings that align with the desired aesthetic and enhance the overall message you want to convey. Whether you’re searching for urban landscapes, natural scenery, or unique architectural spaces, the location should complement the theme and vibe of the song.
Start by brainstorming potential locations based on your concept. Research places that match the desired atmosphere – parks, beaches, abandoned buildings, or city streets. Consider the visual elements that will be present in the background, such as lighting, textures, and colors, and how they will enhance the overall composition of each shot.
Scout both outdoor and indoor locations to have a variety of options. Outdoor locations provide a natural and expansive feel, while indoor settings offer more control over lighting and background elements. Look for unique and visually interesting spots that can add depth and texture to your music video.
During location scouting, it’s essential to evaluate practical aspects as well. Consider the accessibility of the location and whether it is suitable for your production needs. Check for any permit requirements, restrictions, or potential logistical challenges that may arise during the shoot.
Visit each potential location in person, if possible, to assess its suitability. Take note of the lighting conditions at different times of the day, as well as any potential noise or other distractions that could affect the shoot. Pay attention to details like available power sources, parking, and amenities for the crew and talent.
Keep in mind the budget and resources available for your music video. Some locations may require a fee or permit to shoot, so factor in these costs when making your final decision. If you have a limited budget, consider reaching out to friends or local businesses that may be open to allowing you to shoot in their spaces.
Once you have narrowed down your options, present them to your creative team and collaboratively decide on the best locations for your music video. Pay attention to how the locations work together to create a cohesive visual narrative.
Location scouting is an essential part of creating a visually stunning and engaging music video. The right locations can elevate your video from ordinary to extraordinary, so take the time to find the perfect backdrop for your artistic vision.
Assembling the Crew
Assembling the right crew is crucial for a successful music video production. Each member of the crew brings their unique skills and expertise, collaborating to bring your vision to life. From directors and cinematographers to production designers and makeup artists, it’s important to carefully select professionals who align with your creative goals.
Start by identifying the key roles required for your music video. This typically includes a director, cinematographer, production designer, editor, and a production coordinator. Depending on the complexity of your project, you may also need additional crew members such as a gaffer for lighting, a makeup artist, or a choreographer if there are dance sequences involved.
When searching for crew members, look for individuals who have experience in the music video genre and can understand and contribute to your creative vision. Review their portfolios, showreels, and past work to assess their skills and style. Pay attention to their ability to work within your budget and timeline, as well as their communication and collaboration skills.
Networking within the industry can be a great way to find talented crew members. Attend industry events, join online forums and groups, and reach out to colleagues or friends in the film and music industry for recommendations. Utilize online platforms dedicated to connecting filmmakers and crew members, such as LinkedIn, Mandy.com, or ProductionHub.
During the selection process, conduct interviews or meetings with potential crew members to discuss their experience, creative ideas, and availability. Ensure that their vision aligns with yours and that you have a good rapport with them. Chemistry and collaboration are key when working with a crew, so choose individuals who are not only skilled but also easy to work with.
Once you have chosen your crew, clearly communicate the expectations, responsibilities, and timeline to each member. Make sure everyone is on the same page and has a thorough understanding of the project’s vision and objectives. Foster an environment of open communication and collaboration, encouraging creativity and input from every team member.
Remember that the crew’s expertise will greatly contribute to the quality of your music video. Trust their creative instincts and ideas while maintaining your artistic direction.
Assembling a talented and dedicated crew is an essential step in creating a visually stunning and high-quality music video. Collaborating with professionals who understand your vision and can bring it to life will significantly enhance the production value of your video and leave a lasting impact on your audience.
Casting and Rehearsals
Casting and rehearsals are crucial steps in the production of a music video, as they allow you to find the right talent and ensure a polished performance that aligns with your creative vision. Whether you’re casting actors, dancers, or your own band members, these stages help refine the performance and perfect the execution of your concept.
Start by clearly defining the roles you need to cast based on your music video concept. Determine the look, age range, and specific skills required for each role. Write a casting breakdown that includes a character description and any specific instructions or requirements.
There are multiple ways to find talent for your music video. You can hold open auditions, reach out to talent agencies, or seek referrals. Utilize online platforms dedicated to connecting artists and performers, such as Backstage, Casting Networks, or social media platforms.
When conducting auditions or reviewing submissions, look for individuals who not only have the necessary skills and experience but also bring a certain charisma and stage presence. Consider how they embody the essence of your song and concept, and how their performance will translate on screen. Take note of their ability to take direction and adapt to different styles or choreography.
Once you have selected the talent, schedule rehearsals to fine-tune their performances and ensure synchronization with the music. Work closely with the selected individuals to develop their characters and emotions, especially if there is a narrative or storyline involved.
During rehearsals, focus on perfecting the timing, choreography, and overall energy of the performance. Provide constructive feedback and encourage the talent to bring their own creative ideas to the table. Collaboration and open communication are paramount during this stage to achieve the desired outcome.
Consider recording the rehearsals as it can help you analyze and make necessary adjustments in the performance. This recording can also be beneficial for the editorial process as it provides additional footage options and references for the final edit.
Rehearsals also offer an opportunity to assess any technical issues that may arise during the performances, such as lighting or camera movements. This allows you to make necessary adjustments before the actual shoot, saving valuable time and resources.
Remember that casting and rehearsals are iterative processes. Be open to refining or even recasting roles if necessary to ensure that you have the right talent to bring your vision to life. Your time and effort invested in casting and rehearsals will ultimately lead to a polished and captivating performance in your music video.
Shooting Equipment and Setup
Choosing the right shooting equipment and setting up your gear properly is crucial to capturing high-quality footage for your music video. The equipment you select will depend on your budget, the desired visual style, and the technical requirements of your concept.
Firstly, consider the camera and lenses. If you have a larger budget, opt for professional cinema cameras that offer higher resolution, dynamic range, and image quality. However, there are also many consumer DSLR and mirrorless cameras capable of producing exceptional results at a more affordable price point. Research camera options that fit your budget and provide the desired features and image quality.
When it comes to lenses, choose ones that suit the aesthetic you want to achieve. Wide-angle lenses can create a sense of depth and space, while telephoto lenses can compress the frame and bring distant objects closer. Experiment with different focal lengths to find the look that best complements your concept.
In addition to a camera and lenses, invest in stable camera support, such as tripods or gimbals, to ensure smooth and steady shots. Tripods are essential for static shots or when recording performances without camera movement, while gimbals provide smooth motion for dynamic and cinematic shots.
Lighting equipment is another crucial aspect of achieving the desired look for your music video. Invest in a lighting kit that includes key lights, fill lights, and backlighting options. Experiment with lighting angles, colors, and intensity to create the desired mood and atmosphere. If you have a limited budget, natural lighting or practical lights can also be used creatively to your advantage.
Audio is an integral part of any music video. Invest in quality microphones and audio recording equipment to ensure clear and crisp sound. Consider using separate audio recording devices to capture high-fidelity audio, which can be synced with the video footage during the editing process.
Before the shoot, set up and test your equipment to ensure everything is in working order. Make sure batteries are charged, memory cards are formatted, and all necessary cables and accessories are readily available. This will help avoid any last-minute technical issues.
Furthermore, take the time to create a comfortable shooting environment for your talent and crew. Have chairs, water, and snacks available on set. Keep the shooting area organized and free from clutter. Creating a positive and professional atmosphere will contribute to a smooth and productive shoot.
Lastly, it’s important to customize your equipment setup according to the specific needs of your music video. Whether you need to mount cameras on vehicles, use specialized equipment for aerial shots, or employ green screens for visual effects, adapt your setup to accommodate these requirements.
By selecting the right shooting equipment and setting up your gear properly, you will be equipped to capture visually stunning footage that brings your music video concept to life.
Camera Techniques and Angles
The camera techniques and angles you employ in your music video play a significant role in capturing visually engaging and dynamic shots. These techniques help convey emotions, enhance storytelling, and create a unique visual experience for your audience.
One of the most common techniques is the use of camera movement. By moving the camera, whether through pans, tilts, tracking shots, or dolly movements, you can add a sense of dynamism and fluidity to your shots. Experiment with different camera movements to convey the energy and emotions of the song.
Another technique to consider is the use of different levels and perspectives. Shooting from different heights or angles can create a unique visual look and add depth to your shots. Low angle shots can convey power and dominance, while high angles can create a sense of vulnerability or submissiveness. Play with these perspectives to enhance the storytelling and emotions within your music video.
The composition of your shots is also essential in capturing visually appealing footage. The rule of thirds is a common composition technique that helps create a balanced and aesthetically pleasing frame. Divide the frame into thirds horizontally and vertically, and place key subjects or elements along these lines or at their intersections. This technique draws the viewer’s eye and adds interest to the shot.
Different types of shots can also help convey specific emotions and messages. Wide shots or establishing shots can provide context and set the scene, while close-up shots can reveal emotions and capture intimate moments. Medium shots are versatile and can show interactions between characters or display the performance of musicians. Experiment with different shot sizes to create variety and visual interest throughout your music video.
Aside from these techniques, consider incorporating unique camera angles and perspectives that suit your concept. Bird’s-eye view shots, overhead shots, or even unconventional angles can add visual intrigue and creativity to your music video. Don’t be afraid to think outside the box and experiment with different angles to create a visually captivating experience.
Remember to always consider the story you want to tell and the emotions you want to evoke when choosing camera techniques and angles. Each shot should contribute to the overall narrative and reinforce the message of your music video.
Lastly, use the right equipment and accessories to achieve the desired camera techniques and angles. Tripods, gimbals, and stabilizers can help create smooth and stable camera movements, while lenses of different focal lengths allow for various perspectives. Experiment with different equipment and techniques to find the best combination that brings your artistic vision to life.
By employing a variety of camera techniques and angles in your music video, you can create visually engaging footage that captivates your audience and enhances the overall storytelling experience.
Lighting and Color Grading
Lighting and color grading are essential elements in creating the desired mood, atmosphere, and visual aesthetics for your music video. They play a significant role in setting the tone and enhancing the storytelling of your video.
Lighting can be used creatively to evoke emotions and convey the intended mood of your music video. Different lighting setups, such as soft lighting for a romantic scene or harsh lighting for a dramatic moment, can greatly impact the overall look and feel of your video.
Start by understanding the different lighting techniques and their effects. Key lighting is the primary light source and sets the overall brightness and direction of the scene. Fill lighting helps illuminate shadows and create a more balanced look. Backlighting adds depth and separation, highlighting the subjects from the background.
Experiment with different lighting angles, intensities, and color temperatures to create the desired visual impact. Warm tones can evoke a sense of warmth and intimacy, while cool tones can create a more distant or mysterious atmosphere. Play with contrasting lighting setups to create dramatic and visually striking moments.
In addition to traditional lighting techniques, consider incorporating practical lights or unconventional light sources. These can add unique and creative looks to your music video, adding a sense of authenticity and visual interest.
Color grading is the process of enhancing and manipulating colors in post-production to create a consistent and cohesive visual style throughout your music video. It allows you to establish a specific color palette and mood that enhances the narrative and visual appeal.
When color grading, consider the emotions and message you want to convey. Warm tones can evoke a sense of intimacy and nostalgia, while cool tones can create a more distant or melancholic ambiance. Utilize color grading techniques to enhance the emotions of specific scenes or to create visual contrasts between different parts of your video.
Experiment with different color grading styles, such as desaturating colors for a more muted and somber look or boosting saturation for a vibrant and energetic feel. Color grading also provides an opportunity to unify the visual aesthetics of multiple shots, ensuring a seamless transition between different scenes and sequences.
Keep in mind that lighting and color grading go hand in hand. By considering the lighting during production, you can achieve specific looks that can be enhanced and fine-tuned during the color grading process. The collaboration between the lighting team and the colorist ensures consistency and coherence in the final look of your music video.
Whether you’re going for a natural, subdued look or a bold and stylized aesthetic, careful attention to lighting and color grading will elevate the visual impact of your music video, making it visually captivating and memorable for your audience.
Directing the Performers
Directing the performers in your music video is a crucial aspect of bringing your artistic vision to life and creating impactful performances that resonate with your audience. As the director, your role is to guide and inspire the performers to deliver their best performances while staying true to the narrative and emotions of the song.
Effective communication is key when directing performers. Clearly communicate your vision, expectations, and the emotions you want to convey in each scene. Take the time to discuss and understand the lyrics and message of the song with the performers, so they can bring their own interpretation and connection to the performance.
Provide specific guidance and direction for each performance, focusing on the emotions, body language, and gestures that best convey the desired mood and story of the music video. Encourage the performers to tap into their own experiences and emotions and channel them into their performances for an authentic and impactful portrayal.
During rehearsals and on set, create a supportive and collaborative environment. Encourage the performers to experiment with different approaches, explore their range of emotions, and take risks with their performances. Give constructive feedback and guide them through adjustments to achieve the desired performance.
Pay attention to the details of the performance, including facial expressions, hand movements, and body language. These subtleties can greatly contribute to the overall impact and authenticity of the performance. Encourage the performers to focus on their characters and to stay in the moment, allowing them to fully embody the emotions and intentions of the scene.
Work closely with the cinematographer to ensure that the movements and positioning of the performers are captured effectively on camera. Discuss shot compositions, blocking, and camera angles in order to highlight the performers’ emotions and actions in the most visually pleasing way.
Flexibility is also key when directing performers. Be open to their ideas and interpretations, as they may bring unique perspectives and creative input to the scene. Collaboration and a sense of trust between the director and the performers will result in richer and more authentic performances.
Lastly, always provide encouragement and support to your performers. Acknowledge their efforts, celebrate their successes, and create a positive atmosphere on set. A supportive environment encourages creativity and allows the performers to feel safe and empowered to take risks and push their boundaries.
Directing the performers in your music video requires clear communication, attention to detail, and the ability to inspire and guide their performances. With effective direction, you can bring out the best in your performers, resulting in captivating and emotionally impactful performances that elevate the overall quality of your music video.
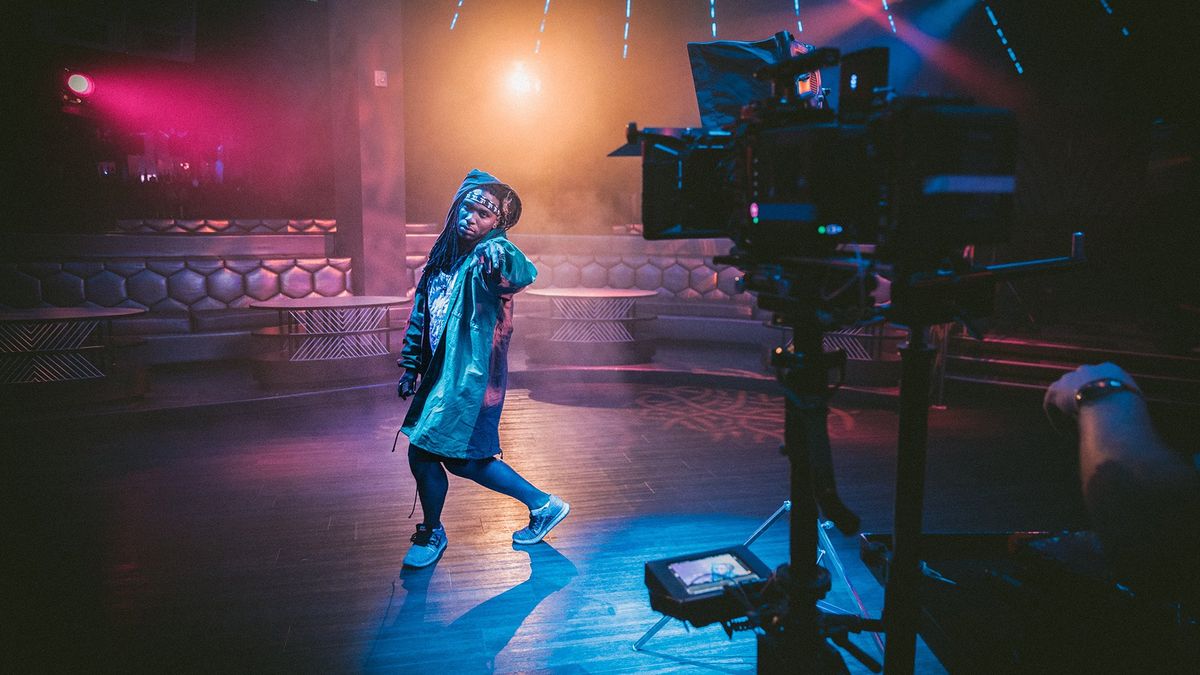
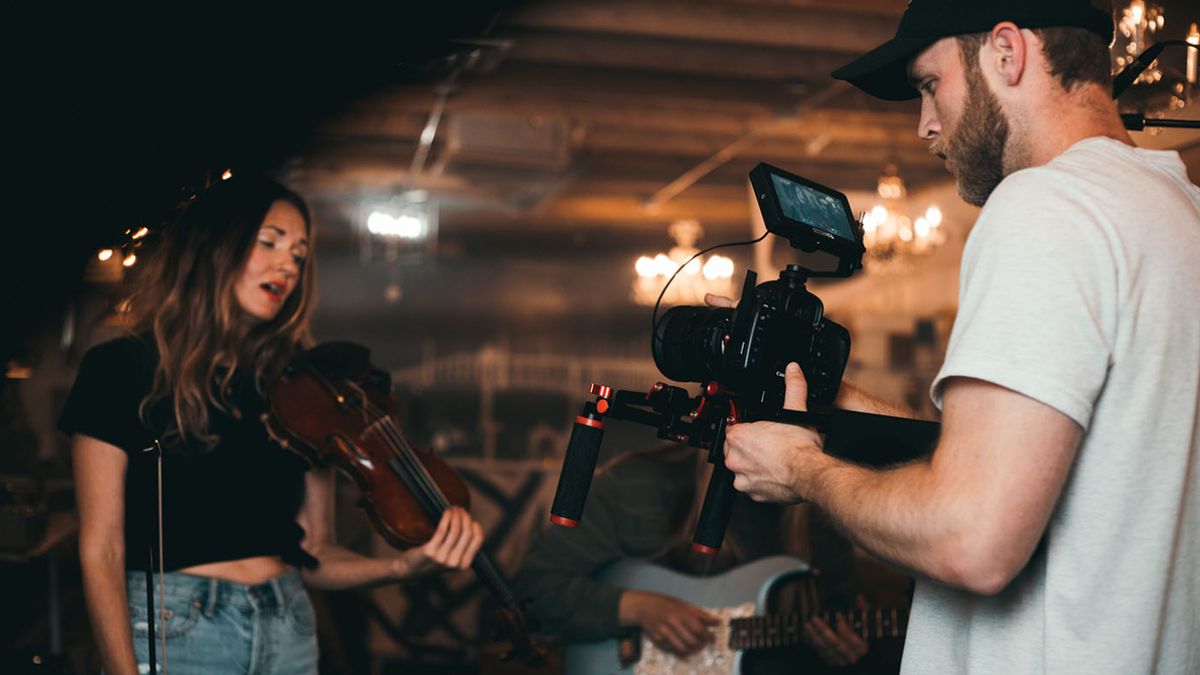
Capturing the Performance
Capturing the performance is a crucial aspect of shooting a music video, as it showcases the talent and brings the song to life visually. The performance segments serve as the centerpiece of the video, conveying the emotions, energy, and artistry of the music.
Before capturing the performance, ensure that all technical aspects are properly set up and ready. Double-check the camera settings, lighting, and audio equipment to ensure optimal recording conditions. Conduct a few test shots to make sure everything is in order and to give the performers an opportunity to acclimate to the environment.
Communicate with the performers beforehand to ensure they are comfortable and confident in their roles. Provide any necessary guidance or reminders about the emotions and actions required for each part of the performance. Encourage them to fully immerse themselves in the music and deliver their most authentic and compelling performances.
During the performance, collaborate with the cinematographer and camera operators to capture a variety of shots. Experiment with different angles, movements, and compositions to add visual interest and enhance the storytelling. Use wide shots to establish the overall performance scene, close-ups to capture the performers’ emotions and expressions, and medium shots to showcase their movements and interactions.
Pay attention to the pacing and rhythm of the performance, ensuring that the camera movements and cuts are in sync with the music. This will create a sense of cohesion and synchronization between the visuals and the audio, enhancing the overall impact of the performance.
Embrace spontaneity and embrace mistakes or unexpected moments. Sometimes, unplanned actions or spontaneous expressions can add authenticity and creative elements to the performance. Be open to capturing these moments and incorporating them into the final edit if they enhance the overall vision of the music video.
Encourage the performers to give their all during each take, even if it means repeating the performance multiple times. The energy and passion exuded by the performers will be felt by the audience and leave a lasting impression.
Ensure that the performers have breaks and rest periods between takes to maintain their energy and enthusiasm. Provide a supportive and encouraging atmosphere where they feel appreciated and motivated to deliver their best performances consistently.
After capturing the performance, take the time to review the footage and provide feedback to the performers. Celebrate their strengths and provide constructive suggestions for improvement as needed. This feedback will help them refine their performances for subsequent takes, if necessary, or for any additional shooting days.
Capturing the performance is a crucial element of the music video production process. By paying attention to the technical details, collaborating with the cinematographer, and nurturing the performers’ talents, you can capture captivating performances that elevate the authenticity and impact of your music video.
Shooting B-Roll
Shooting B-roll is an essential part of capturing additional footage that complements and enhances the main performance in your music video. B-roll footage includes shots of the surroundings, details, and other visual elements that help tell the story and add depth to your video.
Before shooting B-roll, have a clear plan for the types of shots you want to capture. Consider the overall narrative and visuals of your music video and determine what additional footage would support and enhance the storytelling. Create a shot list or storyboard for reference to ensure that you capture a variety of shots that suit your concept.
When shooting B-roll, focus on capturing visually interesting and relevant shots that add context and variety to your video. This could include close-ups of instruments, props, or other objects that are integral to the narrative. Aim to capture details that symbolize the emotions or themes expressed in the song.
Consider the different shooting techniques and angles you can employ to make the B-roll footage visually appealing. Experiment with different perspectives – high-angle shots, low-angle shots, or unconventional angles – to add visual interest and creativity to your video. Incorporate camera movements such as pans, tilts, or tracking shots to add dynamism and energy to the B-roll footage.
Look for opportunities to capture natural or unique moments that occur organically during the production process. These candid shots can provide a sense of authenticity and spontaneity to your video, creating a more immersive and engaging experience for the viewers.
Utilize the surrounding environment to your advantage. If shooting outdoors, pay attention to the lighting conditions and take advantage of golden hour or unique natural elements. Indoor locations can provide interesting backdrops and textures that add depth and visual appeal to your B-roll footage.
Remember to capture a variety of shots in terms of framing and composition. Use wide shots to establish the setting, medium shots to focus on specific actions or interactions, and close-ups to capture intricate details. Varying the shot sizes and composition will add visual interest and provide flexibility during the editing process.
Incorporate movement in your B-roll footage whenever possible. This could include capturing performers walking or dancing, cars passing by, or any other elements that add dynamic motion to the shot. Movement can add energy and excitement to your video, creating a more immersive experience for the viewers.
Lastly, pay attention to the transitions between the main performance footage and the B-roll footage. Look for opportunities to seamlessly merge the two through creative editing techniques, such as match cuts or visual overlaps. This will create a cohesive flow and ensure that the B-roll footage complements and enhances the main performance.
By thoughtfully planning and executing the shooting of B-roll footage, you can enhance the storytelling, add depth, and provide visual interest in your music video. These additional shots contribute to the overall production value and create a more engaging and visually captivating experience for your viewers.
Utilizing Special Effects
Special effects can elevate the visual impact and creativity of your music video, adding a touch of magic and intrigue to enhance the overall storytelling and aesthetics. From practical effects to visual effects, there are various techniques you can utilize to create stunning and memorable visuals.
Practical effects involve creating visual illusions or manipulating physical elements on set. These effects can include pyrotechnics, smoke, atmospheric elements, or even simple props and practical set designs. Practical effects can add a sense of realism and tangibility to your video, providing a more immersive experience for the viewers.
Consider using practical effects that align with the theme, mood, and narrative of your music video. For example, if your video has a fantastical or supernatural element, practical effects like levitation or object manipulation can enhance the overall visual appeal and storytelling.
Visual effects (VFX), on the other hand, involve digitally manipulating and enhancing footage during the post-production stage. This can include adding CGI elements, enhancing colors, creating particle effects, or compositing different shots together. VFX can add a surreal or futuristic touch to your music video, allowing you to create visuals that go beyond the limitations of practical effects.
When using visual effects, it’s important to have a clear vision and plan. Work closely with a skilled VFX artist or team to ensure that the effects seamlessly integrate with the rest of the video and enhance rather than detract from the overall storytelling. Collaboration and communication between the director, editor, and VFX artist are crucial to achieving the desired results.
Avoid relying solely on special effects to carry your video. The effects should serve the story and enhance the emotions and themes expressed in the song. Balance the use of special effects with other elements such as cinematography, performance, and editing to create a well-rounded and cohesive visual experience.
Keep in mind that budget and resources can impact the extent and quality of special effects you are able to incorporate. When planning your music video, be realistic about what is achievable within your means. Simple and practical effects can be just as effective and impactful if executed well.
Experiment with different techniques and effects to find the ones that best suit your music video. Attend workshops or collaborate with professionals who specialize in special effects to explore new ideas and gain insights into what is possible within your production.
Ultimately, special effects can be a powerful tool in capturing the imagination of your audience and elevating the visual appeal of your music video. When used creatively and purposefully, special effects can transform your video into a captivating and visually stunning experience that leaves a lasting impression.
Post-Production Editing
Post-production editing is a critical phase in bringing your music video to life. It is during this stage that you weave together all the visual and audio elements to create a cohesive and impactful final product. Editing not only helps refine the storytelling and pacing of your video, but it also allows for creative enhancements and the addition of visual effects.
Begin by organizing and reviewing the footage you captured during the shoot. Sort and label the clips based on the shot list or storyboard created during pre-production. This will help streamline the editing process and make it easier to locate specific shots or scenes.
Use a professional editing software, such as Adobe Premiere Pro or Final Cut Pro, to assemble and edit your video. Start by creating a rough cut, placing the shots in the desired sequence according to the storyboard or planned narrative. Trim and arrange the clips to establish a compelling pace and flow.
Pay attention to the visual continuity between shots, ensuring that there are smooth transitions between scenes. Use techniques such as jump cuts or cross-dissolves to create seamless connections between shots, while keeping in mind the desired rhythm and energy of the music video.
Experiment with different editing techniques and styles to enhance the visual appeal and storytelling of your video. This can include manipulation of the footage speed, adding overlays or split screens, or incorporating non-linear storytelling elements. Be creative and trust your artistic instincts during the editing process.
Consider incorporating visual effects, if desired, to enhance the overall look and feel of your music video. This may involve adding CGI elements, color grading, or graphic overlays. Work closely with VFX artists or use available tools within the editing software to seamlessly integrate these effects into the footage.
As you fine-tune the edit, focus on the pacing and timing of the shots to ensure they align with the rhythm and emotions of the song. Pay attention to the coordination between the visuals and the beats of the music, syncing the performance and the edits to create a more impactful and engaging video experience.
Sound design and audio mixing are crucial elements in post-production. Clean up any unwanted noise, enhance the clarity and balance of the instruments and vocals, and synchronize the audio with the visuals. Consider adding sound effects or ambient sounds to further immerse the audience in the world of your music video.
Lastly, the final step in post-production editing is the rendering and export of your video. Use the appropriate settings to ensure the best possible quality while considering the desired output format, such as for online platforms or television. Review the final export to ensure all elements are properly aligned and synchronized.
Post-production editing is a creative process that requires attention to detail, technical expertise, and artistic vision. It is through editing that your music video truly comes to life, transforming the raw footage into a visually captivating and emotionally resonant final product.
Adding Visual Effects
Visual effects (VFX) play a significant role in enhancing the visual appeal and creativity of your music video. They allow you to go beyond the limitations of practical effects and create stunning, surreal, and fantastical visuals that captivate your audience. Adding visual effects can elevate the overall production value of your video and make it stand out.
Before adding visual effects, have a clear vision and plan for the desired look and feel. Consider how the effects will align with the narrative, mood, and style of your music video. Collaborate with skilled VFX artists or a post-production team to ensure that the effects seamlessly integrate with the rest of the video and emphasize the desired emotional impact.
There are various types of visual effects you can utilize, depending on your concept and budget. These include CGI (computer-generated imagery) elements, motion graphics, compositing, and more. Each type of effect brings its own unique set of possibilities and challenges, so choose the ones that best suit your artistic vision.
CGI elements can be used to create imaginary landscapes, surreal creatures, or otherworldly environments that complement your narrative. With advancements in technology, CGI effects have become more accessible, even on a smaller budget. Work closely with a skilled VFX artist to create realistic and seamless CGI that blends with the rest of the footage.
Motion graphics can be employed to add dynamic text, animated designs, or graphical elements to your music video. They can enhance the visual storytelling and serve as visual cues to emphasize certain lyrics or moments within the song. Graphic overlays or visual elements can further enhance the aesthetic appeal and branding of your video.
Compositing is the process of combining multiple elements from different shots to create a cohesive visual. This can include green-screen footage, where performers are filmed against a green backdrop and later replaced with different backgrounds or effects. Compositing can add depth, context, and visual interest to your music video.
Color grading is another visual effect to consider. Adjusting the color balance, saturation, and tone of your footage can greatly impact the overall mood and aesthetic. Experiment with different color grading styles to create a look that complements the emotions and atmosphere portrayed in the music video.
When adding visual effects, it’s important to strike a balance between creativity and subtlety. Avoid overusing effects that may distract from or overpower the main focus of the video. The visual effects should serve the narrative and enhance the storytelling, not overshadow it.
Collaboration between the director, editor, and VFX artists is crucial during the post-production process to ensure a cohesive and seamless integration of the visual effects. Regular communication and feedback sessions will help achieve the desired results and ensure that the effects align with the artistic vision of the music video.
Ultimately, adding visual effects can transform your music video into a visually captivating and memorable experience for your audience. When used thoughtfully and skillfully, these effects enhance the impact and creativity of your video, bringing your artistic vision to life.
Sound Design and Mixing
Sound design and mixing are essential elements in creating a polished and immersive audio experience for your music video. They play a crucial role in enhancing the impact of the music, capturing the emotions, and delivering clear and balanced audio to your audience.
Sound design involves creating or selecting sound effects and ambient sounds that complement the visuals and evoke the desired mood and atmosphere. These effects can include footsteps, environmental sounds, or any other audio elements that enhance the storytelling or add depth to the overall experience. Work with a sound designer or utilize online libraries to find and incorporate the right sound effects into your music video.
Consider the concept and style of your music video when designing the sound. Experiment with layering and manipulating different sounds to create unique auditory textures that amplify the visuals. Use sound design to guide the viewers’ attention, emphasize specific moments, or add an extra dimension to the narrative.
Once the sound effects are in place, mixing is the process of adjusting the volume, EQ, and spatial placement of each audio element to create a balanced and cohesive final mix. It is important to maintain a good mix that allows the music and vocals to shine while ensuring that the other audio elements are heard clearly and blend well with the overall audio landscape.
During the mixing process, pay attention to the individual tracks in your audio session. Adjust the levels to ensure that no element is overpowering or getting lost in the mix. Blend the music, vocals, and sound effects so that they support and enhance each other without competing for dominance. Utilize EQ to shape the frequency response of each element, removing any unwanted frequencies and bringing out the desired characteristics of the audio.
Spatial placement is also an essential consideration in mixing. Position each audio element within the stereo field or create a sense of depth in a 3D audio space. This helps create a more immersive and engaging experience for the listener, adding dimensionality to your music video.
Pay attention to transitions between different audio elements, ensuring smooth and seamless transitions between different scenes or shots. Utilize appropriate fades, crossfades, or other techniques to make the audio flow seamlessly and avoid any abrupt or jarring changes in the sound.
Thoroughly review and fine-tune the final mix to ensure that it translates well across different playback systems, such as speakers or headphones. Play the mix in different environments to verify its quality and make any necessary adjustments. Consider collaborating with a professional audio engineer or using reference tracks to achieve an optimal mix.
Finally, perform a final quality check by listening to the mix with fresh ears to identify any small adjustments that can further enhance the overall audio experience. Take the time to make these refinements before finalizing and exporting your audio mix.
Sound design and mixing are critical aspects of the post-production process that contribute to the overall quality and impact of your music video. By carefully designing the sound and balancing the audio elements, you can create an immersive and engaging auditory experience that elevates the emotional impact and storytelling of your video.
Finalizing the Music Video
Finalizing the music video is the last step in the production process, where all the visual and audio elements come together to create a cohesive and polished final product. It involves reviewing, fine-tuning, and making any necessary adjustments to ensure that the music video meets your artistic vision and industry standards.
Start by reviewing the edited version of the music video in its entirety. Watch it multiple times, preferably with fresh eyes, to assess the pacing, flow, and overall impact. Take note of any sections that may need further refinement or adjustments.
Consider the feedback from colleagues, trusted individuals, or focus groups to gain outside perspectives. Take into account their input regarding the storytelling, visuals, audio, and overall impression of the music video. This feedback can provide valuable insights and help identify areas that may require attention.
During the finalization process, pay attention to the technical aspects of the video. Check for any continuity errors, color inconsistencies, or visual artifacts that may have been missed in the earlier stages. Ensure that the audio is balanced, clear, and synchronized with the visuals.
Finalize the color grading and visual effects to achieve a consistent and cohesive look throughout the music video. Make any necessary adjustments to ensure that the visuals align with the desired mood and style.
Perform a final review of the audio, paying close attention to the clarity, volume, and quality of the music and vocals. Ensure that the sound design and mixing are well-balanced and enhance the overall audio experience. Make any final adjustments to address any lingering issues or suggestions for improvement.
Once you are satisfied with the final version, export the music video in the appropriate format and resolution for distribution. Consider the platform on which the video will be shared – whether it’s online streaming platforms, social media, or broadcast television – and ensure that it meets the specifications and requirements for optimal playback quality.
Before officially releasing the music video, be sure to double-check and clear any necessary licenses or permissions for the use of copyrighted materials, such as music, visuals, or artwork.
Once everything is finalized and in accordance with your artistic vision, it’s time to share your music video with the world. Publish it on online platforms, promote it through social media channels, and engage with your audience to generate interest and gather feedback.
Remember that the process of finalizing a music video is iterative, and it may require multiple rounds of review and adjustment. Be open to feedback, trust your creative instincts, and ensure that the final product accurately represents your artistic vision and the emotions expressed in the song.
Finalizing the music video is an exciting and rewarding process, as it signifies the culmination of your artistic endeavors. With careful attention to detail, dedication, and passion, your final product will captivate your audience and serve as a visual masterpiece.
Conclusion
Shooting a music video is a multi-faceted and exciting journey that requires careful planning, creativity, and collaboration. From choosing the right concept to finalizing the video, each step contributes to creating a visually stunning and engaging music video that captivates your audience.
Throughout this article, we have explored the various aspects of music video production, from pre-production planning to post-production editing. We have delved into the importance of selecting the right concept and assembling a talented crew, as well as the significance of casting and directing the performers with precision and creativity.
We have discussed the technical considerations, such as choosing the right equipment, utilizing camera techniques and angles effectively, and refining the visual aesthetic through lighting and color grading. Furthermore, we have explored the world of special effects, sound design, and mixing, which add depth and polish to your music video.
The finalization stage is where all the pieces come together, ensuring that the music, visuals, and overall production are harmonized and ready for release. By thoroughly reviewing and fine-tuning the video, you can make any necessary adjustments to create a cohesive and impactful final product.
Remember, as an artist, it is crucial to infuse your personal style and creativity into each stage of the music video production process. Collaborate with talented individuals who share your vision, experiment with different techniques and ideas, and always trust your instincts.
Ultimately, shooting a music video is an opportunity to showcase your musical talent, connect with your audience on a deeper level, and leave a lasting impression. By creating a visually stunning and engaging music video, you have the power to captivate and inspire your audience, making a lasting impact in the world of music.
So, grab your camera, unleash your creativity, and embark on the exciting journey of shooting a music video that will elevate your artistry, engage your audience, and solidify your place in the music industry.