Home>Devices & Equipment>Microphone>How To Set Up Your Blue Yeti Microphone

Microphone
How To Set Up Your Blue Yeti Microphone
Published: February 17, 2024
Learn how to set up your Blue Yeti microphone for professional sound quality. Follow our step-by-step guide to optimize your microphone settings and improve your audio recordings.
(Many of the links in this article redirect to a specific reviewed product. Your purchase of these products through affiliate links helps to generate commission for AudioLover.com, at no extra cost. Learn more)
Table of Contents
Introduction
So, you've just purchased a Blue Yeti microphone, and you're eager to start using it for your podcasts, voiceovers, or music recordings. Congratulations on investing in a top-notch microphone known for its exceptional audio quality and versatility. Whether you're a seasoned content creator or a beginner in the world of audio recording, the Blue Yeti is a fantastic choice that offers professional-grade performance in a user-friendly package.
In this comprehensive guide, we'll walk you through the process of setting up your Blue Yeti microphone, from unboxing to troubleshooting common issues. By the end of this article, you'll have the knowledge and confidence to maximize the potential of your Blue Yeti, ensuring that your recordings sound clear, crisp, and professional.
Let's dive into the exciting world of high-quality audio recording with the Blue Yeti microphone. Whether you're a podcaster, musician, gamer, or simply someone who values crystal-clear sound, this guide is designed to help you unleash the full potential of your Blue Yeti microphone.
Unboxing Your Blue Yeti Microphone
Unboxing your Blue Yeti microphone is an exciting first step towards unlocking its powerful capabilities. The packaging is designed to ensure that your microphone arrives safely and securely, ready to deliver exceptional audio quality. As you open the box, you’ll find the Blue Yeti nestled within protective foam, emphasizing the manufacturer’s commitment to delivering a premium product.
Upon lifting the Blue Yeti from the box, you’ll immediately notice its solid build and substantial weight, conveying a sense of durability and professional craftsmanship. The sleek and modern design of the microphone is complemented by its sturdy base, which provides stability during use, minimizing the risk of accidental tipping or movement.
As you continue unboxing, you’ll discover the included accessories that accompany the Blue Yeti, such as the USB cable for connecting the microphone to your computer. Additionally, some Blue Yeti models may come with a user manual or documentation, providing valuable insights into the microphone’s features and functionality.
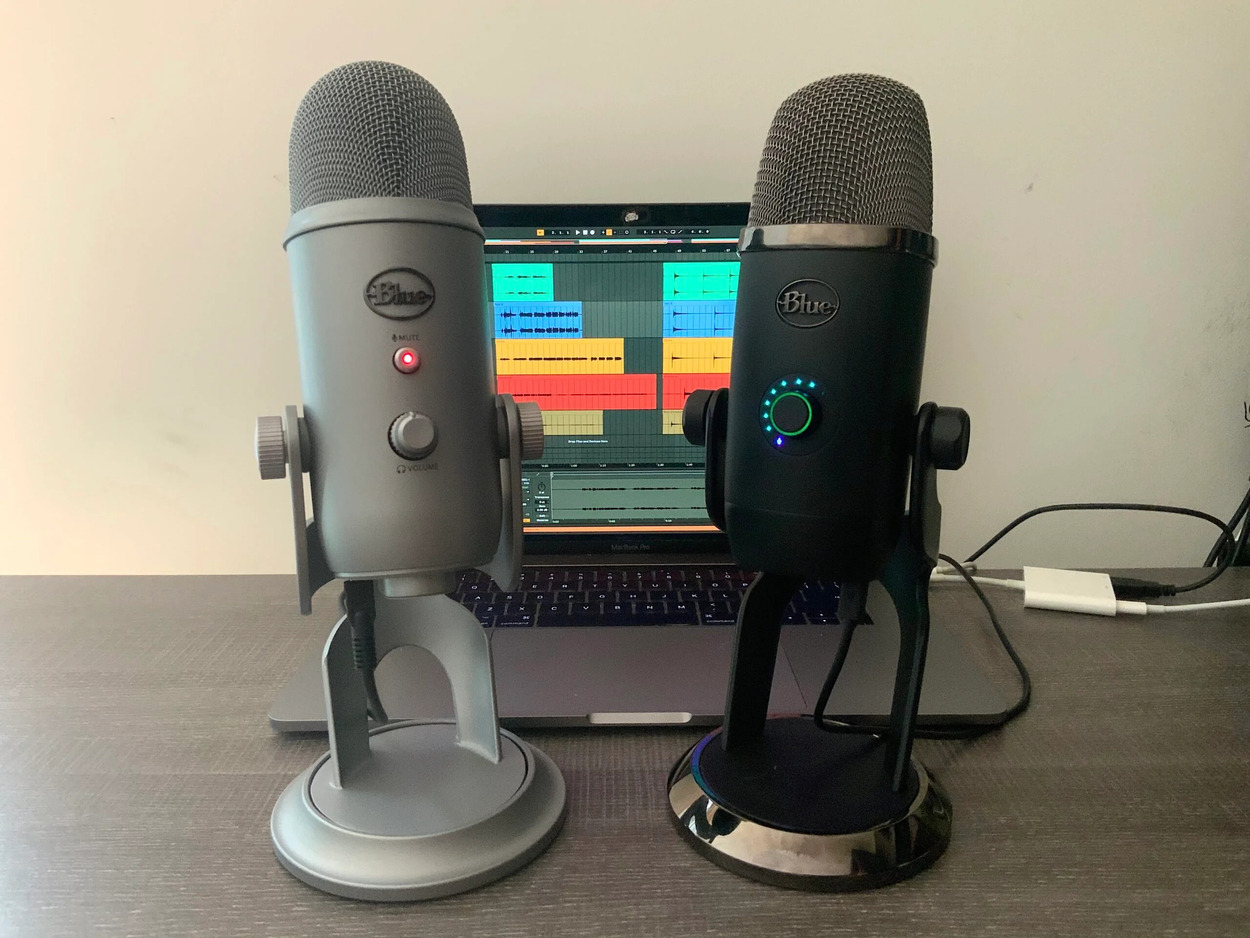
Handling the Blue Yeti microphone for the first time, you’ll appreciate its intuitive layout, with easily accessible controls for adjusting settings such as gain, polar patterns, and headphone volume. The microphone’s versatile functionality is evident from the outset, promising a seamless recording experience for a wide range of applications.
Unboxing the Blue Yeti microphone sets the stage for an immersive and rewarding audio recording journey. With its robust construction and thoughtfully included accessories, the Blue Yeti is poised to become an indispensable tool for capturing pristine sound in any environment.
Assembling Your Blue Yeti Microphone
Assembling your Blue Yeti microphone is a straightforward process that ensures you can begin using it efficiently. The microphone’s design prioritizes user-friendliness, allowing you to set it up with ease and focus on your recording tasks.
The first step in assembling your Blue Yeti microphone is to attach it to the included base. The base serves as a stable platform for the microphone, providing support and minimizing vibrations that could affect the recording quality. The attachment process is simple and secure, ensuring that the microphone remains firmly in place during use.
Once the Blue Yeti is securely attached to the base, you can position it according to your preferences. The microphone’s adjustable stand allows you to angle and orient it for optimal recording, whether you’re capturing vocals, instruments, or ambient sounds. This flexibility empowers you to achieve the ideal setup for your specific recording environment.
After positioning the Blue Yeti microphone, you can connect the included USB cable to its port, enabling communication with your computer. The USB connection facilitates seamless integration with recording software, ensuring that your computer recognizes the Blue Yeti as an audio input device. This step is crucial for harnessing the microphone’s full potential and leveraging its exceptional sound-capturing capabilities.
Assembling your Blue Yeti microphone is a satisfying process that culminates in a fully functional setup ready to capture high-quality audio. The microphone’s user-centric design and intuitive assembly ensure that you can focus on your creative endeavors without being hindered by technical complexities.
Connecting Your Blue Yeti Microphone to Your Computer
Once you have assembled your Blue Yeti microphone, the next crucial step is to connect it to your computer, enabling seamless communication and integration with your recording software. The Blue Yeti’s USB connectivity simplifies this process, allowing for quick and hassle-free setup.
To connect your Blue Yeti microphone to your computer, start by locating an available USB port on your computer or laptop. The USB cable included with the Blue Yeti features a standard USB connector on one end and a micro USB connector on the other, ensuring compatibility with a wide range of devices.
With the USB cable in hand, plug the standard USB connector into an available USB port on your computer. The secure and snug fit of the connector ensures a reliable connection, minimizing the risk of signal interruptions during recording sessions.
Once the standard USB connector is securely plugged into your computer, take the micro USB end of the cable and insert it into the corresponding port on the Blue Yeti microphone. The micro USB port is conveniently located on the underside of the microphone, allowing for effortless connection without obstructing the microphone’s functionality.
Upon establishing the USB connection between your Blue Yeti microphone and your computer, your operating system should recognize the microphone as an audio input device. This recognition is crucial for configuring your recording software to utilize the Blue Yeti as the preferred microphone, ensuring that your recordings benefit from its exceptional audio quality and precision.
Connecting your Blue Yeti microphone to your computer marks a pivotal moment in your recording setup, laying the foundation for capturing pristine audio with ease and reliability. The seamless integration facilitated by the USB connection empowers you to focus on your creative endeavors without being encumbered by technical complexities.
Adjusting Your Blue Yeti Microphone Settings
After connecting your Blue Yeti microphone to your computer, it’s essential to familiarize yourself with its settings and make adjustments to optimize its performance for your specific recording needs. The Blue Yeti offers a range of configurable settings that allow you to customize its behavior and capture pristine audio in diverse environments.
One of the key settings to consider is the microphone’s gain control. This setting determines the microphone’s sensitivity to sound, allowing you to adjust it according to the volume of the audio source. By fine-tuning the gain control, you can ensure that the Blue Yeti captures clear and balanced audio without distortion, even when recording loud sound sources.
Another crucial setting is the selection of polar patterns. The Blue Yeti microphone offers multiple polar patterns, including cardioid, bidirectional, omnidirectional, and stereo. Each pattern is tailored for specific recording scenarios, such as solo vocals, interviews, conference calls, and ambient sound capture. Selecting the appropriate polar pattern optimizes the microphone’s directionality, enhancing the accuracy and focus of your recordings.
Additionally, the Blue Yeti features a headphone volume control that allows you to monitor your recordings in real time. Adjusting the headphone volume ensures that you can hear the captured audio with clarity, enabling you to make on-the-fly adjustments and maintain audio quality throughout the recording process.
Furthermore, the microphone’s mute button provides a convenient way to temporarily disable audio capture, offering flexibility during recording sessions. Whether you need to pause for a moment or make adjustments without affecting the ongoing recording, the mute button empowers you to exert precise control over the microphone’s input.
By familiarizing yourself with and adjusting these settings, you can harness the full potential of your Blue Yeti microphone, tailoring its behavior to suit your specific recording requirements. The microphone’s versatile settings empower you to capture exceptional audio with precision and clarity, ensuring that your recordings meet professional standards.
Testing Your Blue Yeti Microphone
Once you have adjusted the settings of your Blue Yeti microphone, it’s essential to conduct thorough testing to ensure that it delivers the desired audio quality and meets your recording needs. Testing the microphone allows you to verify its performance, identify any potential issues, and make further adjustments as necessary.
Begin by launching your preferred recording software on your computer. Whether you’re using a dedicated digital audio workstation (DAW) or a simple recording application, ensure that the software recognizes the Blue Yeti as the selected audio input device. This step is crucial for initiating the recording process and monitoring the microphone’s performance in real time.
With the recording software ready, speak or perform into the Blue Yeti microphone while monitoring the audio levels. Pay close attention to the clarity, volume, and fidelity of the captured audio. By testing the microphone with your voice or musical instruments, you can evaluate its ability to faithfully reproduce sound without introducing unwanted artifacts or distortion.
Experiment with different polar patterns to assess their impact on sound capture. For example, if you’re using the cardioid pattern for solo vocals, evaluate its ability to isolate your voice while minimizing background noise. Similarly, if you’re conducting an interview using the bidirectional pattern, test its effectiveness in capturing sound from two distinct directions with clarity and balance.
During the testing phase, adjust the microphone’s gain control to determine the optimal sensitivity for your specific recording scenario. By fine-tuning the gain, you can ensure that the Blue Yeti captures sound accurately without overloading or underrepresenting the audio signal, resulting in balanced and professional recordings.
As you test the Blue Yeti microphone, take advantage of the headphone volume control to monitor the captured audio in real time. This allows you to assess the quality of the recordings and make immediate adjustments to the microphone’s settings, ensuring that the final audio output meets your expectations.
Thoroughly testing your Blue Yeti microphone is a crucial step in the setup process, enabling you to fine-tune its settings and verify its performance across different recording scenarios. By conducting comprehensive tests, you can gain confidence in the microphone’s capabilities and ensure that it consistently delivers exceptional audio quality for your creative endeavors.
Troubleshooting Common Blue Yeti Microphone Issues
While the Blue Yeti microphone is renowned for its exceptional performance and user-friendly design, it’s not uncommon to encounter occasional issues that may impact its functionality. By familiarizing yourself with common troubleshooting techniques, you can swiftly address these issues and ensure that your Blue Yeti continues to deliver outstanding audio quality.
1. Connectivity Problems: If your Blue Yeti microphone is not being recognized by your computer, start by checking the USB connection. Ensure that the USB cable is securely plugged into both the microphone and an available port on your computer. If connectivity issues persist, try using a different USB cable or port to isolate the source of the problem.
2. Audio Distortion: When experiencing audio distortion during recordings, adjust the microphone’s gain control to lower the sensitivity. High gain settings can lead to distortion, especially when recording loud sound sources. Additionally, ensure that the audio levels in your recording software are not peaking, as this can also cause distortion.
3. Background Noise: If you notice an excessive amount of background noise in your recordings, consider switching to a different polar pattern that is better suited for noise isolation. For example, the cardioid pattern is effective at focusing on sound sources in front of the microphone while minimizing ambient noise from the sides and rear.
4. Monitoring Issues: If you encounter difficulties with monitoring the audio through the headphone output, check the headphone volume control on the Blue Yeti. Ensure that the volume is set to an appropriate level, allowing you to hear the captured audio with clarity. Additionally, verify that your computer’s audio settings are configured to route the microphone’s output to the headphone jack.
5. Software Compatibility: In some cases, compatibility issues with recording software may arise. Ensure that your recording software is updated to the latest version and is compatible with the Blue Yeti microphone. If necessary, check for driver updates or firmware updates for the microphone to ensure seamless integration with your preferred recording application.
By addressing these common issues through systematic troubleshooting, you can maintain the optimal performance of your Blue Yeti microphone and mitigate potential obstacles that may arise during recording sessions. Familiarizing yourself with these troubleshooting techniques empowers you to overcome challenges swiftly, allowing you to focus on capturing exceptional audio with confidence and ease.
Conclusion
Congratulations! You have successfully navigated the process of setting up and optimizing your Blue Yeti microphone, positioning yourself to embark on a rewarding journey of high-quality audio recording. By unboxing, assembling, and connecting your Blue Yeti, you have laid the groundwork for capturing pristine sound with confidence and precision.
Throughout this guide, you have gained valuable insights into adjusting the microphone’s settings, testing its performance, and troubleshooting common issues. Armed with this knowledge, you are well-equipped to harness the full potential of the Blue Yeti, ensuring that your recordings meet professional standards and captivate your audience with exceptional audio quality.
As you continue to explore the capabilities of your Blue Yeti microphone, remember to leverage its versatile features, such as adjustable polar patterns and gain control, to tailor its behavior to suit diverse recording scenarios. Whether you’re capturing vocals, instruments, podcasts, or live streams, the Blue Yeti empowers you to achieve outstanding results with ease.
Furthermore, remain attentive to the nuances of troubleshooting, as occasional challenges may arise. By employing the recommended troubleshooting techniques, you can swiftly address common issues and maintain the consistent performance of your Blue Yeti, ensuring that it remains a reliable and indispensable tool in your creative endeavors.
Ultimately, the Blue Yeti microphone stands as a testament to innovation and excellence in the realm of audio recording. Its intuitive design, exceptional build quality, and unparalleled sound-capturing capabilities make it a valuable asset for content creators, musicians, podcasters, and voiceover artists alike.
As you venture forth with your Blue Yeti microphone, unleash your creativity and passion, knowing that you possess the knowledge and resources to capture breathtaking soundscapes and compelling audio experiences. Embrace the art of recording with confidence, knowing that the Blue Yeti is your steadfast companion in the pursuit of sonic excellence.
May your recording sessions be filled with inspiration, innovation, and the sheer joy of creating remarkable audio content. With the Blue Yeti microphone as your ally, the possibilities are endless, and the sonic landscapes you craft are destined to resonate with brilliance.

