Home>Devices & Equipment>Music Box>How To Repair Thorens Music Box

Music Box
How To Repair Thorens Music Box
Published: January 12, 2024
Looking for a guide on how to repair your Thorens music box? Discover expert tips and techniques for fixing your music box and bringing the music back to life.
(Many of the links in this article redirect to a specific reviewed product. Your purchase of these products through affiliate links helps to generate commission for AudioLover.com, at no extra cost. Learn more)
Table of Contents
- Introduction
- Step 1: Gathering the necessary tools
- Step 2: Opening the Thorens music box
- Step 3: Inspecting and identifying the issue
- Step 4: Repairing or replacing damaged parts
- Step 5: Cleaning and lubricating the music box mechanism
- Step 6: Properly reassembling the Thorens music box
- Step 7: Testing and fine-tuning the repaired music box
- Step 8: Maintaining and preserving the Thorens music box
- Conclusion
Introduction
Music boxes have a timeless charm and allure that can transport us to a world of melody and nostalgia. Among the many brands that have crafted exquisite music boxes, Thorens stands as a revered name in the industry. Known for their precision engineering and beautiful melodies, Thorens music boxes have captured the hearts of collectors and enthusiasts for generations.
However, like any mechanical device, Thorens music boxes may encounter issues over time. Whether it’s a broken spring, a misaligned gear, or a worn-out mechanism, these delicate treasures may require repair to restore their enchanting melodies.
In this article, we will guide you through the process of repairing a Thorens music box, ensuring that you can revive its harmonious melodies while preserving its authenticity. From gathering the necessary tools to properly reassembling the music box, we’ll provide step-by-step instructions to help you navigate the repair process. We’ll also share tips on maintaining and preserving your Thorens music box for years to come.
Whether you are a music box enthusiast or a curious DIY-er, this guide will equip you with the knowledge and skills to mend your beloved Thorens music box and relish in its captivating tunes once again.
Join us as we embark on a journey to unlock the secrets of Thorens music box repair, and let the melodies fill your heart and home once more.
Step 1: Gathering the necessary tools
Before you embark on repairing your Thorens music box, it’s essential to gather all the necessary tools. Having the right tools at hand will make the repair process smoother and more efficient. Here’s a list of tools you’ll need:
- Screwdriver set: A set of precision screwdrivers with various sizes will help you remove the screws that hold the music box together. It’s crucial to have screwdrivers that perfectly fit the screws to avoid damaging them.
- Tweezers: Tweezers are invaluable when it comes to delicate tasks, such as handling tiny springs or placing gears. Opt for tweezers with a fine point for optimal control.
- Lubricant: A music box mechanism requires proper lubrication to operate smoothly. Choose a high-quality lubricant that is specifically made for mechanical devices. Avoid using oil or grease that may damage the delicate parts.
- Cleaning supplies: To ensure effective cleaning, gather soft brushes, cotton swabs, and microfiber cloths. These will be useful for removing dust, debris, and old lubricant from the music box components.
- Replacement parts: Depending on the issue with your Thorens music box, you may need to replace certain components. It’s advisable to have spare springs, gears, or other commonly damaged parts readily available. Consult a Thorens specialist or music box repair shop to determine the necessary replacement parts.
By gathering these tools before starting the repair process, you’ll ensure that you have everything you need to tackle the task at hand. Now that you’re equipped with the right tools, let’s move on to the next step: opening the Thorens music box.
Step 2: Opening the Thorens music box
Opening your Thorens music box is the first step towards uncovering the internal mechanisms that require repair or maintenance. Follow the steps outlined below to safely open your music box:
- Prepare a clean, well-lit workspace: Find a clear area where you can work undisturbed. Make sure to have enough space to lay out the music box components without the risk of losing or misplacing any parts. A well-lit workspace will help you better inspect and work on the delicate mechanisms.
- Identify the access points: Examine your Thorens music box to locate the access points that allow you to open it. In most cases, there will be screws or small latches that secure the top or bottom of the music box. Carefully inspect the edges and sides to find these access points.
- Use the appropriate tools: Depending on the type of fasteners, use the correct screwdriver or tool to loosen and remove the screws or release the latches. It’s important to use the right tools to avoid damaging the exterior of the music box.
- Take note of the location and arrangement of the components: Before fully opening the music box, take a moment to observe and note the position, arrangement, and orientation of the components. This will aid you during reassembly later on.
- Gently lift the top or bottom of the music box: Once the screws or latches have been loosened, carefully lift the top or bottom of the music box. Be cautious as you do this, as the internal mechanisms may be delicate and can easily be damaged if mishandled.
- Set aside the cover and examine the internal components: Once the music box is open, set aside the cover and take a close look at the internal components. Pay attention to any visible damage or signs of wear and tear that may require repair or replacement.
By following these steps, you will be able to safely open your Thorens music box without causing any damage to its delicate mechanisms. With the music box open, you can now proceed to the next step: inspecting and identifying the issue.
Step 3: Inspecting and identifying the issue
Once you have opened your Thorens music box, it’s time to carefully inspect the internal components and identify the issue that is causing the malfunction or disruption to its melodious harmony. Follow these steps to effectively inspect and identify the problem:
- Observe the overall condition: Take a close look at the components, paying attention to any visible damage, misalignment, or signs of wear and tear. Check for loose or broken parts, rust, or excessive dirt and debris.
- Listen for any irregular sounds: Wind up the music box or activate the mechanism to listen for any unusual or irregular sounds. This may help you pinpoint the area or component that is causing the issue.
- Manually test the movement of the components: Carefully interact with the gears, levers, and other moving parts using tweezers or your fingers. Ensure that the parts move smoothly without any stiffness, resistance, or excessive play.
- Examine the spring mechanism: The spring is a common area of concern in music boxes. Check for any broken or stretched springs. If there is excessive tension or slack, you may need to adjust or replace the spring.
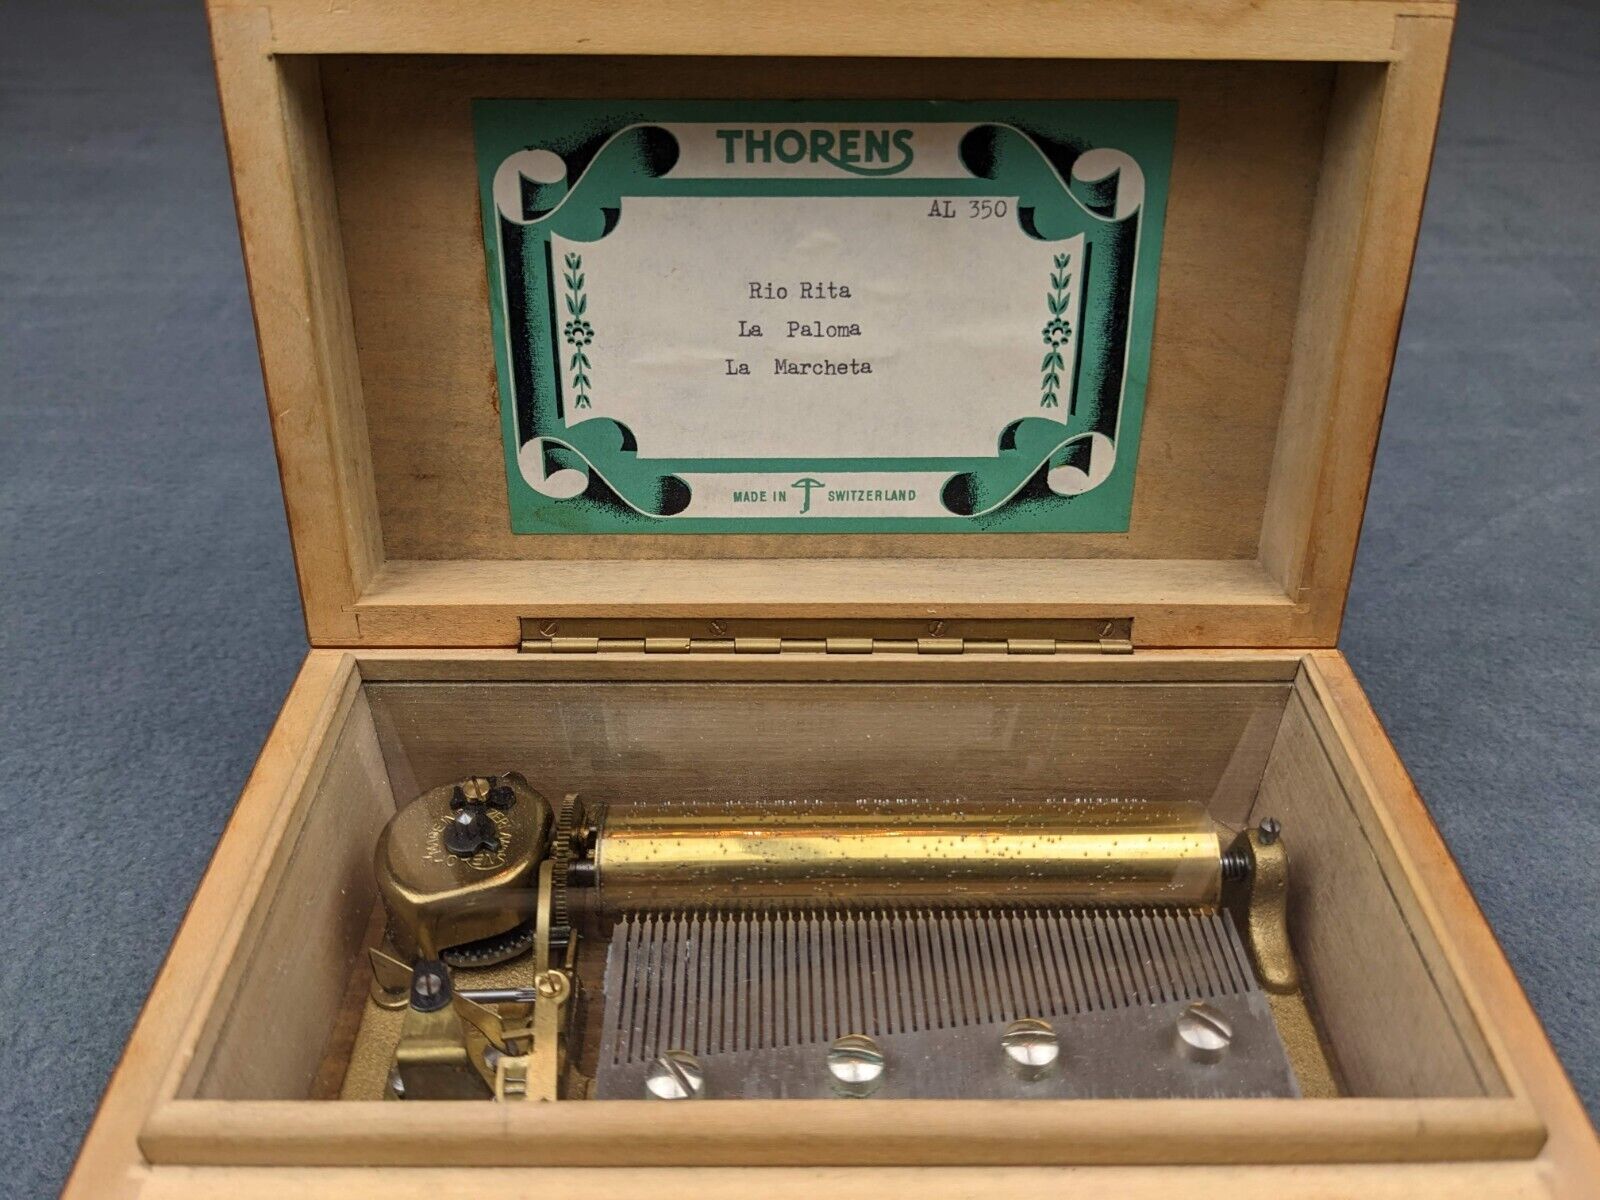
- Inspect the comb and teeth: The comb, which produces the musical notes, and its teeth should be clean, intact, and properly aligned. Any bent or missing teeth may affect the quality of sound.
- Take note of the issue: Once you have identified the problem or potential areas of concern, make a note of them. This will help you focus your efforts on the necessary repairs or replacements.
Through a thorough inspection of the internal components, you can identify the specific issue that is impacting your Thorens music box’s performance. Whether it’s a broken spring, misaligned gears, or a dirty mechanism, understanding the problem will guide you towards the appropriate repair solution.
Now that you have identified the issue, it’s time to move on to the next step: repairing or replacing the damaged parts.
Step 4: Repairing or replacing damaged parts
With the issue identified, it’s time to address the specific problem by repairing or replacing the damaged parts of your Thorens music box. Depending on the extent of the damage and your expertise, you may choose to undertake the repairs yourself or seek professional assistance. Here are some common repair techniques:
- Repairing a broken spring: If the spring is broken or stretched, you can attempt to repair it by carefully removing the old spring and replacing it with a new one of the appropriate size and tension. Take caution while working with the spring as it can cause injury if not handled properly.
- Aligning or replacing misaligned gears: Misaligned gears can disrupt the smooth movement of the music box mechanism. Gently adjust or realign the gears using tweezers or small pliers. If the gears are damaged beyond repair, they will need to be replaced with new ones.
- Cleaning and polishing: If the issue is due to dirt, dust, or oxidization, cleaning the components can often resolve the problem. Use a soft brush, cotton swabs, and mild cleaning solutions to carefully remove dirt and debris. Polishing the metal parts can restore their shine and functionality.
- Repairing or replacing the comb: If the comb has bent or missing teeth, you can try to manually straighten the teeth using tweezers. However, if the damage is severe, it’s advisable to replace the entire comb with a new one to ensure optimal sound quality.
- Seeking professional help: If you are unsure about the repairs or lack the necessary skills and tools, it’s best to consult a professional music box repair technician. They have the expertise and experience to handle complex repairs and ensure the longevity of your Thorens music box.
Remember to proceed with caution when making repairs to ensure that you do not cause further damage to the delicate components. It’s always better to seek professional assistance if you are unsure of your capabilities.
Once you have addressed the necessary repairs, it’s time to move on to the next step: cleaning and lubricating the music box mechanism.
Step 5: Cleaning and lubricating the music box mechanism
After repairing or replacing any damaged parts, it’s crucial to clean and lubricate the music box mechanism to ensure smooth and optimum performance. Follow these steps to effectively clean and lubricate your Thorens music box:
- Disassemble the relevant components: If possible, disassemble the components that require cleaning, such as the gears, levers, and spring barrel. This will allow for a more thorough cleaning.
- Remove dust and dirt: Use a soft brush, cotton swabs, or compressed air to gently remove any dust, dirt, or debris from the components. Be careful not to damage or displace any delicate parts while cleaning.
- Clean using mild solutions: Prepare a mild cleaning solution using warm water and a small amount of mild dish soap or specialized jewelry cleaner. Dip a soft brush or cotton swab into the solution and gently scrub the components to remove grease or grime.
- Rinse and dry thoroughly: Once cleaned, rinse the components with clean water to remove any soap residue, and pat dry using a microfiber cloth. Allow the parts to air dry completely before proceeding.
- Apply lubricant: Use a high-quality lubricant specifically designed for mechanical devices, such as clock or music box oil. Apply a small amount of lubricant to the appropriate areas, such as the pivots and gears, ensuring smooth operation.
- Avoid over-lubrication: It’s important not to over-lubricate the mechanism, as excess oil or grease can attract more dirt and impede the smooth movement of the components. Use just enough lubricant to ensure proper functioning.
- Reassemble the components: Carefully reassemble the cleaned and lubricated components, following the proper arrangement and orientation as noted during the inspection. Ensure that all parts fit together snugly but without excessive force.
By cleaning and properly lubricating your Thorens music box, you not only maintain its functionality but also extend its lifespan. Regular cleaning and lubrication should be part of your maintenance routine to keep the music box in optimal condition.
Now that you have cleaned and lubricated the mechanism, let’s move on to the next step: properly reassembling the Thorens music box.
Step 6: Properly reassembling the Thorens music box
Now that you have completed the necessary repairs, cleaned, and lubricated the components, it’s time to carefully reassemble your Thorens music box to ensure its proper functioning. Follow these steps to ensure a successful reassembly:
- Refer to your notes or documentation: Retrieve your notes or refer to any documentation you may have taken during the disassembly process. This will help you remember the correct order, arrangement, and orientation of the components.
- Start with the base: Begin by placing the base of the music box in a stable position. Ensure that it is properly aligned and level before proceeding with the reassembly.
- Place the components in the correct order: Start placing the components back into the music box in the correct order according to your notes. Ensure that each piece fits properly and aligns with the corresponding holes or slots.
- Secure with screws or latches: As you place each component, secure them in place using the appropriate screws or latches. Tighten them firmly but not excessively to avoid damaging the music box case or components.
- Test the functionality: Once the music box is fully reassembled, test its functionality by winding it up or activating the mechanism. Listen for the smooth operation of the gears and the clear melody produced by the comb. Ensure that all the functions are working correctly and adjust if necessary.
- Make final adjustments: If you notice any issues or irregularities during the testing phase, make the necessary adjustments to solve the problem. This may include realigning gears, repositioning parts, or adjusting tension as needed.
It’s important to be patient and take your time during the reassembly process. Ensure that all components are properly aligned and securely fastened to prevent any future issues or damage to the music box.
Now that your Thorens music box is properly reassembled and functioning, it’s time to move on to the next step: testing and fine-tuning the repaired music box.
Step 7: Testing and fine-tuning the repaired music box
With your Thorens music box reassembled, it’s crucial to thoroughly test and fine-tune the repaired components to ensure optimal performance and sound quality. Follow these steps to effectively test and fine-tune your music box:
- Wind up the music box: Begin by winding up the music box fully and observe its operation. Pay attention to the smoothness of the winding mechanism and listen for any abnormalities or irregularities.
- Listen for the melody: Activate the music box several times and carefully listen to the produced melody. Ensure that the notes are clear, and there are no skips, stutters, or off-key sounds. Adjustments may be needed if the melody is not perfect.
- Adjust the speed regulator: Some Thorens music boxes have a speed regulator to adjust the tempo of the melody. If needed, carefully adjust the speed regulator until the desired tempo is achieved. Be gentle to avoid causing damage.
- Fine-tune the comb and teeth: If you notice any inconsistencies or imperfections in the sound produced by the comb and teeth, consider fine-tuning them. Use gentle pressure with tweezers to adjust the position of the teeth slightly for improved sound quality.
- Check for any residue or debris: Inspect the music box mechanism for any leftover residue or debris from the repair process. Clean any remaining dust or oil carefully to maintain the cleanliness of the components.
- Test various melodies and functions: If your Thorens music box offers multiple melodies or additional functions, test them to ensure everything is in proper working order. Confirm that each melody plays correctly and that all functions operate smoothly.
Through thorough testing and fine-tuning, you can ensure that your repaired Thorens music box is functioning at its best. Fine adjustments and attention to detail will enhance the overall experience and ensure the music box delivers the enchanting melodies it is known for.
Now that you have tested and fine-tuned your music box, it’s time to move on to the final step: maintaining and preserving the Thorens music box.
Step 8: Maintaining and preserving the Thorens music box
After repairing and restoring your Thorens music box, it’s important to implement proper maintenance practices to ensure its longevity and preserve its beauty. By following these maintenance tips, you can enjoy your music box for years to come:
- Keep the music box away from humidity and direct sunlight: Exposure to excessive humidity or direct sunlight can cause damage to the wood and metal components of the music box. Store it in a dry and cool place to prevent warping or discoloration.
- Regularly clean the exterior: Use a soft cloth or a microfiber cloth to remove dust and fingerprints from the music box’s surface. Avoid using abrasive cleaners or harsh chemicals that can damage the finish.
- Avoid touching the comb: To prevent damage to the delicate teeth of the comb, avoid touching it with your fingers. The oils and moisture from your hands can harm the comb’s functionality and sound quality.
- Wind with care: When winding up the music box, use gentle and even pressure to avoid overwinding or causing stress on the internal mechanisms. Follow the manufacturer’s instructions on the recommended number of turns.
- Regularly lubricate the mechanism: Periodically lubricate the music box mechanism using a high-quality clock or music box oil. Apply a small amount of lubricant to the pivot points and gears to ensure smooth operation.
- Avoid excessive handling: To minimize the risk of damage, avoid excessive handling of the music box. Only touch the necessary parts when winding or activating the mechanism.
- Store in a protective case: If you’re not displaying or using the music box regularly, consider storing it in a protective case or box. This will safeguard it from dust, accidental falls, or other potential damage.
- Regularly inspect and maintain: Conduct routine inspections to ensure that all screws, latches, and components are secure. Look for any signs of wear or damage and address them promptly to prevent further issues.
By implementing these maintenance practices, you can preserve the beauty and functionality of your Thorens music box. Regular care and maintenance will ensure that it continues to bring joy with its melodious tunes for years to come.
With the final step of maintenance and preservation complete, you have successfully repaired, restored, and maintained your Thorens music box. Enjoy its harmonious melodies and cherish it as a timeless piece of art and craftsmanship.
Conclusion
Repairing a Thorens music box can be a rewarding and fulfilling endeavor, bringing new life to a cherished piece of nostalgia. By following the step-by-step guide in this article, you have learned how to gather the necessary tools, open the music box, inspect and identify issues, repair or replace damaged parts, clean and lubricate the mechanism, reassemble the music box, test and fine-tune its performance, and maintain it for years to come.
Throughout the process, it is crucial to approach each step with patience, precision, and care. Adhering to proper techniques and using the right tools will help preserve the delicate components of the music box. Whether it’s a broken spring, misaligned gears, or a dirty mechanism, restoring a Thorens music box requires attention to detail and a passion for its intricacies.
Remember, if at any point you are unsure or uncomfortable with the repair process, seeking the assistance of a professional music box repair technician is always a good option. They have the expertise and experience to handle complex repairs and ensure the longevity of your Thorens music box.
Now, armed with the knowledge and skills to repair and maintain your Thorens music box, immerse yourself in its captivating melodies and relish in the nostalgia it evokes. The beauty and harmony of a Thorens music box can continue to enchant and delight for generations to come.

