Home>Events & Info>Playback>How To Enable A Disabled Playback Device
Playback
How To Enable A Disabled Playback Device
Modified: January 22, 2024
Learn how to enable a disabled playback device on your device and get back to enjoying your favorite media files.
(Many of the links in this article redirect to a specific reviewed product. Your purchase of these products through affiliate links helps to generate commission for AudioLover.com, at no extra cost. Learn more)
Table of Contents
- Introduction
- Understanding Disabled Playback Devices
- Troubleshooting Disabled Playback Devices
- Method 1: Enabling Disabled Playback Devices in Device Manager
- Method 2: Updating Drivers to Enable Disabled Playback Devices
- Method 3: Using Windows Sound Troubleshooter to Enable Disabled Playback Devices
- Method 4: Enabling Disabled Playback Devices in Sound Settings
- Method 5: Checking for Hardware Issues to Enable Disabled Playback Devices
- Conclusion
Introduction
Having a disabled playback device on your computer can be frustrating, especially when you’re trying to enjoy your favorite music or watch a movie. But don’t worry, there are several methods you can try to enable a disabled playback device and get your audio or video back on track. In this article, we’ll explore the reasons behind disabled playback devices and ways to troubleshoot and fix this issue.
A playback device is a device connected to your computer that allows you to hear or view multimedia content, such as speakers, headphones, or monitors with built-in speakers. When a playback device is disabled, it means that your computer is not recognizing it as an available audio or video output option. This can happen due to various reasons, such as outdated drivers, hardware conflicts, or software glitches.
Before diving into the troubleshooting methods, it’s important to note that the steps may slightly vary depending on the operating system you’re using. However, the general principles remain the same.
You may wonder why it’s necessary to enable a disabled playback device instead of simply using another working device. Well, each playback device has its own unique qualities and features that can enhance your audio or visual experience. Plus, if you’ve invested in a high-quality audio or video device, you’ll want to make the most out of it.
Now, let’s move on to the troubleshooting methods that can help you enable a disabled playback device on your computer. Whether you’re using Windows, Mac, or Linux operating systems, there’s a solution waiting for you. So, let’s get started!
Understanding Disabled Playback Devices
Before we delve into the methods of enabling disabled playback devices, let’s take a moment to understand what it means for a playback device to be disabled. A disabled playback device is a device connected to your computer that is not recognized or available for use as an audio or video output option.
There can be several reasons why a playback device becomes disabled. It could be due to outdated or incompatible drivers, hardware conflicts, software glitches, or even user error. When a playback device is disabled, it means that your computer is not detecting it as a viable option for audio or video playback.
When you encounter a disabled playback device, it can disrupt your multimedia experience. You may not be able to hear sound from your speakers or headphones, or you may not see any video on your monitor. This can be frustrating, especially when you’re trying to enjoy music, movies, or videos on your computer.
It’s important to note that disabled playback devices can occur on various operating systems, including Windows, Mac, and Linux. However, the solutions to enable these devices may differ slightly depending on the operating system you’re using.
Enabling a disabled playback device is crucial if you want to make the most out of your audio or visual experience. Each playback device has its own unique features and qualities that can enhance your multimedia enjoyment. Whether it’s the immersive sound quality of your speakers or the crisp display of your monitor, enabling a disabled playback device allows you to fully utilize the capabilities of your hardware.
Now that we have a greater understanding of what it means for a playback device to be disabled, let’s move on to the troubleshooting methods that can help you enable these devices and get your audio and video back on track. From updating drivers to using built-in system tools, we’ll explore various solutions to address this issue on different operating systems.
Troubleshooting Disabled Playback Devices
When facing a disabled playback device, it’s important to follow a systematic approach to troubleshoot and fix the issue. In this section, we’ll explore several methods that can help you enable a disabled playback device on your computer.
1. Check connections: Ensure that all cables connecting your playback device to your computer are securely plugged in. Sometimes, a loose or faulty connection can prevent your computer from recognizing the device as an available playback option.
2. Restart your computer: A simple restart can often resolve software glitches that may be causing the playback device to be disabled. Restarting your computer can reset the system and potentially fix any temporary issues.
3. Update drivers: Outdated or incompatible drivers are common culprits of disabled playback devices. To update your drivers, you can visit the manufacturer’s website and download the latest driver for your specific playback device. Alternatively, you can use a driver update tool to simplify the process.
4. Re-enable the device in Device Manager: On Windows, you can access Device Manager by right-clicking on the Start button and selecting “Device Manager” from the menu. Locate the disabled playback device under the “Sound, video, and game controllers” section, right-click on it, and select “Enable” to re-enable the device.
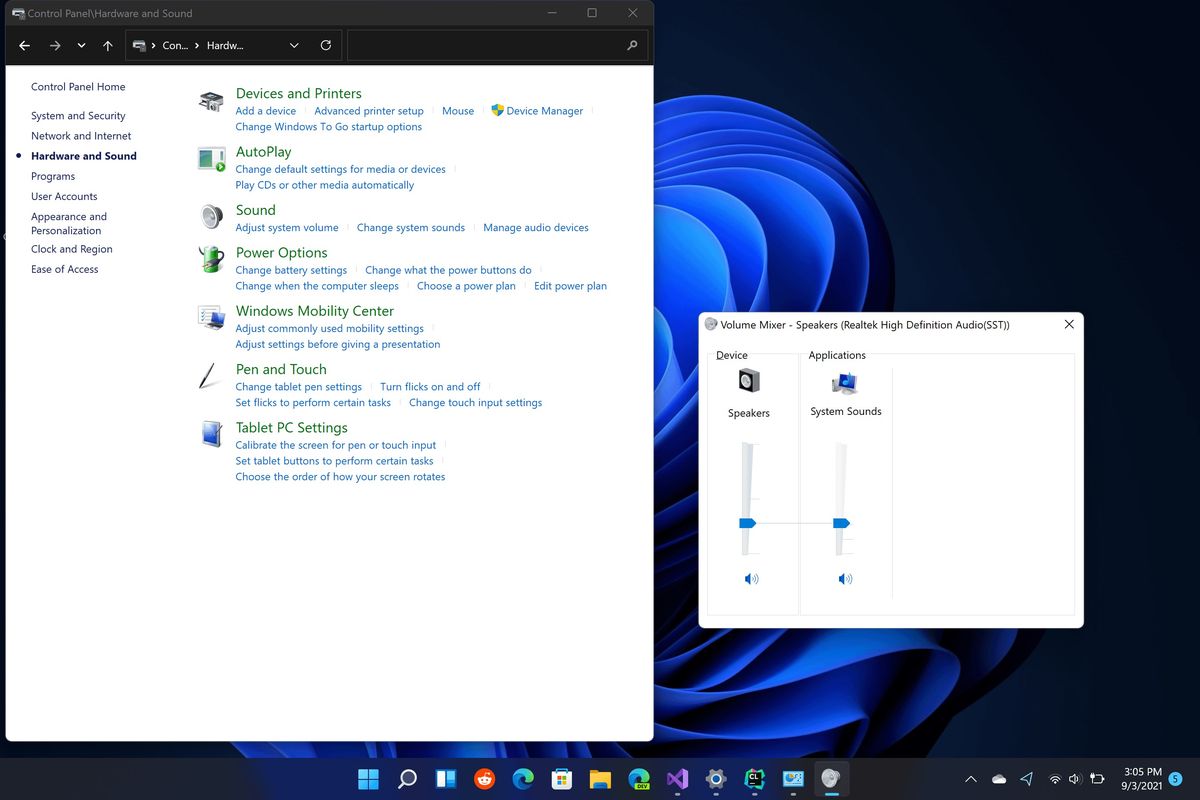
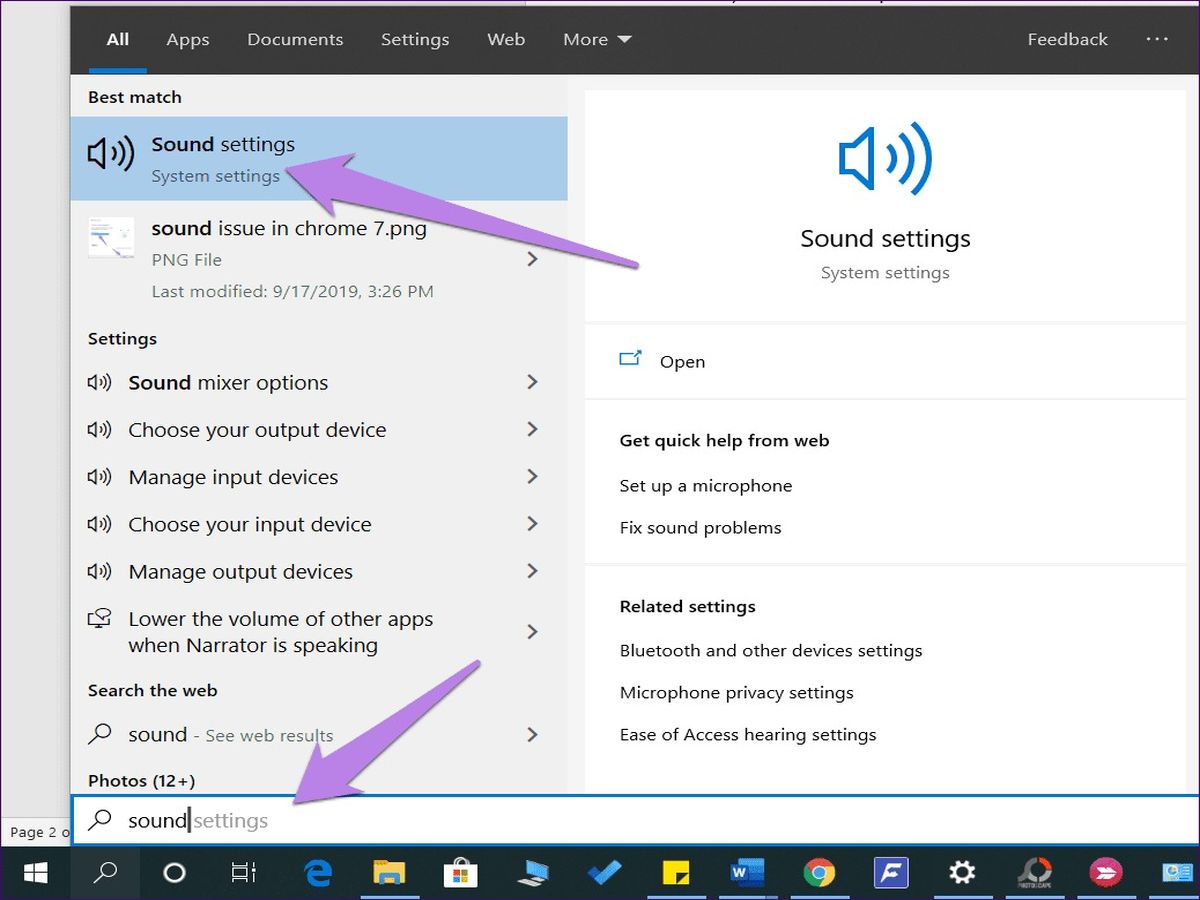
5. Use the Windows Sound Troubleshooter: Windows provides a built-in troubleshooter that can automatically detect and fix common audio playback issues. To access it, right-click on the speaker icon in the taskbar, select “Troubleshoot sound problems,” and follow the on-screen instructions to resolve the disabled playback device issue.
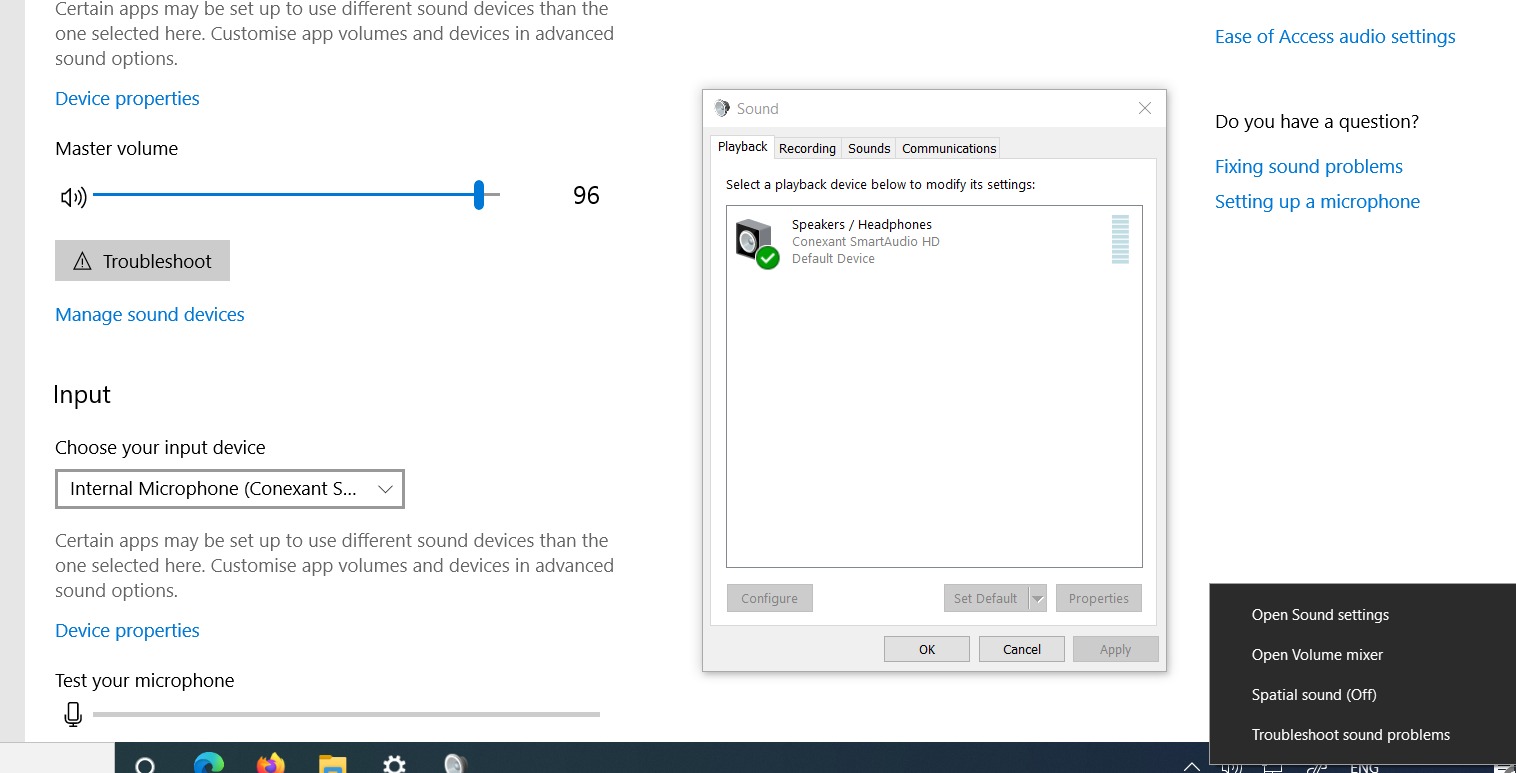
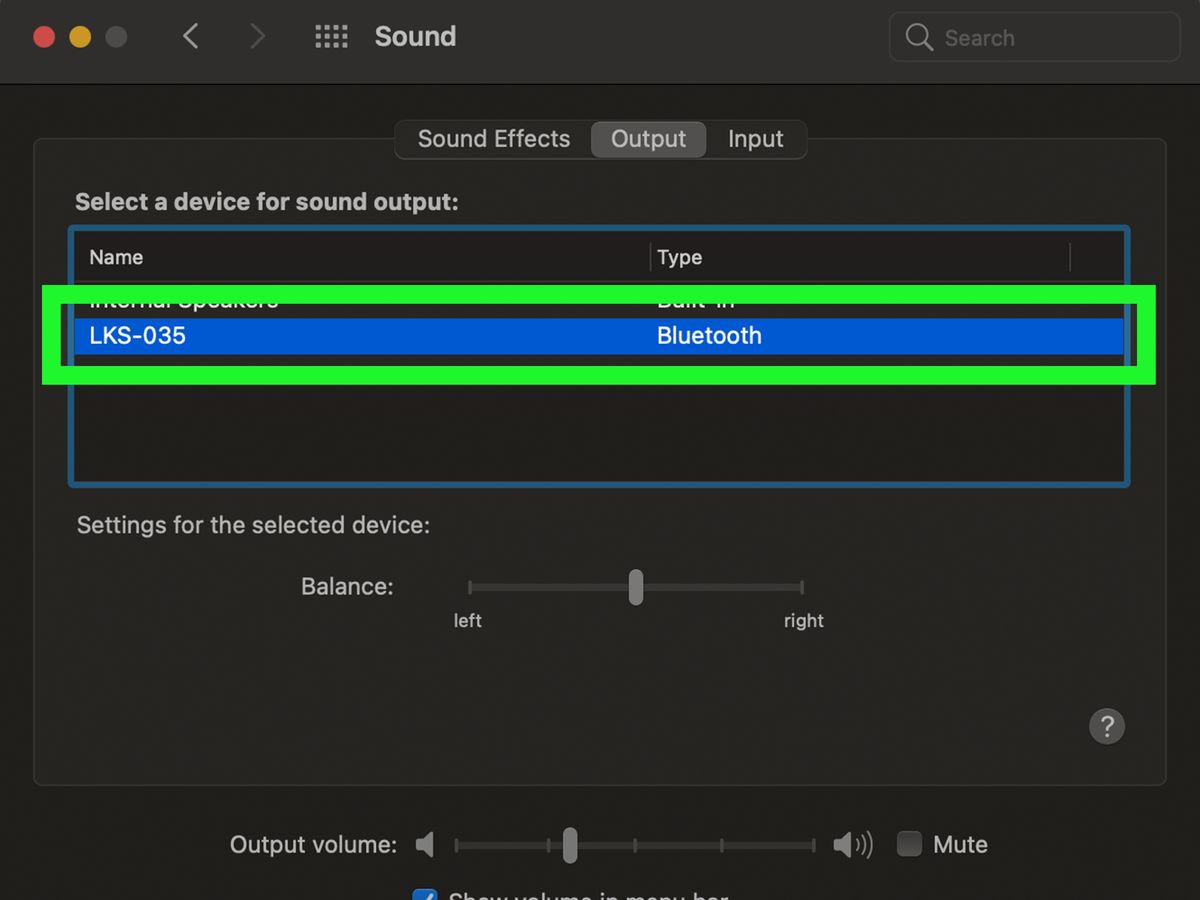
6. Check Sound Settings: In Windows, you can access Sound Settings by right-clicking on the speaker icon in the taskbar and selecting “Open Sound settings.” Under the “Output” section, ensure that the disabled playback device is not muted and is set as the default device.
7. Check for hardware issues: If none of the above methods work, there might be a hardware issue with your playback device. Try connecting the device to another computer to see if it works. If it does, then the issue might be with your computer’s hardware or software configuration, and you may need to seek professional assistance.
Remember to apply these troubleshooting methods according to the operating system you’re using, as the steps may vary slightly. By following these steps, you should be able to enable a disabled playback device and resume your audio and video playback.
Method 1: Enabling Disabled Playback Devices in Device Manager
If you’re using a Windows operating system, one of the most common ways to enable a disabled playback device is through the Device Manager. The Device Manager is a built-in Windows tool that allows you to manage and control hardware devices connected to your computer.
Here’s how you can use Device Manager to enable a disabled playback device:
- Right-click on the Windows Start button and select “Device Manager” from the menu that appears. Alternatively, you can press “Windows + X” on your keyboard and choose “Device Manager” from the list.
- Once the Device Manager window opens, look for the “Sound, video, and game controllers” section and click on the arrow next to it to expand the category.
- Scroll through the list of devices and locate the disabled playback device.
- Right-click on the disabled device and select “Enable” from the context menu.
- After enabling the device, close the Device Manager and try playing audio or video again to see if the playback device is now functioning properly.
Enabling the disabled playback device through the Device Manager gives Windows a chance to recognize and activate the device as an available playback option. This method is convenient and user-friendly, making it a go-to solution for many users experiencing disabled playback devices on their Windows computers.
It’s worth noting that this method may not be applicable for all disabled playback devices. In some cases, the device may still appear as enabled in the Device Manager, even though it’s not working properly. If that’s the case, you may need to explore other troubleshooting methods to fix the issue.
Remember, understanding the specific operating system you’re using is crucial when applying troubleshooting methods. The steps and options available in Device Manager may vary slightly depending on the version of Windows you have installed on your computer.
Now that you’re familiar with enabling disabled playback devices through the Device Manager, let’s move on to the next method, which involves updating drivers to fix the issue.
Method 2: Updating Drivers to Enable Disabled Playback Devices
Another effective method to enable a disabled playback device is by updating the drivers associated with the device. Drivers are software components that allow your operating system to communicate with and control hardware devices connected to your computer. Outdated or incompatible drivers can often cause issues, including disabled playback devices.
Here’s how you can update drivers to enable disabled playback devices:
- Identify the specific playback device that is disabled on your computer. This information can be found in Device Manager, as explained in the previous method.
- Visit the manufacturer’s website for your playback device. Look for a “Support” or “Downloads” section on the website.
- Search for the latest driver available for your playback device. Make sure to download the driver that is compatible with your specific operating system.
- Once the driver is downloaded, double-click on the file to run the installation process. Follow the on-screen instructions to complete the installation.
- After the driver installation is complete, restart your computer to ensure that the changes take effect.
Updating the drivers associated with your disabled playback device can often resolve compatibility issues, software conflicts, or outdated drivers that are preventing the device from functioning properly.
If you’re unsure about the exact driver you need to download, you can use driver update software to automatically scan your computer and identify outdated or missing drivers. These tools can simplify the driver update process and ensure that you have the latest drivers installed for your playback device.
Remember to always download drivers from official and reputable sources. Using third-party or unofficial drivers can be risky and may cause further issues with your computer’s performance or security.
By updating your drivers, you’re providing your operating system with the necessary instructions to recognize and enable the disabled playback device. This method is widely used and has a high success rate in resolving disabled playback device issues on various operating systems.
Now that you’re familiar with the process of updating drivers, let’s move on to the next method, which involves using the Windows Sound Troubleshooter to enable disabled playback devices.
Method 3: Using Windows Sound Troubleshooter to Enable Disabled Playback Devices
If you’re using a Windows operating system, you can take advantage of the built-in Windows Sound Troubleshooter to automatically detect and fix common audio playback issues, including disabled playback devices.
Here’s how you can use the Windows Sound Troubleshooter to enable a disabled playback device:
- Right-click on the speaker icon in the taskbar and select “Troubleshoot sound problems” from the context menu.
- A window will appear, and Windows will begin detecting and diagnosing any audio playback issues.
- Follow the on-screen instructions provided by the troubleshooter. It may ask you to perform certain actions, such as checking speaker connections or adjusting volume settings.
- During the troubleshooting process, Windows may detect and fix the disabled playback device issue automatically. If so, it will enable the device and notify you of the successful resolution.
- Once the troubleshooting process is complete, close the troubleshooter and test your playback device to ensure that it is now enabled and working properly.
The Windows Sound Troubleshooter is a helpful tool that can save you time and effort in diagnosing and resolving audio playback issues. It scans your system, detects common problems, and provides step-by-step guidance on how to fix them.
However, it’s important to note that the troubleshooter may not always be able to fix complex or specific issues. In such cases, you may need to explore other troubleshooting methods or seek further assistance.
Using the Windows Sound Troubleshooter is a user-friendly method that doesn’t require in-depth technical knowledge. It can be a quick and efficient way to enable a disabled playback device on your Windows computer.
Now that you’re familiar with using the Windows Sound Troubleshooter, let’s move on to the next method, which involves manually enabling disabled playback devices through the Sound Settings in Windows.
Method 4: Enabling Disabled Playback Devices in Sound Settings
If you’re using a Windows operating system, you can manually enable disabled playback devices through the Sound Settings. This method provides you with more control over the audio settings of your computer and allows you to enable specific playback devices as needed.
Here’s how you can enable disabled playback devices in Sound Settings:
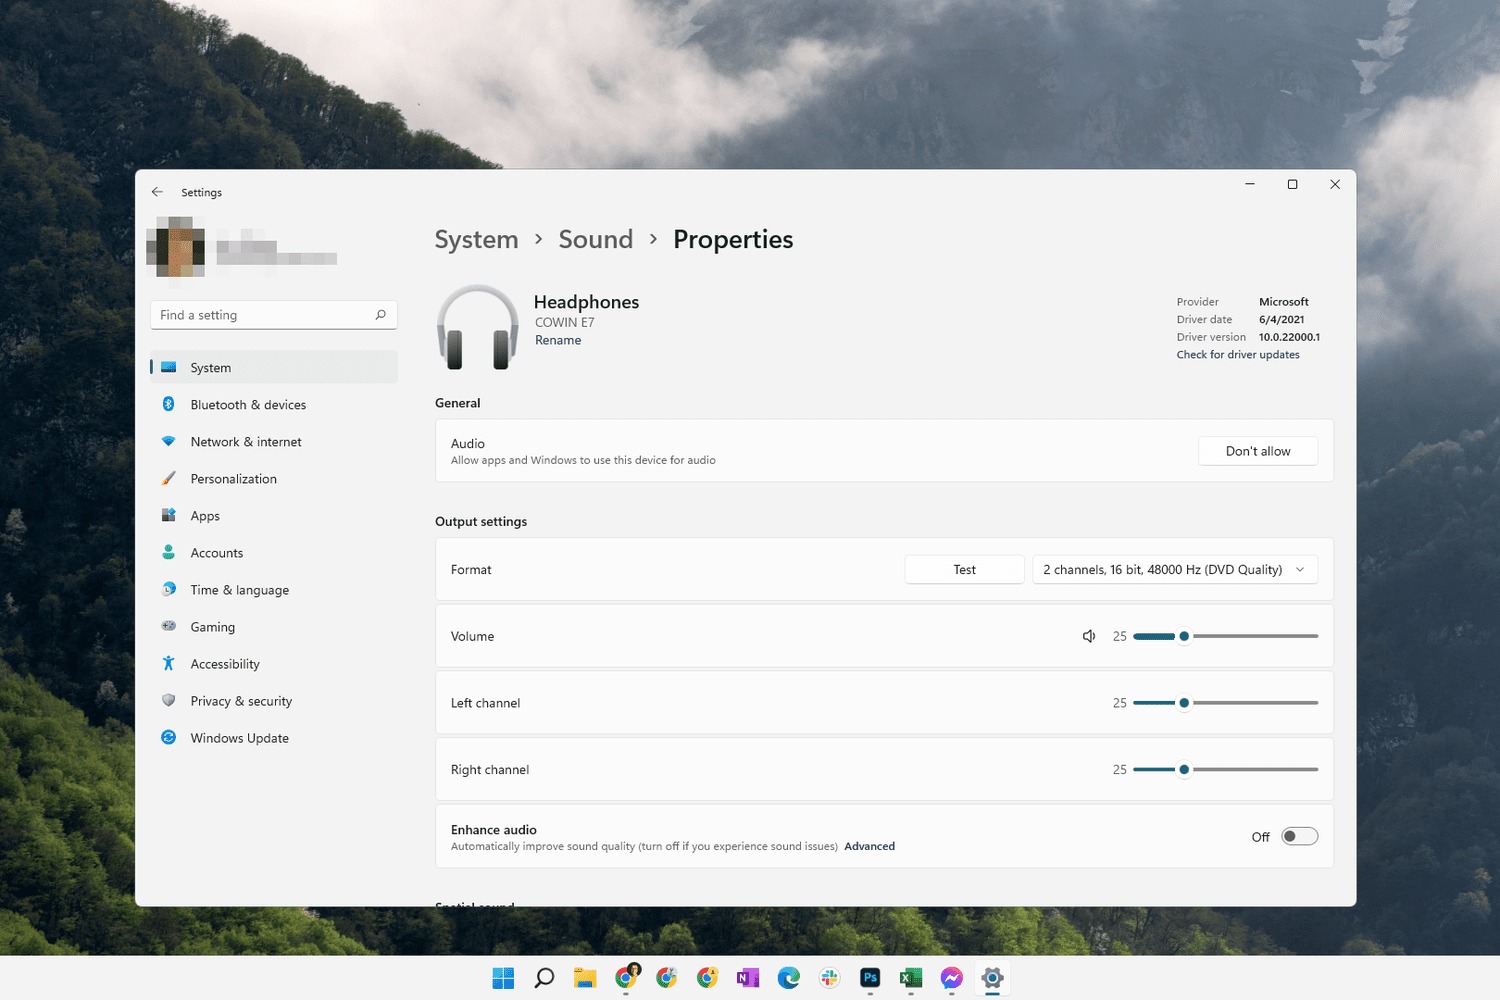
- Right-click on the speaker icon in the taskbar and select “Open Sound settings” from the context menu.
- A Sound Settings window will appear, displaying various audio options and devices.
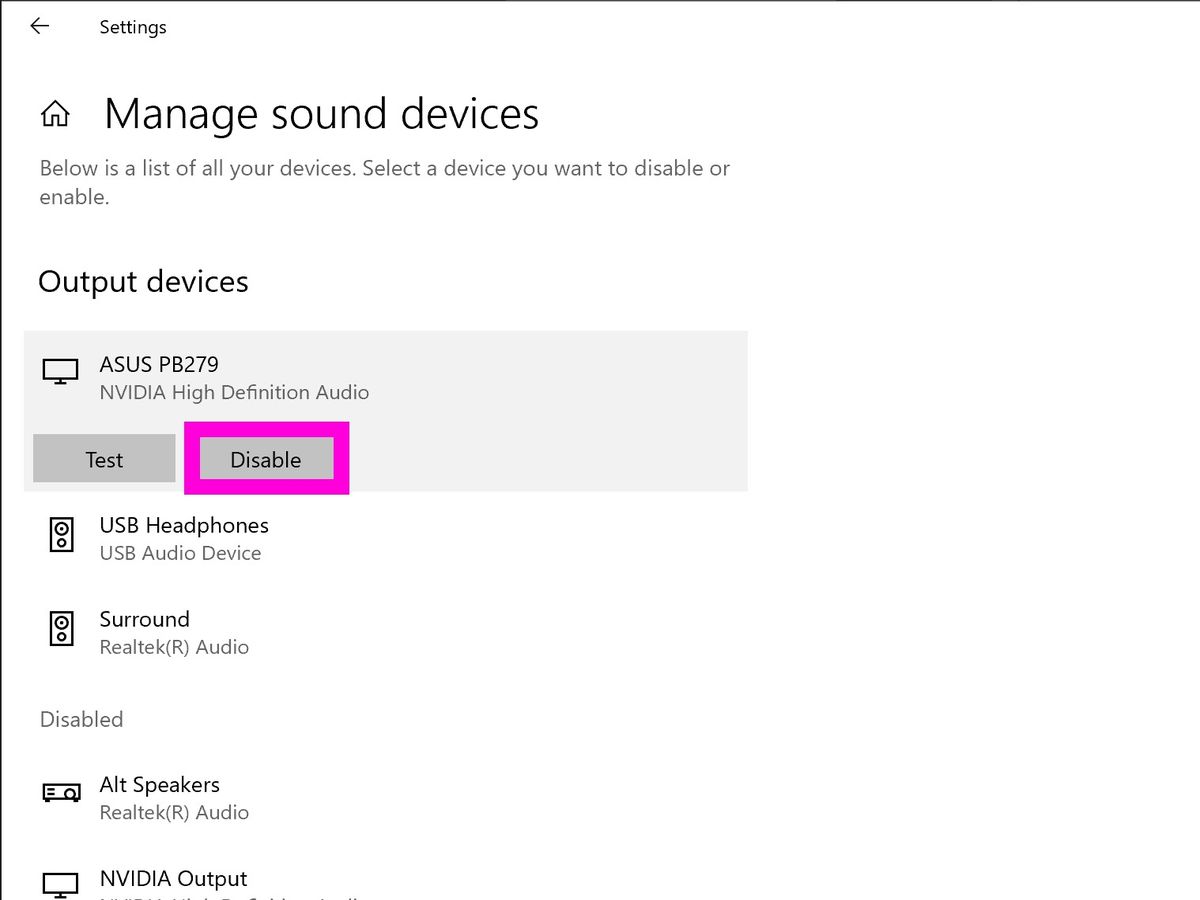
- Scroll down to the “Output” section, which lists the available playback devices.
- Look for the disabled playback device that you want to enable. It may appear with a grayed-out icon or a label indicating that it’s disabled.
- Click on the disabled device to select it, then click on the “Set default” button to make it the default playback device (if desired).
- Once selected, click on the “Troubleshoot” button under the disabled device.
- Windows will attempt to diagnose and fix any issues with the disabled device. If successful, it will enable the device and inform you of the resolution.
- Close the Sound Settings window and test your playback device to ensure that it is now enabled and functioning properly.
The Sound Settings in Windows provide an intuitive interface for managing audio devices and settings on your computer. By manually enabling disabled playback devices, you have more control and flexibility in selecting the desired output for your audio or video playback.
It’s important to note that if you want to use a specific playback device, such as headphones or external speakers, it’s recommended to set it as the default device within the Sound Settings. This ensures that your computer routes audio through the preferred device by default.
Remember, the steps and options within the Sound Settings may vary slightly depending on your version of Windows. If you’re unable to find the disabled playback device or encounter any issues, you may need to explore other troubleshooting methods or seek further assistance.
Now that you’re familiar with enabling disabled playback devices in Sound Settings, let’s move on to the next method, which involves checking for hardware issues that may be causing the playback device to be disabled.
Method 5: Checking for Hardware Issues to Enable Disabled Playback Devices
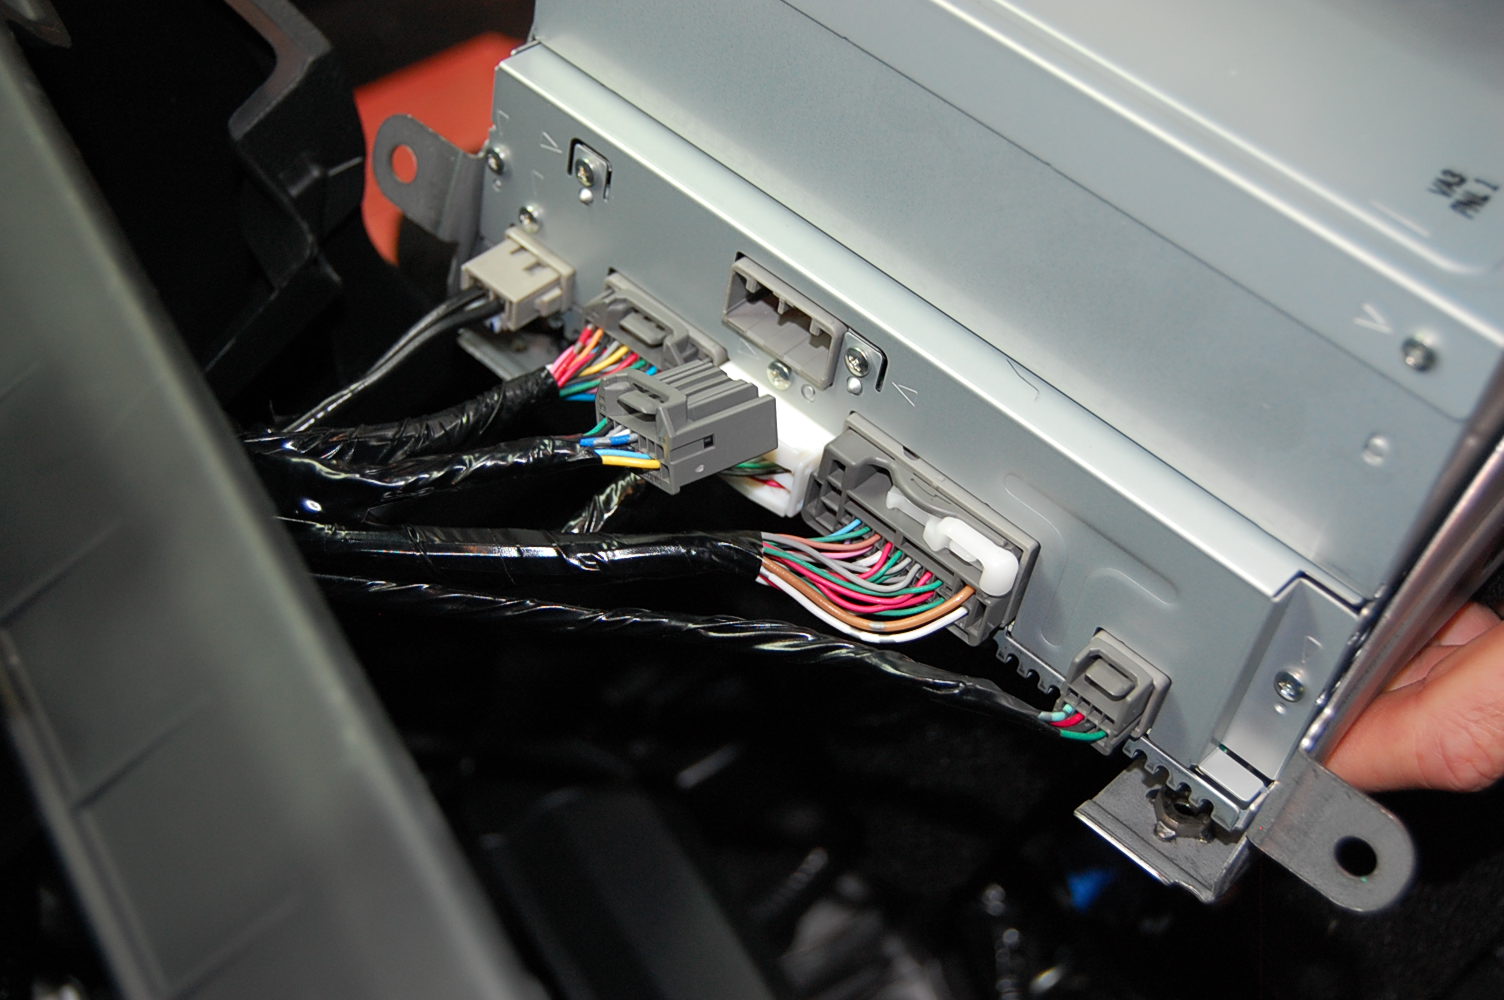
If you’ve tried the previous methods and are still facing a disabled playback device, it’s worth checking for any hardware issues that may be causing the problem. Hardware conflicts or malfunctions can prevent your computer from recognizing and enabling playback devices.
Here’s how you can check for hardware issues to enable disabled playback devices:
- Disconnect the disabled playback device from your computer.
- Inspect the cable and connectors for any visible damage or loose connections. Replace the cable if necessary.
- Connect the playback device to another available port or try using a different cable if possible. This helps determine if the issue lies with the port or the cable itself.
- If you’re using external speakers or headphones, try connecting them to another computer or device to see if they work. If they do, it suggests that the issue is with your computer rather than the playback device.
- Restart your computer and enter the BIOS or UEFI settings. Consult your computer’s manual or manufacturer’s website for instructions on how to access these settings.
- Look for any options related to audio devices and make sure they are enabled.
- Save the changes in the BIOS or UEFI settings and exit.
- Restart your computer and check if the disabled playback device is now recognized and enabled.
By performing these hardware checks, you can identify potential issues with cables, connectors, ports, or even your computer’s BIOS or UEFI settings. Fixing these hardware-related issues can help enable the disabled playback device and restore audio or video playback.
If you’re still unable to enable the playback device after performing the hardware checks, it may be necessary to seek professional assistance. There could be deeper hardware problems or conflicts that require technical expertise to resolve.
Remember, it’s important to handle hardware components with care and to consult the appropriate resources or professionals if you’re unsure about any steps or procedures. Improper handling or troubleshooting can potentially cause further damage or void warranties.
Now that you’re familiar with checking for hardware issues, let’s summarize the troubleshooting methods we’ve covered so far.
Conclusion
Dealing with a disabled playback device can be a frustrating experience, but with the right troubleshooting methods, you can enable the device and resume your audio or video playback. Throughout this article, we explored various methods to help you overcome this issue on a Windows operating system.
We started by understanding what it means for a playback device to be disabled and why it’s important to enable it. We then walked through the troubleshooting process, which involved checking connections, restarting your computer, updating drivers, enabling devices in Device Manager, using the Windows Sound Troubleshooter, adjusting Sound Settings, and checking for hardware issues. These methods provided a comprehensive approach to tackle different aspects of the problem.
Remember to adapt the troubleshooting methods according to your operating system, as the steps may vary. While we focused on Windows in this article, similar principles can be applied to other operating systems such as Mac and Linux.
If you find that one method doesn’t work for you, don’t get discouraged. Try other methods until you find the one that resolves the issue for your specific situation. In some cases, it may be necessary to combine multiple methods or seek professional assistance if the problem persists.
By following the troubleshooting methods outlined in this article, you should be able to overcome disabled playback device issues and regain the audio or video experience you desire. Remember to stay patient, thorough, and systematic in your approach, and don’t hesitate to reach out for help when needed.
We hope this article has provided you with valuable insights and effective solutions for enabling disabled playback devices. Now it’s time to apply these methods and enjoy uninterrupted audio and video playback on your computer!