Home>Events & Info>Playback>How To Fix Playback Device On Computer
Playback
How To Fix Playback Device On Computer
Modified: January 22, 2024
Learn how to fix playback issues on your computer and optimize your playback device for smooth and uninterrupted audio and video playback.
(Many of the links in this article redirect to a specific reviewed product. Your purchase of these products through affiliate links helps to generate commission for AudioLover.com, at no extra cost. Learn more)
Table of Contents
- Introduction
- Common Issues with Playback Devices
- Troubleshooting Methods
- Method 1: Check Connections
- Method 2: Update Device Drivers
- Method 3: Adjust Sound Settings
- Method 4: Run Audio Troubleshooter
- Method 5: Reset Playback Device
- Method 6: Reinstall Audio Drivers
- Method 7: Test Device on Another Computer
- Conclusion
Introduction
Having issues with your playback device on your computer can be frustrating, especially when you’re trying to enjoy your favorite music or watch a movie. Whether it’s a problem with the sound quality, device recognition, or playback control, it can disrupt your entertainment experience. But fret not, as there are several troubleshooting methods that can help you fix playback device issues and get your audio and video back on track.
Playback devices are an essential part of any computer setup, allowing you to hear sound or view content through speakers, headphones, or other audio and video devices. They can include sound cards, external speakers, headphones, or even wireless Bluetooth devices. These devices rely on a combination of hardware and software components to function correctly, and any issues with either can lead to playback problems. Fortunately, many common playback device issues can be resolved without needing expert assistance, saving you time and money in the process.
In this article, we will explore some of the most common issues faced with playback devices on a computer and provide step-by-step troubleshooting methods to help you fix them. Whether you’re encountering no sound, distorted audio, unrecognized devices, or any other playback-related problems, we’ve got you covered. So, let’s dive in and get your playback devices back in working order.
Common Issues with Playback Devices
Playback devices can encounter various problems that can hinder their proper functioning. Understanding these common issues can help you identify and resolve them more effectively. Here are some of the most frequently encountered issues with playback devices on a computer:
- No sound: One of the most frustrating issues is when you can’t hear any sound coming from your playback device. This could be due to incorrect audio settings, volume settings, or faulty connections.
- Distorted audio: If you hear crackling, popping, or distorted sound from your playback device, it can ruin your listening experience. This can be caused by outdated drivers, incompatible settings, or hardware problems.
- Device not recognized: Sometimes, your computer may not recognize your playback device at all. This can be due to driver conflicts, incompatible hardware, or issues with the USB or audio ports.
- Playback control issues: You may experience difficulties controlling playback functions, such as pausing, rewinding, or skipping. This can be caused by software conflicts, outdated drivers, or issues with the media player.
- Interference: Certain playback devices, especially wireless ones, can be susceptible to interference from other electronic devices. This can result in audio dropouts, static noise, or interrupted signal.
These are just a few examples of the common issues you may encounter with playback devices. It’s important to diagnose the specific problem accurately, as the troubleshooting methods may vary depending on the issue at hand. In the following sections, we will explore various troubleshooting methods to help you fix these playback device issues and get your audio and video back to normal.
Troubleshooting Methods
When faced with playback device issues on your computer, it’s important to follow a systematic troubleshooting approach to identify and resolve the problem. Here are some effective methods that can help you troubleshoot and fix common playback device issues:
- Check Connections: Start by checking the connections between your playback device and the computer. Ensure that the cables are plugged in securely and that there are no loose connections. Additionally, examine the ports on your computer and the playback device for any signs of damage.
- Update Device Drivers: Outdated or incompatible device drivers can cause playback issues. Visit the manufacturer’s website or use a driver update utility to check for driver updates specific to your playback device. Install any available updates and restart your computer.
- Adjust Sound Settings: Incorrect sound settings can lead to no sound or distorted audio. Right-click on the volume icon in the taskbar and select “Playback Devices” to open the Sound settings. Ensure that the correct playback device is set as the default and adjust the volume levels accordingly.
- Run Audio Troubleshooter: Windows has a built-in Audio Troubleshooter that can automatically detect and fix common audio playback problems. Go to the Control Panel, search for “Troubleshoot” and select “Troubleshoot audio playback.” Follow the instructions provided to diagnose and resolve any identified issues.
- Reset Playback Device: In some cases, resetting the playback device can resolve issues with unrecognized devices or incorrect configurations. Disconnect the device from your computer, restart both the computer and the playback device, and then reconnect the device to see if it is properly recognized.
- Reinstall Audio Drivers: If updating the device drivers didn’t resolve the issue, you can try uninstalling and reinstalling the audio drivers. Open the Device Manager, locate the audio device, right-click on it, and select “Uninstall device.” Then, restart your computer to automatically reinstall the drivers.
- Test Device on Another Computer: To determine whether the issue lies with the playback device or the computer, try connecting the device to another computer. If the device works fine on another computer, it indicates that the issue is with your computer, and further troubleshooting may be required.
These troubleshooting methods should help you resolve common playback device issues on your computer. However, if the problem persists or you are unsure about performing these steps yourself, it is advisable to seek professional assistance to avoid any potential damage.
Method 1: Check Connections
When facing playback device issues on your computer, it’s crucial to start with the basics. One of the first troubleshooting methods is to check the connections between your playback device and the computer. Faulty or loose connections can lead to various playback problems. Here’s how you can check the connections:
- Cables: Ensure that all cables connecting your playback device to the computer are securely plugged in. Check both ends of the cable to verify a snug fit. If using an external speaker or headphone, see if there are any visible signs of damage or fraying on the cable. If so, consider replacing it.
- Ports: Examine the ports on your computer and the playback device for any signs of damage. Ensure that there are no obstructions or dust particles in the ports, as they can interfere with the connection. Use compressed air or a small brush to clean out any debris if necessary.
- USB or Audio Jacks: If your playback device uses a USB connection or audio jack, make sure that the corresponding port on your computer is functioning properly. Try connecting a different USB device or headphone to the same port to check if it works. Alternatively, you can connect your playback device to another USB port or audio jack on your computer to rule out a faulty port.
- Power Supply: If your playback device requires a separate power source, such as external speakers, make sure they are plugged in and receiving power. Check the power cable and ensure that it is firmly connected to both the device and the power outlet.
- Wireless Connectivity: If you are using wireless playback devices, such as Bluetooth headphones or speakers, ensure that they are within the appropriate range and that there are no obstacles causing interference. Try moving closer to the computer or removing any potential sources of interference, such as other wireless devices or large metal objects.
By checking and ensuring the proper connections between your playback device and computer, you can eliminate any potential issues caused by faulty or loose connections. Once you have verified the connections, test your playback device to see if the problem has been resolved. If the issue persists, proceed to the next troubleshooting method.
Method 2: Update Device Drivers
Outdated or incompatible device drivers can often be the cause of playback issues on your computer. Device drivers act as a communication bridge between your operating system and your playback device, ensuring proper functionality. If these drivers are outdated or incompatible, it can result in various playback problems. Updating your device drivers can help resolve these issues. Here’s how you can update your device drivers:
- Identify the Device: Start by identifying the specific playback device that is experiencing problems. This could be a sound card, external speakers, headphones, or any other audio or video device connected to your computer.
- Visit the Manufacturer’s Website: Once you have identified the device, visit the manufacturer’s website. Look for the support or downloads section, where you can find drivers specific to your device model.
- Search for the Latest Drivers: Use the search function on the website to locate the latest drivers for your device. It’s important to find drivers that are compatible with your operating system version.
- Download and Install: Once you have found the appropriate drivers, download them to your computer. The file is usually in a compressed format (such as a ZIP file) and needs to be extracted. Follow the manufacturer’s instructions to install the drivers.
- Restart Your Computer: After installing the updated drivers, restart your computer. This allows the changes to take effect and ensures a fresh start for your playback device.
- Test the Playback Device: Once your computer has rebooted, test your playback device to see if the issue has been resolved. Play an audio or video file and check for any signs of improved performance or functionality.
Updating your device drivers ensures that your playback device is utilizing the latest software enhancements and bug fixes. It can also address compatibility issues between the device and your operating system. If updating the drivers doesn’t resolve the playback issues, move on to the next troubleshooting method.
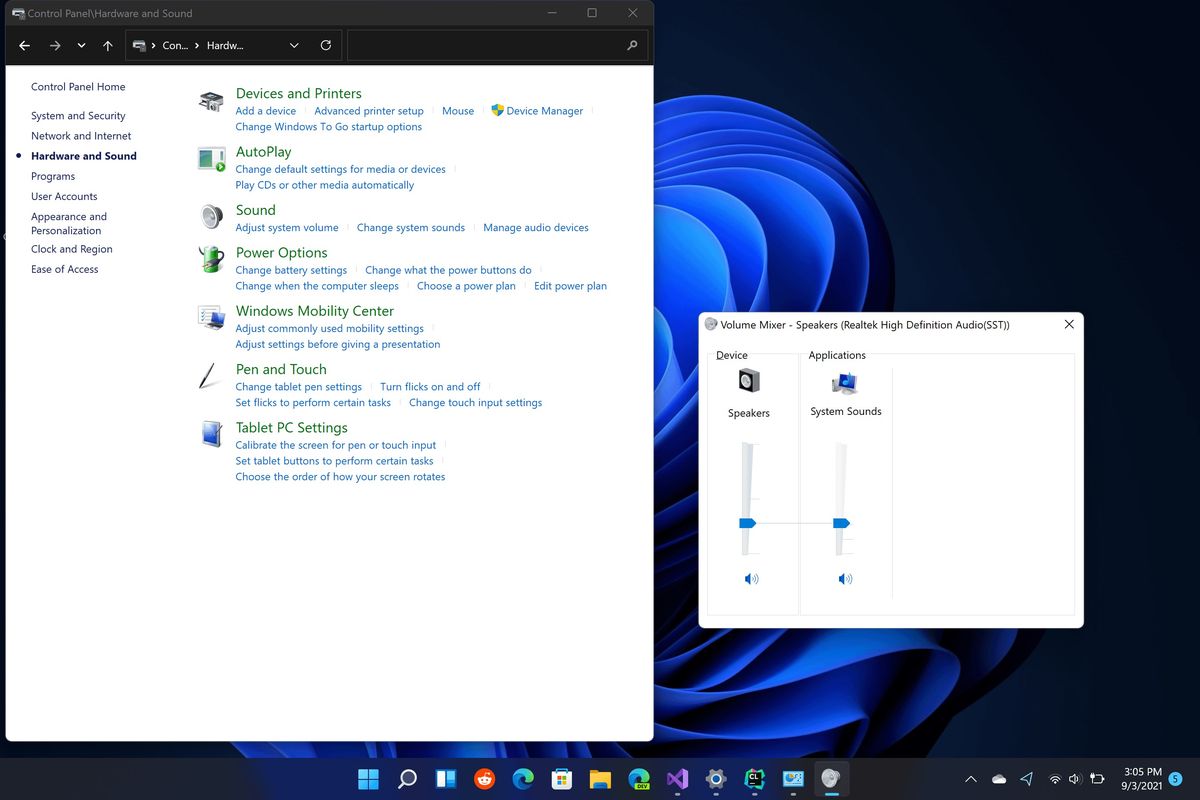
Method 3: Adjust Sound Settings
Sometimes, incorrect sound settings can lead to playback issues on your computer. By adjusting the sound settings, you can ensure that the correct playback device is selected as the default and that the volume levels are properly configured. Here’s how you can adjust the sound settings to resolve common playback problems:
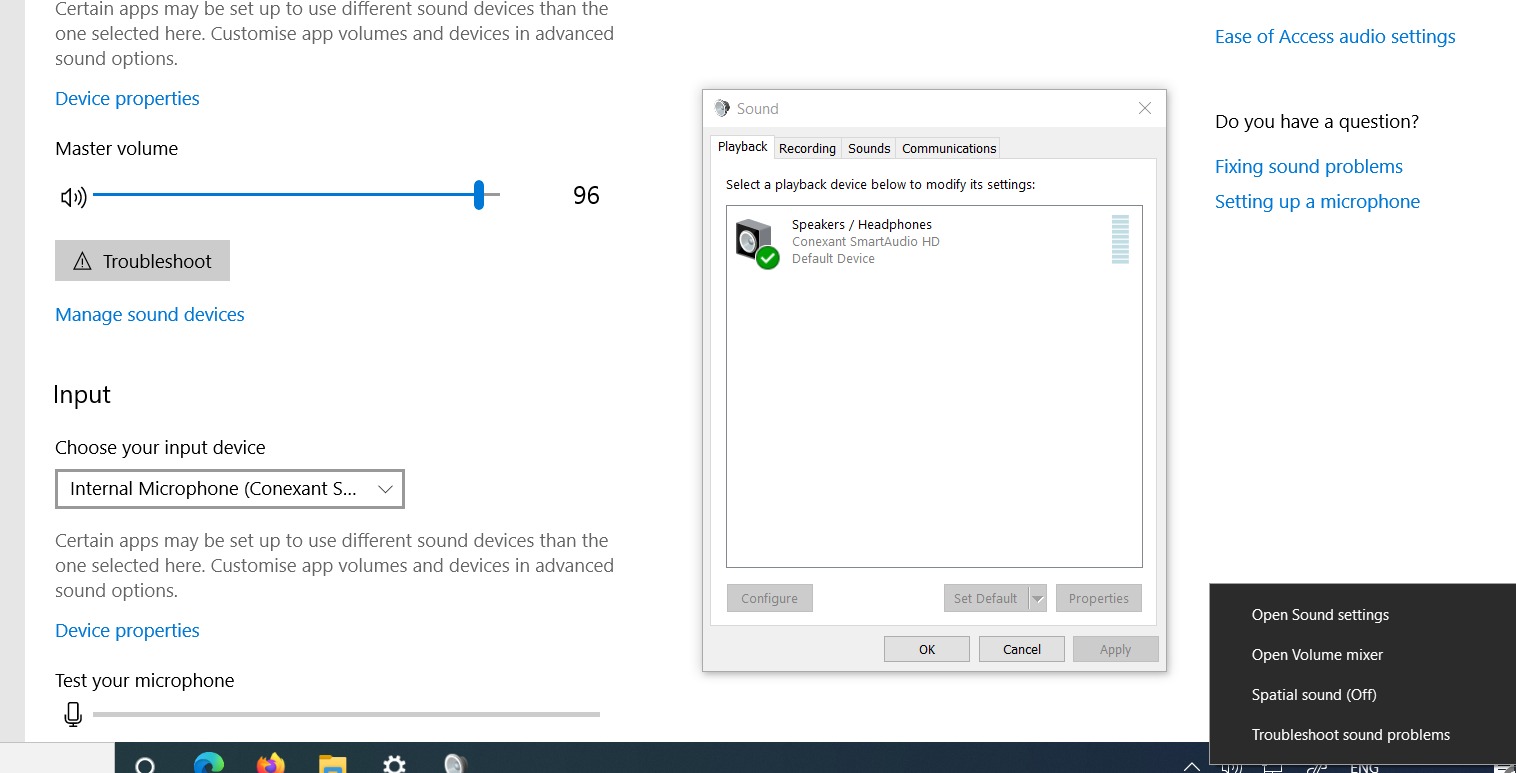
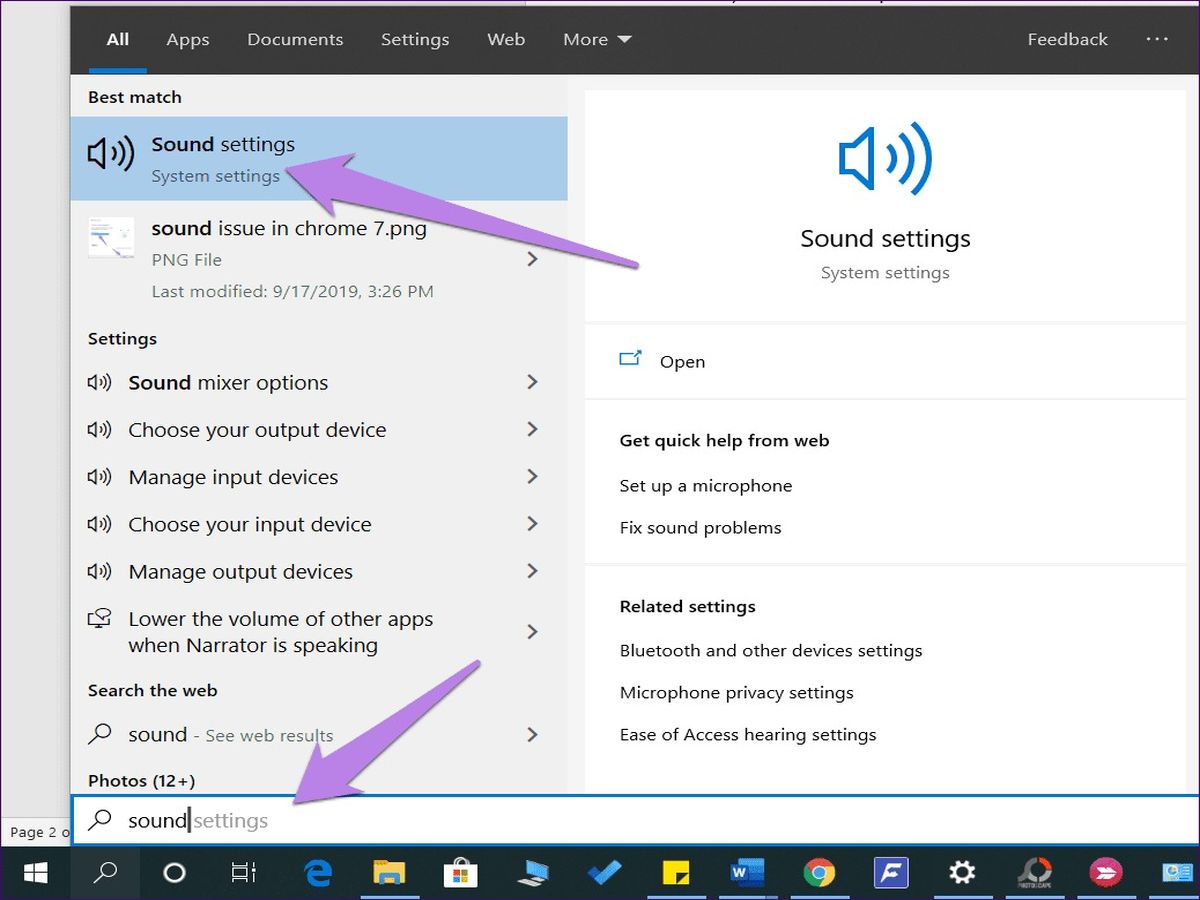
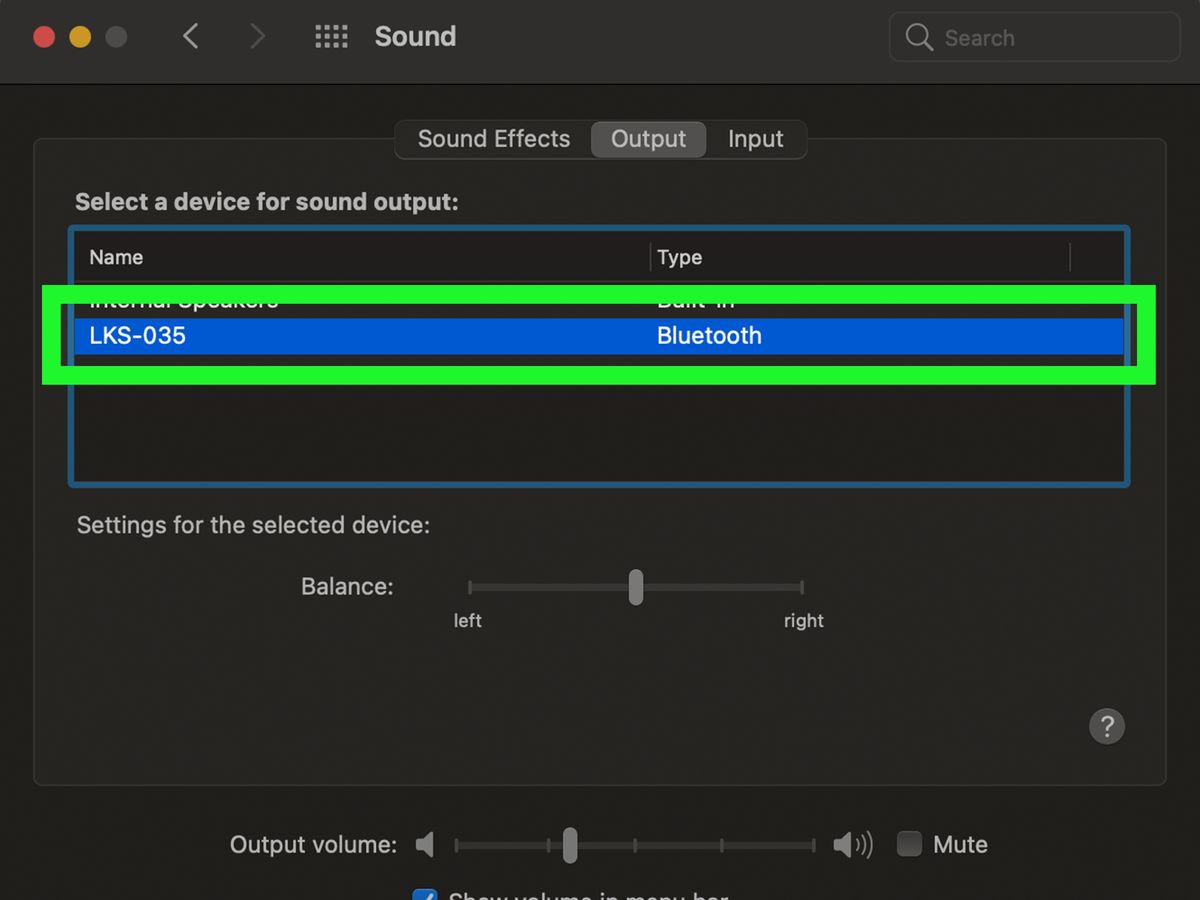
- Open Sound Settings: Right-click on the volume icon in the taskbar of your computer and select “Open Sound settings.” This will open the Sound settings window.
- Select Playback Device: In the Sound settings window, navigate to the “Playback” tab. Here, you will see a list of playback devices connected to your computer. Look for the device you are experiencing issues with and ensure it is selected as the default playback device. If it’s not selected, right-click on the device and choose “Set as Default Device.”
- Adjust Volume Levels: While in the Sound settings window, you can also adjust the volume levels as per your preference. Move the slider under the device you are using to increase or decrease the volume level. Ensure that the volume is not muted and that it’s set at an adequate level.
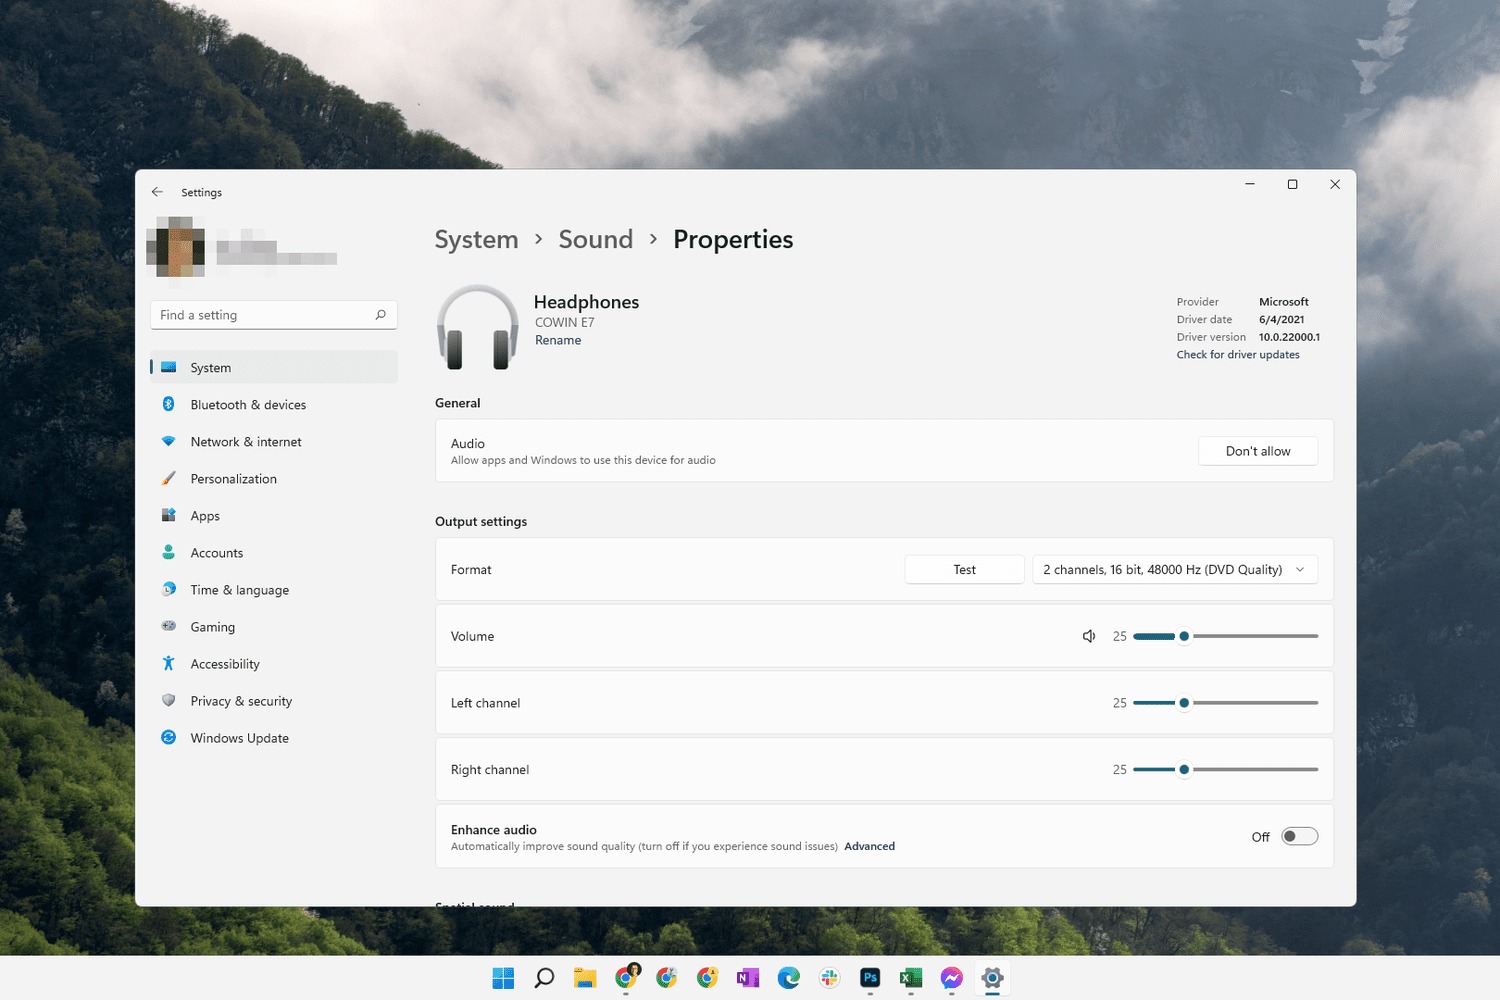
- Check Advanced Settings: Some playback devices may have additional advanced settings. To access these settings, select the device in the Sound settings window and click on the “Properties” button. Here, you can adjust various settings such as enhancements, sample rate, and bit depth. It’s recommended to check the manufacturer’s documentation for guidance on these settings.
- Test the Playback Device: Once you have adjusted the sound settings, test your playback device by playing an audio or video file. Check if the sound quality has improved and if the device is functioning as expected.
By adjusting the sound settings, you can ensure that the correct playback device is selected and that the volume levels are properly configured. This can often resolve issues such as no sound or low sound output. If adjusting the sound settings doesn’t fix the playback problems, proceed to the next troubleshooting method.
Method 4: Run Audio Troubleshooter
If you’re experiencing playback device issues on your computer, running the built-in Audio Troubleshooter can help diagnose and fix common audio problems automatically. The Audio Troubleshooter is designed to detect and resolve issues related to the audio playback on your computer. Here’s how you can run the Audio Troubleshooter:
- Open Control Panel: To access the Audio Troubleshooter, first, open the Control Panel on your computer. You can do this by searching for “Control Panel” in the Start menu or by clicking on the Windows icon and selecting Control Panel from the list.
- Go to Troubleshoot: In the Control Panel window, navigate to the “System and Security” section and click on “Troubleshoot.”
- Run the Audio Troubleshooter: In the Troubleshoot window, select the “Troubleshoot audio playback” option. This will launch the Audio Troubleshooter on your computer.
- Follow the Instructions: Once the Audio Troubleshooter is open, it will prompt you with a series of instructions to diagnose and fix any audio playback problems. Follow the on-screen instructions carefully and provide any necessary input when prompted.
- Apply the Fixes: The Audio Troubleshooter will automatically detect any identified issues with your playback device and attempt to fix them. It may suggest adjusting settings, reinstalling drivers, or applying other recommended fixes. Allow the troubleshooter to complete its process.
- Test the Playback Device: After the Audio Troubleshooter has finished running, test your playback device by playing an audio or video file. Check if the issue has been resolved and if the device is functioning properly.
The built-in Audio Troubleshooter in Windows is a helpful tool to automatically detect and fix common audio playback issues. It can save you time and effort by providing specific troubleshooting steps tailored to your system. If the Audio Troubleshooter doesn’t resolve the playback problems, proceed to the next troubleshooting method.
Method 5: Reset Playback Device
If your playback device is not being recognized by your computer or has incorrect configurations, resetting the device can often resolve the issue. Resetting the playback device can help restore the default settings and establish a proper connection with your computer. Here’s how you can reset your playback device:
- Disconnect the Device: Start by disconnecting the playback device from your computer. Unplug any cables or disconnect any wireless connections associated with the device.
- Restart Your Computer: Next, restart your computer. This allows for a fresh start and ensures that any temporary software glitches are cleared.
- Power Cycle the Device: While your computer is restarting, power cycle the playback device. This involves completely powering off the device, waiting for a few seconds, and then powering it back on. Refer to the manufacturer’s instructions for your specific device on how to power it off and on properly.
- Reconnect the Device: After your computer has restarted and the playback device has been power cycled, reconnect the device to your computer. Plug in any necessary cables or establish any wireless connections.
- Test the Playback Device: Once the device is reconnected, test it by playing an audio or video file. Check if the device is now recognized by your computer and if the playback is functioning as expected.
Resetting the playback device can help resolve issues with unrecognized devices or incorrect configurations. It allows for a fresh connection between your device and computer, often eliminating any temporary software glitches that may have been causing the problem. If resetting the device doesn’t fix the playback issues, proceed to the next troubleshooting method.
Method 6: Reinstall Audio Drivers
If updating the device drivers didn’t resolve the playback issues, reinstalling the audio drivers may help. Corrupted or incompatible audio drivers can cause various playback problems on your computer. Reinstalling the drivers can ensure that you have a fresh and properly functioning set of audio drivers. Here’s how you can reinstall the audio drivers:
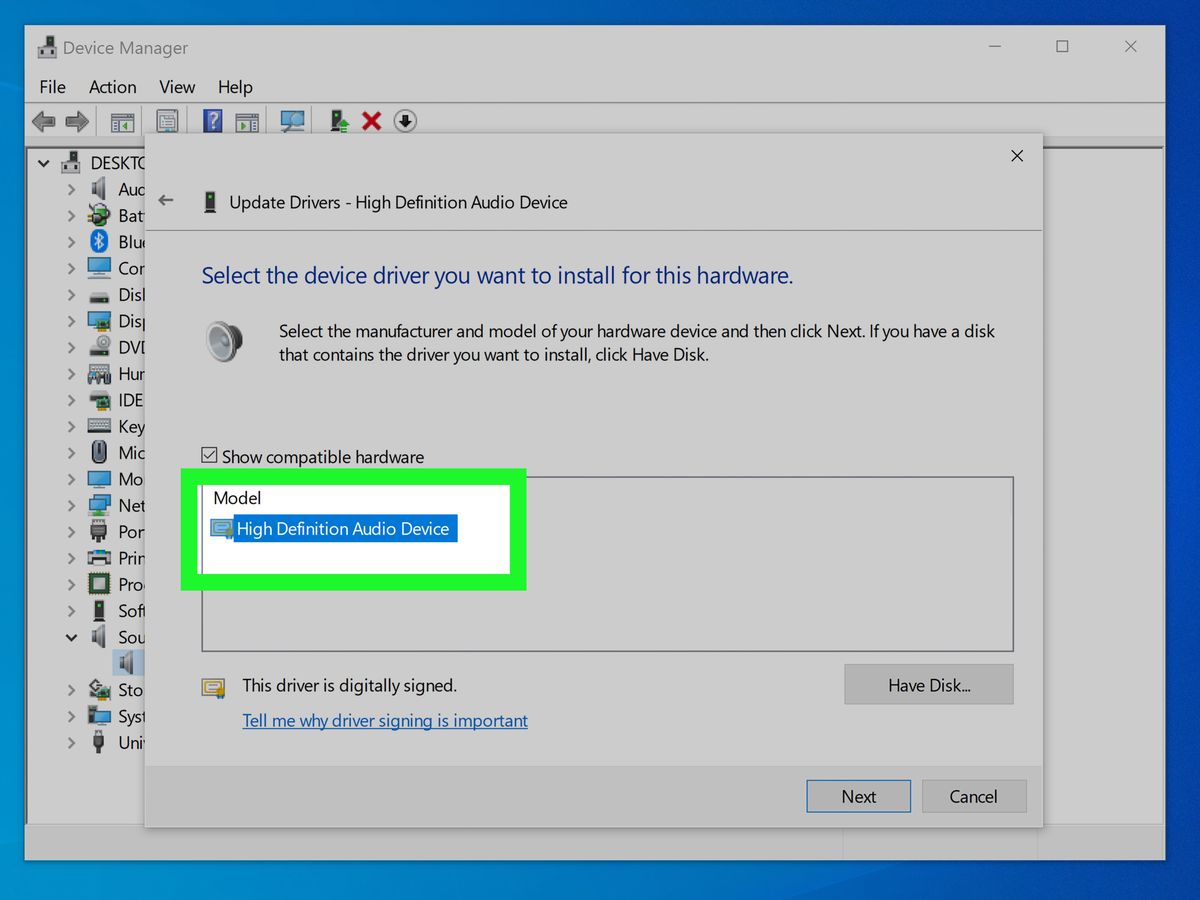
- Open Device Manager: To reinstall the audio drivers, first, open the Device Manager on your computer. You can do this by right-clicking on the Start button and selecting “Device Manager” from the menu that appears.
- Locate the Audio Device: In the Device Manager window, expand the “Sound, video and game controllers” category. This will display a list of audio devices installed on your computer. Look for the audio device that is experiencing issues.
- Uninstall the Audio Device: Right-click on the audio device and select “Uninstall device” from the context menu. You may see a warning message asking if you want to uninstall the device. Check the box that says “Delete the driver software for this device” to completely remove the driver files.
- Restart Your Computer: After uninstalling the audio device, restart your computer. This will allow your computer to automatically reinstall the audio drivers during the boot-up process.
- Automatic Driver Installation: Upon restarting your computer, Windows will automatically detect the missing audio device and attempt to install the appropriate drivers. Make sure you are connected to the internet to allow Windows to search for and download the necessary drivers.
- Test the Playback Device: Once the audio drivers have been reinstalled, test your playback device by playing an audio or video file. Check if the issue has been resolved and if the playback is functioning properly.
Reinstalling the audio drivers can resolve issues caused by corrupt or incompatible drivers. It ensures that you have a fresh set of drivers that are properly installed and compatible with your system. If reinstalling the audio drivers doesn’t resolve the playback problems, continue to the next troubleshooting method.
Method 7: Test Device on Another Computer
If you’ve tried various troubleshooting methods and are still experiencing playback issues with your device on your computer, it’s a good idea to test the device on another computer. Testing the device on another computer allows you to determine whether the issue lies with the playback device itself or with your computer. Here’s how you can test your device on another computer:
- Find Another Computer: Locate another computer or laptop that you can use for testing purposes. It could be a friend’s computer, a family member’s device, or a colleague’s computer.
- Connect the Device to the Other Computer: Once you have access to another computer, connect your playback device to it. Ensure that all necessary cables are securely plugged in or establish a wireless connection, depending on the type of device.
- Play an Audio or Video File: On the other computer, play an audio or video file to test the playback device. Check if the device works normally and if you encounter any of the previous issues you experienced on your own computer.
- Compare the Results: Analyze the results of the playback on the other computer. If the device works fine and you don’t encounter any issues, it suggests that the problem lies with your computer. In this case, you may need to delve deeper into computer-specific troubleshooting methods or seek professional assistance.
- Consider Device Compatibility: If the playback device exhibits similar issues on the other computer, it indicates that the problem may lie with the device itself. Check for any compatibility issues between your device and the operating system or any specific software requirements. You may need to consult the device’s user manual or contact the manufacturer for further assistance.
Testing your playback device on another computer helps you determine whether the issue is computer-specific or device-related. This information can guide you in focusing your troubleshooting efforts and seeking the appropriate support. Remember to always establish a backup of your files before trying any troubleshooting methods or reaching out for assistance.
Conclusion
Playback device issues on your computer can be frustrating, but with the right troubleshooting methods, you can resolve them and get back to enjoying your audio and video content without interruptions. In this article, we explored several common issues with playback devices and provided step-by-step troubleshooting methods to help you fix them.
We started by highlighting the common issues you may encounter with playback devices, such as no sound, distorted audio, device not recognized, playback control issues, and interference. Understanding these issues can help you identify and address the specific problem you’re facing.
We then explored various troubleshooting methods, including checking connections, updating device drivers, adjusting sound settings, running the audio troubleshooter, resetting the playback device, reinstalling audio drivers, and testing the device on another computer. Each method can play a crucial role in diagnosing and resolving playback device issues.
By following these troubleshooting methods, you can often fix playback issues on your computer without needing expert assistance. However, if the problem persists or you are unsure about performing the steps yourself, it’s advisable to seek professional help or contact the customer support of the playback device manufacturer.
Remember to exercise patience and be systematic in your approach. Take the time to check connections, update drivers, and adjust settings properly. It’s important to ensure that you have the most up-to-date drivers and that the device is correctly recognized by your computer.
By taking these steps, you can overcome common playback device issues and enjoy your audio and video content seamlessly once again. Whether you’re listening to music, watching movies, or playing games, having a properly functioning playback device enhances your overall experience.