Home>Events & Info>Playback>How To Add To Playback Devices In Sound

Playback
How To Add To Playback Devices In Sound
Modified: January 22, 2024
Learn how to add playback devices to your sound settings and enhance your audio experience. Follow our step-by-step guide to easily connect and configure your playback devices.
(Many of the links in this article redirect to a specific reviewed product. Your purchase of these products through affiliate links helps to generate commission for AudioLover.com, at no extra cost. Learn more)
Table of Contents
Introduction
Welcome to this comprehensive guide on how to add a device to playback in sound settings. Whether you have a new audio device or simply want to connect an existing one to your computer or mobile device, this tutorial will provide you with step-by-step instructions to help you easily add the device to your playback options.
Having the ability to add a new playback device is essential for a smooth and enjoyable audio experience. Whether you want to connect speakers, headphones, or other audio devices, it’s important to know how to navigate your sound settings and make the necessary adjustments.
Adding a new playback device enables you to customize your audio output preferences, control sound levels, and ensure that the device you want to use is selected as the default option. This can be particularly useful if you frequently switch between different audio devices or need to troubleshoot any issues with your sound settings.
In this guide, we will walk you through the process of adding a new device to playback in sound settings step by step. We’ll start by showing you how to open sound settings and access the playback devices menu. Then, we’ll guide you through the process of adding a new device and configuring its settings. Finally, we’ll demonstrate how to test the new playback device to ensure that it’s working properly.
It’s important to note that the specific steps may vary slightly depending on the operating system and device you are using. However, the general principles and concepts outlined in this guide will apply to most Windows, Mac, and mobile devices.
Now, let’s dive into the first step: opening sound settings.
Step 1: Open Sound Settings
The first step to adding a device to playback in sound settings is to open the sound settings menu on your computer or mobile device. The location of the sound settings may vary depending on the operating system you are using, but the process is generally similar.
Here’s how you can open sound settings on different platforms:
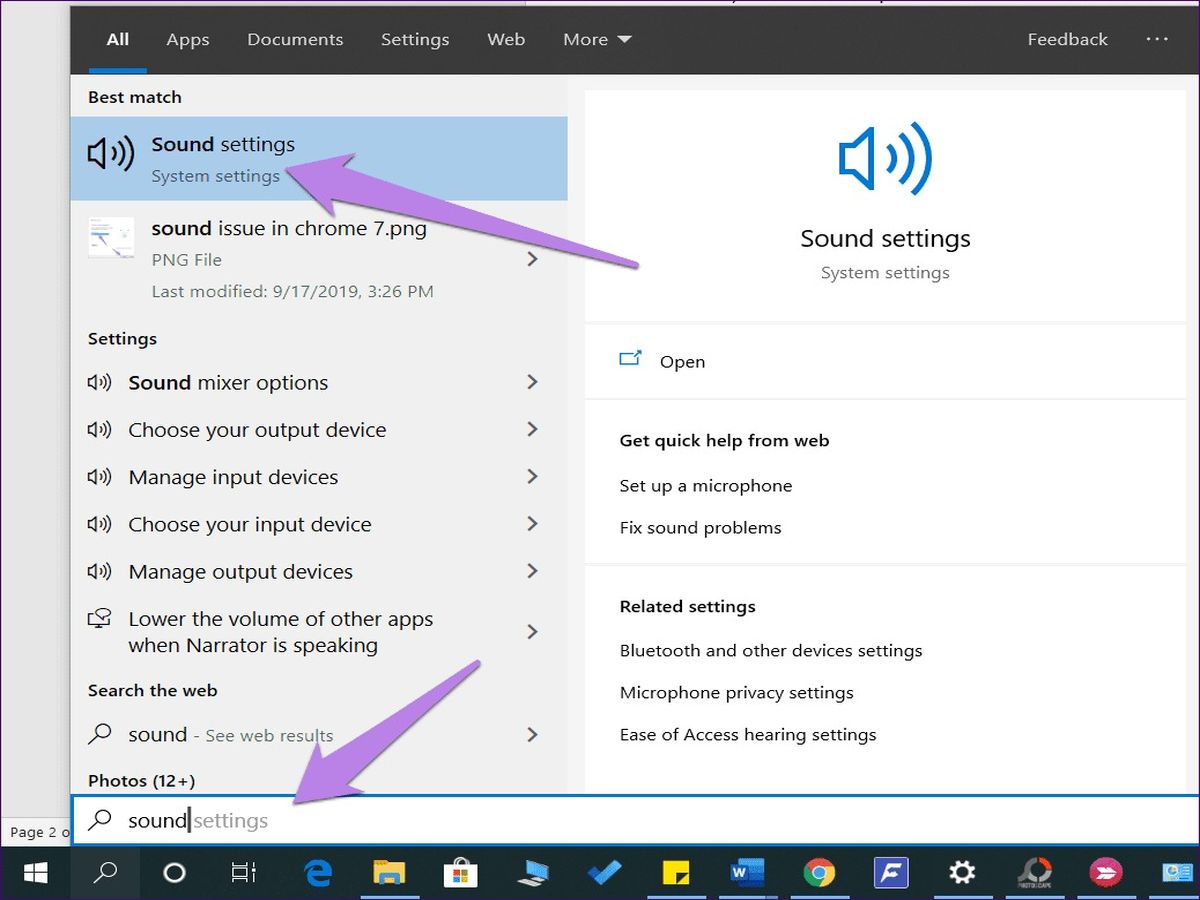
- Windows: On Windows, you can access sound settings by right-clicking on the volume icon in the taskbar and selecting “Sounds” or “Open Sound Settings.” Alternatively, you can open the Control Panel, navigate to the “Hardware and Sound” section, and click on “Sound.”
- Mac: If you’re using a Mac, you can open sound settings by clicking on the Apple menu in the top-left corner of the screen, selecting “System Preferences,” and then clicking on “Sound.”
- Mobile: On mobile devices, the process may vary depending on the operating system and device. Generally, you can open sound settings by going to the Settings app, selecting “Sound” or “Audio,” and then choosing the relevant options.
Once you have opened the sound settings, you will have access to a range of audio settings and options. In the next step, we will guide you through accessing the playback devices menu where you can add a new device to your audio playback options.
Now that you’ve opened the sound settings, let’s move on to Step 2 and learn how to access the playback devices menu.
Step 2: Access Playback Devices
After opening the sound settings, the next step is to access the playback devices menu. This menu allows you to view and manage the audio playback options available on your computer or mobile device.
Here’s how you can access the playback devices menu on different platforms:
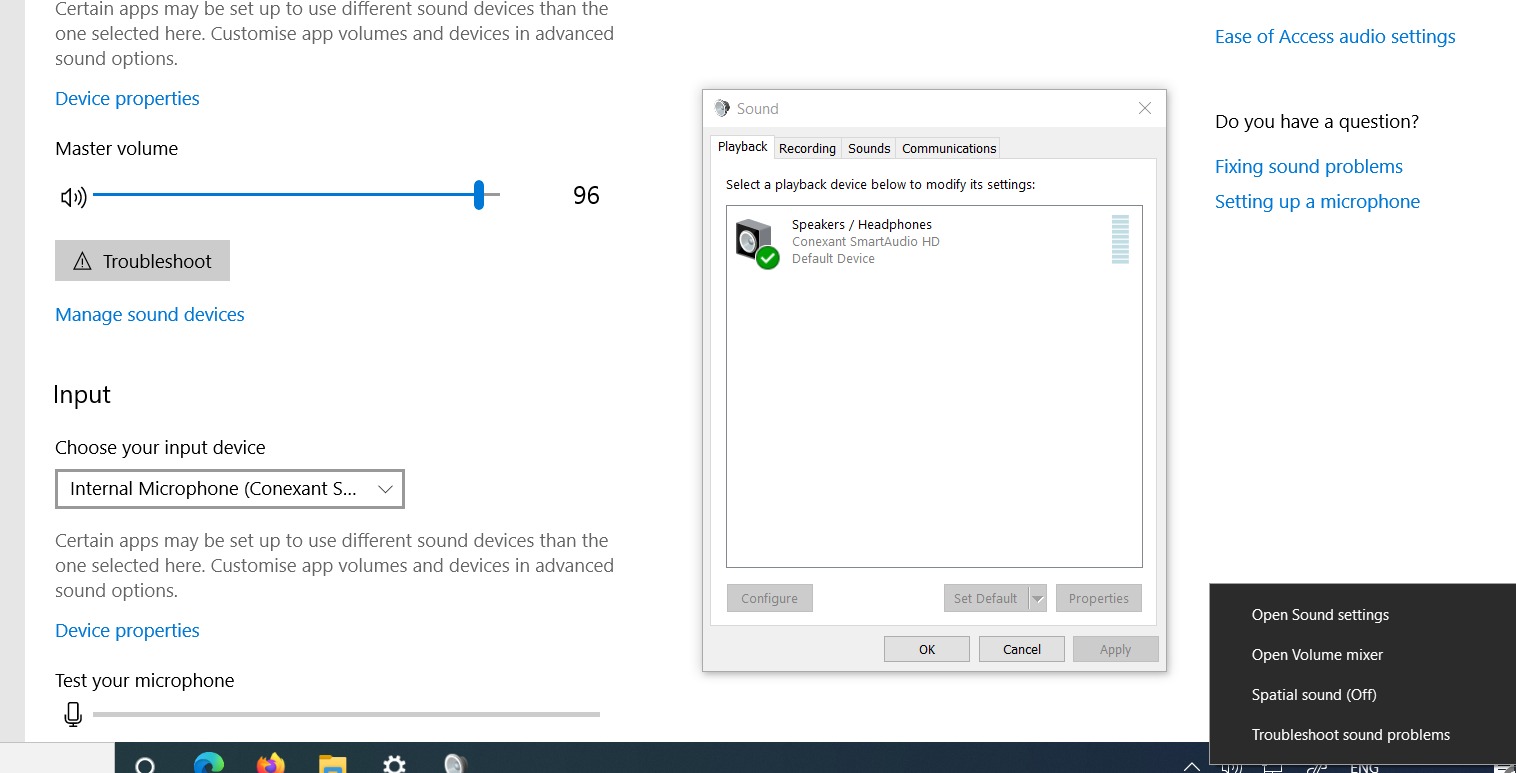
- Windows: In the sound settings window on Windows, you will typically find a tab labeled “Playback” or “Playback Devices.” Click on this tab to access the playback devices menu.
- Mac: On a Mac, you will usually see a row of tabs at the top of the sound settings window. Click on the “Output” tab to view the playback devices menu.
- Mobile: On mobile devices, the process may vary depending on the operating system and device. Look for options like “Sound” or “Audio” in the settings menu. From there, you should be able to access the playback devices menu.
Once you have accessed the playback devices menu, you will see a list of available audio playback devices. This list may include built-in speakers, headphones, external speakers, and other connected devices.
Now that you know how to access the playback devices menu, let’s move on to Step 3 and learn how to add a new playback device to your system.
Step 3: Add a New Playback Device
Once you have accessed the playback devices menu, you can proceed to add a new playback device to your system. Adding a new device will allow you to expand your audio options and choose the device you want to use for playback.
Follow these steps to add a new playback device:
- Look for a button or option in the playback devices menu that says “Add” or “Add Device.” Click on this button to initiate the process of adding a new device.
- In the next window, you may have the option to choose the type of device you want to add. This could include options like speakers, headphones, or other audio devices. Select the appropriate device type for the device you want to add.
- Next, you may need to connect the new playback device to your computer or mobile device if you haven’t already done so. Follow the manufacturer’s instructions for connecting the device properly.
- Once the device is connected, click on the “Install” or “Next” button to proceed. Your system will then detect and install the necessary drivers or software for the new playback device.
- After the installation process is complete, you will see the newly added device listed in the playback devices menu. It may be labeled with the device’s name or a generic identifier.
- At this point, you can also set the newly added device as the default playback device if desired. This means that any audio output will automatically be directed to this device unless you specify otherwise.
Congratulations! You have successfully added a new playback device to your system. In the next step, we will guide you through the process of configuring the settings for the newly added device.
Now that you know how to add a new playback device, let’s move on to Step 4 and learn how to configure its settings.
Step 4: Configure Playback Device Settings
After adding a new playback device to your system, it’s important to configure its settings to ensure optimal audio performance. The specific settings and options may vary depending on the device and operating system you are using, but the general process remains the same.
Follow these steps to configure the playback device settings:
- Locate the newly added playback device in the playback devices menu. It may be listed with its name or a generic identifier.
- Right-click on the device and select “Properties” or a similar option. This will open a window with settings specific to that device.
- In the device properties window, you will find various options to configure the settings for the playback device. These options may include volume controls, equalizer settings, spatial sound options, and more.
- Adjust the volume controls to set the desired sound level for the playback device. You can typically drag a slider or use arrow buttons to increase or decrease the volume.
- Explore other settings and options to customize the audio output according to your preferences. This may include adjusting bass, treble, and balance settings, enabling surround sound, or applying audio effects.
- Once you have configured the playback device settings to your liking, click on the “Apply” or “OK” button to save the changes.
By configuring the playback device settings, you can fine-tune the audio output according to your specific needs and preferences. Whether you want a more immersive sound experience, enhanced bass, or a balanced audio profile, these settings allow you to achieve your desired audio quality.
Now that you have successfully configured the playback device settings, let’s move on to Step 5 and learn how to test the newly added playback device.
It’s time to ensure that your newly added device is working properly and delivering the desired sound. In the next step, we’ll guide you through the process of testing the playback device.
Step 5: Test the New Playback Device
Now that you have added a new playback device and configured its settings, it’s time to test the device to make sure it is functioning properly and producing the desired sound output. Testing the device will help you identify any issues or discrepancies and ensure that you can enjoy an optimal audio experience.
Follow these steps to test the new playback device:
- Play any audio or video file on your computer or mobile device. This could be a song, a video clip, or any other media that includes sound.
- While the audio or video is playing, go back to the playback devices menu.
- Look for the device that you added in the previous steps. It should be listed among the available playback devices.
- Right-click on the device and select “Test” or a similar option. This will play a test sound through the selected device.
- Listen to the test sound coming from the playback device. Make sure that the sound is clear, balanced, and free from any distortion or abnormality.
- If you encounter any issues with the sound during the test, double-check the device connections, ensure that the volume is set to an appropriate level, and confirm that the device settings are configured correctly.
- If the test sound plays successfully without any issues, you can close the playback devices menu and continue using the device for all your audio playback needs.
By testing the new playback device, you can ensure that it is functioning as expected and delivering the desired sound quality. If you encounter any issues during the test, you may need to troubleshoot further or seek assistance from the device manufacturer or technical support.
Congratulations! You have successfully added a new playback device, configured its settings, and tested it for optimal audio performance. Now, you can enjoy a seamless and immersive audio experience with your newly added playback device.
To wrap up, let’s conclude the guide in the next and final section.
Conclusion
Adding a new device to playback in sound settings is a simple process that allows you to expand your audio options and customize your audio experience. By following the steps outlined in this guide, you can easily add a new playback device, configure its settings, and ensure that it is functioning properly.
Opening the sound settings on your computer or mobile device is the first step to accessing the playback devices menu. From there, you can add a new device by simply clicking on the “Add” or “Add Device” button and following the prompts. Once the device is added, you can configure its settings, including volume controls, equalizer settings, and more, to customize your audio output.
After configuring the settings, it’s important to test the new playback device to ensure that it is working properly. Playing audio or video and listening to the test sound will help you identify any issues and make necessary adjustments.
Whether you want to connect speakers, headphones, or any other audio device, knowing how to add a device to playback in sound settings gives you the flexibility to choose the device that best suits your needs at any given time.
Remember, the specific steps may vary slightly depending on the operating system and device you are using. However, the general principles outlined in this guide will apply to most Windows, Mac, and mobile devices.
Now that you have the knowledge and know-how, go ahead and add your desired devices to playback in your sound settings. Enjoy the enhanced audio experience and immerse yourself in the world of immersive sound.
Happy listening!