Home>Events & Info>Podcast>How To Edit Podcast Audio

Podcast
How To Edit Podcast Audio
Modified: January 22, 2024
Learn how to edit podcast audio and enhance the sound quality for your podcast episodes. Get expert tips and techniques for editing your podcast audio to perfection.
(Many of the links in this article redirect to a specific reviewed product. Your purchase of these products through affiliate links helps to generate commission for AudioLover.com, at no extra cost. Learn more)
Table of Contents
Introduction
Welcome to the world of podcasting! With the rise in popularity of podcasts, it is no wonder that more and more people are jumping on the bandwagon and starting their own shows. But one crucial aspect of creating a podcast is editing the audio to ensure a professional and engaging final product. In this article, we will guide you through the process of editing podcast audio, providing you with the essential tips and techniques to create a top-notch podcast.
Editing podcast audio involves fine-tuning the raw recordings, removing any unwanted noise, adjusting volume levels, adding music and sound effects, and ensuring a smooth and cohesive listening experience. While it may seem overwhelming at first, with the right software and approach, you can easily take your podcast audio from raw to polished.
Throughout this article, we will cover the key steps to editing podcast audio, from the initial organization of files to the final export and saving of your edited audio. We will also discuss the importance of enhancing audio quality and how to achieve it. So, let’s dive in and explore the world of podcast audio editing!
Choosing the Right Software
When it comes to editing podcast audio, choosing the right software is essential. There are numerous options available, each with its own set of features and user interface. To help you make an informed decision, here are some factors to consider:
- User-Friendly Interface: Look for software that is intuitive and easy to navigate. A cluttered or complicated interface can slow down your editing process and hinder your creativity.
- Compatibility: Ensure that the software you choose is compatible with your operating system. Whether you are using Windows, Mac, or Linux, make sure the software supports your system.
- Editing Capabilities: Consider the specific editing features you require for your podcast. Do you need tools for adjusting volume levels, removing noise, adding effects, or removing mistakes? Look for software that provides the necessary tools.
- Flexibility: Look for software that allows you to work with multiple tracks or layers. This is especially important if you plan to incorporate music, sound effects, or multiple speakers into your podcast.
- Import and Export Options: Check if the software supports a wide range of audio file formats, as this will ensure compatibility with different recording devices and platforms.
- Cost: Consider your budget and choose a software option that suits your financial constraints. Keep in mind that there are both free and paid options available, each with its own set of features.
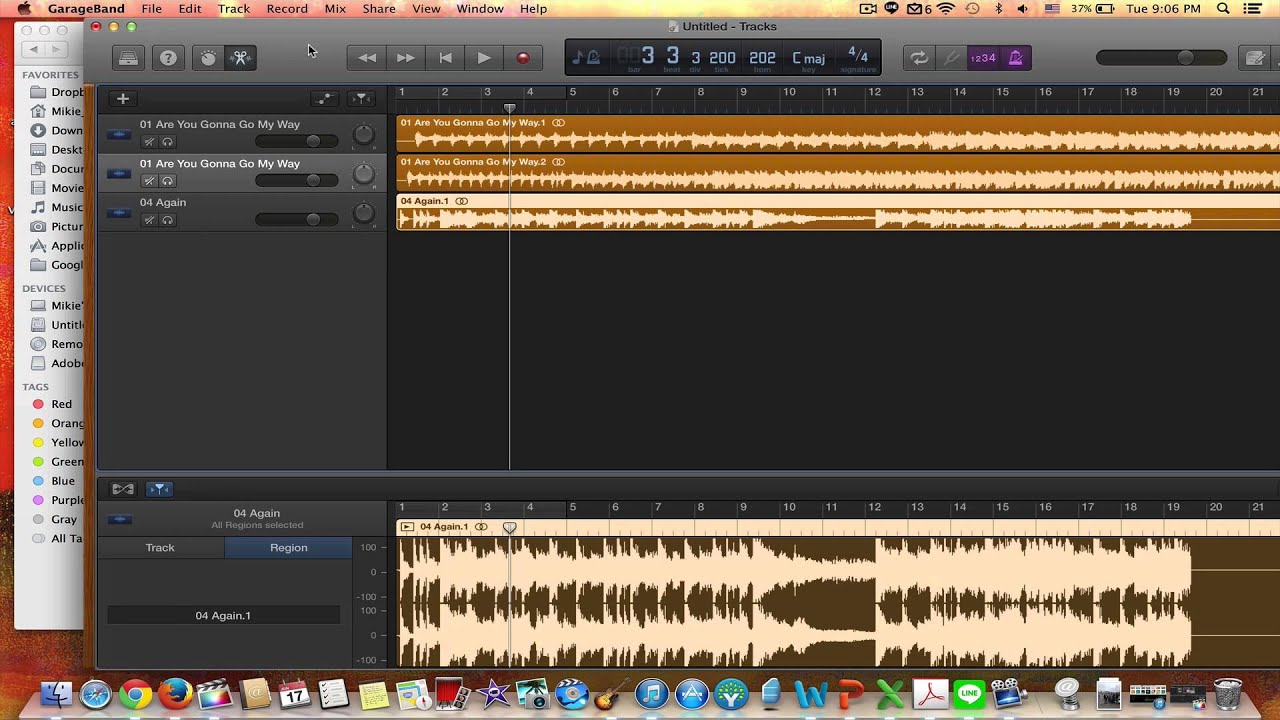
Some popular podcast editing software options include Audacity (free, open-source), Adobe Audition (paid), GarageBand (free for Mac users), and Reaper (affordable and flexible). Each of these options has its own strengths and weaknesses, so explore them and choose the one that aligns with your preferences and requirements.
Once you have selected the right software, invest some time in getting familiar with its features and functionality. This will help streamline your editing process and allow you to focus on creating high-quality podcast audio.
Importing and Organizing Your Podcast Audio Files
Before you can start editing your podcast audio, you need to import and organize your audio files within your chosen editing software. Here are some steps to follow:
- Create a Folder Structure: Begin by creating a dedicated folder on your computer where you will store all your podcast audio files. Within this folder, organize your files into subfolders for each episode, making it easier to locate specific files in the future.
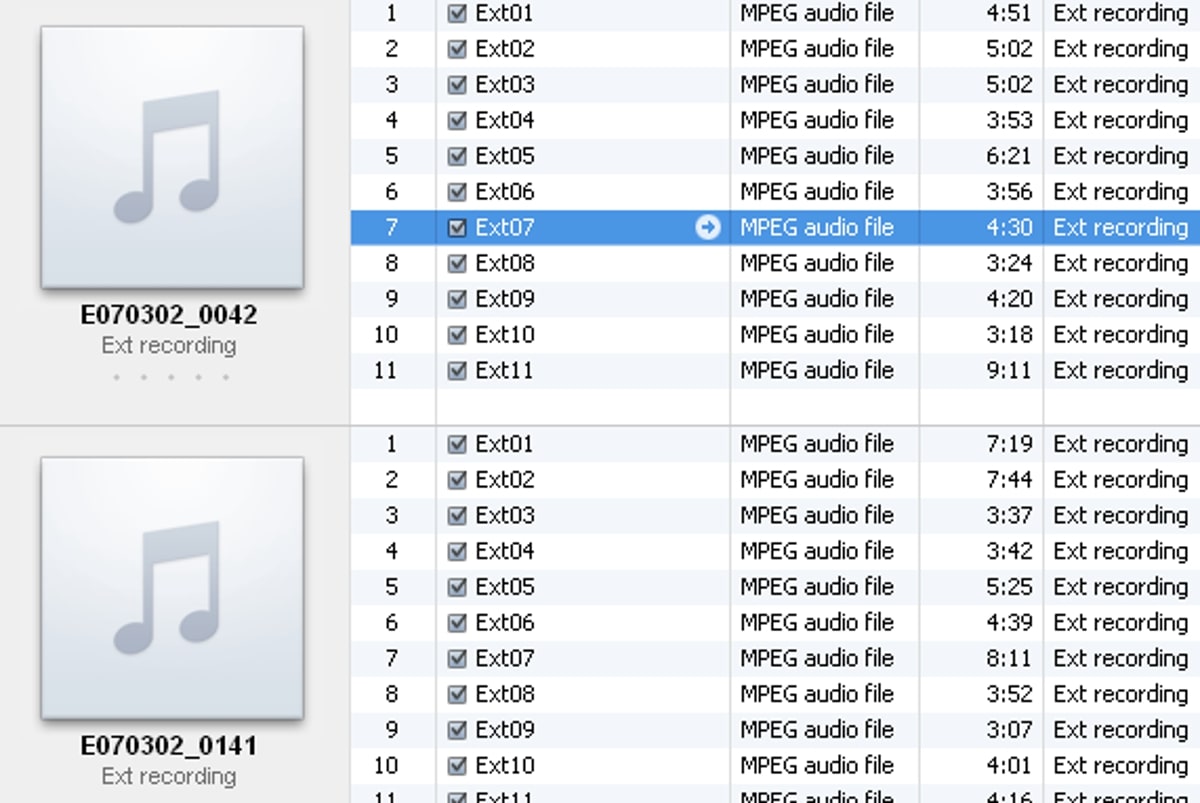
- Import Your Raw Audio Files: Open your editing software and locate the import feature. Select the raw audio files for the episode you want to edit and import them into your project. Most editing software allows you to drag and drop files directly into the workspace.
- Arrange the Files: Once imported, arrange the audio files in the correct order of your podcast episode. This may include intro music, dialogue, interviews, and outro music. The timeline view in your editing software will allow you to visually organize the audio files in the desired sequence.
- Label and Rename Files: To maintain organization, rename your audio files with meaningful names that indicate their content. This will help you easily identify and locate specific elements within your podcast episode.
- Backup Your Files: As a precautionary measure, make regular backups of your podcast audio files. This will protect against accidental loss or corruption of data and give you peace of mind throughout the editing process.
By following these steps, you will have a well-organized library of podcast audio files, ready for you to edit. Organizing your files upfront will save you time and frustration during the editing process and ensure a smooth workflow.
Now that your audio files are imported and organized, it’s time to dive into the editing process, which we will explore in the following sections.
Basic Audio Editing
Once your podcast audio files are imported and organized, you can start the basic editing process. This includes trimming, cutting, and rearranging audio segments to create a cohesive and engaging podcast episode. Here are some essential editing techniques to consider:
- Trimming and Cutting: Identify any unnecessary pauses, mistakes, or awkward silences in your audio. Use the editing software’s trimming or cutting tools to remove these sections and create a smoother flow.
- Rearranging Segments: If needed, rearrange the order of audio segments to enhance the narrative flow of your podcast episode. This may involve moving an interview section or shifting the order of topics for better coherence.
- Smooth Transitions: Ensure seamless transitions between different segments of your podcast. Use crossfades, fade-ins, and fade-outs to smoothen any abrupt changes and create a more polished listening experience.
- Volume Balancing: Pay attention to the volume levels of different audio segments. Adjust the volume as needed to achieve consistent levels throughout your podcast episode, ensuring that the audio is neither too loud nor too soft.
- Pacing and Timing: Consider the pacing and timing of your podcast episode. Remove any moments of dead air or excessive pacing that may cause your listeners to lose interest. Aim for a steady and engaging rhythm in your editing.
During the basic editing process, it is important to maintain an objective perspective and listen to your podcast audio critically. Take note of sections that can be tightened, improved, or removed altogether to enhance the overall quality of your episode.
Remember, the goal of basic audio editing is to create a cohesive and engaging podcast episode by removing any distractions or unnecessary elements. Put your personal touch on the editing process while keeping in mind the preferences of your target audience.
With the basic editing complete, you can move on to more advanced techniques such as removing background noise and adjusting volume levels, which we will explore in the next sections.
Removing Background Noise
Background noise can be a major distraction in podcast recordings, affecting the overall quality of your audio. Fortunately, most editing software provides tools and techniques to remove or reduce background noise effectively. Here are some steps to achieve cleaner audio:
- Identify the Noise: Listen carefully to your podcast audio and identify any persistent background noises such as hum, hiss, or air conditioning. It’s essential to distinguish between background noise and the desired audio content.
- Noise Reduction Effect: Use the noise reduction effect or plugin available in your editing software. This tool analyzes a sample of the background noise and then applies a filter to diminish its presence in the recording. Adjust the settings carefully to find the right balance between removing noise and maintaining the integrity of the desired audio.
- Frequency Spectrum Editing: For more control over specific frequencies, use spectral editing tools. These tools allow you to visualize and manipulate the audio signal in the frequency domain. By pinpointing the frequencies of the background noise, you can selectively remove or reduce them.
- Gate Effect: A gate effect can be helpful in eliminating low-level background noise during pauses or breaks in speech. This effect automatically reduces or mutes the audio when the volume falls below a certain threshold, effectively minimizing unwanted noise between spoken segments.
- Avoid Overprocessing: Be cautious when applying noise reduction techniques, as excessive processing can introduce artifacts and distortions into your audio. Continuously listen and review your changes to ensure the optimal balance between noise reduction and natural-sounding audio.
Removing background noise can significantly improve the clarity and professionalism of your podcast audio. However, it’s important to note that complete elimination of all noise may not always be achievable, especially in challenging recording environments. In such cases, focusing on reducing the noise as much as possible while maintaining the overall quality is a realistic goal.
By taking the time to address background noise, you can provide your listeners with a more enjoyable and immersive listening experience, making your podcast stand out among the competition.
Now that you have successfully dealt with background noise, let’s move on to adjusting volume levels in the next section.
Adjusting Volume Levels
Ensuring consistent volume levels throughout your podcast episode is crucial for a pleasant listening experience. Uneven volume levels can distract listeners and make it difficult to follow the content. To achieve balanced audio, follow these steps:
- Use Normalization: Utilize the normalization feature in your editing software to automatically adjust the overall volume of your podcast. Normalization helps bring the loudest and softest parts of your audio closer to an average level, ensuring a consistent volume throughout.
- Manually Adjust Levels: Review the waveform of your podcast audio and identify sections that are too loud or too soft in comparison to the rest. Adjust the volume levels of these sections manually using the volume or gain controls in your editing software.
- Compression: Apply compression to your podcast audio to further balance the volume levels. Compression reduces the dynamic range of the audio, making softer sounds louder and louder sounds softer. This helps to smooth out any drastic volume variations and create a more even and controlled audio level.
- Use Limiting: Limiting is a technique used to prevent audio from exceeding a certain level, known as the “ceiling.” It is particularly useful for controlling loud peaks and preventing distortion. Apply a limiter effect to ensure that the audio does not go beyond a certain threshold level.
- Audition Playback: Regularly listen to your edited podcast audio through different devices and headphones to ensure the volume levels are well-balanced and consistent across various listening environments. This step will help you catch any discrepancies or issues that may have been missed during the editing process.
Remember that adjusting volume levels is an ongoing process throughout your editing workflow. Continually monitor and make adjustments to achieve the desired balance and enhance the overall listening experience.
By applying these techniques, you can ensure that your podcast audio remains clear, stable, and enjoyable for your audience. Next, let’s explore the process of adding music and sound effects to enhance your podcast episodes.
Adding Music and Sound Effects
Music and sound effects can elevate the production value of your podcast and add depth and atmosphere to your episodes. Here are some tips on how to effectively incorporate music and sound effects into your podcast:
- Choose the Right Music: Select background music that complements the mood and theme of your podcast. Find royalty-free music or consider purchasing licenses for commercial tracks to ensure legal use.
- Timing and Placement: Introduce music at appropriate moments, such as during the intro, transitions, or when setting the mood for a specific segment. Make sure to balance the music volume with your spoken audio to avoid overpowering the dialogue.
- Sound Effects: Sound effects can enhance storytelling and create a more immersive experience for your listeners. Use sound effects sparingly and strategically to emphasize important moments or create a specific ambiance.
- Layering and Blending: Adjust the volume levels of the music and sound effects to ensure they blend smoothly with the spoken audio. Experiment with layering different tracks and effects to create a more dynamic and engaging soundscape.
- Transition Techniques: Utilize fade-ins, fade-outs, crossfades, or other transition effects to seamlessly blend music and sound effects with your spoken content. Smooth transitions enhance the overall flow and prevent jarring cuts between different audio elements.
Remember, while music and sound effects can enhance your podcast, it is important not to overwhelm or distract your audience. The focus should always remain on the spoken content and the message you want to convey.
Lastly, ensure that you have the necessary rights and licenses for any music or sound effects you include in your podcast. There are plenty of resources available online for royalty-free music and sound effects libraries that can help you find the perfect audio elements to enhance your podcast episodes.
With the addition of music and sound effects, your podcast will become more engaging and immersive, creating a unique listening experience for your audience. Next, let’s dive into the process of removing mistakes and pauses from your podcast audio.
Removing Mistakes and Pauses
Editing out mistakes and awkward pauses is an important step in refining your podcast audio and ensuring a smooth and professional listening experience. Here are some techniques to remove mistakes and pauses:
- Identify Mistakes: Listen attentively to your podcast audio and mark any sections where mistakes, stutters, or verbal slips occur. These may include mispronunciations, long pauses, or tangents that detract from the flow of your episode.
- Cutting and Deleting: Use editing tools in your software to cut out the unwanted sections containing mistakes or pauses. Make precise cuts before and after the segment to ensure a seamless transition.
- Smooth Transition: To avoid abrupt edits, apply crossfades or other fade effects at the cut points. This helps to blend the edited sections and maintains a natural flow so that the removal is not apparent to the listener.
- Fillers and Vocal Tics: Remove unnecessary filler words (such as “um” and “uh”) and vocal tics that may distract listeners from the content. Make sure to maintain the overall rhythm and pacing by adjusting adjacent speech sections if needed.
- Narrative Coherence: Ensure that the removal of mistakes and pauses does not compromise the coherence of your narrative. Review the surrounding context to ensure a smooth transition between edited segments and maintain the overall flow of your content.
It’s important to strike a balance between removing mistakes and pauses while maintaining the authenticity and natural flow of your podcast. Remember, a few minor imperfections can add a personal touch and make your podcast feel more conversational.
Take the time to listen to your edited audio multiple times during this process to ensure the overall quality and to catch any missed mistakes or pauses. It’s also helpful to have a fresh set of ears, so consider getting feedback from trusted friends or colleagues to ensure a thorough review.
By removing mistakes and pauses, you can refine your podcast audio and deliver a polished, professional episode to your audience. Next, let’s explore how you can enhance the overall audio quality of your podcast.
Enhancing Audio Quality
Enhancing the audio quality of your podcast is essential for creating a captivating and professional listening experience. Here are some techniques to help you achieve optimal audio quality:
- EQ Adjustment: Use the equalizer (EQ) tool in your editing software to adjust the frequency response of your audio. This allows you to emphasize or reduce certain frequencies to enhance clarity and improve the overall balance of the sound.
- De-Essing: Reduce harsh “s” sounds and other sibilant consonants that can be distracting to listeners. Apply a de-esser effect or use manual techniques to tame these frequencies without affecting the overall quality of the audio.
- Spatial Imaging: Use stereo widening techniques to create a sense of space and depth in your podcast audio. This can help make the audio feel more immersive and engaging for your listeners.
- Dynamic Range Compression: Apply compression to even out the volume levels and reduce the dynamic range of your audio. This technique helps to balance the loud and soft parts, making it easier for listeners to hear all the nuances in your podcast.
- Room Ambience: If your recording has a dry or unnatural sound, you can add subtle room ambience or reverb to mimic a more spacious environment. Be careful not to overdo it, as excessive reverb can make the audio sound artificial.
- Monitoring Quality: Ensure that you are using high-quality headphones or studio monitors to accurately evaluate the audio during the editing process. Good monitoring allows you to catch any imperfections or issues that may not be apparent with consumer-grade headphones or speakers.
Experiment with these techniques and adjust settings according to the specific needs of your podcast audio. Remember, the goal is to enhance the natural characteristics of the audio rather than completely altering its original sound.
Additionally, maintaining consistent audio levels, controlling background noise, and addressing technical issues like pops or clicks can also significantly enhance audio quality. Regularly listen and review your edits to ensure the changes made are improving the overall sound of your podcast.
By enhancing audio quality, your podcast will sound professional, immersive, and enjoyable to your audience. Now, let’s move on to the final step: exporting and saving your edited podcast audio.
Exporting and Saving Your Edited Podcast Audio
After you have completed the editing process and are satisfied with the final result of your podcast audio, it’s time to export and save your edited files. Follow these steps to ensure a seamless export:
- Select the Desired Format: Choose the appropriate audio file format for your podcast. Common options include MP3, WAV, or FLAC. Consider the requirements of podcast platforms and compatibility with different devices and players.
- Set Bitrate and Sample Rate: Adjust the bitrate and sample rate settings based on your podcast’s target audience and the desired balance between file size and audio quality. Higher bitrates and sample rates generally result in higher audio quality but larger file sizes.
- Naming and Metadata: Give your exported podcast audio file a clear and descriptive name. Also, make sure to include relevant metadata such as episode number, title, and artwork. This metadata helps with organization and improves the appearance of your podcast on various platforms.
- Backup Your Project: Before exporting, create a backup of your original project file and associated audio files. This ensures you have a copy of your edits in case any issues arise or changes need to be made in the future.
- Export Settings: Follow the prompts in your editing software’s export feature to specify the output location, format, and settings. Double-check that you have selected the correct options before proceeding with the export process.
- Test the Exported File: After the export process is complete, take a moment to listen to the exported audio file to confirm that it retains the desired audio quality and all edits are intact.
- Storage and Archiving: Store your exported files in a dedicated folder or storage system that is easily accessible and properly organized. Additionally, consider creating backups of your exported audio files to safeguard against potential data loss.
By following these steps, you can ensure the efficient and accurate export of your podcast audio, ready to be uploaded to podcast hosting platforms and shared with your audience.
Remember, the process of exporting and saving your edited podcast audio marks the completion of your editing journey. Take pride in the polished and professional sound you have achieved, ready to be shared with your listeners.
With your edited and exported podcast audio files in hand, you are now equipped to share your podcast with the world and captivate your target audience. Congratulations on completing the editing process and creating a high-quality podcast episode!
Conclusion
Editing podcast audio is an essential step in creating a high-quality and engaging podcast. By following the techniques and tips outlined in this article, you can enhance the overall sound of your podcast and deliver a polished final product to your audience.
Choosing the right software and organizing your audio files are crucial initial steps that set the foundation for a smooth editing process. Basic editing techniques such as trimming, rearranging, and balancing volume levels help create a cohesive and professional podcast episode.
Removing background noise and adjusting volume levels ensure a clean and consistent listening experience, while adding music and sound effects adds depth and atmosphere to your episodes.
Don’t forget the importance of removing mistakes and pauses to maintain a seamless flow and narrative coherence in your podcast. Finally, enhancing audio quality through equalization, compression, and other techniques takes your podcast to the next level.
Once you are satisfied with your edited podcast audio, it’s time to export and save the files in the appropriate format, considering factors such as bitrate, sample rate, and metadata. With your exported files safely stored, you are ready to share your podcast with the world.
Remember that podcast editing is an ongoing learning process. Continuously hone your editing skills, experiment with different techniques, and seek feedback from your audience to further refine your podcast episodes.
Embrace the power of audio editing to create a unique and captivating podcast that resonates with your listeners. With dedication, creativity, and attention to detail, you can produce exceptional podcast episodes that leave a lasting impact.
So, go ahead and dive into the world of podcast audio editing. Unleash your creativity, master the techniques, and let your podcast shine!