Home>Production & Technology>MP3>How To Edit An MP3
MP3
How To Edit An MP3
Modified: January 22, 2024
Learn how to edit MP3 files easily with our step-by-step guide. Trim, merge, and enhance your audio tracks with just a few clicks.
(Many of the links in this article redirect to a specific reviewed product. Your purchase of these products through affiliate links helps to generate commission for AudioLover.com, at no extra cost. Learn more)
Table of Contents
Introduction
In the world of digital media, MP3 files have become a popular choice for storing and listening to music. However, there are times when you may need to make edits to an MP3 file, whether it’s trimming the length, adjusting the volume, or adding special effects. With the right tools and techniques, you can easily edit your MP3 files to suit your needs.
In this article, we will explore the process of editing MP3 files in a step-by-step manner. We will cover everything from selecting the right editing tool to the various editing options available. Whether you’re a professional audio engineer or a casual music enthusiast, this guide will provide you with the knowledge and skills to edit your MP3 files with confidence.
Before diving into the details, it’s important to note that when editing MP3 files, it’s always a good practice to work on a copy of the original file. This ensures that your original file remains intact, in case any mistakes are made during the editing process. Now, without further ado, let’s jump into the world of MP3 editing!
Step 1: Selecting an MP3 editing tool
Choosing the right MP3 editing tool is crucial to ensure a smooth and efficient editing process. There are various software options available, each offering different features and capabilities. Here are some popular MP3 editing tools to consider:
- Audacity: Audacity is a free, open-source audio editing software that is widely used and highly regarded in the industry. It offers a range of editing functions such as cutting, copying, and pasting sections of audio, as well as applying effects and filters.
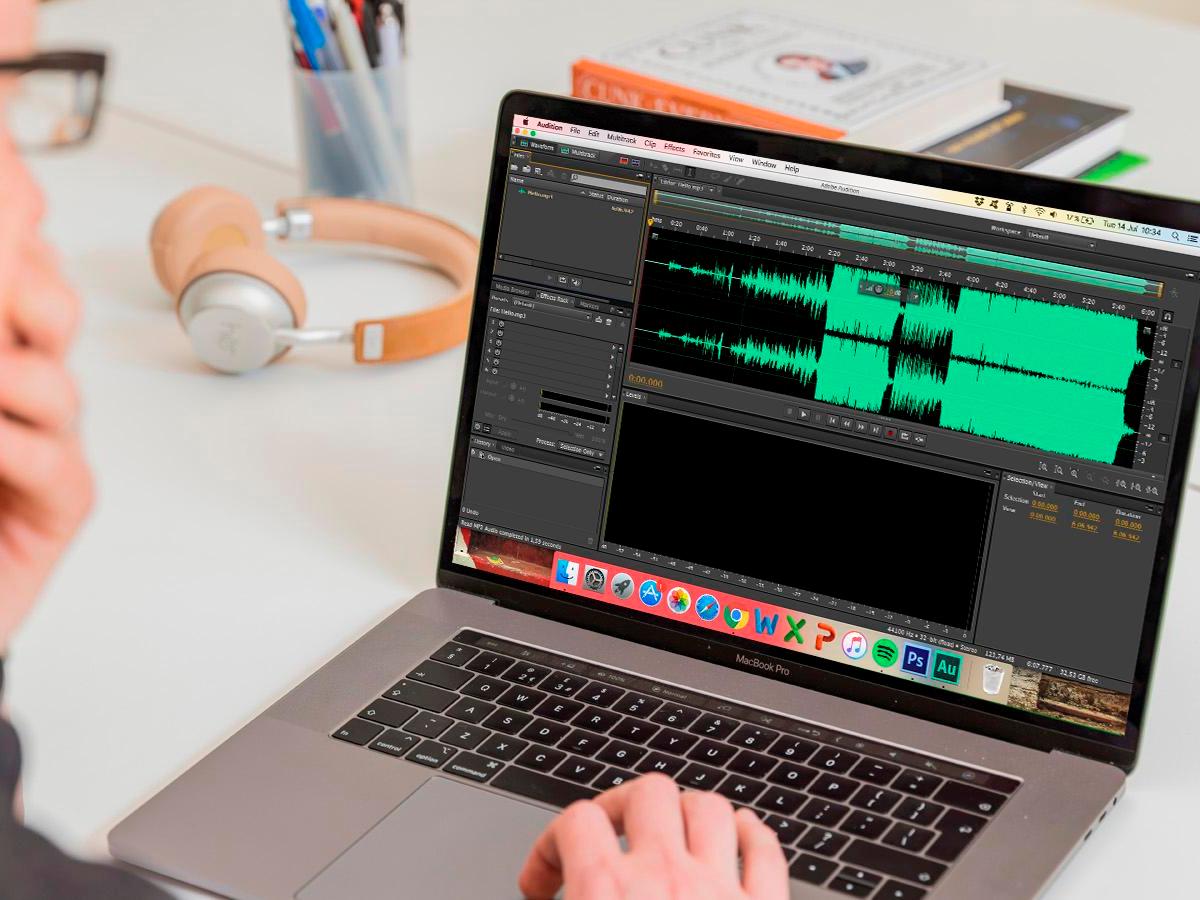
- Adobe Audition: Adobe Audition is a professional-grade audio editing software that provides advanced features for editing MP3 files. It offers a comprehensive set of tools for precise editing, along with audio restoration and mastering capabilities.
- GarageBand: GarageBand is a popular choice among Mac users. It is a user-friendly software that offers a range of editing options, including trimming, splitting, and adding effects to MP3 files. GarageBand also provides built-in virtual instruments and loops for creating music.
- Sony Sound Forge: Sony Sound Forge is a powerful audio editing software that offers a wide range of features for editing MP3 files. It provides tools for precise editing, audio restoration, and mastering, making it a great choice for professional audio engineers.
Before selecting an MP3 editing tool, consider your specific needs and level of expertise. If you’re a beginner, a user-friendly software like Audacity or GarageBand may be more suitable. However, if you require advanced editing capabilities, Adobe Audition or Sony Sound Forge would be ideal choices.
Once you have selected an MP3 editing tool that suits your requirements, download and install it on your computer. Familiarize yourself with the software’s interface and features before moving on to the next step.
Step 2: Importing the MP3 file
After selecting an MP3 editing tool, the next step is to import the MP3 file you wish to edit into the software. Here’s how you can do it:
- Launch the MP3 editing software on your computer.
- Look for the “Import” or “Open” option in the software’s menu. Click on it to browse your computer and locate the MP3 file you want to edit.
- Select the MP3 file and click on the “Open” button to import it into the editing software. The file will now appear in the software’s workspace.
Depending on the software you’re using, you may have the option to import multiple MP3 files at once. This can be useful if you’re working with a batch of files or creating a compilation.
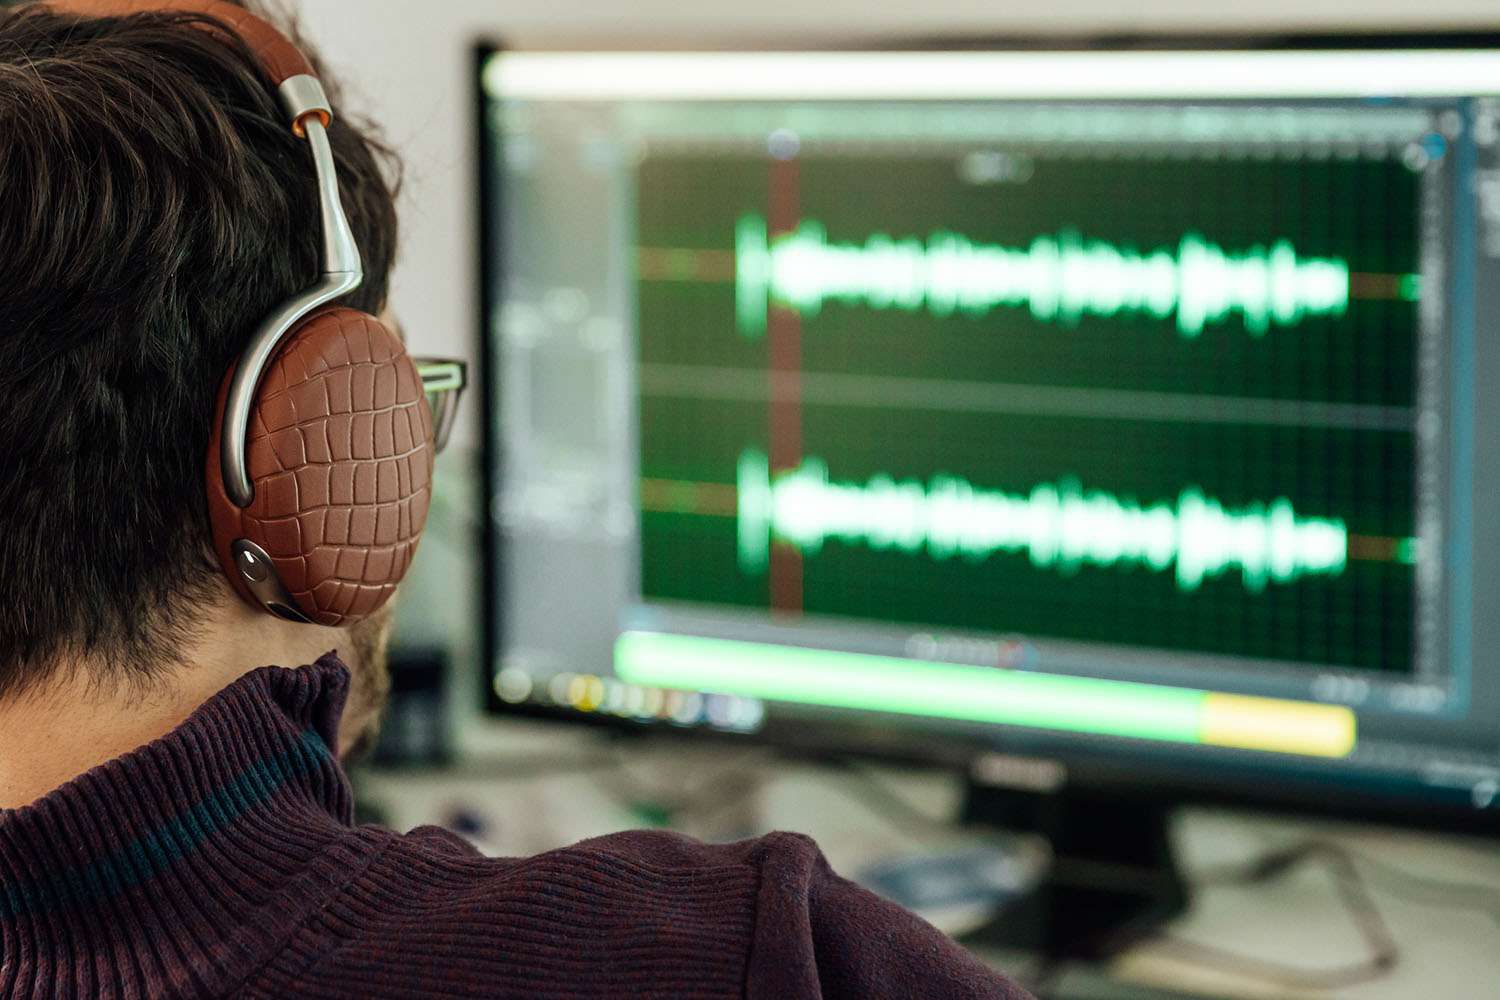
Once the MP3 file is imported, you will be able to see its waveform representation on the software’s interface. This visual representation allows you to identify different sections of the audio and make precise edits.
It’s important to note that some MP3 editing tools may take a few moments to analyze and load the file, especially if it’s a large file or if you have limited system resources. Therefore, please be patient while the software processes the MP3 file.
Now that you have successfully imported your MP3 file into the editing software, you’re ready to move on to the next step: exploring the basic editing options.
Step 3: Basic editing options
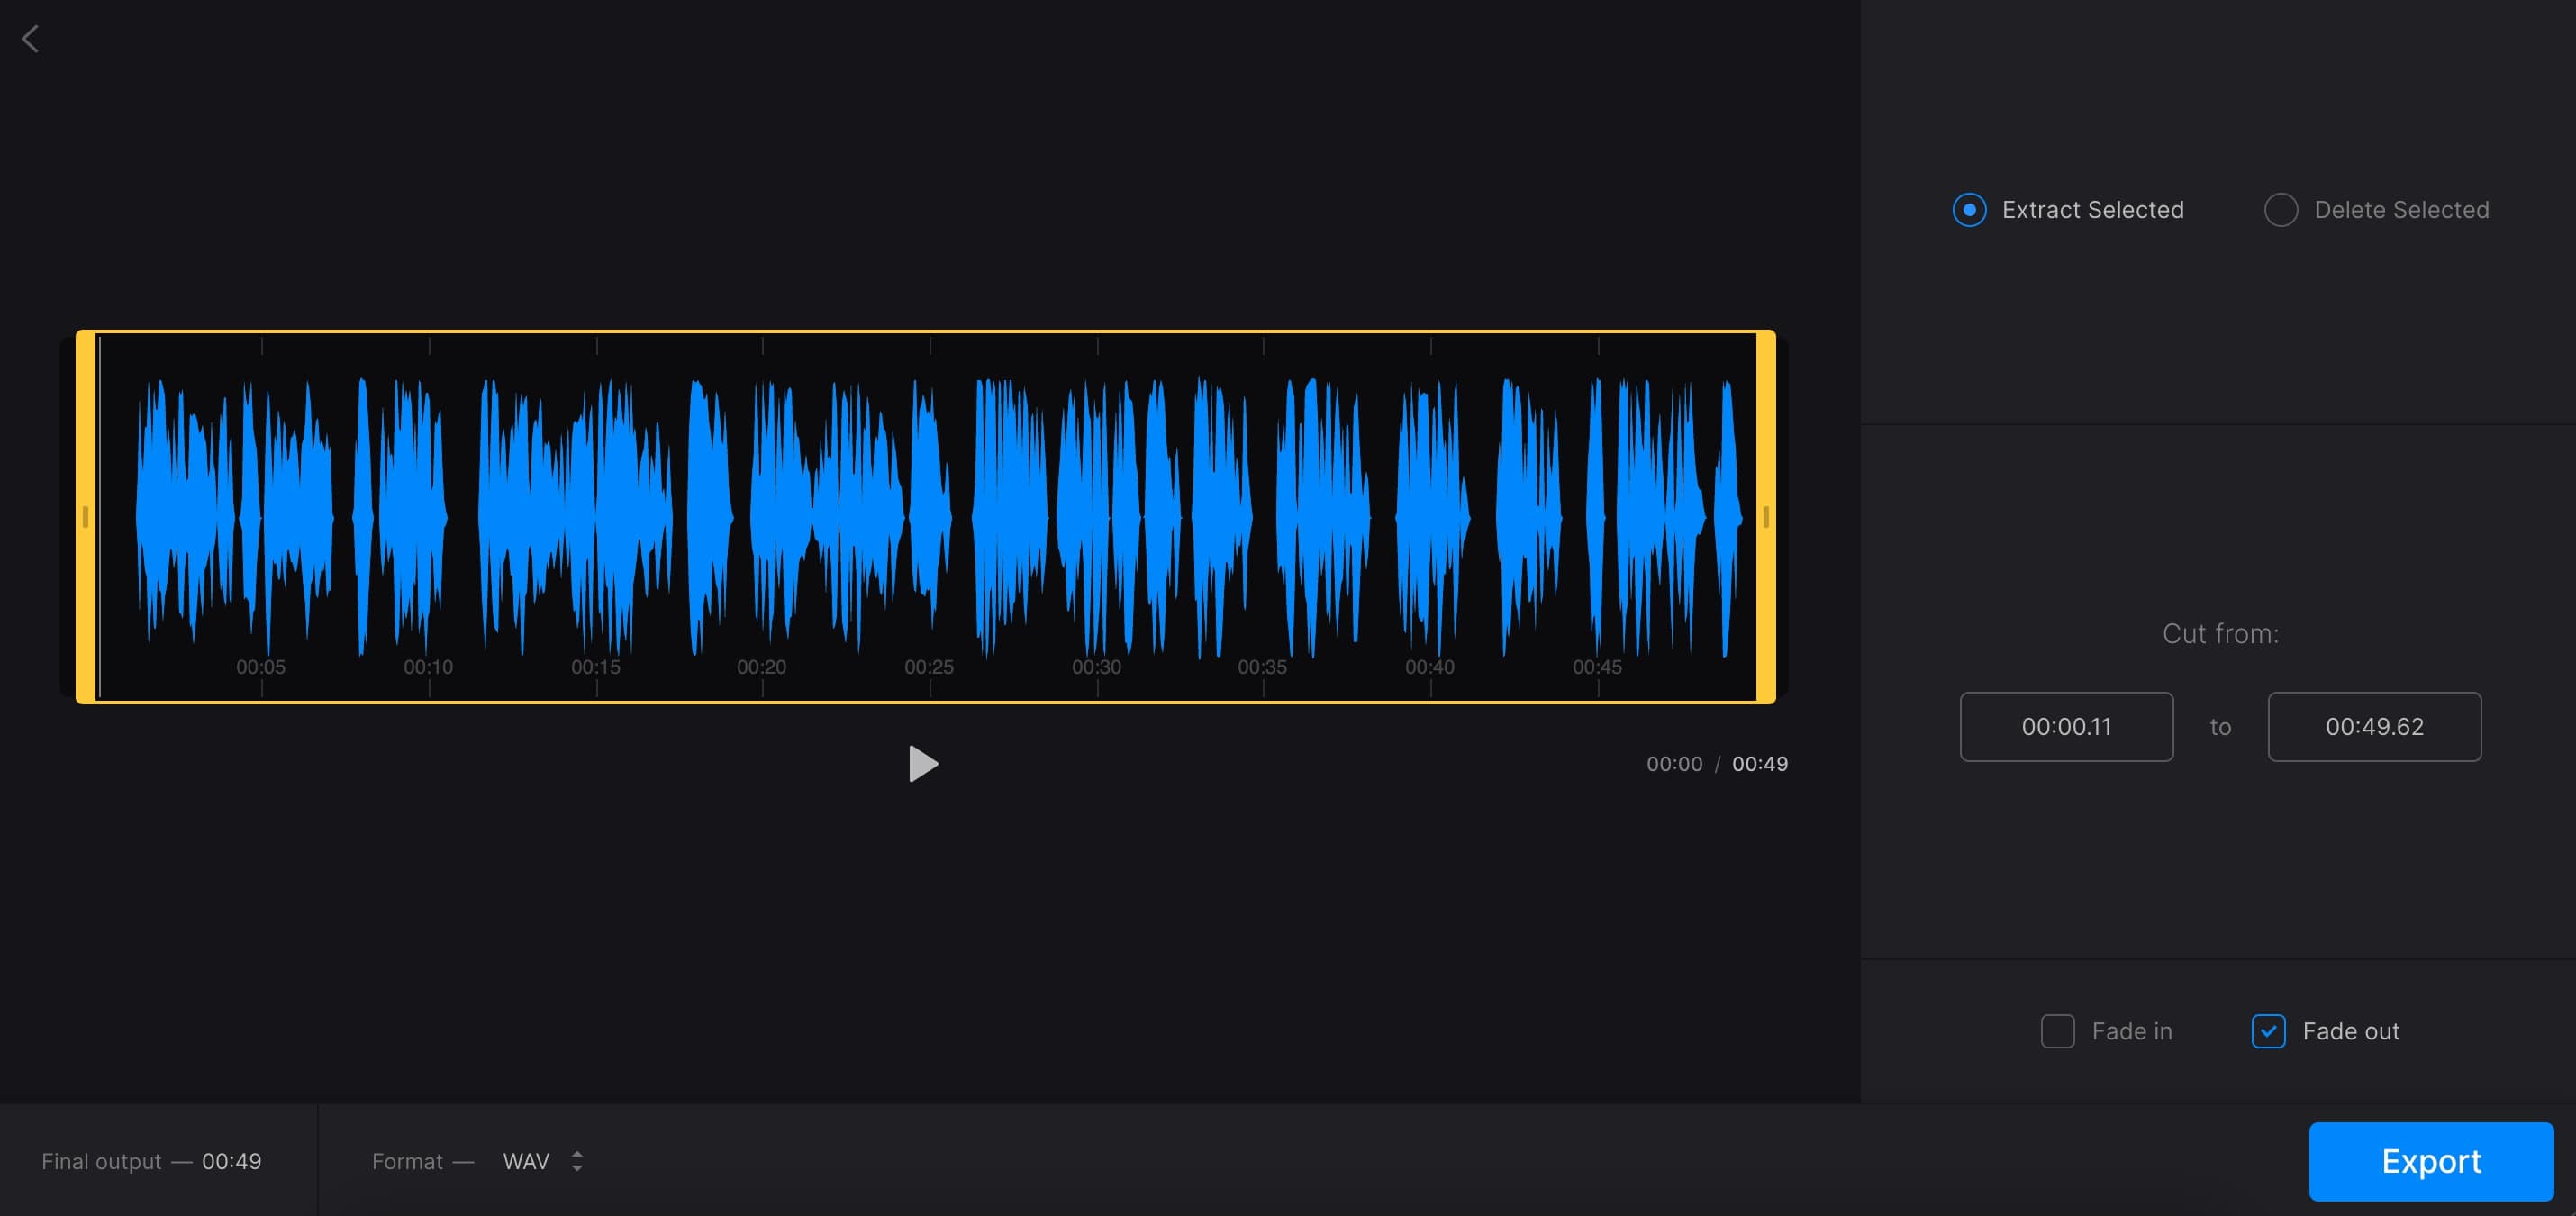
Once you have imported your MP3 file into the editing software, it’s time to start making some basic edits. The basic editing options will allow you to trim, split, and adjust the volume of your MP3 file. Here’s a breakdown of these essential editing functions:
- Trimming: Trimming allows you to remove unwanted sections from your MP3 file. To do this, you can simply select the portion of the audio waveform you want to remove and delete it. This is useful for eliminating long pauses, mistakes, or any unnecessary parts of the audio.
- Splitting: Splitting the MP3 file allows you to divide it into smaller sections. This is handy if you want to rearrange or remove specific parts of the audio. You can split the file at specific timestamps or by selecting the waveform and using the designated split function in the software.
- Volume adjustment: Adjusting the volume of your MP3 file ensures a consistent audio level throughout. This is especially important if the original file has uneven volume levels. You can amplify or decrease the volume of the entire file or apply volume adjustments to specific sections.
Most MP3 editing tools provide a user-friendly interface that allows you to perform these basic editing functions intuitively. You can generally select the desired portion of the audio waveform by clicking and dragging the mouse, and then apply the desired editing function from the software’s menu or toolbar.
Remember to save your project frequently to avoid losing your changes. Some software may offer an option to automatically save your progress at regular intervals. Taking advantage of this feature can be a lifesaver if any unexpected issues arise during the editing process.
With the basic editing options mastered, you’re ready to dive into more advanced editing techniques in the next step.
Step 4: Advanced editing techniques
Now that you’re familiar with the basic editing options for your MP3 file, it’s time to explore some advanced editing techniques to take your audio editing skills to the next level. These techniques will allow you to add special effects, apply filters, and enhance the overall quality of your MP3 file. Let’s dive in:
- Applying effects: Most MP3 editing tools offer a wide range of effects that can be applied to your audio. This includes effects like reverb, echo, chorus, and more. Experiment with different effects to add depth and texture to your MP3 file. Be careful not to overdo it, as too many effects can make the audio sound unnatural.
- Equalization: Equalization, commonly known as EQ, allows you to adjust the frequency balance of your MP3 file. With EQ, you can boost or cut specific frequency ranges to enhance the clarity and impact of instruments or vocals in the audio. This is useful for achieving a more balanced and polished sound.
- Noise reduction: If your MP3 file has background noise or unwanted sounds, you can utilize noise reduction tools to minimize or eliminate them. These tools analyze the audio and remove frequencies associated with noise, resulting in a cleaner and more professional-sounding MP3 file.
- Pitch correction: Whether you’re fixing off-key vocals or creating unique vocal effects, pitch correction tools allow you to adjust the pitch of the audio. This helps ensure that the vocals or instruments are in tune and harmonious.
- Time stretching: Time stretching is a powerful technique used to change the tempo or duration of the audio without affecting the pitch. This enables you to create slow-motion or fast-forward effects, as well as match the tempo of different tracks if you’re working on a remix or mashup.
It’s important to note that not all MP3 editing tools may offer the same advanced editing features. Therefore, it’s essential to explore the capabilities of your chosen editing software and experiment with different techniques to achieve your desired results.
Remember to save your progress regularly, especially when working with advanced editing techniques that involve multiple adjustments. This will help safeguard your work and allow you to backtrack if needed.
With the advanced editing techniques at your disposal, you’re now equipped to transform your MP3 file into a professionally polished piece of audio.
Step 5: Saving and exporting the edited MP3
After you have successfully edited your MP3 file to your satisfaction, it’s time to save and export your changes. Here’s how you can do it:
- Choose the export or save option: Look for the export or save option in your MP3 editing software. It is usually located in the file menu or toolbar. Click on this option to proceed.
- Select the export format: When exporting your edited MP3 file, you may have the option to choose the format and quality settings. Select the MP3 format as the output format to ensure compatibility with various devices and players.
- Specify the export destination: Choose the location on your computer where you want to save the edited MP3 file. Consider creating a dedicated folder for your edited files to keep them organized.
- Adjust the export settings: Some MP3 editing software may provide additional export settings, such as bit rate, sample rate, or stereo/mono options. Adjust these settings as per your requirements or leave them at the default values if you’re unsure.
- Export the edited MP3 file: Click on the export or save button to initiate the exporting process. The software will process the file and create the final edited MP3 file as per your specified settings.
Depending on the complexity of the edits and the size of the file, the exporting process may take some time. Be patient and allow the software to complete the task without interruption.
Once the exporting process is finished, navigate to the location where you saved the edited MP3 file. Double-check the file to ensure that the changes you made are accurately reflected.
At this point, you can transfer the edited MP3 file to your preferred media player, upload it to a streaming platform, or share it with others, depending on your purpose for editing the file.
Congratulations! You have successfully edited, saved, and exported your MP3 file using the chosen software. Now you can enjoy your customized audio or share it with others.
Conclusion
Editing MP3 files allows you to tailor your music or audio to your specific needs. Whether you’re a professional audio engineer or a casual music enthusiast, being able to make precise edits to your MP3 files opens up a world of creative possibilities.
In this guide, we have covered the step-by-step process of editing MP3 files, starting from selecting the right editing tool to saving and exporting the final edited file. We explored basic editing options like trimming, splitting, and volume adjustment, as well as advanced techniques such as applying effects, equalization, noise reduction, pitch correction, and time stretching.
Remember, it’s important to choose an MP3 editing tool that aligns with your requirements and level of expertise. Take the time to familiarize yourself with the software’s interface and features before diving into the editing process. Always work on a copy of the original file to avoid any accidental changes to your original content.
Whether you’re editing MP3 files for personal enjoyment, professional projects, or creative endeavors, the ability to tailor your audio to your liking is invaluable. Explore different editing techniques, experiment with effects, and let your creativity flow.
With practice and patience, you’ll become more proficient in editing MP3 files, and you’ll be able to refine your skills to create high-quality, customized audio that truly stands out.
So go ahead, unleash your creativity, and have fun editing your MP3 files to create a unique audio experience!