Home>Instruments>Bass>How To Set Up Bass Drum Pedal

Bass
How To Set Up Bass Drum Pedal
Modified: January 22, 2024
Learn how to properly set up your bass drum pedal and optimize your drumming experience. Follow our step-by-step guide for a seamless bass pedal setup.
(Many of the links in this article redirect to a specific reviewed product. Your purchase of these products through affiliate links helps to generate commission for AudioLover.com, at no extra cost. Learn more)
Table of Contents
- Introduction
- Step 1: Gathering the necessary tools and equipment
- Step 2: Positioning the bass drum pedal
- Step 3: Attaching the pedal to the bass drum
- Step 4: Adjusting the beater angle
- Step 5: Adjusting the pedal tension
- Step 6: Connecting the bass drum pedal to the bass drum
- Step 7: Testing the pedal’s functionality
- Conclusion
Introduction
Welcome to the world of bass drum pedals, an essential component for any drummer looking to create powerful and impactful beats. The bass drum pedal is responsible for transferring your foot movements into the striking force that produces the deep and resonant sound of the bass drum. Whether you’re a beginner or an experienced drummer, learning how to properly set up a bass drum pedal is crucial to achieving optimal performance and comfort during your drumming sessions.
In this article, we will guide you through the step-by-step process of setting up a bass drum pedal. We will cover everything from gathering the necessary tools and equipment, to positioning the pedal correctly, and adjusting its tension and beater angle. By the end of this guide, you’ll have the knowledge and confidence to set up your bass drum pedal like a pro.
Before we dive into the details, it’s important to understand the significance of a well-adjusted bass drum pedal. A properly set up pedal ensures that your foot has maximum control, allowing you to execute precise and powerful bass drum strokes. It also helps to prevent fatigue and potential discomfort that can arise from an improperly adjusted pedal. So, let’s get started and make sure your bass drum pedal is ready to deliver the thunderous beats you desire.
Step 1: Gathering the necessary tools and equipment
Before you begin setting up your bass drum pedal, it’s important to gather all the necessary tools and equipment to ensure a smooth and hassle-free process. Here’s a list of items you’ll need:
- Bass drum pedal: This is the main component of your setup. Make sure you have a reliable and high-quality pedal that suits your drumming style and preferences.
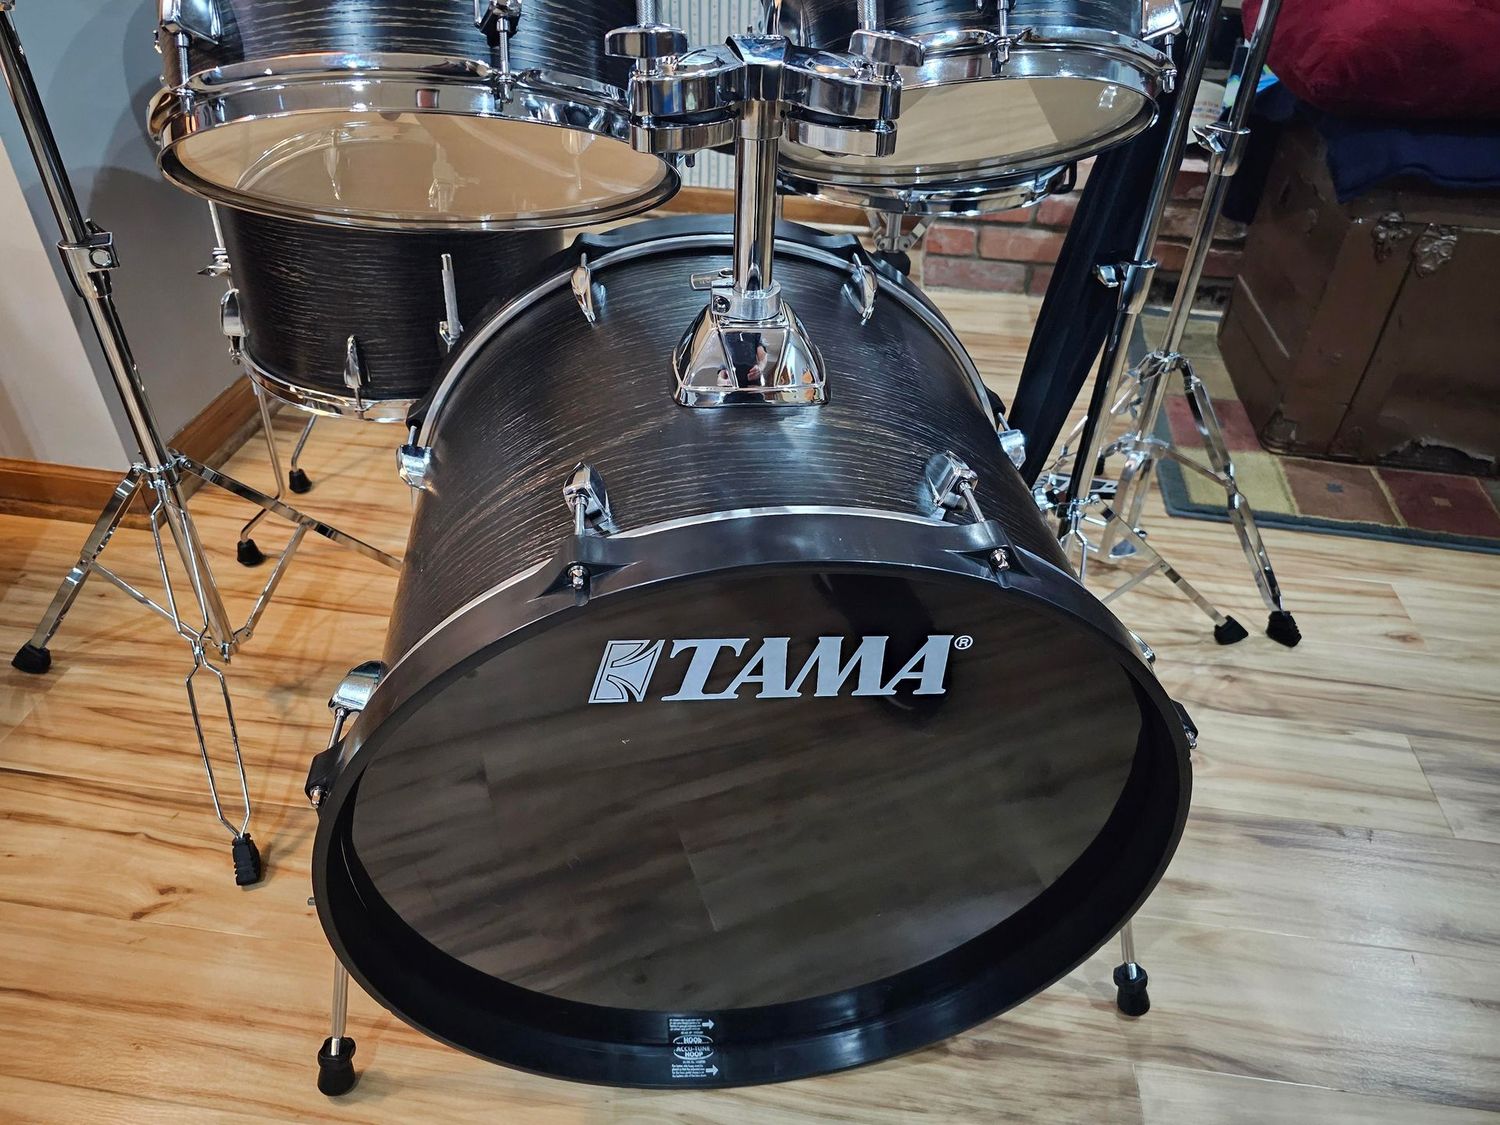
- Bass drum: You’ll need a bass drum to attach the pedal to. Ensure that your bass drum is in good condition and securely placed in its designated spot.
- Drum key: This tool is essential for adjusting the tension of the pedal and the drumhead. Most drum kits come with a drum key, but if you don’t have one, you can easily purchase one from any music store.
- Anchoring system (optional): Some drummers prefer using anchor systems to prevent the pedal from moving during intense drumming sessions. If you decide to use an anchor, make sure you have it ready.
- Drum rug (optional): A drum rug can help stabilize your drum kit and prevent it from sliding on the floor. While not essential, it can be beneficial, especially if you’re setting up on a slippery surface.
- Extra drum accessories: It’s always handy to have extra drum sticks, drum dampeners, and spare drumheads nearby in case you need to make any further adjustments or replacements during the setup process.
Once you have gathered all the necessary tools and equipment, you’re ready to move on to the next step: positioning the bass drum pedal.
Step 2: Positioning the bass drum pedal
Now that you have all the tools and equipment ready, it’s time to position your bass drum pedal. The proper positioning of the pedal ensures that you have maximum control and comfort while playing. Here’s how to do it:
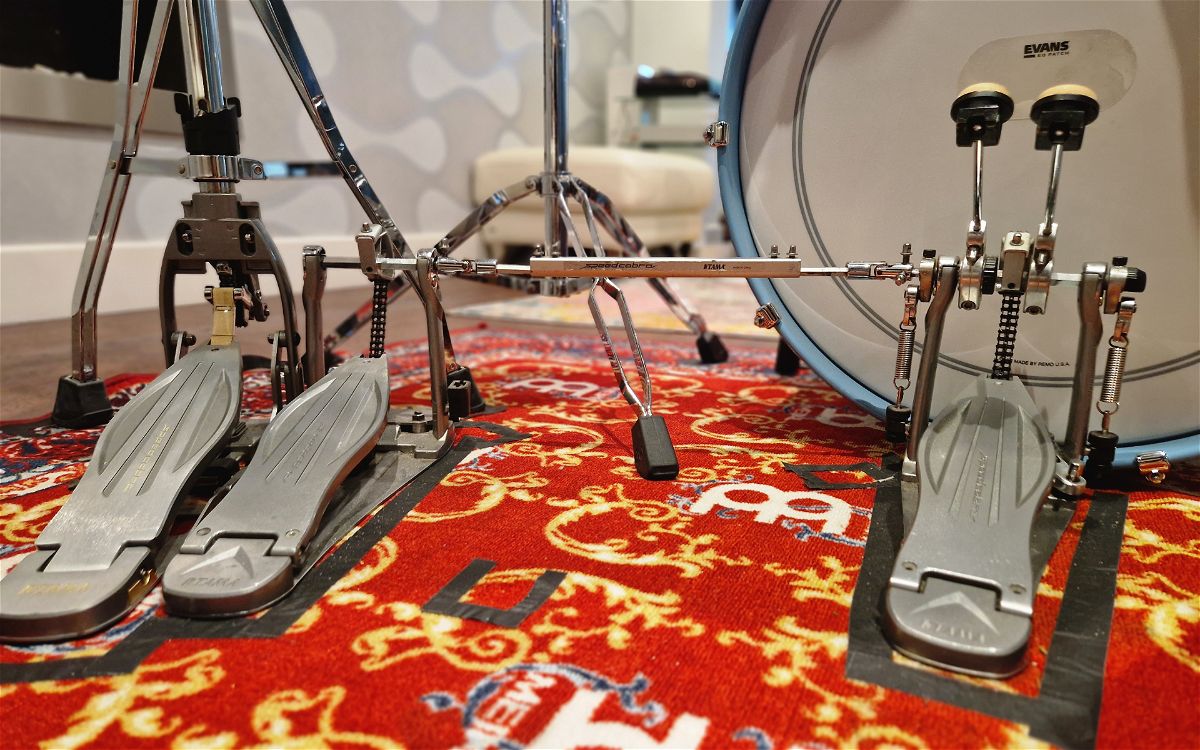
- Place the bass drum pedal in front of the bass drum: Position the pedal directly in front of the bass drum, making sure the pedal is centered and aligned with the drumhead. This will ensure an even and balanced strike on the drum.
- Adjust the distance: Determine the distance between the pedal and the bass drum by sitting on your drum throne and comfortably placing your foot on the pedal. The ideal distance is where your heel is resting comfortably on the footplate, and your toes have enough space to move without feeling cramped.
- Angle the pedal: Adjust the angle of the pedal to match your playing style. Some drummers prefer a flat angle, while others prefer a slight tilt. Experiment with different angles to find what works best for you.
- Secure the pedal: Once you have found the desired position and angle, make sure to secure the pedal in place. Most pedals have a locking mechanism or a clamp system that can be tightened to prevent any unwanted movement during your drumming sessions.
Remember, the positioning of the bass drum pedal is highly subjective and can vary based on personal preference and playing style. Take some time to experiment and find the position that feels most comfortable and natural to you.
With the bass drum pedal properly positioned, you’re ready to move on to the next step: attaching the pedal to the bass drum.
Step 3: Attaching the pedal to the bass drum
Now that you have positioned your bass drum pedal, it’s time to attach it to the bass drum. Proper attachment ensures stability and allows for effective strikes on the drumhead. Follow these steps to attach the pedal:
- Locate the bass drum hoop: Identify the hoop of the bass drum, which is the metal ring that holds the drumhead in place. It should be visible and positioned vertically.
- Place the pedal on the bass drum hoop: Position the bass drum pedal slightly above the hoop, ensuring that the bottom of the pedal’s footplate is aligned with the top of the hoop.
- Secure the pedal with the hoop clamp: Most bass drum pedals have a hoop clamp mechanism located on the bottom of the pedal. Loosen the clamp, place it over the hoop, and tighten it securely. Make sure that the pedal is firmly attached to the hoop and doesn’t move or wobble when you apply pressure.
- Check the pedal height: Ensure that the beater, the part of the pedal that strikes the drumhead, is positioned at the center of the bass drumhead. Adjust the pedal height if needed, either by adjusting the hoop clamp or using any height adjustment mechanisms provided by the pedal.
Make sure to double-check the attachment and stability of the pedal before proceeding to the next step. A securely attached pedal ensures better control and precision while playing.
Now that you have successfully attached the pedal to the bass drum, it’s time to move on to adjusting the beater angle, which is covered in the next step.
Step 4: Adjusting the beater angle
Once you have attached the bass drum pedal to the bass drum, it’s important to adjust the beater angle. The beater is the part of the pedal that strikes the bass drumhead to produce sound. Proper beater angle adjustment ensures optimal contact with the drumhead and allows for desired playing dynamics. Follow these steps to adjust the beater angle:
- Locate the beater: Identify the beater, which is the weighted object attached to the pedal shaft that strikes the bass drumhead. It should be positioned at the center of the drumhead.
- Loosen the beater angle adjustment mechanism: Most pedals have a beater angle adjustment mechanism that allows you to change the angle of the beater. Locate this mechanism, which is usually a screw or a lever, and loosen it gently to adjust the angle.
- Adjust the beater angle: Experiment with different beater angles to find the one that suits your playing style and desired sound. Some drummers prefer a straight angle, while others prefer a slight tilt towards the bass drumhead. Adjust the angle by either turning the screw or moving the lever.
- Tighten the beater angle adjustment mechanism: Once you have found the desired beater angle, make sure to tighten the adjustment mechanism to secure the angle in place. This will prevent any unwanted movement during your drumming sessions.
Keep in mind that the beater angle may need to be readjusted based on different playing styles, music genres, or personal preferences. Take the time to experiment with different angles and listen to the resulting sound to find the sweet spot that enhances your drumming experience.
With the beater angle properly adjusted, you’re ready to move on to the next step: adjusting the pedal tension.
Step 5: Adjusting the pedal tension
Proper pedal tension is crucial for achieving optimal control and responsiveness while playing the bass drum. The tension of the pedal determines the resistance you feel when pressing the footplate. Follow these steps to adjust the pedal tension:
- Locate the tension adjustment mechanism: Most bass drum pedals have a tension adjustment mechanism located near the spring or the connecting rod. It can be in the form of a knob or a screw.
- Start with a neutral tension setting: Begin by setting the tension adjustment to a neutral or medium setting. This will give you a baseline to work with.
- Test the pedal: Place your foot on the footplate and press down to play the bass drum. Pay attention to the feel and responsiveness of the pedal. If it feels too loose or sluggish, you need to increase the tension. If it feels too tight and unresponsive, you need to decrease the tension.
- Adjust the tension: Use the tension adjustment mechanism to increase or decrease the tension based on your preference. Clockwise rotation usually tightens the tension, while counterclockwise rotation loosens it. Make gradual adjustments, testing the pedal after each adjustment until you find the tension that feels comfortable and responsive.
- Finalize the tension: Once you have found the desired tension, ensure that the tension adjustment mechanism is securely tightened to maintain the tension setting. This will prevent any unintentional changes during your drumming sessions.
Remember, the pedal tension is subjective and varies depending on personal preference and playing style. Take the time to find the tension that allows you to execute precise and controlled bass drum strokes with ease.
With the pedal tension properly adjusted, you’re ready to move on to the next step: connecting the bass drum pedal to the bass drum.
Step 6: Connecting the bass drum pedal to the bass drum
Now that you have adjusted the pedal tension, it’s time to connect the bass drum pedal to the bass drum. This step ensures that the pedal operates smoothly and efficiently, allowing you to produce the desired bass drum sound. Follow these steps to connect the pedal:
- Position the beater: Ensure that the beater, the part of the pedal that strikes the bass drumhead, is at the center of the drumhead. Adjust the angle if necessary.
- Confirm the positioning of the bass drum pedal: Double-check that the bass drum pedal is securely positioned in front of the bass drum, aligned with the drumhead, and at the desired distance and angle.
- Place your foot on the footplate: Rest your foot on the footplate of the bass drum pedal, positioning it in a way that feels comfortable and allows for effortless foot movement.
- Connect the bass drum pedal to the bass drum: Apply pressure on the footplate to ensure that the beater strikes the bass drumhead. Take note of how the pedal feels and adjust the positioning or tension as necessary to achieve the desired response.
- Check for any unwanted movement: Once connected, test the pedal by playing the bass drum with varying degrees of force. Ensure that the pedal doesn’t slide or move unintentionally during play. Adjust the pedal or drum rug if needed to improve stability.
By connecting the bass drum pedal to the bass drum properly, you establish a solid link between your foot and the drum, allowing you to play with precision and power.
With the pedal securely connected to the bass drum, you’re ready to move on to the final step: testing the pedal’s functionality.
Step 7: Testing the pedal’s functionality
After setting up your bass drum pedal, it’s essential to test its functionality before starting your drumming session. Testing ensures that the pedal operates smoothly, produces the desired sound, and provides the comfort and control you need. Follow these steps to test the pedal’s functionality:
- Play various dynamics: Start by playing the bass drum using different levels of force and dynamics. Test soft strokes, medium hits, and powerful accents to see how the pedal responds. Pay attention to the consistency of the sound and the ease of control.
- Check for any sticking: While playing, listen for any sticking or unwanted sound from the pedal. Sticking can occur if the beater is too close to the drumhead or if there is excess friction in the pedal mechanism. Adjust the beater angle or pedal tension as needed to eliminate sticking.
- Evaluate pedal response: Assess how the pedal responds to your foot movements. Ensure that it feels smooth, responsive, and comfortable to play. Take note of any specific adjustments you may need to make based on your playing style and preferences.
- Experiment with different techniques: Try out various bass drum techniques that you commonly use, such as heel-toe technique, slide technique, or double bass drumming. Test how the pedal handles these techniques and make any necessary adjustments to improve control and efficiency.
- Take note of any issues: If you encounter any issues or discomfort while testing the pedal, identify the problem areas and make the required adjustments. This could involve tweaking the beater angle, pedal tension, or even considering the need for replacement parts or maintenance.
By thoroughly testing the functionality of your bass drum pedal, you ensure that it is in optimum condition to support your drumming technique and musical expression.
With the pedal’s functionality tested and any necessary adjustments made, you are now ready to unleash your creativity and enjoy an immersive drumming experience!
Remember, setting up a bass drum pedal is a personal process, and it may take some time to find the perfect settings that suit your playing style and preference. Don’t be afraid to experiment and make adjustments as needed. Happy drumming!
Conclusion
Setting up a bass drum pedal is a crucial step in optimizing your drumming experience. By following the steps outlined in this guide, you can ensure that your bass drum pedal is properly positioned, securely attached, and adjusted to your liking. This will result in improved control, responsiveness, and comfort when playing the bass drum.
Remember, the key steps in setting up your bass drum pedal include gathering the necessary tools and equipment, positioning the pedal correctly, attaching it securely to the bass drum, adjusting the beater angle and tension, connecting the pedal to the bass drum, and finally, testing its functionality.
Throughout the setup process, it’s essential to take the time to experiment and make adjustments to find what works best for your playing style and personal comfort. Everyone’s preferences may vary, so don’t hesitate to fine-tune the pedal’s position, angle, tension, and other factors until you achieve the desired sound and feel.
Properly setting up your bass drum pedal not only enhances your drumming performance but also reduces the risk of fatigue and discomfort during extended playing sessions. It allows you to focus on your creativity and musical expression without distractions or limitations.
As a drummer, your bass drum pedal is a vital tool in shaping your rhythm and adding depth to your beats. Take the time to ensure that your pedal is set up correctly, and don’t be afraid to adapt and make adjustments whenever necessary.
Now, armed with the knowledge and guidance from this article, you’re ready to embark on your drumming journey, armed with a well-set-up bass drum pedal. So go ahead, let the powerful and resonant beats of your bass drum fill the air and drive the rhythm of your music!


