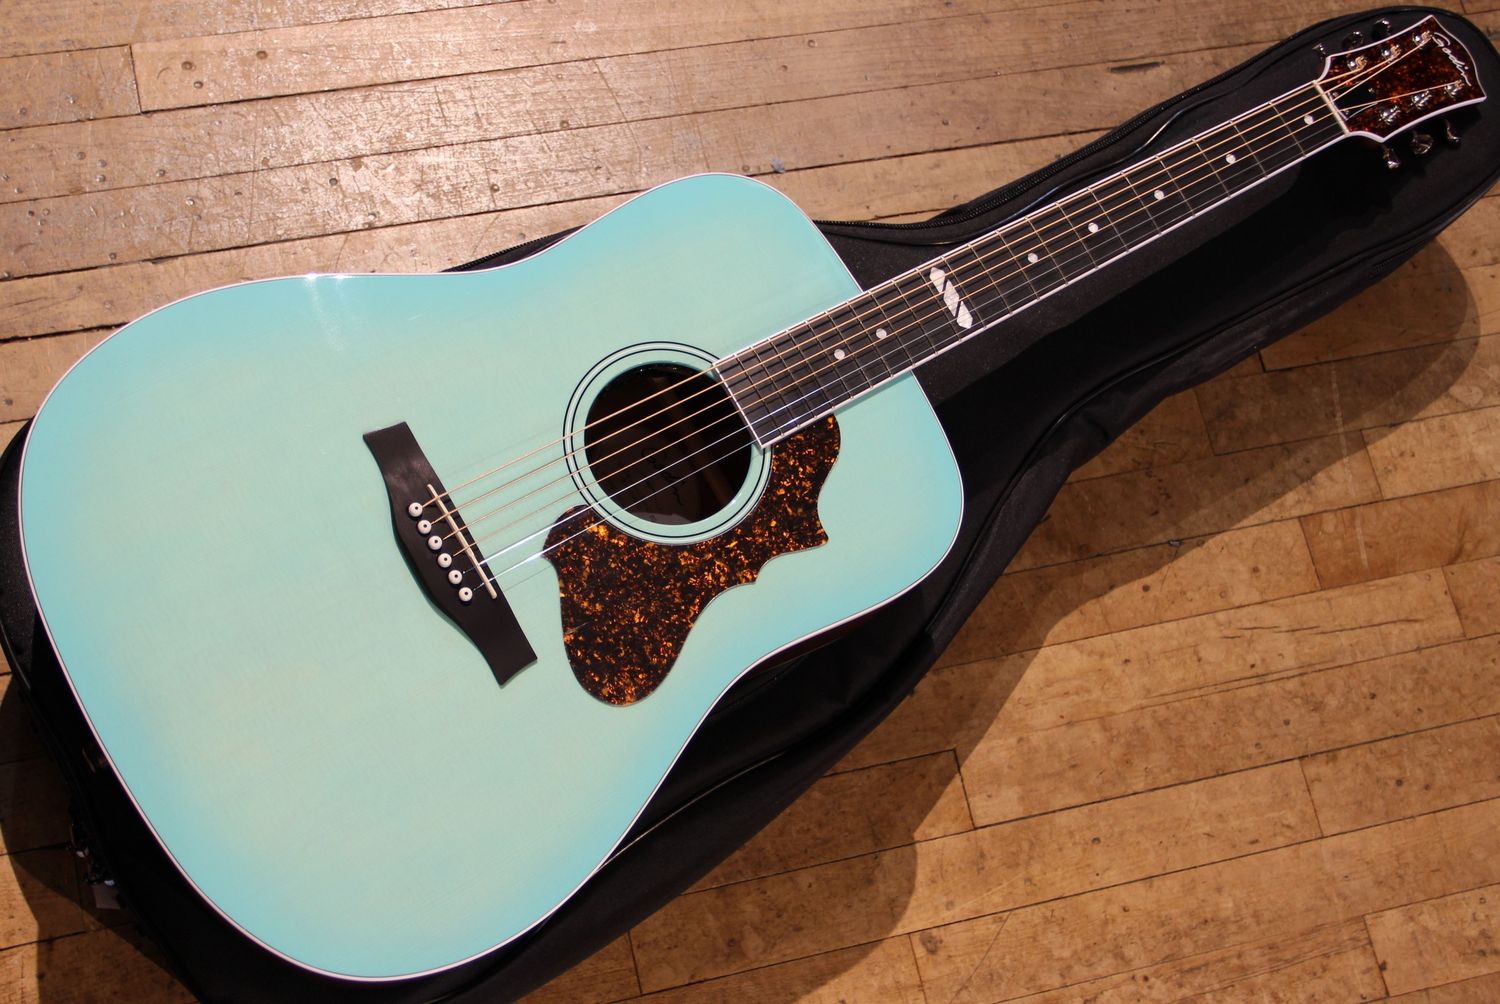
Home>Instruments>Guitar>How To Make An Acoustic Guitar
Guitar
How To Make An Acoustic Guitar
Published: February 13, 2024
Learn how to make an acoustic guitar from scratch with our comprehensive guide. Discover the essential steps and techniques for crafting your own unique instrument. Perfect for guitar enthusiasts and DIY musicians.
(Many of the links in this article redirect to a specific reviewed product. Your purchase of these products through affiliate links helps to generate commission for AudioLover.com, at no extra cost. Learn more)
Table of Contents
Introduction
Creating your own acoustic guitar can be an incredibly rewarding and fulfilling experience for any music enthusiast or woodworking hobbyist. The process of crafting a guitar from scratch allows you to deeply connect with the instrument, understand its intricacies, and ultimately produce a unique and personalized piece of art that resonates with your individual style and preferences.
Building an acoustic guitar from raw materials requires patience, precision, and a genuine passion for the instrument. It's a journey that combines the art of woodworking with the science of acoustics, resulting in a harmonious blend of craftsmanship and musicality. Whether you're a seasoned luthier or a curious beginner, embarking on the endeavor of making an acoustic guitar opens up a world of creativity and skill development.
Throughout this comprehensive guide, we will delve into the step-by-step process of creating an acoustic guitar, covering everything from selecting the finest tonewoods to assembling the intricate components that contribute to the instrument's rich, resonant sound. By the end of this journey, you will have not only gained a newfound appreciation for the craftsmanship behind acoustic guitars but also acquired the knowledge and skills to construct your very own instrument.
So, roll up your sleeves, gather your tools and materials, and let's embark on this enriching and fulfilling endeavor of crafting an acoustic guitar from start to finish. Whether you're drawn to the artistry of woodworking, the allure of musical craftsmanship, or simply the satisfaction of creating something truly exceptional, the journey of making an acoustic guitar promises to be a remarkable and unforgettable experience.
Tools and Materials Needed
Before diving into the intricate process of building an acoustic guitar, it’s essential to gather the necessary tools and materials. The following list outlines the fundamental items required to embark on this fulfilling endeavor:
Tools:
- Clamps: Essential for securing guitar components during assembly.
- Chisels and Files: Used for shaping and refining the guitar's body and neck.
- Router: Ideal for creating precise cavities for the guitar's electronics and hardware.
- Sandpaper and Sanding Blocks: Essential for smoothing and refining wood surfaces.
- Drill Press: Needed for drilling precise holes for hardware installation.
- Workbench: Provides a sturdy and spacious surface for guitar assembly and construction.
- Measuring Tools: Including rulers, calipers, and a straightedge for precise measurements and alignments.
- Planes: Used for shaping and smoothing wood surfaces.
- Saws: Including a bandsaw, jigsaw, and handsaws for cutting and shaping various guitar components.
- Radius Dish: Essential for shaping the guitar's braces and achieving a proper radius on the soundboard and back.
Materials:
- Tonewoods: Select high-quality spruce, cedar, mahogany, or other tonewoods for the soundboard, back and sides, and neck of the guitar.
- Guitar Hardware: Including tuning machines, bridge, nut, fret wire, and truss rod for assembling the guitar's essential components.
- Wood Glue: High-strength adhesive for securely joining wood components.
- Finish: Choose a suitable lacquer or varnish for protecting and enhancing the appearance of the guitar.
- Fretboard and Inlay Materials: Select materials for the fretboard and decorative inlays, such as mother-of-pearl or abalone.
- Bindings and Purflings: Decorative elements for outlining the guitar's body and soundhole.
- Electronics (Optional): If incorporating pickups, preamps, or other electronic components, ensure you have the necessary wiring and soldering tools.
By acquiring these essential tools and materials, you will be well-prepared to commence the captivating journey of crafting your own acoustic guitar, combining woodworking finesse with musical artistry to create a truly exceptional instrument.
Choosing the Right Wood
When it comes to crafting an acoustic guitar, the selection of tonewoods plays a pivotal role in determining the instrument’s sound, resonance, and overall aesthetic appeal. Each type of wood contributes distinct tonal characteristics, making the choice of tonewoods a critical decision for luthiers and guitar enthusiasts. Here’s a closer look at the primary tonewoods commonly used in acoustic guitar construction:
Spruce:
Spruce is revered for its exceptional strength-to-weight ratio, making it an ideal choice for the soundboard or top of the guitar. This tonewood delivers a balanced and versatile sound, with crisp articulation and impressive projection. Sitka spruce, Engelmann spruce, and Adirondack spruce are among the popular variations favored for their distinct tonal qualities.
Mahogany:
Renowned for its warm and focused sound, mahogany is a favored choice for the back and sides of acoustic guitars. It offers a pronounced midrange, clear note definition, and a pleasing emphasis on the lower frequencies. Mahogany’s stability and aesthetic appeal further contribute to its popularity among luthiers and guitar builders.
Rosewood:
Valued for its rich, complex tonal character, rosewood is often used for the back and sides of acoustic guitars. This tonewood exhibits deep bass response, lush overtones, and a vibrant, resonant sound. Brazilian rosewood, Indian rosewood, and Madagascar rosewood are esteemed varieties known for their exceptional acoustic properties.
Cedar:
Cedar is favored for its warm, mellow sound and quick response, making it a popular choice for the soundboard of classical and flamenco guitars. It offers a lush, dark tone with a strong focus on the midrange, providing a unique sonic signature that appeals to many discerning players and enthusiasts.
When selecting tonewoods for your acoustic guitar, consider the sonic qualities you wish to emphasize, the playing style you intend to accommodate, and the visual aesthetics that resonate with your preferences. The careful consideration of tonewood combinations and their inherent characteristics will ultimately contribute to the creation of an acoustic guitar that embodies your musical vision and artistic expression.
Building the Guitar Body
The construction of the guitar body is a pivotal stage in the guitar-making process, as it lays the foundation for the instrument’s structural integrity and acoustic resonance. Here’s a step-by-step overview of crafting the guitar body:
1. Soundboard and Bracing:
Begin by selecting a high-quality spruce or cedar soundboard, carefully considering its grain orientation and overall resonance. The soundboard serves as the primary vibrating surface, influencing the guitar’s tonal characteristics. Next, meticulously carve and install the internal bracing, which reinforces the soundboard and influences its flexibility, contributing to the instrument’s tonal balance and projection.
2. Back and Sides Assembly:
Select premium tonewoods such as mahogany, rosewood, or maple for the back and sides of the guitar. Precisely bend the wood to form the curved shape of the guitar body, ensuring a snug and seamless fit between the back and sides. This step demands precision and patience to achieve a structurally sound and visually appealing body assembly.
3. Neck Block and Tail Block:
Install the neck block and tail block within the guitar body, providing essential anchor points for attaching the neck and tail of the instrument. These components play a crucial role in maintaining the structural integrity of the guitar and ensuring a stable connection between the body and neck.
4. Binding and Purfling:
Enhance the visual appeal of the guitar body by meticulously installing decorative bindings and purflings along the edges. These ornamental elements not only add aesthetic flair but also serve to protect the vulnerable edges of the guitar while complementing its overall design.
5. Side Bending and Assembly:
Utilize a bending iron to precisely shape the sides of the guitar, ensuring a seamless fit with the top and back. The delicate art of side bending demands patience and finesse to achieve the desired curvature and structural integrity without compromising the tonal properties of the tonewoods.
By meticulously executing each stage of the guitar body construction, you lay the groundwork for an instrument that embodies precision, artistry, and sonic excellence. The culmination of these efforts results in a beautifully crafted guitar body that sets the stage for the instrument’s acoustic prowess and visual allure.
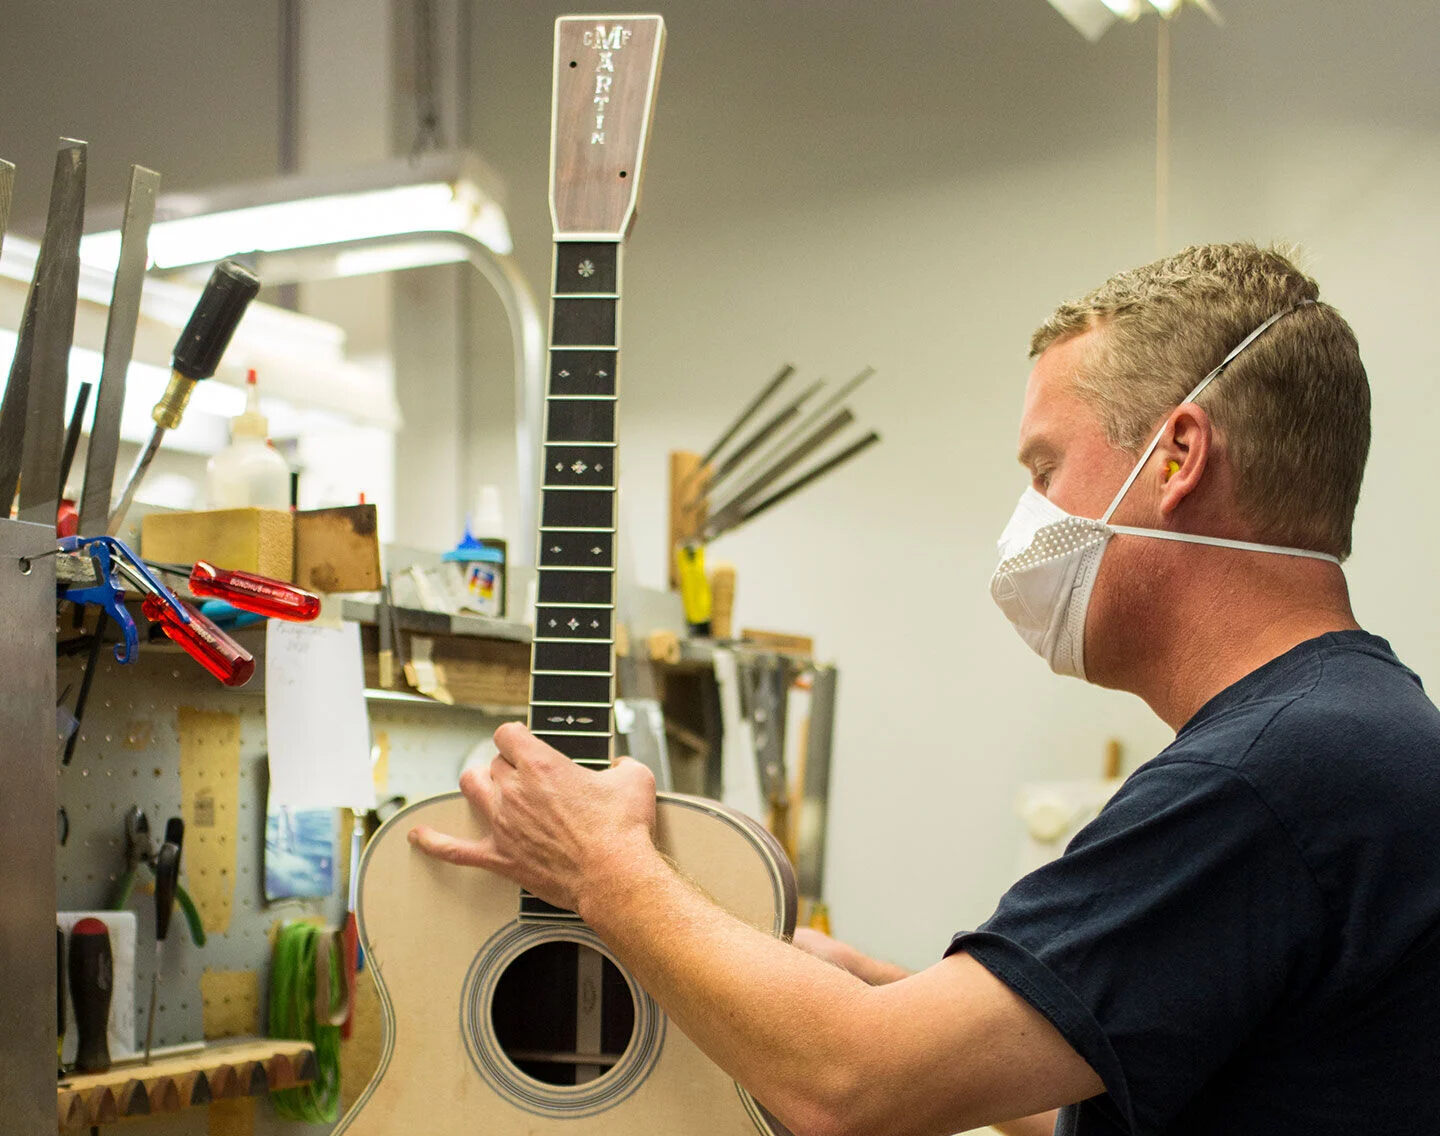
Attaching the Neck and Fretboard
Attaching the neck and fretboard is a critical phase in the construction of an acoustic guitar, as it establishes the foundation for playability, intonation, and overall structural stability. The meticulous integration of these components demands precision and attention to detail. Here’s a comprehensive overview of the process:
1. Neck Fitting and Alignment:
Begin by carefully shaping the neck to ensure a seamless and snug fit within the guitar body. The neck’s alignment plays a crucial role in determining the instrument’s playability and overall comfort. Pay close attention to the angle and alignment of the neck to achieve optimal string action and intonation.
2. Fretboard Installation:
Precisely install the fretboard onto the neck, ensuring proper alignment and secure attachment. The fretboard’s positioning directly influences the instrument’s intonation, fret spacing, and overall playability. Meticulously slot and install fret wire, paying careful attention to achieving uniform height and spacing for each fret.
3. Neck Joint and Stability:
Create a robust and stable neck joint, ensuring a secure connection between the neck and body. Common neck joint styles include dovetail, mortise and tenon, and bolt-on configurations, each offering distinct advantages in terms of structural integrity and tonal transfer.
4. Truss Rod Installation:
Install a truss rod within the neck to provide essential adjustability for controlling the instrument’s neck relief and addressing potential issues such as fret buzzing or excessive neck curvature. The truss rod serves as a valuable tool for fine-tuning the guitar’s playability and addressing changes in neck relief due to string tension and environmental factors.
5. Nut Installation:
Precisely install the nut at the upper end of the fretboard, ensuring proper string spacing and height to facilitate smooth and accurate string action. The nut’s positioning significantly influences the guitar’s playability and tonal clarity, making it a critical component in the instrument’s overall performance.
By meticulously executing the process of attaching the neck and fretboard, you establish the structural foundation and playability of the acoustic guitar, setting the stage for the instrument’s sonic potential and ergonomic comfort. The seamless integration of these components is essential in creating a finely crafted and playable instrument that resonates with precision and musical excellence.
Installing the Bridge and Nut
Installing the bridge and nut is a crucial step in the construction of an acoustic guitar, as these components directly influence the instrument’s intonation, string action, and overall playability. Meticulous attention to detail is essential to ensure that these elements are positioned and crafted to exacting standards. Here’s a detailed overview of the process:
1. Bridge Installation:
Position the bridge accurately on the soundboard, ensuring precise placement for optimal intonation and string length. The bridge not only anchors the guitar’s strings but also transmits their vibrations to the soundboard, making its placement critical to the instrument’s tonal characteristics and resonance. Securely affix the bridge, paying careful attention to alignment and structural integrity.
2. Saddle Crafting and Placement:
Craft a custom saddle from a durable and sonically resonant material such as bone or synthetic materials designed for optimal string transfer. The saddle’s positioning and contouring directly impact the guitar’s intonation and string action, making it a pivotal component in achieving a balanced and responsive instrument.
3. Nut Slotting and Positioning:
Precisely slot the nut at the upper end of the fretboard, ensuring accurate string spacing and height for smooth and consistent string action. The nut’s placement and contouring play a crucial role in establishing proper string clearance and intonation, contributing to the instrument’s overall playability and tonal clarity.
4. Intonation and String Compensation:
Address the instrument’s intonation and string compensation by meticulously shaping the saddle and nut to accommodate the guitar’s scale length and individual string gauges. This process involves fine adjustments to ensure that each string produces accurate pitches and consistent tonal response across the fretboard, enhancing the instrument’s overall playability and sonic integrity.
By carefully executing the installation of the bridge and nut, you establish the foundation for the guitar’s intonation, string action, and tonal balance. These critical components directly contribute to the instrument’s playability and sonic characteristics, underscoring the importance of precision and meticulous craftsmanship in creating a finely tuned and responsive acoustic guitar.
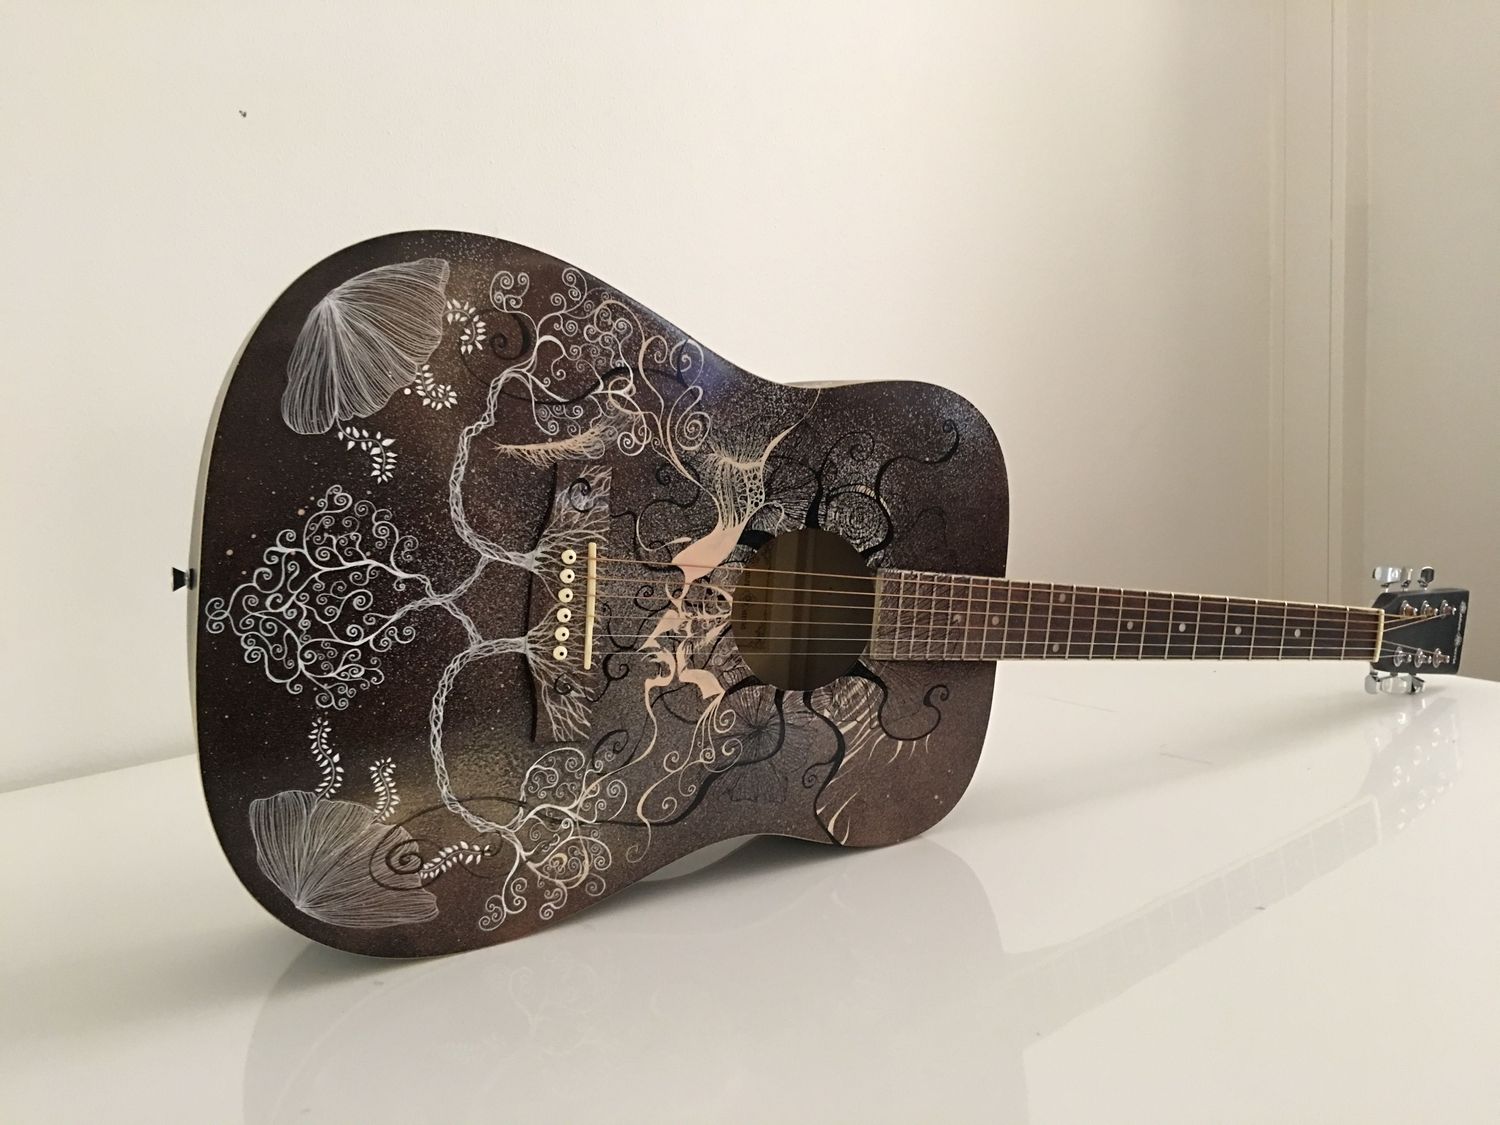
Applying the Finish
Applying the finish to an acoustic guitar is a transformative process that not only enhances the instrument’s visual appeal but also protects the wood and influences its tonal properties. The careful application of a finish requires precision, patience, and an eye for detail. Here’s a comprehensive overview of the crucial steps involved in finishing an acoustic guitar:
1. Surface Preparation:
Begin by meticulously sanding the guitar’s body, neck, and headstock to achieve a smooth and uniform surface. This preparatory step is essential for ensuring that the finish adheres properly and that any imperfections in the wood are addressed before the application of the final coating.
2. Selection of Finish:
Choose a suitable finish based on your aesthetic preferences and tonal objectives. Common options include nitrocellulose lacquer, polyurethane, shellac, and oil-based varnishes, each offering distinct visual and sonic characteristics. Consider the impact of the finish on the guitar’s resonance and tonal properties, as some finishes may dampen or enhance the instrument’s acoustic qualities.
3. Application Technique:
Apply the chosen finish using a method that ensures even coverage and minimal buildup. Whether spraying, brushing, or wiping on the finish, maintain a consistent and controlled application to achieve a professional-looking result. Pay careful attention to avoiding drips, runs, or uneven patches that could detract from the guitar’s visual appeal.
4. Curing and Buffing:
Allow the finish to cure thoroughly according to the manufacturer’s recommendations, providing adequate time for the coating to harden and develop its protective properties. Once cured, carefully buff the finish to achieve a smooth and lustrous surface, enhancing the wood’s natural beauty and creating a visually stunning instrument.
5. Final Inspection and Touch-ups:
Thoroughly inspect the finished guitar, addressing any imperfections or blemishes that may have arisen during the finishing process. Touch up any areas that require additional attention, ensuring that the guitar’s appearance is flawless and that the finish contributes to the instrument’s overall aesthetic allure.
By meticulously executing each stage of the finishing process, you elevate the acoustic guitar from a raw wood assembly to a visually stunning and protected instrument. The chosen finish not only enhances the guitar’s appearance but also influences its sonic characteristics, making the finishing process a crucial element in the creation of a finely crafted and resonant acoustic guitar.
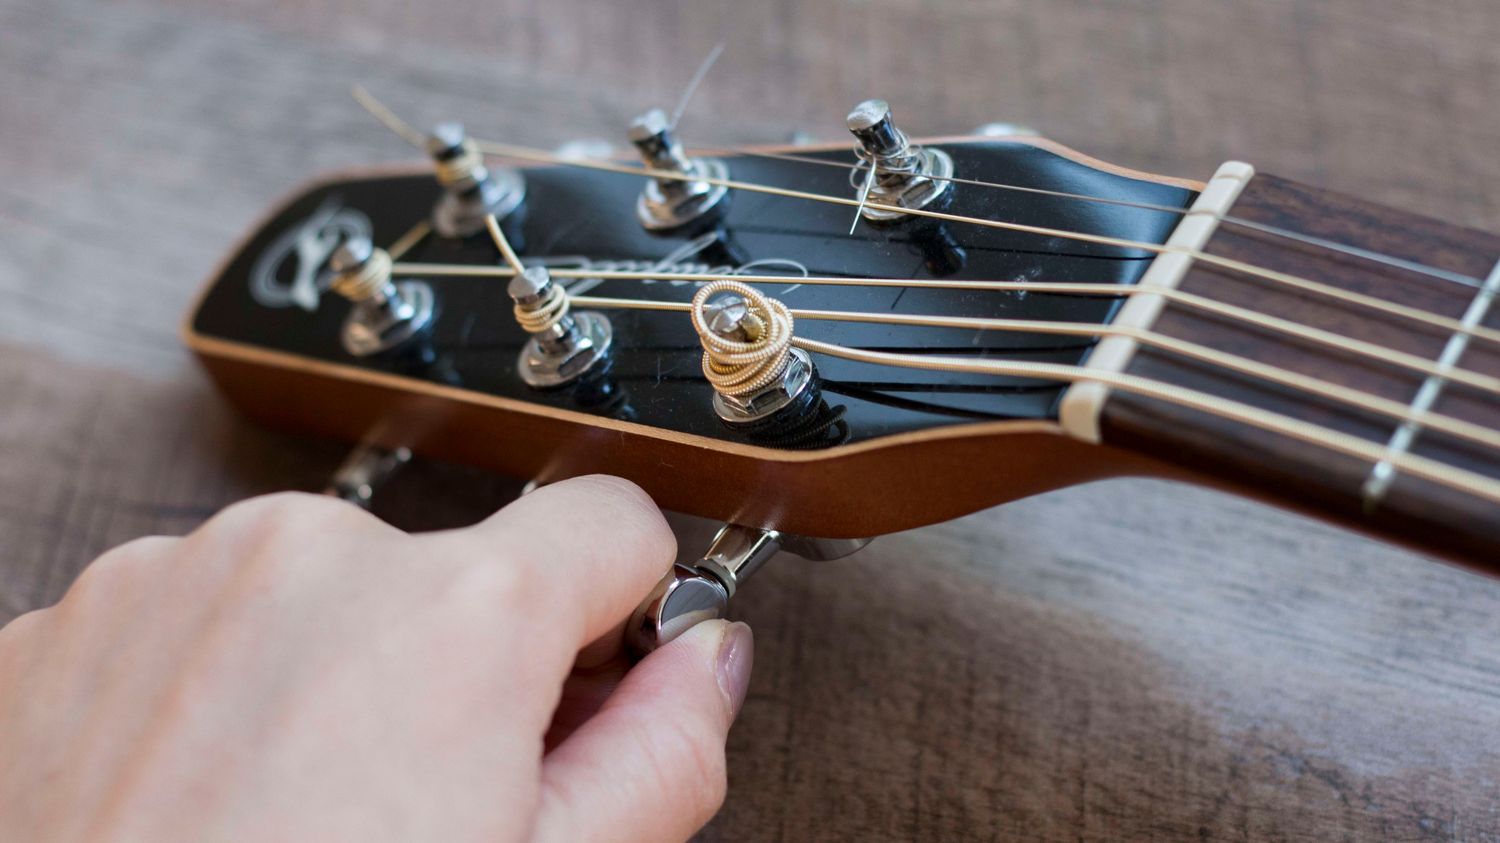
Installing the Tuning Pegs
Installing the tuning pegs, also known as machine heads or tuners, is a crucial step in the construction of an acoustic guitar, as it directly influences the instrument’s tuning stability, playability, and overall functionality. The meticulous installation of tuning pegs ensures that the guitar can maintain accurate pitch and facilitates smooth and reliable tuning. Here’s a detailed overview of the process:
1. Selection of Tuning Pegs:
Choose high-quality tuning pegs that complement the aesthetic and functional requirements of the guitar. Consider factors such as gear ratio, material, and design to ensure that the selected tuners offer precise tuning control while aligning with the instrument’s overall visual appeal.
2. Pilot Hole Preparation:
Mark and drill pilot holes for the tuning pegs, ensuring that the hole size and depth correspond to the specifications provided by the tuner manufacturer. Precision in drilling pilot holes is essential to facilitate secure and stable installation without compromising the integrity of the headstock.
3. Installation and Alignment:
Carefully insert the tuning pegs into the pilot holes, ensuring a snug fit and proper alignment. Secure the pegs in place, paying close attention to their orientation and spacing to facilitate smooth string winding and minimal interference with adjacent tuners.
4. String Post Positioning:
Position the string posts of the tuning pegs to ensure optimal string angles and minimal binding during the tuning process. Proper string post alignment contributes to the guitar’s tuning stability and minimizes the likelihood of string slippage or excessive tension on the nut and bridge.
5. Functionality and Testing:
Verify the functionality of the installed tuning pegs by stringing the guitar and conducting tuning tests. Ensure that the tuners operate smoothly, providing precise and consistent tuning control without slippage or excessive resistance. Address any issues related to tuning peg functionality to guarantee reliable and accurate pitch adjustment.
By meticulously executing the installation of tuning pegs, you establish the foundation for the guitar’s tuning stability and playability. The seamless integration of high-quality tuners ensures that the instrument can maintain accurate pitch, facilitating a rewarding playing experience and underscoring the importance of precision and attention to detail in creating a finely crafted and reliable acoustic guitar.
Stringing the Guitar
Stringing an acoustic guitar is a fundamental yet crucial process that directly impacts the instrument’s playability, tonal characteristics, and overall performance. The meticulous installation of strings ensures optimal tension, intonation, and resonance, laying the groundwork for a responsive and sonically rich instrument. Here’s a detailed overview of the process:
1. Selection of Strings:
Choose high-quality strings that align with the guitar’s tonal preferences, playing style, and gauge preferences. Consider factors such as material, winding type, and string gauge to achieve the desired tonal balance, playability, and responsiveness. Select strings that resonate with the instrument’s sonic potential and the player’s musical preferences.
2. String Installation:
Begin by anchoring the ball end of each string to the bridge, ensuring a secure and snug fit within the bridge pin slots. Carefully thread the opposite end of the strings through the corresponding tuning pegs, maintaining proper winding direction and avoiding excessive slack or tension during installation.
3. Winding Technique:
Employ a consistent and controlled winding technique when securing the strings to the tuning pegs, ensuring that each string wraps neatly and uniformly around the pegs. Proper winding technique minimizes the likelihood of string slippage, facilitates precise tuning, and contributes to the guitar’s tuning stability and playability.
4. String Stretching and Settling:
Gradually bring the strings up to pitch, allowing them to stretch and settle into their optimal tension over several tuning cycles. Gently stretch each string to expedite the settling process, ensuring that the strings maintain stable pitch and minimal tuning instability during subsequent playing sessions.
5. Tuning and Intonation Adjustment:
Conduct meticulous tuning and intonation adjustments to ensure that each string produces accurate pitches and harmonizes with the instrument’s overall tonal balance. Verify that the guitar maintains stable tuning across the fretboard and that each string resonates with clarity and responsiveness, addressing any intonation discrepancies or tuning irregularities as needed.
By meticulously executing the process of stringing the guitar, you establish the foundation for the instrument’s tonal characteristics, playability, and sonic responsiveness. The careful installation and adjustment of strings contribute to a harmonious and vibrant playing experience, underscoring the importance of precision and attention to detail in creating a finely crafted and resonant acoustic guitar.
Final Adjustments and Setup
As the culmination of the guitar-building process, the final adjustments and setup phase are pivotal in ensuring that the instrument achieves optimal playability, tonal balance, and ergonomic comfort. Meticulous attention to detail and precision in the setup process are essential to fine-tune the instrument and elevate its performance to its full potential. Here’s a comprehensive overview of the critical steps involved in the final adjustments and setup:
1. Neck Relief and Truss Rod Adjustment:
Verify and adjust the neck relief, ensuring that the curvature of the neck complements the desired playing action and minimizes the risk of fret buzzing or excessive string tension. Fine-tune the truss rod to achieve the optimal balance between neck relief and string action, addressing any irregularities in the neck’s curvature.
2. Nut and Saddle Adjustment:
Precisely adjust the nut and saddle heights to establish the ideal string action, facilitating comfortable fretting and optimal string clearance. Ensure that the nut slots and saddle contours align with the instrument’s scale length and individual string gauges, contributing to consistent playability and tonal clarity.
3. Intonation Calibration:
Conduct meticulous intonation adjustments to ensure that each string produces accurate pitches across the fretboard. Fine-tune the saddle positions to address any intonation discrepancies, facilitating harmonious and in-tune performance across the instrument’s entire range.
4. Fret Dressing and Polishing:
Address any fret imperfections or sharp edges, conducting fret dressing and polishing to achieve a smooth and comfortable playing surface. Ensure that the frets are level, properly crowned, and polished to enhance the instrument’s playability and facilitate effortless fretting and bending.
5. Functional Testing and Playability Assessment:
Thoroughly test the instrument’s functionality, playability, and tonal characteristics, verifying that the final adjustments and setup have yielded the desired results. Assess the guitar’s responsiveness, tonal balance, and ergonomic comfort, making any additional adjustments to address specific playing preferences or performance requirements.
By meticulously executing the final adjustments and setup, you elevate the acoustic guitar to its full potential, ensuring that the instrument embodies precision, playability, and sonic excellence. The comprehensive setup process underscores the importance of fine-tuning every aspect of the instrument to create a finely crafted and responsive acoustic guitar that resonates with exceptional playability and tonal richness.
Conclusion
The journey of crafting an acoustic guitar from start to finish is a remarkable odyssey that combines artistry, precision, and a deep appreciation for the instrument’s intrinsic beauty and sonic potential. From meticulously selecting tonewoods to fine-tuning the instrument’s playability, each stage of the guitar-making process represents a harmonious fusion of craftsmanship and musical artistry.
By embarking on the endeavor of making an acoustic guitar, you have delved into the rich tapestry of woodworking finesse and musical creativity, weaving together the structural integrity of the instrument with the nuances of its tonal expression. Throughout this comprehensive guide, you have gained insights into the intricate steps involved in crafting a finely tuned and resonant acoustic guitar, from shaping the soundboard to adjusting the instrument’s final setup.
As you reflect on the journey of creating an acoustic guitar, you have not only honed your woodworking skills but also cultivated a profound understanding of the instrument’s acoustic nuances and the art of lutherie. The instrument that emerges from this transformative process is a testament to your dedication, patience, and unwavering pursuit of excellence in musical craftsmanship.
Whether you are a seasoned luthier, a passionate woodworker, or an aspiring guitar builder, the journey of making an acoustic guitar is an enriching and fulfilling endeavor that transcends the realms of art and craftsmanship. The instrument you have created embodies not only the meticulous precision of its construction but also the soulful resonance of its musical potential, serving as a testament to the timeless artistry and enduring allure of acoustic guitars.
As you continue to explore the boundless realms of musical craftsmanship and woodworking artistry, may the journey of creating an acoustic guitar inspire you to embrace the profound beauty of handcrafted instruments and the transformative power of merging creativity with technical finesse.