Home>Production & Technology>Cover Song>How To Record A Cover Song On Garageband

Cover Song
How To Record A Cover Song On Garageband
Modified: February 20, 2024
Learn how to record a cover song on Garageband and create your own unique version. Follow these step-by-step instructions and showcase your talent.
(Many of the links in this article redirect to a specific reviewed product. Your purchase of these products through affiliate links helps to generate commission for AudioLover.com, at no extra cost. Learn more)
Table of Contents
- Introduction
- Step 1: Setting up Garageband
- Step 2: Choosing the song to cover
- Step 3: Importing the song into Garageband
- Step 4: Creating a new project
- Step 5: Selecting instruments
- Step 6: Recording the cover
- Step 7: Editing and arranging the cover
- Step 8: Adding effects and mixing the cover
- Step 9: Exporting the cover song
- Conclusion
Introduction
Recording a cover song can be a thrilling and creative endeavor for any musician, providing an opportunity to put your own unique spin on a beloved track. Whether you’re a seasoned musician or just starting out, Garageband offers a user-friendly platform for recording and producing your cover songs.
Gone are the days when you needed expensive recording equipment and a professional studio to create high-quality music. With Garageband, you can set up a virtual studio right on your computer. This powerful digital audio workstation (DAW) is equipped with a range of features and tools that allow you to record, mix, and master your cover songs with ease.
In this article, we will guide you through the process of recording a cover song using Garageband. From setting up the software to exporting the final track, we’ll cover all the necessary steps to help you create a polished and professional cover song.
Whether you’re a solo artist, part of a band, or simply want to experiment with different sounds, Garageband provides a versatile platform to unleash your creativity. So, let’s dive in and discover how you can record your very own cover song using Garageband!
Step 1: Setting up Garageband
Before you can start recording your cover song, you’ll need to ensure that Garageband is properly set up on your computer. Follow these steps to get started:
- Install Garageband: If you haven’t already, download and install Garageband from the official Apple website. Garageband is available for free on Mac computers and iOS devices.
- Open Garageband: Launch the Garageband application on your computer. You’ll be greeted with a welcome screen and various project options.
- Create a New Project: Click on “New Project” to create a new project for your cover song. Garageband offers a range of project templates to choose from, including singer-songwriter, electronic, and rock.
- Select Audio Input: If you’re using an external microphone or audio interface, ensure that it is properly connected to your computer. Garageband will automatically detect and configure the audio input device. If you’re using the built-in microphone on your computer or iOS device, Garageband will select it as the default input.
- Adjust Settings: Click on the gear-shaped icon in the control bar to access the project settings. Here, you can adjust the tempo, key signature, time signature, and other settings according to your preferences.
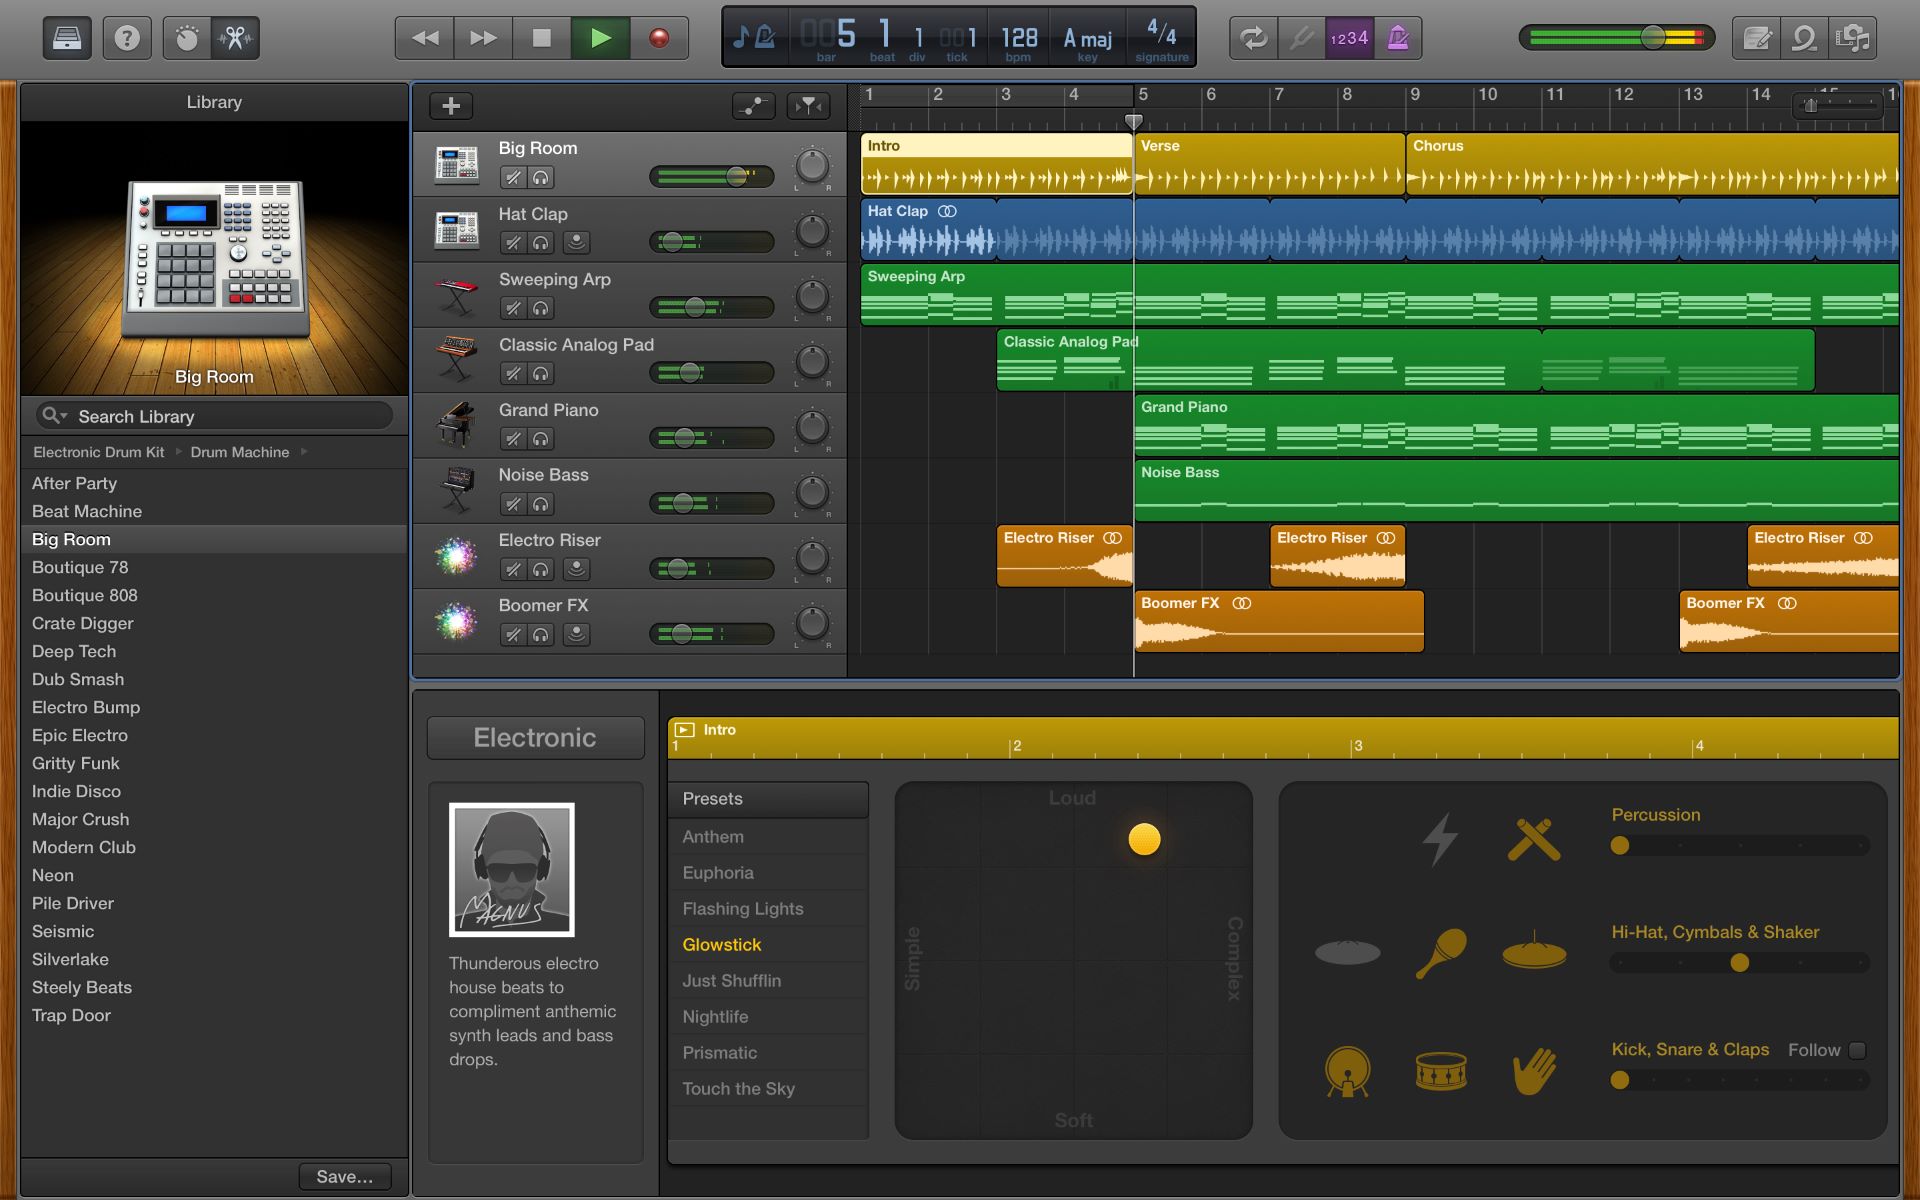
- Set up Tracks: Garageband provides multiple tracks for recording different instruments or vocals. Click on the “+” icon in the Tracks area to add new tracks. You can choose to record live instruments, import audio files, or use virtual instruments within Garageband.
By following these steps, you’ll have Garageband set up and ready to go for recording your cover song. Make sure to check that your audio input device is working properly and that all the necessary settings are adjusted to your liking. With Garageband’s flexible interface and intuitive controls, you’re well on your way to creating your own unique cover song!
Step 2: Choosing the song to cover
Choosing the right song to cover is an important step in the cover song recording process. Here are some tips to help you select the perfect track:
- Choose a song you love: Select a song that resonates with you personally. It’s important to have a genuine connection and passion for the song you’ll be covering.
- Consider your vocal range and style: Take into account your vocal range and the style of singing that suits you best. You can choose a song that allows you to showcase your strengths as a vocalist.
- Make it your own: Put your own unique spin on the song. Whether it’s rearranging the instrumentation, changing the tempo, or adding different vocal harmonies, find ways to make the cover song reflect your own style and creativity.
- Consider the accessibility of the song: Think about your target audience and ensure that the song you choose is familiar to them. While it’s great to introduce listeners to new music, covering a well-known song can help captivate and engage your audience more effectively.
- Research copyright and licensing: Before recording and distributing your cover song, make sure to research the copyright and licensing requirements. In some cases, you may need to obtain permission or pay royalties to the original songwriter or publisher.
- Experiment with different genres: Don’t be afraid to step out of your comfort zone and try covering a song from a different genre. This can add a fresh and unexpected twist to your cover song.
Take your time to explore different songs and experiment with different options. Ultimately, choose a song that not only showcases your talent but also allows you to bring your own unique interpretation to the table. Once you have selected the perfect song, you’re ready to move on to the next step of recording your cover using Garageband.
Step 3: Importing the song into Garageband
Once you have chosen the song you want to cover, the next step is to import it into Garageband. Follow these steps to import the song into your project:
- Gather the song file: Make sure you have a digital copy of the song you want to cover. It can be an audio file in MP3, WAV, AIFF, or other compatible formats.
- Open Garageband: Launch Garageband and open the project you created for your cover song.
- Click on the Media Browser: In the Garageband interface, click on the Media Browser button located in the control bar. It looks like a music note icon.
- Select “Audio Files”: In the Media Browser, select “Audio Files” from the dropdown menu.
- Browse your computer for the song file: Navigate to the location where your song file is saved on your computer. Select the file and click “Import” to bring it into your Garageband project.
- Drag the song to the Tracks area: Once the song is imported, you will see it in the Media Browser. Drag the song from the Media Browser and drop it onto the Tracks area in Garageband.
Garageband will automatically create a new track for your imported song. You can now proceed to the next step of recording your cover song using Garageband. The imported song will serve as the reference track for your cover.
It’s important to note that when recording a cover song, it is necessary to respect copyright laws. Ensure that you have obtained the appropriate permissions and licenses to use the original song. If you plan on distributing your cover song, make sure to comply with the legal requirements and attribute credit to the original songwriter.
With the song now imported into Garageband, you’re one step closer to recording your cover song. The next steps will guide you through the process of creating a new project and selecting instruments to bring your cover to life.
Step 4: Creating a new project
Now that you have imported the song you want to cover into Garageband, it’s time to create a new project for your cover song. Follow these steps to create a new project:
- Launch Garageband: Open Garageband on your computer and ensure that you have a blank project open.
- Select the project template: Garageband offers various project templates to choose from. You can select a template that aligns with the genre or style of your cover song, or choose the “Empty Project” template for a fully customizable experience.
- Set the project tempo: Consider the tempo of the original song you’re covering and adjust the project tempo accordingly. This will help you maintain consistency and ensure that your cover aligns with the original song.
- Set the project key signature: Determine the key signature of the original song and set it as the key signature for your project. This will provide a solid foundation for recording and arranging your cover.
- Choose the project time signature: Decide on the time signature that best suits your cover song. Garageband allows you to choose from various time signature options, from simple 4/4 to more complex rhythms.
- Name your project: Give your project a descriptive name, such as the title of the cover song or a unique identifier. This will help you stay organized and easily identify your project among other files.
Once you have set up your new project in Garageband, you’re ready to move on to the next step of selecting instruments. Garageband offers a wide range of virtual instruments that you can use to recreate the sounds of the original song or add your own creative elements. With your project created, it’s time to bring your cover song to life!
Step 5: Selecting instruments
Choosing the right instruments for your cover song is crucial in capturing the essence of the original track and adding your own creative flair. Garageband provides a vast selection of virtual instruments that you can utilize to recreate the sounds of the original song or experiment with new sounds. Follow these steps to select instruments for your cover song:
- Explore the instrument options: Click on the Library tab in the Garageband interface to access the wide array of virtual instruments available. You’ll find options such as guitars, basses, keyboards, drums, and more.
- Consider the instrumentation of the original song: Take note of the instruments used in the original song and try to replicate them as closely as possible. This will help maintain the familiar elements of the song while giving you the flexibility to add your own creative touches.
- Experiment with different sounds: Garageband offers a variety of sounds and presets for each instrument. Spend some time exploring different tones, effects, and settings to find the perfect sound for your cover.
- Add virtual instruments to tracks: Once you’ve chosen the instruments you want to use, drag and drop them onto individual tracks in your Garageband project. Assign each instrument to the appropriate track to keep your arrangement organized.
- Create MIDI recordings: If you want to add your own unique melodies or harmonies, you can use Garageband’s built-in piano roll editor to create MIDI recordings. This allows you to sequence notes and create instrumental parts using your computer keyboard or external MIDI controller.
- Utilize the Smart Controls: Adjust the parameters of each instrument using the Smart Controls feature in Garageband. This allows you to tweak the sound and customize it to your liking. Experiment with techniques such as adjusting EQ, adding reverb, or applying effects to shape the sound to fit your vision.
Remember that the instrument selection process is an opportunity to get creative and add your own unique flavor to the cover song. Try incorporating unexpected instruments or experimenting with different sounds to give your cover a fresh and distinctive sound. With Garageband’s extensive collection of virtual instruments, the possibilities are endless.
Once you’ve selected your instruments and added them to your project, you’re ready to move on to the next step of recording your cover song. Let’s dive into the exciting process of capturing your performance.
Step 6: Recording the cover
Now that you have your project set up and instruments selected, it’s time to start recording your cover song in Garageband. Follow these steps to capture your performance:
- Prepare for recording: Make sure your instruments are properly tuned and your microphone is positioned correctly if you plan on recording vocals. Eliminate any potential distractions and ensure you have a quiet environment for recording.
- Set the recording level: Adjust the input gain for each track to ensure a clean and balanced recording. Garageband provides level meters that indicate the strength of the incoming audio signal.
- Arm the tracks for recording: Click on the Record Enable button (looks like a red circle) to arm the tracks you want to record on. This allows you to selectively choose which tracks to record on while muting others.
- Click the Record button: When you’re ready to start recording, click the Record button (red circle) in the Transport controls. Garageband will begin recording your performance.
- Perform your cover song: Play your instruments or sing along to the reference track as Garageband records your performance. Aim for a solid take without too many mistakes, but don’t be afraid to experiment and try multiple takes.
- Use the Punch-In and Punch-Out: If you make mistakes or want to fix specific sections, use the Punch-In and Punch-Out features in Garageband. These allow you to re-record specific sections of your performance without having to record the entire song again.
- Monitor your recording: Use Garageband’s monitoring feature to listen to your performance as you record. This ensures that you can hear yourself clearly and make necessary adjustments to your playing or singing.
Remember, recording a cover song is all about capturing your unique interpretation. Don’t be afraid to add your own twists and embellishments while staying true to the spirit of the original song. Experiment with dynamics, phrasing, and different techniques to make the cover your own.
Once you’re satisfied with your recording, you can move on to the next step of editing and arranging your cover song in Garageband.
Step 7: Editing and arranging the cover
After you have recorded your cover song in Garageband, it’s time to dive into the process of editing and arranging your performance. Follow these steps to refine your cover and bring it to life:
- Trim unwanted sections: Use the trim tool or split tool in Garageband to remove any unwanted sections or mistakes from your recording. This allows you to create a clean and polished final product.
- Adjust timing and tempo: If needed, use Garageband’s Flex Time and Flex Pitch features to correct any timing or pitch issues in your recording. This ensures that your performance is in sync and sounds tight.
- Create an arrangement: Determine the structure and arrangement of your cover song. You can rearrange sections, such as verses and choruses, to add variation and make the cover more engaging. Garageband’s intuitive interface makes it easy to drag and drop sections to create an arrangement that flows smoothly.
- Add transitions: Use fade-ins, fade-outs, and crossfades between sections to create seamless transitions in your cover song. This enhances the overall listening experience and gives your cover a professional touch.
- Experiment with effects: Garageband offers a range of effects that you can apply to individual tracks or the overall mix. Explore options such as reverb, delay, EQ, and compression to enhance the sound of your cover and add depth and dimension to the mix.
- Consider layering: Experiment with adding layers to your cover by recording additional vocal harmonies, instrumental tracks, or background textures. This can help make your cover sound fuller and more dynamic.
- Arrange your tracks: Organize your tracks in Garageband’s Tracks area to maintain clarity and structure in your arrangement. This makes it easier to navigate and edit each element of your cover song individually.
- Refine the mix: Spend time adjusting the volume levels, panning, and EQ of each track in your cover song to create a well-balanced mix. Pay attention to achieving clarity and cohesion between the different elements of your cover.
Remember, the editing and arranging process allows you to shape and fine-tune your cover song to achieve the desired sound and impact. Take your time to experiment with different techniques and effects to make your cover shine.
Once you are satisfied with the editing and arrangement of your cover song, it’s time to move on to the next step: adding effects and mixing the cover in Garageband.
Step 8: Adding effects and mixing the cover
Now that you have edited and arranged your cover song in Garageband, it’s time to enhance the overall sound and bring your mix to life by adding effects and applying proper mixing techniques. Follow these steps to add effects and mix your cover:
- Review your tracks: Listen to each track individually and assess if any additional effects or processing are needed. Consider adding effects like reverb, delay, chorus, or distortion to enhance the sound of each track.
- Consider the song’s dynamics: Pay attention to the dynamics of your cover song to ensure that certain parts stand out and create a sense of tension and release. Use volume automation and compression to control the dynamics and balance the levels of different elements.
- Pan your tracks: Experiment with panning to create a spacious and immersive mix. Spread out the instruments and vocals across the stereo field to create a sense of depth and separation.
- Add EQ and balance frequencies: Use equalization (EQ) to sculpt the frequency balance of each track, removing any unwanted frequencies and enhancing the desired ones. This helps to achieve a balanced and cohesive mix.
- Apply compression: Use compression to control the dynamic range of your mix, making sure that the louder parts are more controlled and the quieter parts are brought up in volume. This helps to glue the elements of your mix together.
- Utilize automation: Use automation to manually adjust parameters over time, such as volume, panning, or effects. This can create dynamic changes and add interest to your cover.
- Create a sense of space: Add reverb or delay effects to create an ambiance that fits the mood and style of your cover. Experiment with different settings to create a realistic and immersive sonic environment.
- Listen critically and make adjustments: Continuously listen to your mix and make adjustments as needed. Pay attention to the balance of instruments, vocals, and effects, and ensure that everything sits well together.
Remember, mixing a cover song is about achieving a balance between all the elements while retaining the essence of the original song. Trust your ears, experiment with different techniques, and don’t be afraid to make creative choices to make your cover sound unique and professional.
Once you’re satisfied with the effects and mix of your cover song, it’s time to move on to the final step: exporting your cover song from Garageband.
Step 9: Exporting the cover song
After you have completed the mixing and final touches on your cover song in Garageband, it’s time to export your track and share it with the world. Follow these steps to export your cover song:
- Ensure your mix is ready: Before exporting, make sure you are happy with the final mix of your cover song. Double-check the volume levels, effects, and overall balance of the tracks.
- Select the Export option: In Garageband, navigate to the File menu and choose the “Export Song to Disk” option. This will open the export settings window.
- Choose the export format: Select the desired audio format for your cover song. Common formats include MP3, WAV, AAC, or AIFF. Consider the intended use of the exported file, such as uploading to streaming platforms or burning to a CD.
- Adjust the export settings: Customize the export settings according to your preferences. You can choose the audio quality, bit rate, and other settings depending on your specific needs and requirements.
- Specify the export location: Choose the folder or destination where you want to save the exported cover song. Select a location on your computer that is easily accessible and memorable.
- Enter the song information: Fill in the metadata for your cover song, such as the track name, artist name, and album information. This will ensure that the exported file contains the correct information when shared or uploaded.
- Click Export: Once you have configured the export settings and specified the location, click the Export button to begin the export process. Garageband will process your cover song and save it as a separate audio file in the chosen format.
After the export is complete, you can locate the exported file in the specified folder. Take this opportunity to listen to the exported file and confirm that it sounds as expected. If satisfied, you can proceed to share your cover song online, distribute it to streaming platforms, burn it to CDs, or use it for any other intended purpose.
Congratulations! You have successfully completed the process of recording, editing, mixing, and exporting your cover song using Garageband. Now it’s time to share your musical talent with the world and let your cover song shine.
Remember to credit the original songwriters and ensure that you have obtained the necessary permissions and licenses for using the original song in your cover.
Enjoy the process, have fun, and continue creating remarkable cover songs.
Conclusion
Cover songs offer a fantastic opportunity for musicians to showcase their creativity and put their own unique twist on beloved tracks. With Garageband, the process of recording and producing cover songs has become more accessible and enjoyable than ever before.
In this article, we have walked you through the steps of recording a cover song using Garageband. From setting up the software and choosing the perfect song to importing the track, selecting instruments, and recording your performance, we have covered the essential steps to help you create a polished and professional cover song.
We emphasized the importance of selecting a song that resonates with you, experimenting with different instruments and sounds, and making the cover your own through creative arrangements and additions. We also highlighted the significance of respecting copyright laws and obtaining the necessary permissions and licenses when recording and distributing your cover.
Furthermore, we discussed the process of editing and arranging your cover song, adding effects and mixing the elements to create a balanced and engaging mix. Finally, we guided you through the process of exporting your cover song and preparing it for sharing with the world.
Remember, recording cover songs is not only a way to pay tribute to the original artist but also an opportunity to showcase your own musical style and interpretation. With Garageband’s powerful tools and features, you can unleash your creativity and bring your cover songs to life.
So, whether you’re a novice musician or a seasoned artist, embrace the process, experiment with different techniques, and have fun creating remarkable cover songs that resonate with listeners. Happy recording!

