Home>Production & Technology>MP3>How To Download Music On An MP3

MP3
How To Download Music On An MP3
Modified: March 8, 2024
Learn how to easily download music on an MP3 player. Step-by-step guide on downloading and transferring your favorite songs onto your MP3 device.
(Many of the links in this article redirect to a specific reviewed product. Your purchase of these products through affiliate links helps to generate commission for AudioLover.com, at no extra cost. Learn more)
Table of Contents
- Introduction
- Understanding the MP3 Format
- Legal Considerations
- Method 1: Downloading Music from Online Platforms
- Method 2: Transferring Music from Your Computer
- Method 3: Using Music Streaming Apps with Offline Modes
- Method 4: Using Music Downloading Apps
- Method 5: Ripping Music from CDs
- Method 6: Downloading Music from Peer-to-Peer Networks
- Conclusion
Introduction
Music has the power to uplift our spirits, transport us to different worlds, and evoke a wide range of emotions. In today’s digital age, we have access to an immense library of music that can be easily enjoyed on portable devices like MP3 players. Whether you’re a music enthusiast, a commuter looking to pass the time, or simply want to groove to your favorite tunes, downloading music on an MP3 player allows you to carry your personal soundtrack with you wherever you go.
In this article, we’ll explore various methods you can use to download music onto your MP3 player. From legal considerations to downloading from online platforms, transferring music from your computer, using streaming apps with offline modes, and even ripping music from CDs, we’ll cover it all. So, let’s dive in and explore the wonderful world of MP3 music downloads!
Before we get started, it’s important to note that while music downloading is a common practice, it’s essential to ensure you do it legally and ethically. Many online platforms provide legitimate ways to acquire music, and it’s crucial to support artists by purchasing their work or utilizing legal methods to obtain their music. By doing so, you not only contribute to the thriving music industry but also avoid potential copyright infringement issues.
So, let’s begin our journey into the world of MP3 music downloads, where you’ll discover a plethora of options to curate your own personalized music collection. Whether you’re a fan of popular hits or prefer niche genres, there’s a method that suits your preferences.
Understanding the MP3 Format
The MP3 format revolutionized the way we consume music. Developed in the late 1980s, MP3 (MPEG-1 Audio Layer 3) is a digital audio coding format that compresses audio files without significantly sacrificing audio quality. It achieved widespread popularity due to its ability to reduce file sizes while maintaining a balance between storage efficiency and sound fidelity.
The MP3 format employs a compression algorithm that removes redundant and irrelevant audio data, resulting in smaller file sizes compared to other audio formats like WAV or FLAC. This compression allows for faster downloads and efficient storage on devices with limited storage capacity, such as MP3 players.
It’s important to note that although MP3 offers a good balance between file size and audio quality, it is a lossy compression format, which means it permanently discards some audio data during the compression process. The extent of this loss depends on the chosen bitrate. Higher bitrates result in better audio quality but larger file sizes, while lower bitrates result in smaller file sizes but lower audio quality.
When downloading music in MP3 format, it’s crucial to strike a balance between file size and audio quality that suits your specific preferences. Higher bitrates, such as 256 or 320 kbps (kilobits per second), are generally recommended for a better listening experience, especially on high-quality headphones or speakers. However, if storage space is a concern, lower bitrates like 128 kbps can still provide an acceptable level of audio quality for casual listening.
Many online platforms, music download apps, and software offer the option to select the desired bitrate when downloading music in MP3 format. This allows you to customize your music collection based on your storage capacity and desired audio quality.
Now that we have a better understanding of the MP3 format, its compression algorithm, and the importance of selecting the right bitrate, let’s move on to exploring the various methods you can use to download music onto your MP3 player.
Legal Considerations
When it comes to downloading music onto your MP3 player, it’s important to navigate the process in a legal and ethical manner. While the internet offers a vast range of music resources, not all methods of obtaining music are legal or authorized by the artists and copyright holders.
Here are some key legal considerations to keep in mind:
- Copyright laws: Copyright laws protect the rights of artists and creators, giving them exclusive control over their work. Downloading copyrighted music without permission or proper licensing is illegal. It’s essential to respect the intellectual property rights of musicians and support them by obtaining music through legal means.
- Authorized sources: To ensure that you’re downloading music legally, stick to authorized sources such as official music stores, streaming platforms with download options, and websites that offer licensed music. These platforms obtain proper licenses from copyright holders, allowing them to distribute the music legally.
- Pay for music: Supporting artists by purchasing their music is not only a legal obligation but also a way to show appreciation for their work. There are numerous platforms that allow you to purchase and download MP3 music, ensuring that the artists receive fair compensation for their creativity and talent.
- Creative Commons: Creative Commons (CC) licenses enable artists to allow specific uses of their music while retaining some rights. Some artists release their work under CC licenses, permitting the free downloading and sharing of their music under certain conditions. However, it’s important to review the specific terms of the CC license to ensure compliance.
By adhering to these legal considerations, you not only avoid potential consequences such as fines or legal action but also support the artists and industry that brings us the music we love.
Now that we’ve discussed the importance of legal considerations, it’s time to explore the various methods you can use to download music onto your MP3 player while staying on the right side of the law. From online platforms to music streaming apps and even ripping music from CDs, there’s a method that suits your needs and aligns with legal standards.
Method 1: Downloading Music from Online Platforms
One of the most common and convenient methods to download music onto your MP3 player is through online platforms. There are numerous authorized websites and stores that offer a wide selection of music, allowing you to purchase and download MP3 files legally.
Follow these steps to download music from online platforms:
- Research and choose a reputable online platform: Start by exploring popular authorized platforms such as iTunes, Amazon Music, Google Play Music, or Bandcamp. These platforms have a vast collection of music from various genres.
- Create an account: Sign up or create an account on the platform of your choice. This will allow you to make purchases and manage your music library easily.
- Browse and select your desired music: Use the search function or browse through different categories to find the songs or albums you want to download. You can often preview samples of the music before making a purchase.
- Choose the MP3 format and quality: Select the MP3 format and the desired bitrate. Higher bitrates typically offer better audio quality, but they may result in larger file sizes.
- Complete the payment process: Once you’ve chosen the music, proceed to the payment process. Most platforms offer various payment options, including credit/debit cards, PayPal, or gift cards.
- Download the music: After completing the purchase, you’ll typically receive a confirmation email or a direct download link. Click on the link to start the download process. The downloaded MP3 files can then be transferred to your MP3 player.
It’s important to note that some online platforms may require digital rights management (DRM) restrictions for downloaded music to prevent unauthorized distribution. DRM may limit the number of devices you can transfer the music to or the number of times you can burn the music to CDs. Make sure to review the terms and conditions of the platform to understand any limitations.
Downloading music from authorized online platforms ensures that you have legal access to a vast library of music while supporting the artists and industry. It’s a convenient way to add new tracks to your MP3 player and curate your personal playlist.
Now that you’re familiar with downloading music from online platforms, let’s explore another method for transferring music onto your MP3 player – transferring music from your computer.
Method 2: Transferring Music from Your Computer
If you have a collection of music stored on your computer, transferring it to your MP3 player is a straightforward method to enjoy your favorite tunes. This method allows you to have control over your music library and easily manage and update it as needed.
Follow these steps to transfer music from your computer to your MP3 player:
- Connect your MP3 player to your computer: Use the USB cable that came with your MP3 player to connect it to your computer. Make sure both devices are powered on.
- Enable file transfer mode on your MP3 player: Depending on the model of your MP3 player, you may need to navigate to the settings or device options to enable “File Transfer” or “USB Mode”. This allows your computer to recognize the MP3 player as a storage device.
- Locate the music files on your computer: Open the file explorer on your computer and navigate to the folder where your music is stored. It could be in your “Music” folder or a specific location you have chosen.
- Select and copy the music files: Select the songs or albums you want to transfer to your MP3 player. You can use the Ctrl or Shift key to select multiple files. Right-click on the selected files and choose “Copy” from the context menu.
- Paste the music files onto your MP3 player: Go back to the file explorer window for your MP3 player. Open the device folder or storage area and right-click inside it. Choose “Paste” to transfer the music files from your computer to your MP3 player.
- Wait for the transfer to complete: The time taken to transfer the music files will depend on the size of the files and the speed of your USB connection. Once the transfer is complete, safely disconnect your MP3 player from your computer.
It’s important to note that different MP3 players may have varying folder structures or restrictions on the supported music formats. Before transferring the files, make sure they are in a compatible format (such as MP3, AAC, or WMA) and follow any specific instructions from the MP3 player’s manufacturer.
Transferring music from your computer to your MP3 player gives you the freedom to curate your own music collection, including songs from various sources such as CDs, downloads, or even homemade recordings. It allows for customization and ensures that you always have your favorite tracks with you on the go.
Now that you know how to transfer music from your computer, let’s explore another method – using music streaming apps with offline modes.
Method 3: Using Music Streaming Apps with Offline Modes
In the age of music streaming, many popular platforms offer the convenience of streaming music directly to your devices. However, what if you want to enjoy your favorite tracks offline, without relying on a stable internet connection? That’s where music streaming apps with offline modes come in.
Here’s how you can use music streaming apps with offline modes to download and enjoy music on your MP3 player:
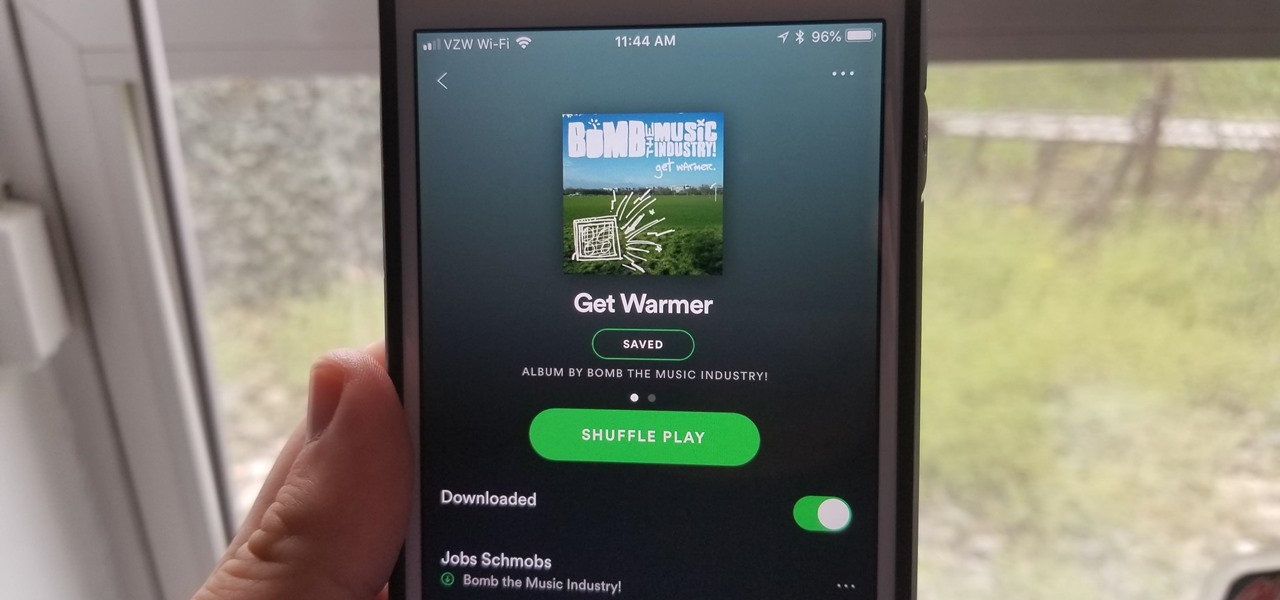
- Choose a music streaming app with offline mode: Look for platforms that offer an offline mode feature, such as Spotify, Apple Music, or YouTube Music. These apps allow you to download music onto your device for offline listening.
- Install and set up the app: Download and install the selected music streaming app on your smartphone or tablet. Sign up or log in to create an account and set up your preferences.
- Explore the app’s settings: Navigate to the app’s settings to access the offline mode feature. This is where you can designate storage locations, set download quality, and manage your downloaded music.
- Select and download music: Find your favorite songs, albums, or playlists within the app’s library. Look for the download or save option adjacent to the music content, and tap on it to initiate the download process. Choose the desired quality if applicable.
- Wait for the download to complete: Depending on the size of the music files and your internet connection, the download process may take some time. Ensure that you have a stable connection throughout the download process.
- Access and listen to your downloaded music: Once the music has finished downloading, you can access it within the app’s offline mode section. Connect your MP3 player to your computer and transfer the downloaded files to your device as per the device’s instructions.
Music streaming apps with offline modes provide a flexible and versatile way to access a vast catalog of music. You can discover new artists and genres, create personalized playlists, and enjoy unlimited listening options.
Before downloading music through streaming apps, ensure that you are subscribed to a premium or paid version of the app. Free versions of certain apps may have limitations on offline downloads or include advertisements during playback. By subscribing to the premium service, you can enjoy uninterrupted offline listening on your MP3 player.
Now that you’re familiar with using music streaming apps with offline modes, let’s dive into another method – using dedicated music downloading apps.
Method 4: Using Music Downloading Apps
If you’re looking for a dedicated and efficient way to download music directly onto your MP3 player without using web browsers or streaming services, using music downloading apps is an excellent option. These apps are designed specifically for downloading and managing music files, providing a seamless experience for building your personal music library.
Here’s how you can use music downloading apps to download music onto your MP3 player:
- Research and choose a reliable music downloading app: Look for well-known apps such as SoundCloud, Tidal, or Audiomack, which offer extensive music collections and user-friendly interfaces. Ensure that the app has positive user reviews and a good reputation.
- Install and launch the music downloading app: Download and install the chosen app from your device’s app store. Launch the app and create an account if necessary.
- Browse or search for music: Explore the app’s library by browsing through genres, artists, or charts. Alternatively, use the search function to find specific songs or albums.
- Select and download the music: Once you’ve found a track or album you want to download, tap on the download icon or the download button. Choose the desired audio quality if available, and confirm the download.
- Check the download status: The app will display the download progress, indicating how much of the music file has been downloaded. Wait for the download to complete before proceeding.
- Access and transfer the downloaded music: Once the music has finished downloading, you can access it within the app’s designated section. Connect your MP3 player to your computer, navigate to the app’s storage location, and transfer the downloaded files to your MP3 player using the appropriate file transfer method.
Music downloading apps provide a convenient way to discover new music, download songs, and access them offline. They often include additional features such as playlist creation, music recommendations, and customizable settings to enhance your listening experience.
It’s important to note that while music downloading apps offer a wide selection of music, the availability of specific songs or albums may vary depending on licensing agreements and regional restrictions. Additionally, some apps may include advertisements or offer premium versions with additional features and benefits.
Now that you’re familiar with using music downloading apps, let’s explore another method – ripping music from CDs.
Method 5: Ripping Music from CDs
If you have a collection of CDs that you want to enjoy on your MP3 player, ripping the music from the CDs is a convenient option. Ripping allows you to convert the audio tracks from the CD into digital files that can be transferred to your MP3 player, providing easy access to your favorite music without carrying physical CDs.
Follow these steps to rip music from CDs:
- Use a computer with a CD drive: Ensure that you have access to a computer with a CD drive. If your computer doesn’t have a built-in CD drive, you can use an external CD/DVD drive.
- Choose ripping software: Select a reliable CD ripping software, such as iTunes, Windows Media Player, or Foobar2000. Install the software on your computer if it’s not already installed.
- Open the ripping software: Launch the CD ripping software and ensure that your CD drive is recognized by the software.
- Configure ripping settings: Configure the settings in the ripping software to your preferred format (such as MP3) and desired audio quality (bitrate). You can usually find these settings in the software’s options or preferences menu.
- Insert the CD: Gently insert the CD into the CD drive. The ripping software should detect the CD and display the tracklist.
- Select the tracks to rip: Choose the tracks you want to rip from the CD. You can select individual tracks or choose to rip the entire album.
- Start the ripping process: Click the “Rip” or “Start” button in the ripping software to initiate the ripping process. The software will extract the audio data from the CD and convert it into digital files based on your specified settings.
- Wait for the ripping to complete: The ripping process may take some time, depending on the speed of your CD drive and the number of tracks being ripped. Once the process is complete, the digital files will be saved to your computer.
- Transfer the ripped music to your MP3 player: Connect your MP3 player to your computer using the appropriate USB cable. Locate the ripped music files on your computer and transfer them to your MP3 player, following the device’s instructions for file transfer.
Ripping music from CDs not only allows you to digitize your collection but also provides the flexibility to create custom playlists and organize your music library according to your preferences. It’s a convenient way to enjoy your favorite CDs on your MP3 player anywhere, anytime.
Ensure that you are following local copyright laws when ripping music from CDs. It’s essential to own the physical copy of the CD and use the ripped files for personal use only.
Now that you’re familiar with the process of ripping music from CDs, let’s explore another method – downloading music from peer-to-peer networks.
Method 6: Downloading Music from Peer-to-Peer Networks
Downloading music from peer-to-peer (P2P) networks is a method that allows users to share and download music files directly from other users’ devices. While this method can provide access to a vast array of music, it’s crucial to be aware of the legal and ethical implications, as downloading copyrighted material without permission is illegal in many jurisdictions.
Before considering this method, it’s important to note that downloading music from P2P networks may come with risks, such as downloading malicious files or facing potential consequences for copyright infringement. It is highly recommended to utilize legal and authorized methods to obtain music rather than resorting to P2P networks.
If you still choose to proceed with downloading music from P2P networks, here are the general steps involved:
- Install a P2P client: Download and install a P2P client software, such as BitTorrent or uTorrent, on your computer. These software applications facilitate the sharing and downloading of files through the P2P network.
- Find a reliable source: Look for reputable P2P websites or platforms that host music files. These sources should have a good reputation and user feedback to minimize the risks of downloading harmful or illegal content.
- Search for the desired songs or albums: Use the search function within the P2P client to find the music you want to download. It’s important to be specific with your search terms to obtain accurate results.
- Select and download the files: Choose the music files you wish to download from the search results. Look for files with positive user ratings or comments to ensure their quality and legitimacy. Start the download process and monitor the progress.
- Check the downloaded files: Once the download is complete, scan the downloaded files with reliable antivirus software to ensure they are free from any potential malware or viruses. Be cautious before opening or moving the files to your MP3 player.
- Transfer the downloaded music: Connect your MP3 player to your computer and transfer the downloaded music files using the appropriate file transfer method specified by your device. Refer to your MP3 player’s instructions for details on the file transfer process.
As previously mentioned, it’s important to emphasize that downloading copyrighted content without the necessary permissions is illegal and unethical. It’s always best to support artists and acquire music through legal means to ensure they receive fair compensation for their creative work.
Now that we’ve explored different methods for downloading music onto your MP3 player, let’s summarize the key points and conclude our article.
Conclusion
Downloading music onto your MP3 player opens up a world of possibilities, allowing you to curate your own personal collection and enjoy your favorite tracks wherever you go. In this article, we have explored various methods to download music onto your MP3 player while considering legal and ethical considerations.
We began by understanding the MP3 format and its significance in compressing audio files without compromising sound quality. From there, we delved into the importance of adhering to copyright laws and supporting artists through legal means.
We then discussed several methods for downloading music onto your MP3 player, including downloading from online platforms, transferring music from your computer, utilizing music streaming apps with offline modes, using dedicated music downloading apps, and ripping music from CDs. Each method offers its own advantages and considerations, providing flexibility and convenience based on your preferences.
However, it’s vital to stress the significance of respecting copyright laws and using authorized and legal sources to obtain music. Supporting artists by purchasing their music or utilizing licensed platforms ensures the sustainability of the music industry and acknowledges the hard work and talent they bring to the table.
Remember, technology has given us incredible access to a world of music, but it is our responsibility to use it ethically and lawfully. By doing so, we can continue to enjoy the power of music, support our favorite artists, and create a diverse and vibrant musical landscape.
So go ahead, explore the various methods discussed in this article, and embark on your journey to build your own personalized music collection on your MP3 player. Let the melodies accompany you on your daily adventures!

